

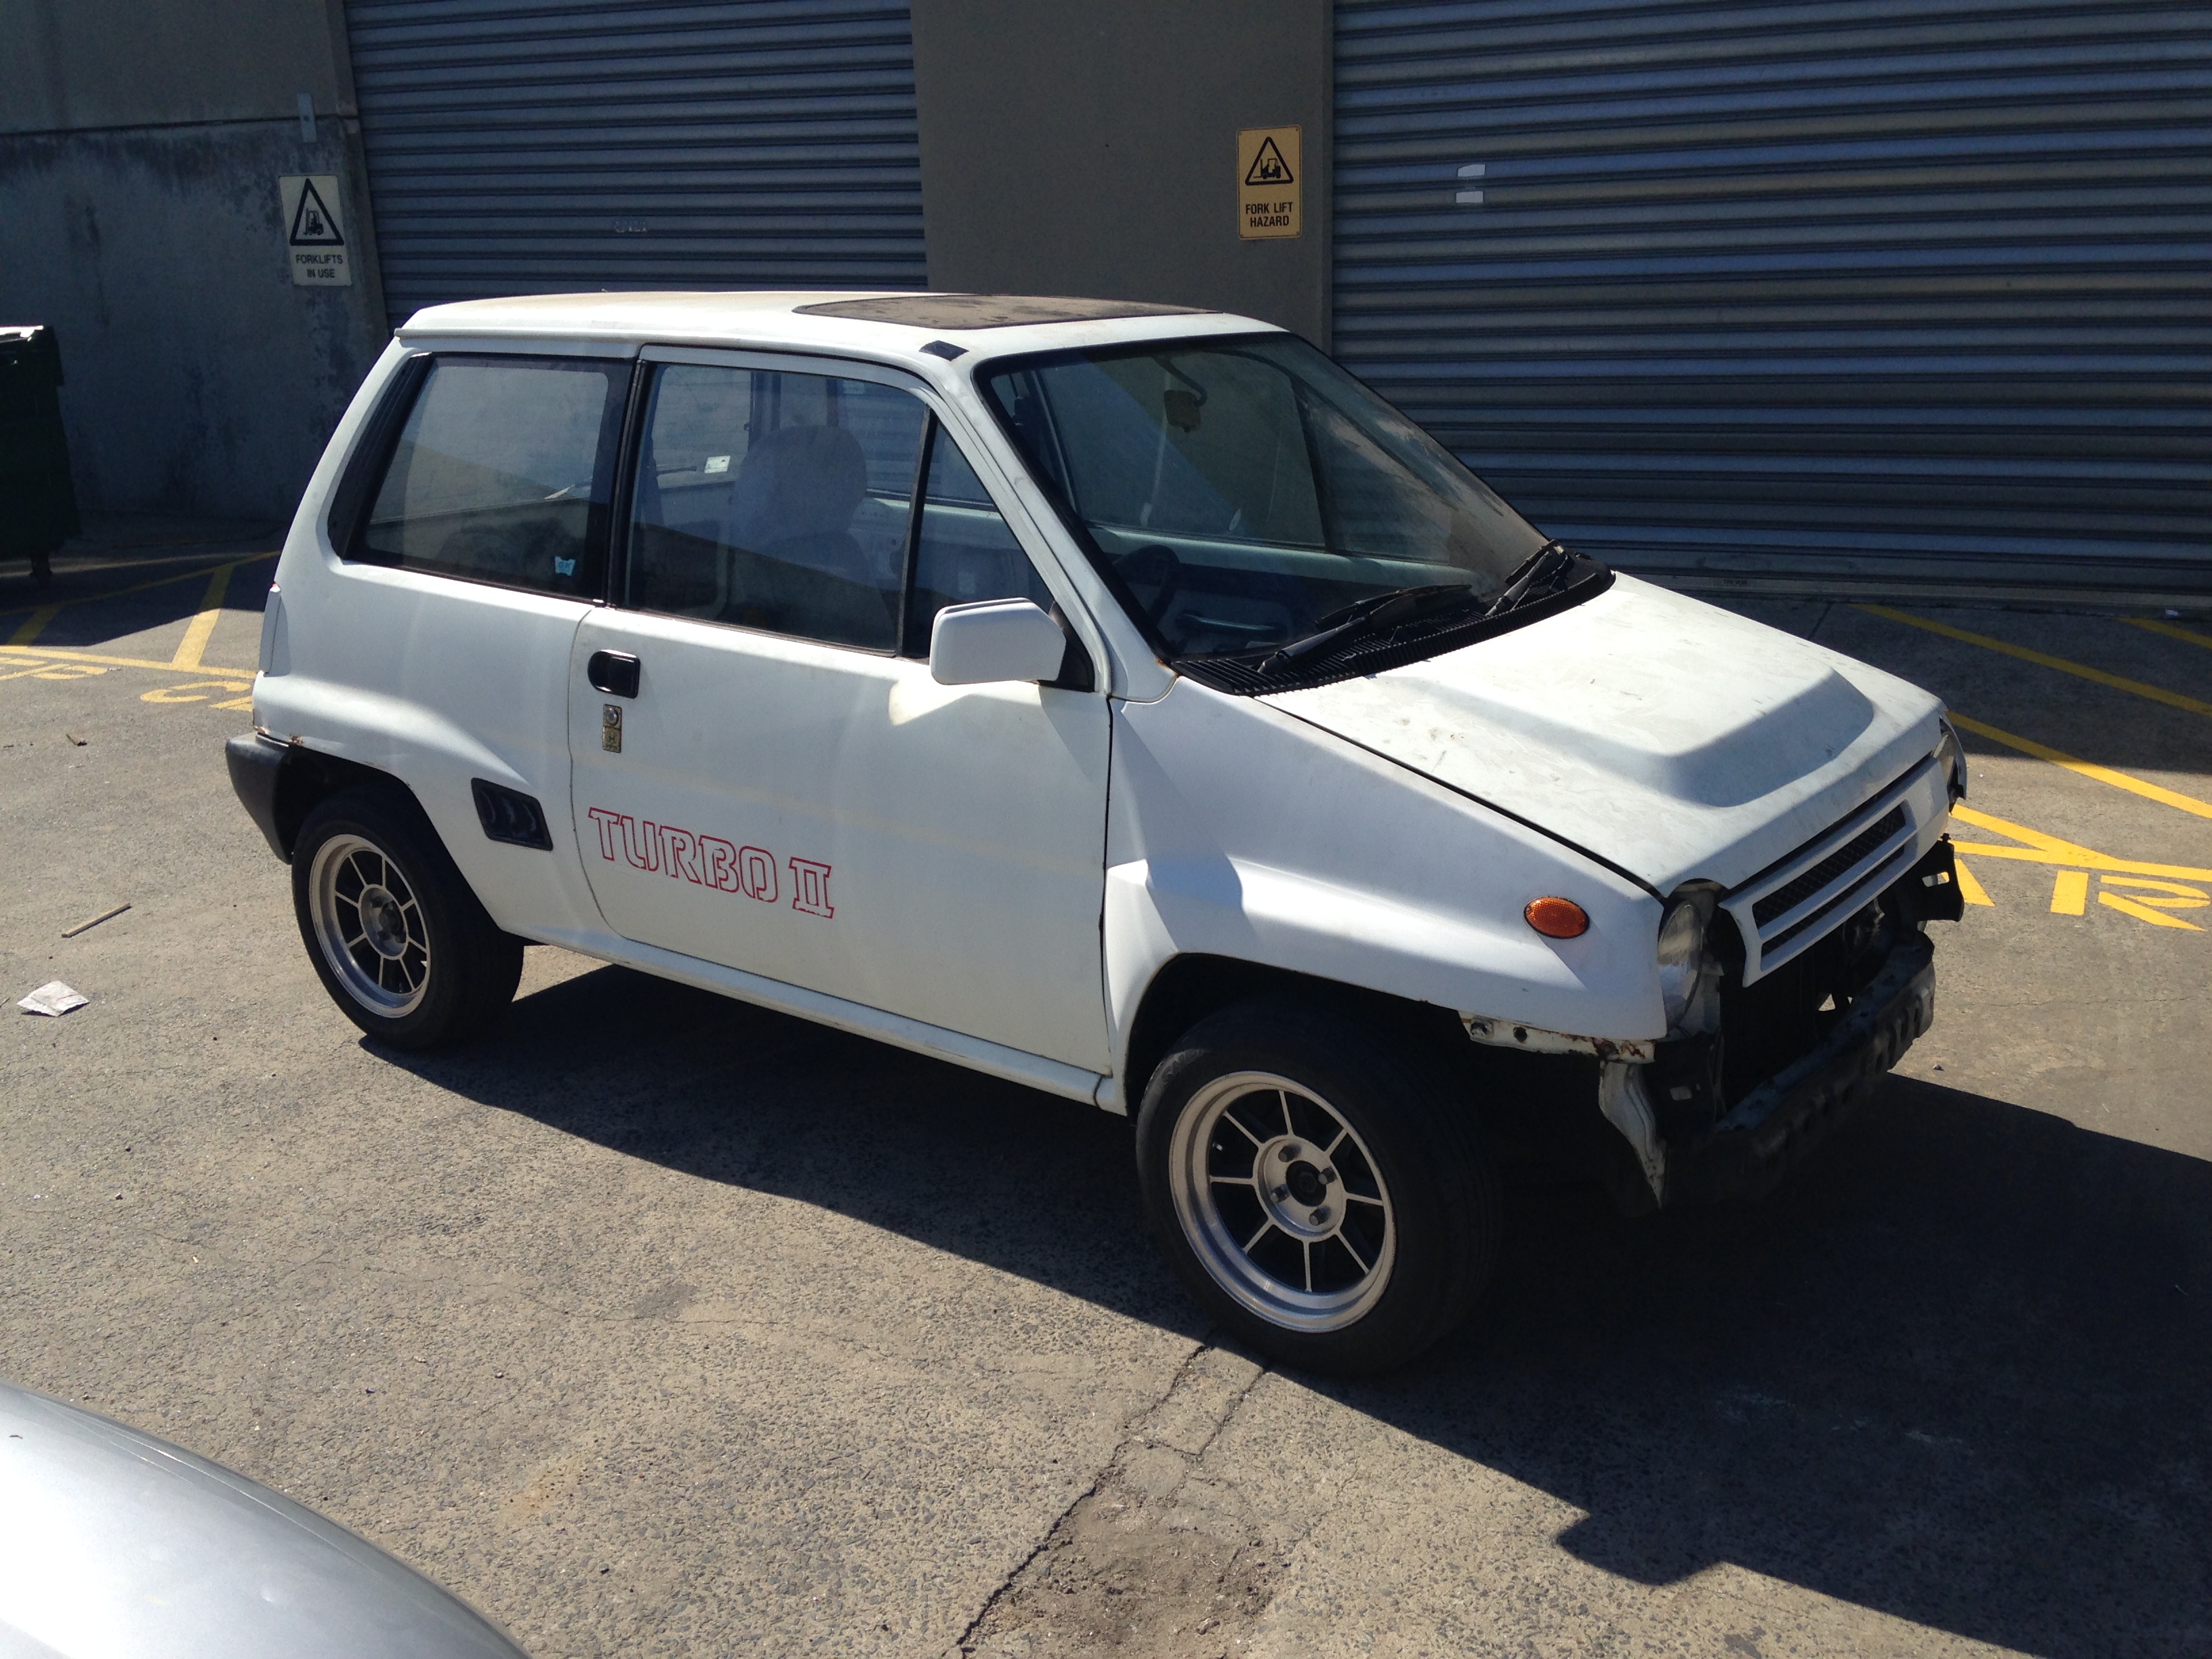
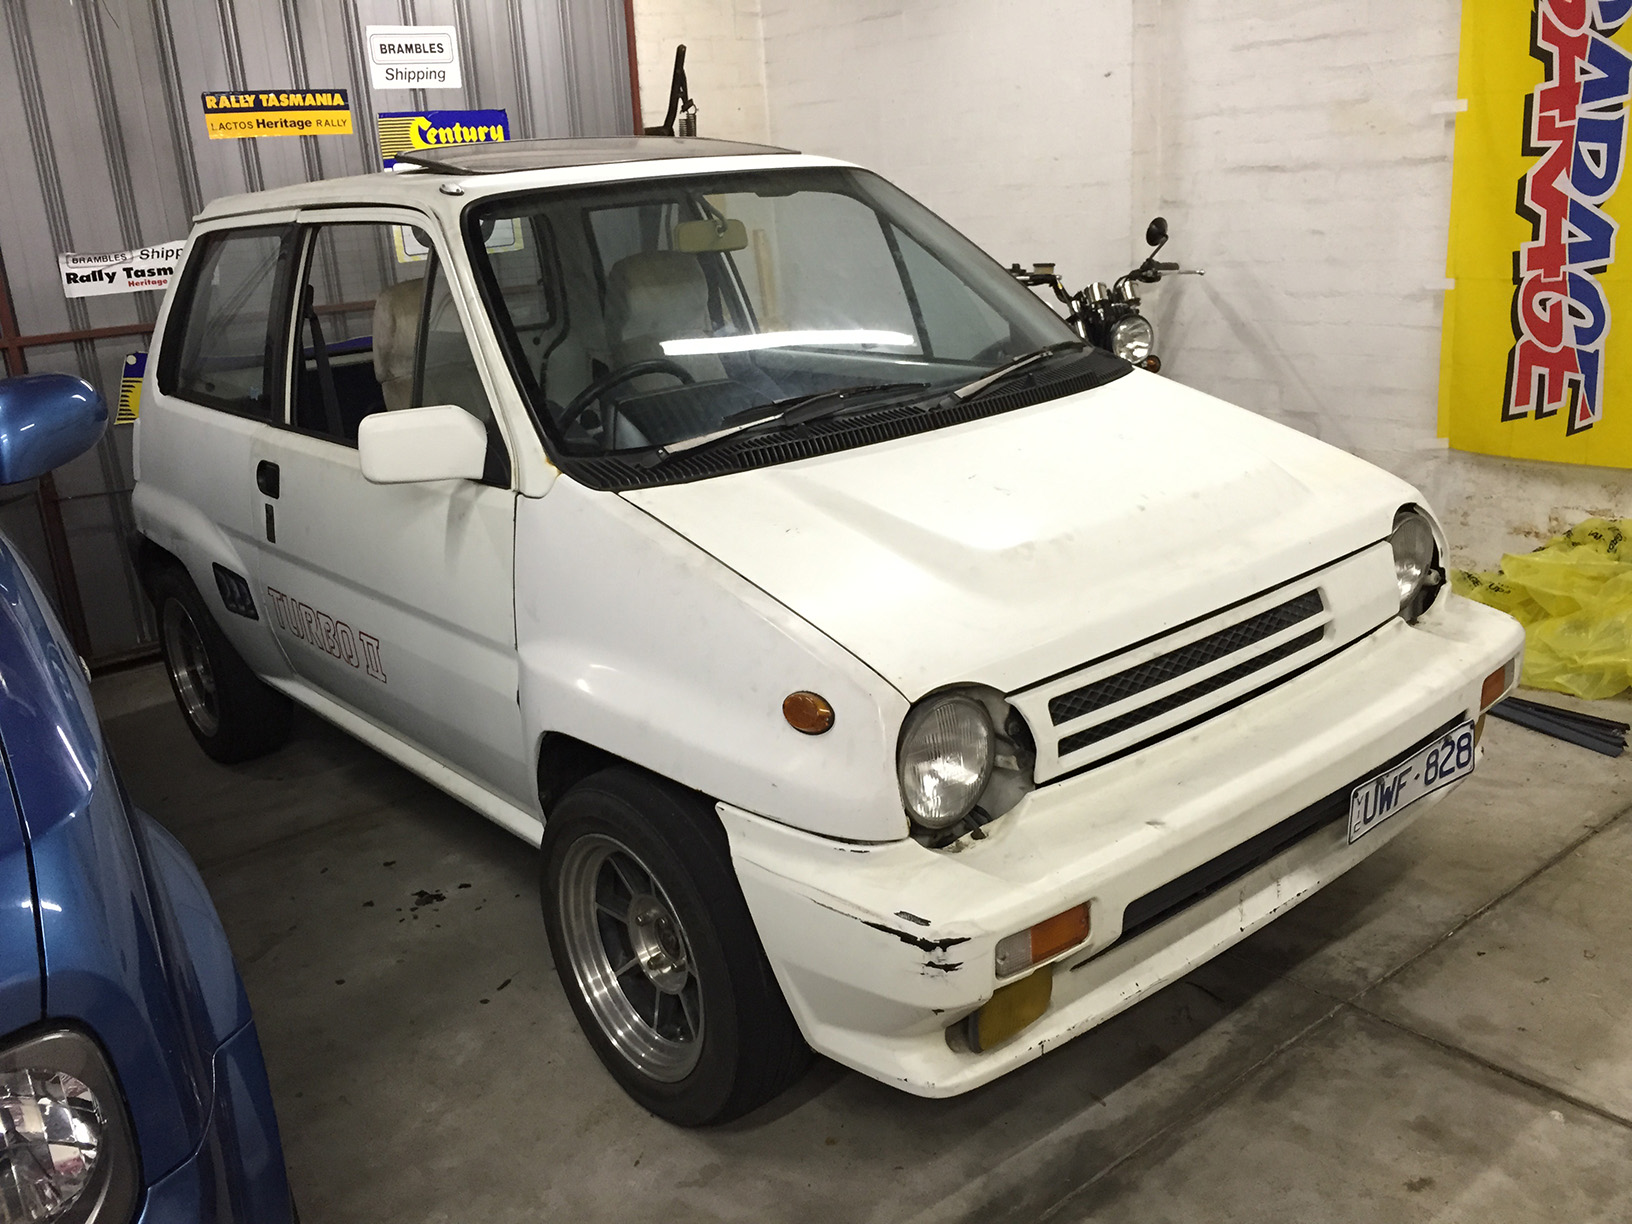
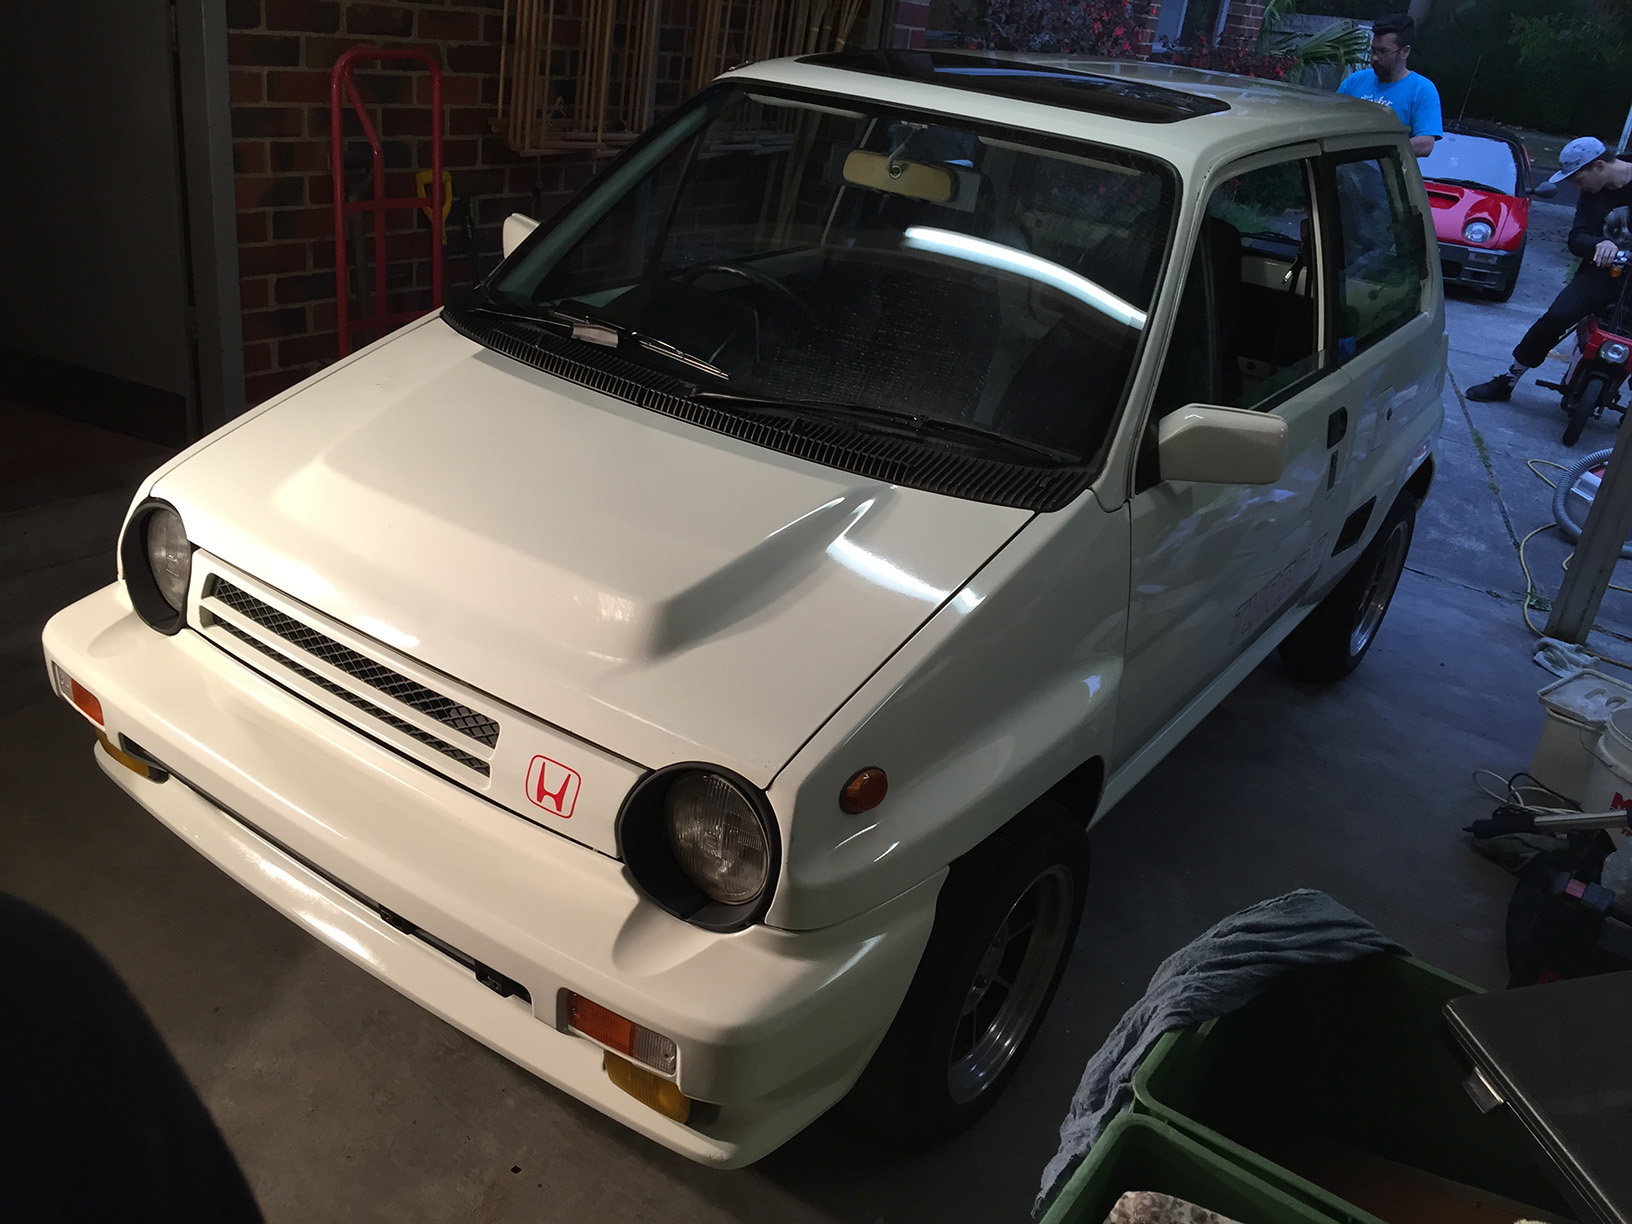
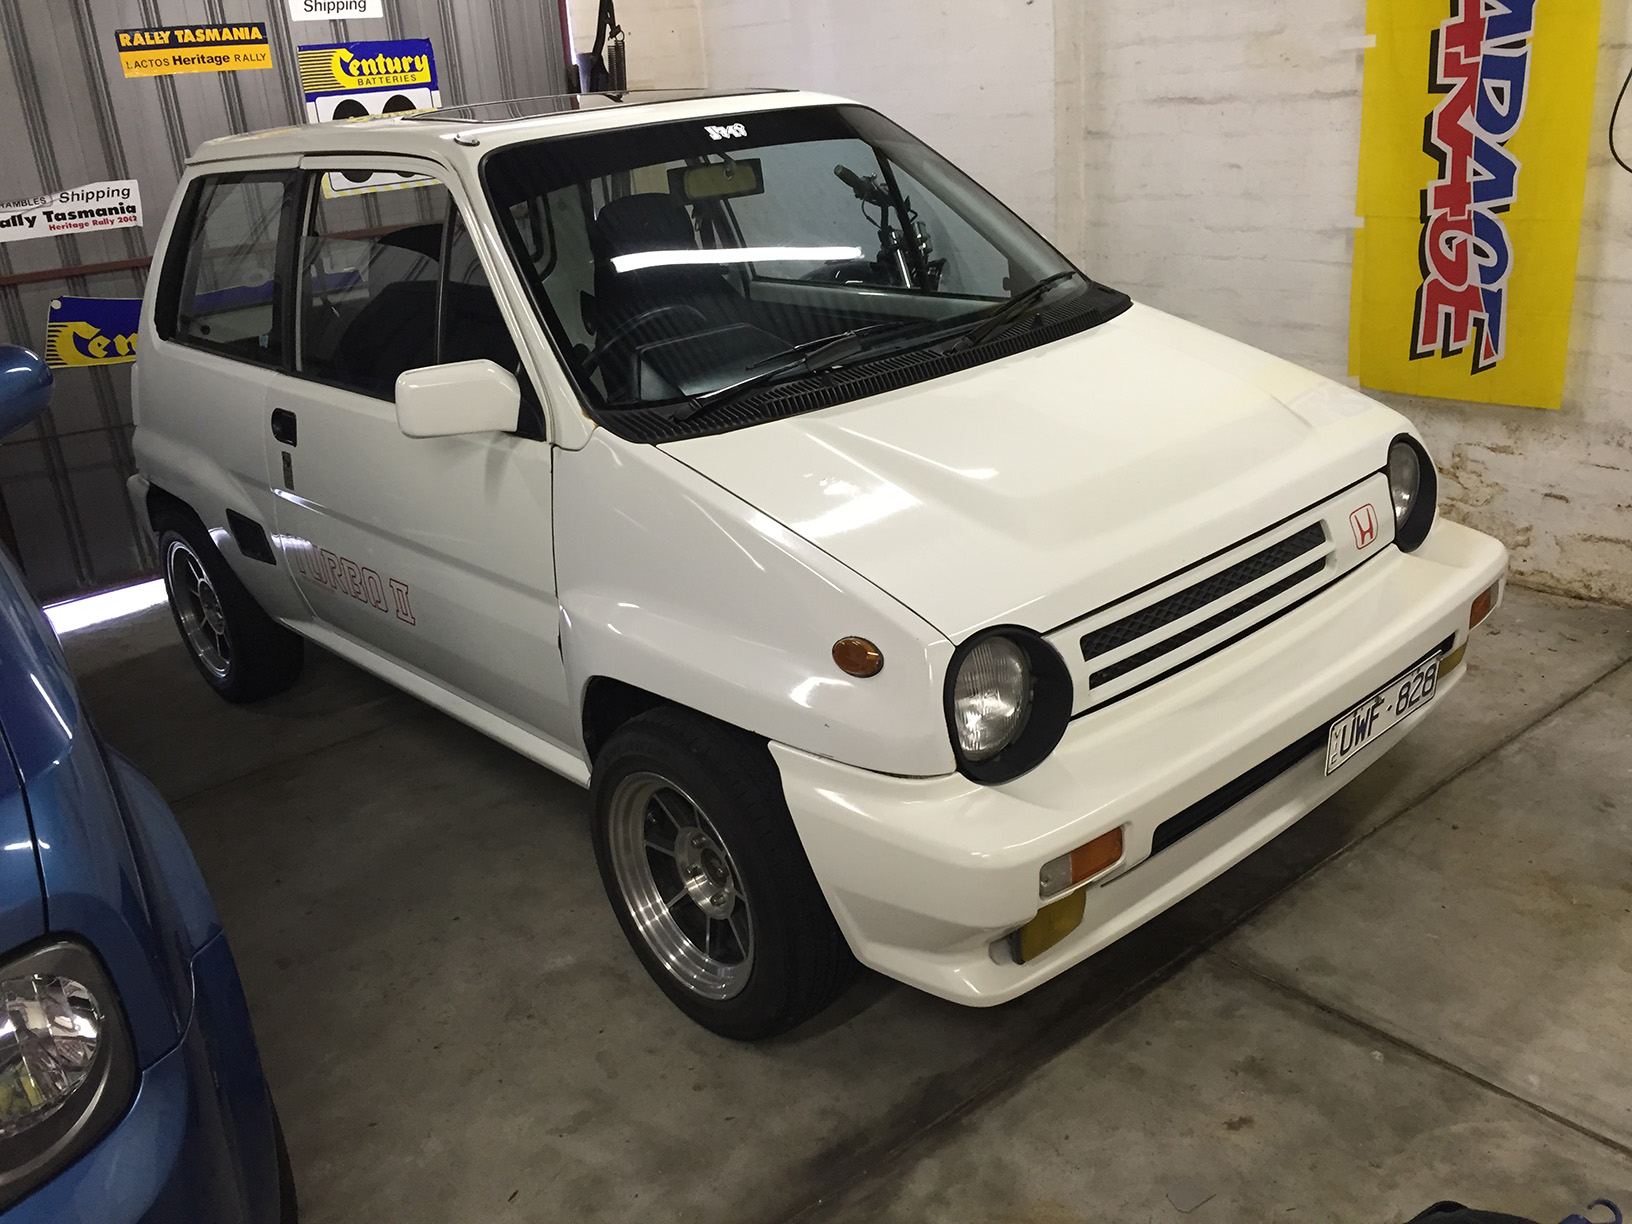
I haven’t posted an update on Project Honda City Turbo II since late last year, so let’s take a moment to catch up with the finishing touches on this boxy 80’s cult hatch. This is a truly huge update which sees the final mechanical work completed, so the car can attend it’s debut outing, Classic Japan. If you’re a fan of odball JDM machinery, then this is the post for you, as you’ll find some other treats further down the page (hint: tiny motorbike and gullwing doors).
Part 1: Introduction
Part 2: Teardown
Part 3: Engine refresh
Part 4: Bringing the engine home
Part 5: First start
Words and images by Ryan Lewis
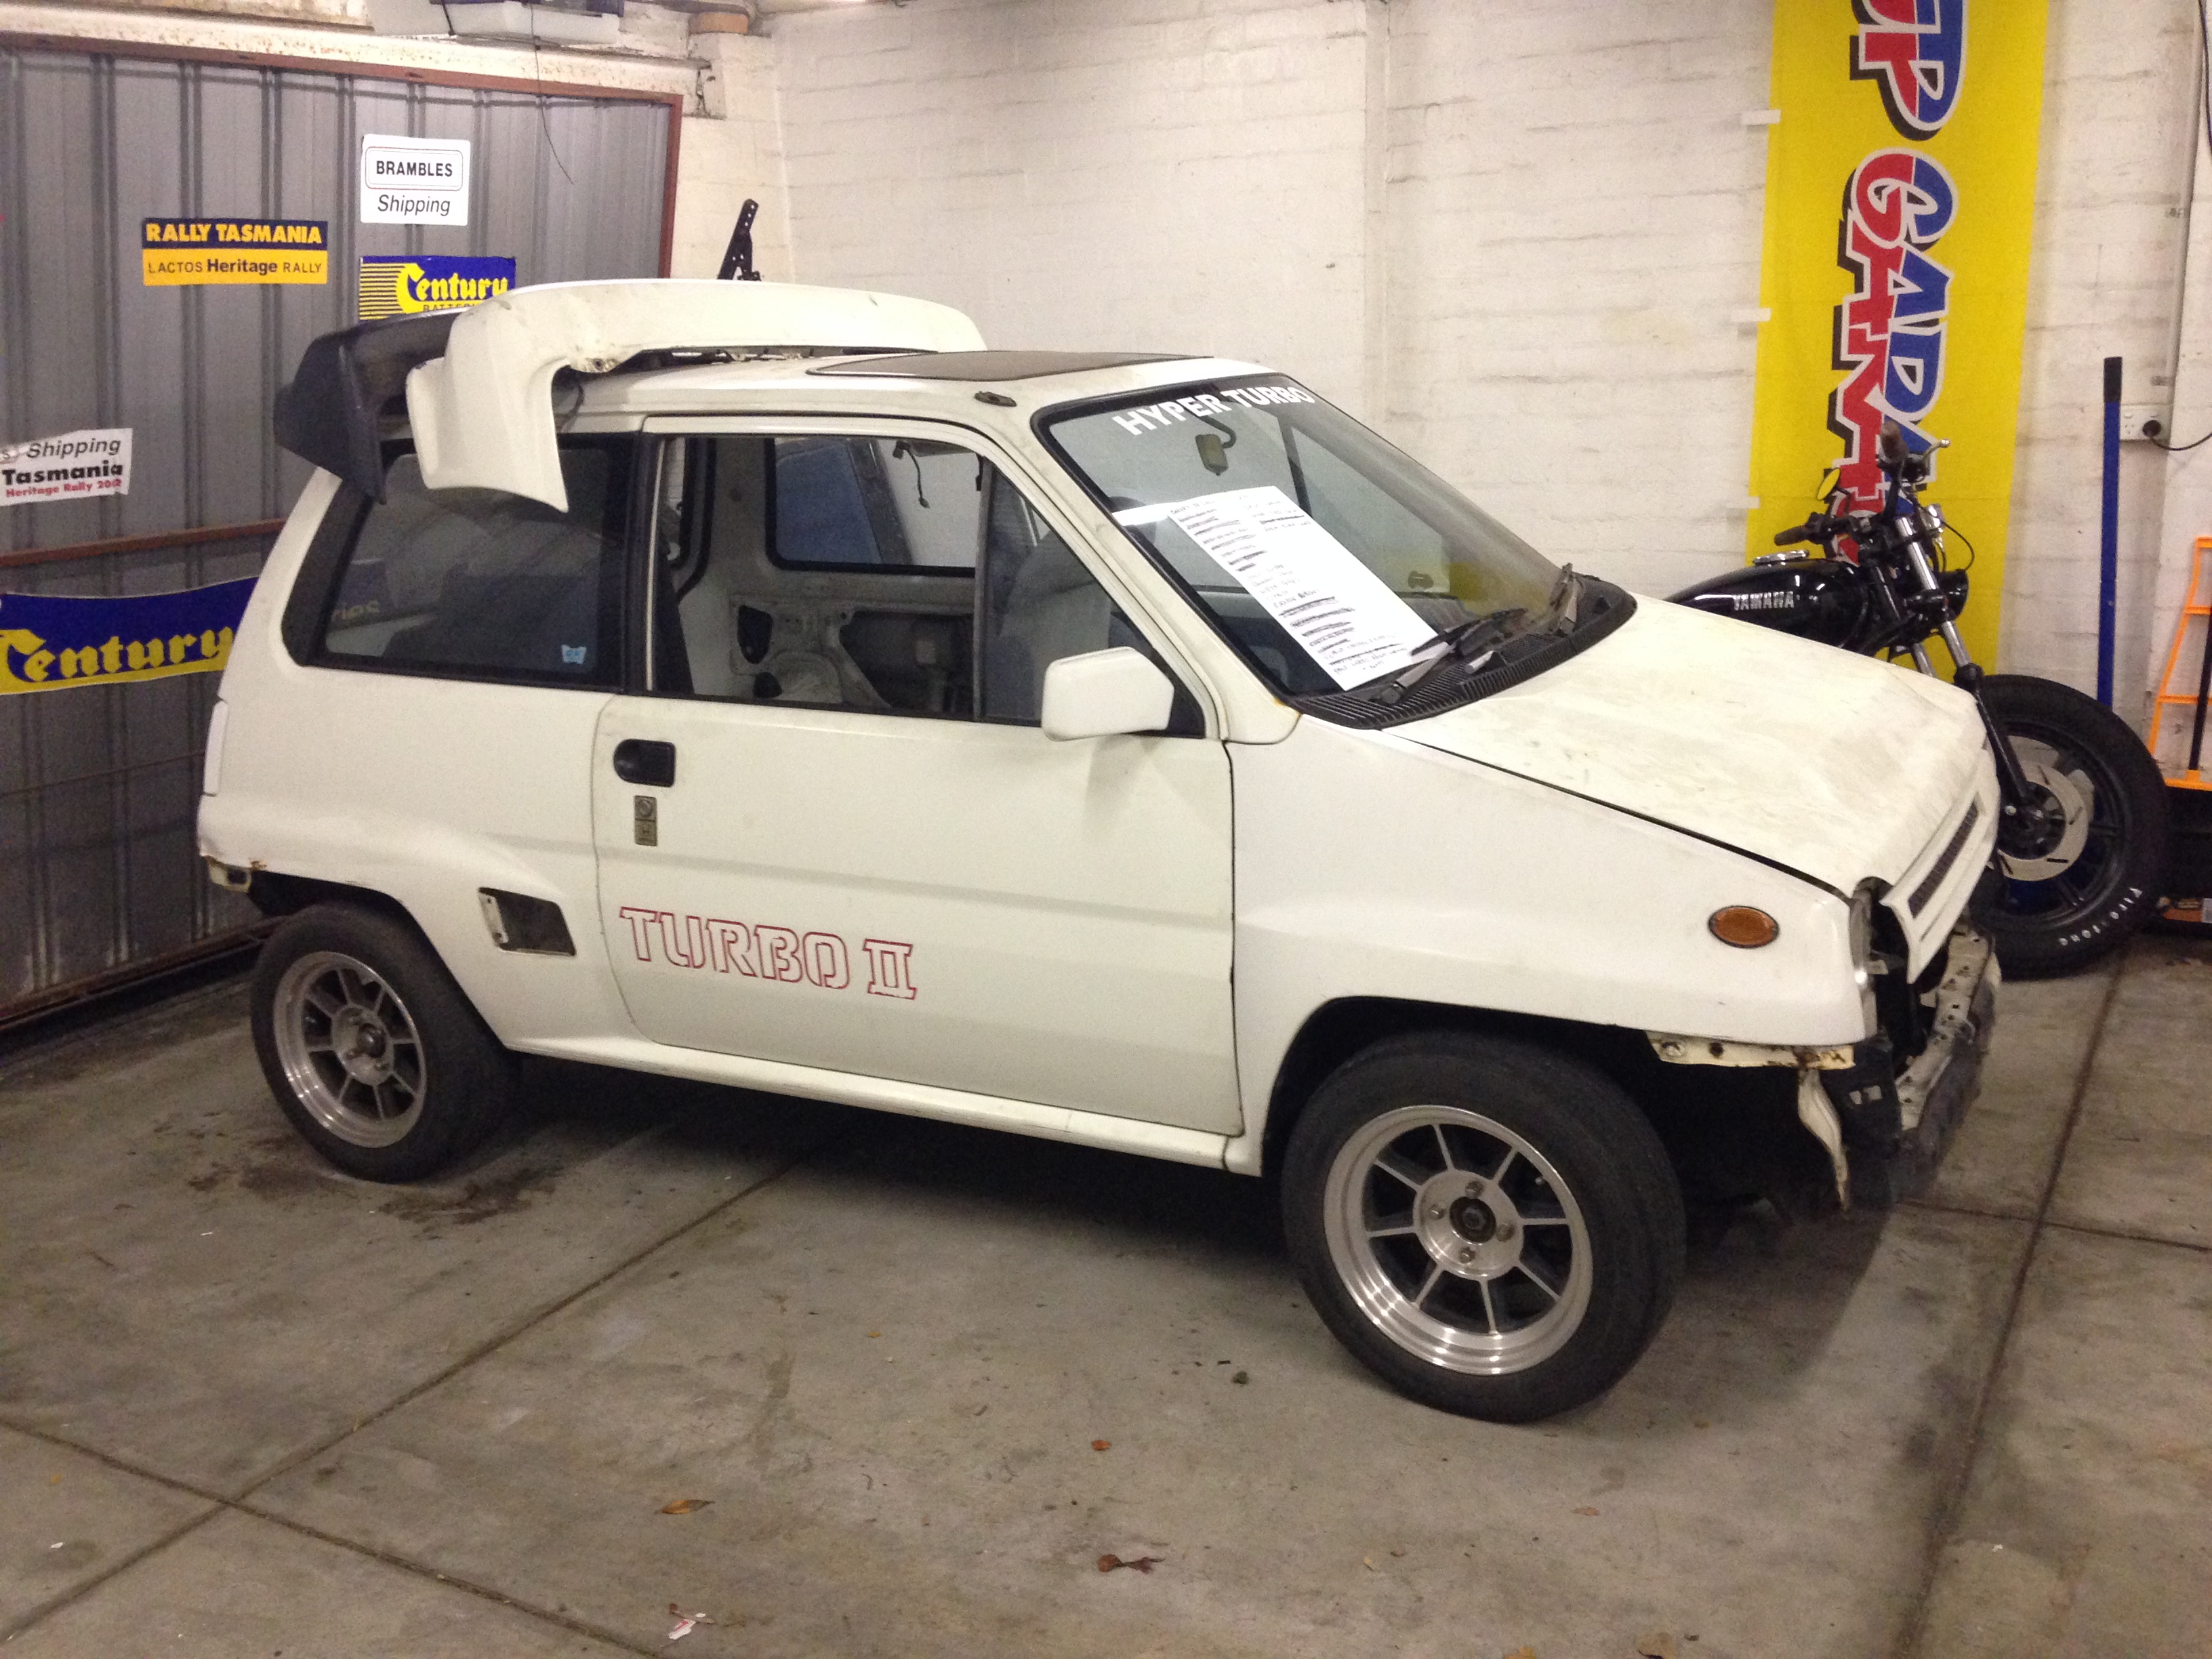
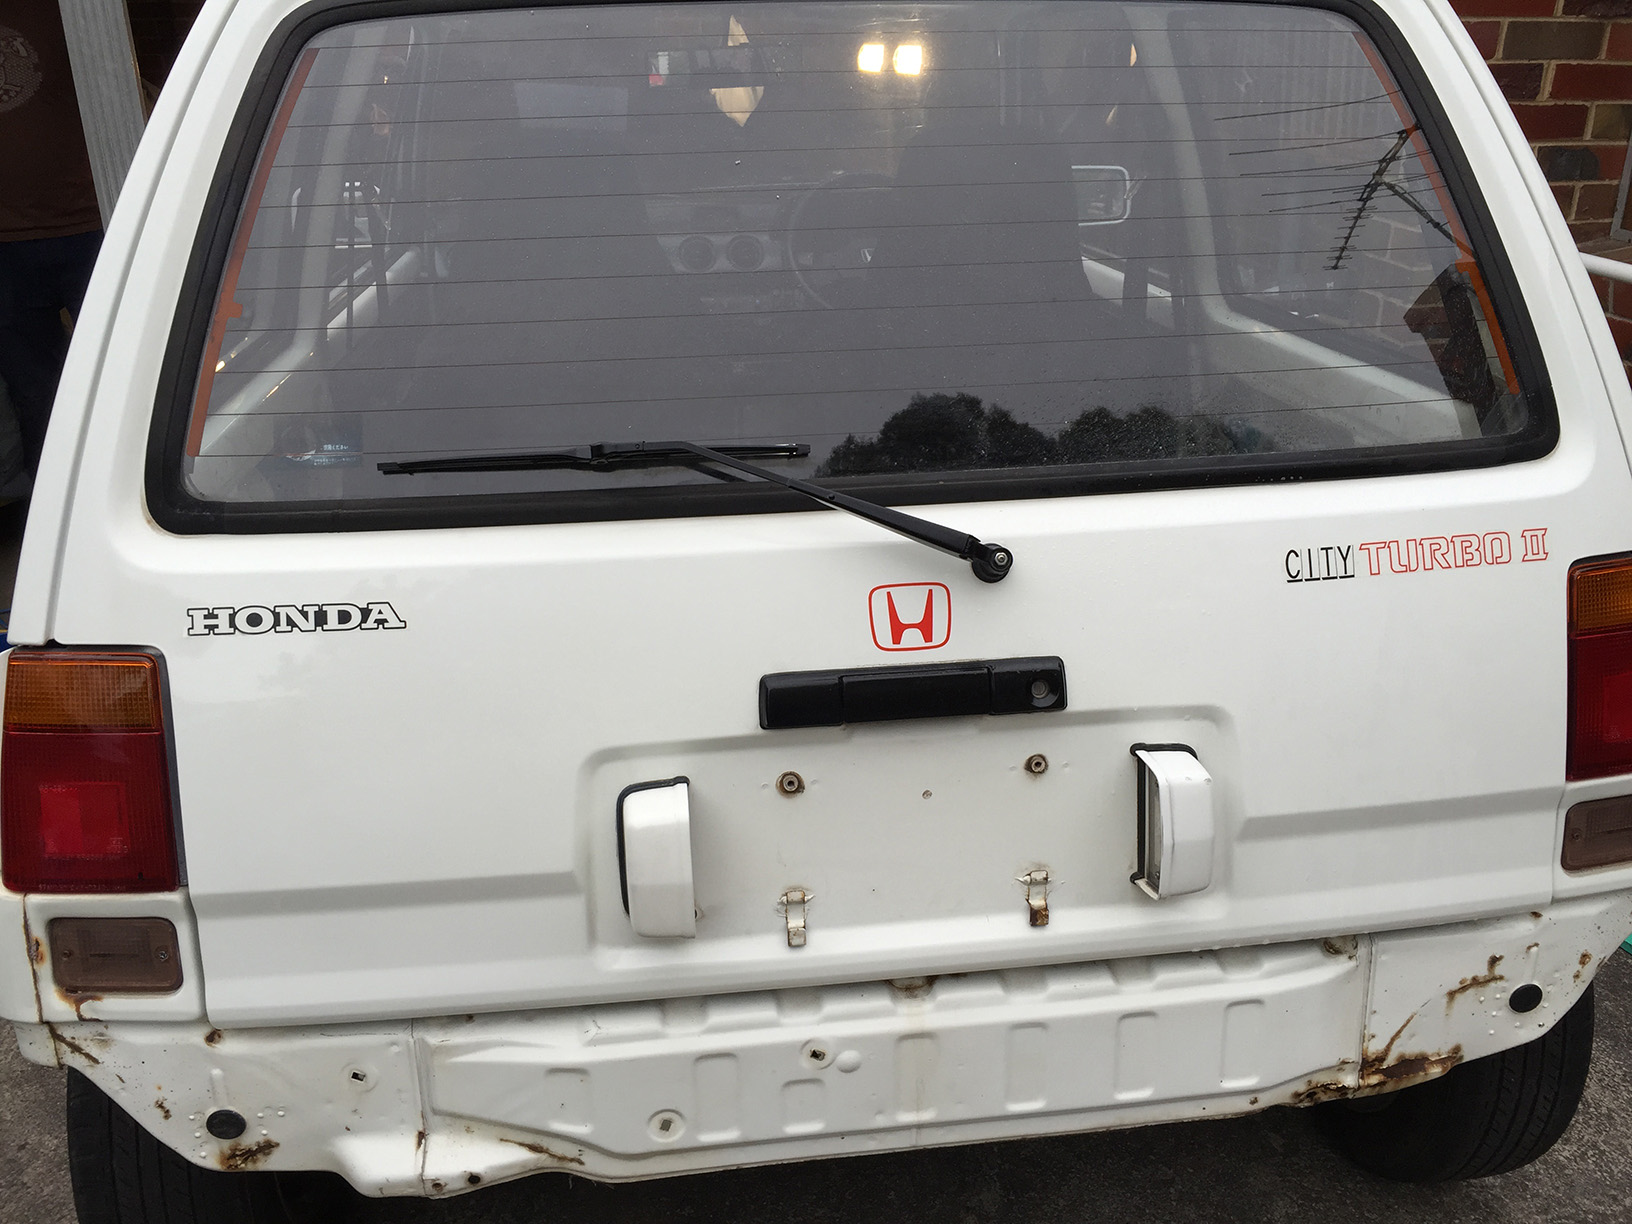
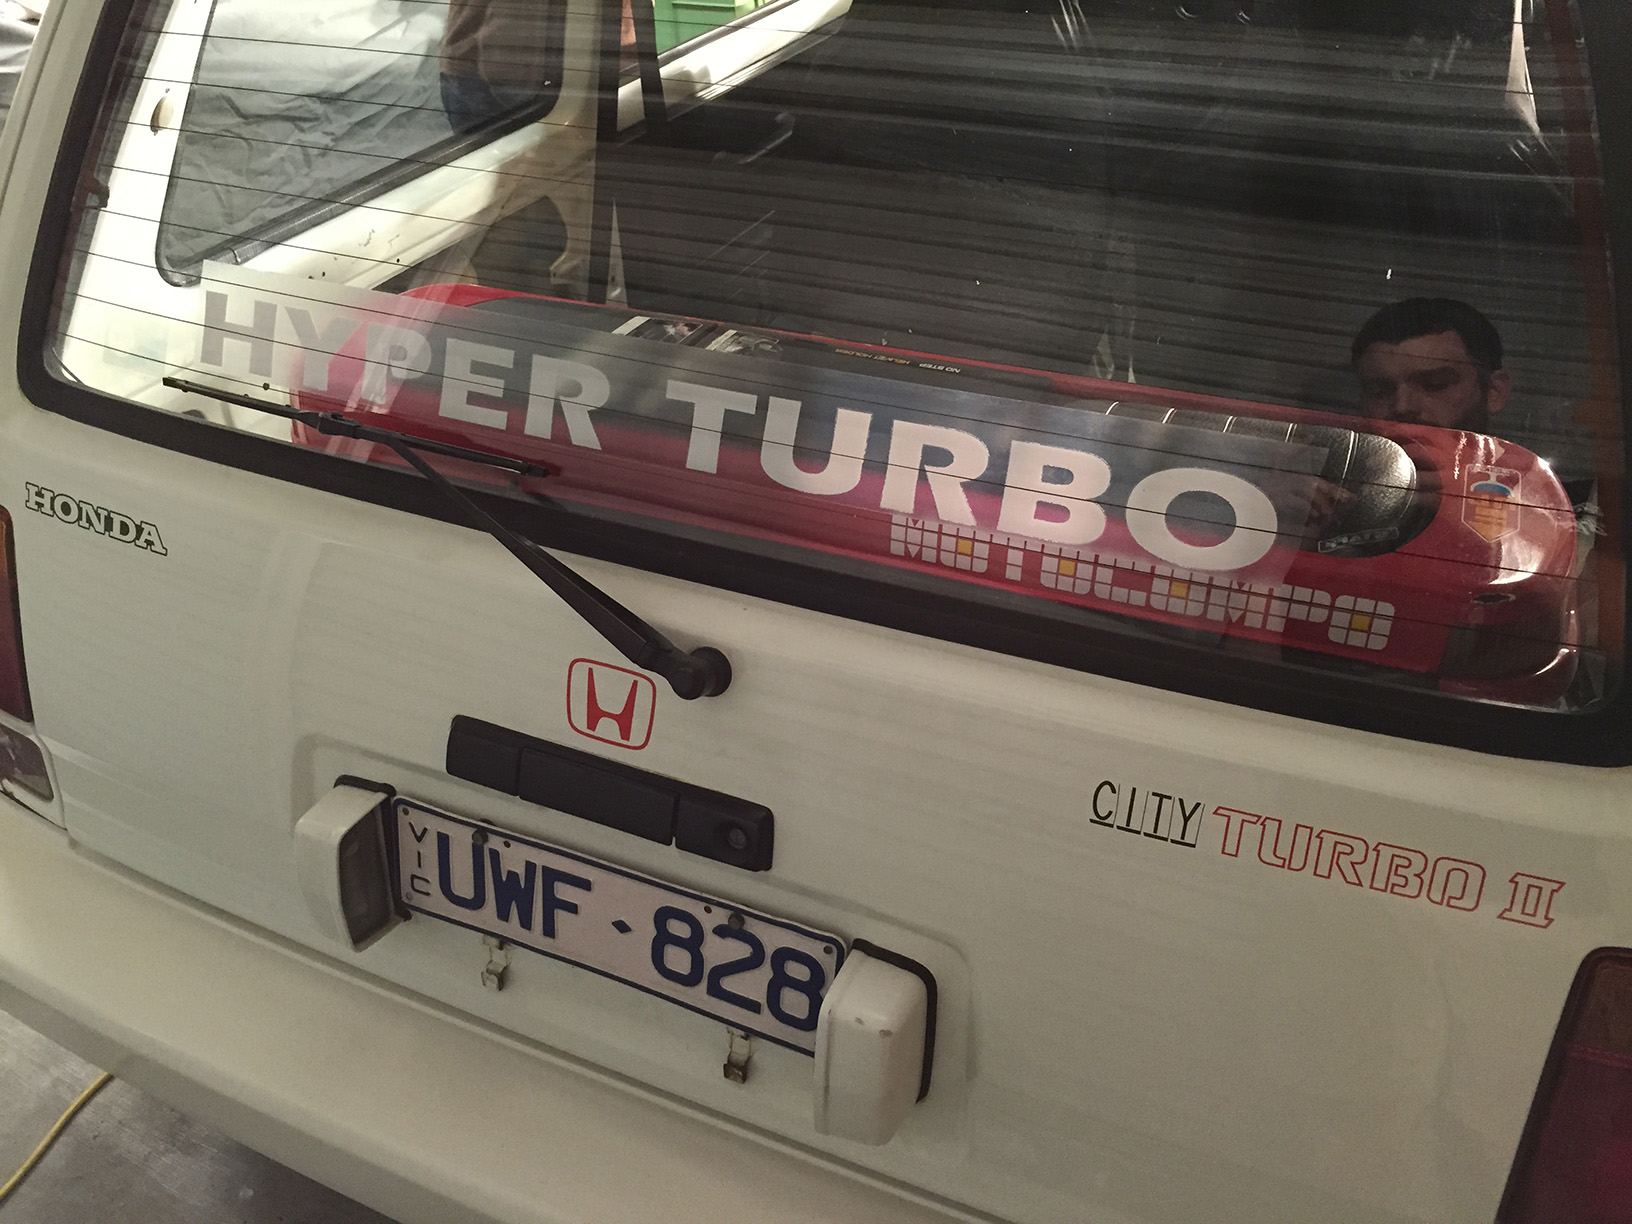
Rewinding back to where we left off, I did get another Hyper Turbo decal made up in reverse so we can stick it on the inside of the rear window. I also grabbed some black vinyl so we have the option of replacing the one on the front with a solid windscreen banner like the one below.

Then little Honderp went on an excursion to the exhaust doctor.
On Friday night Tony and I tackled a few things to make sure it was ready to roll on Saturday.
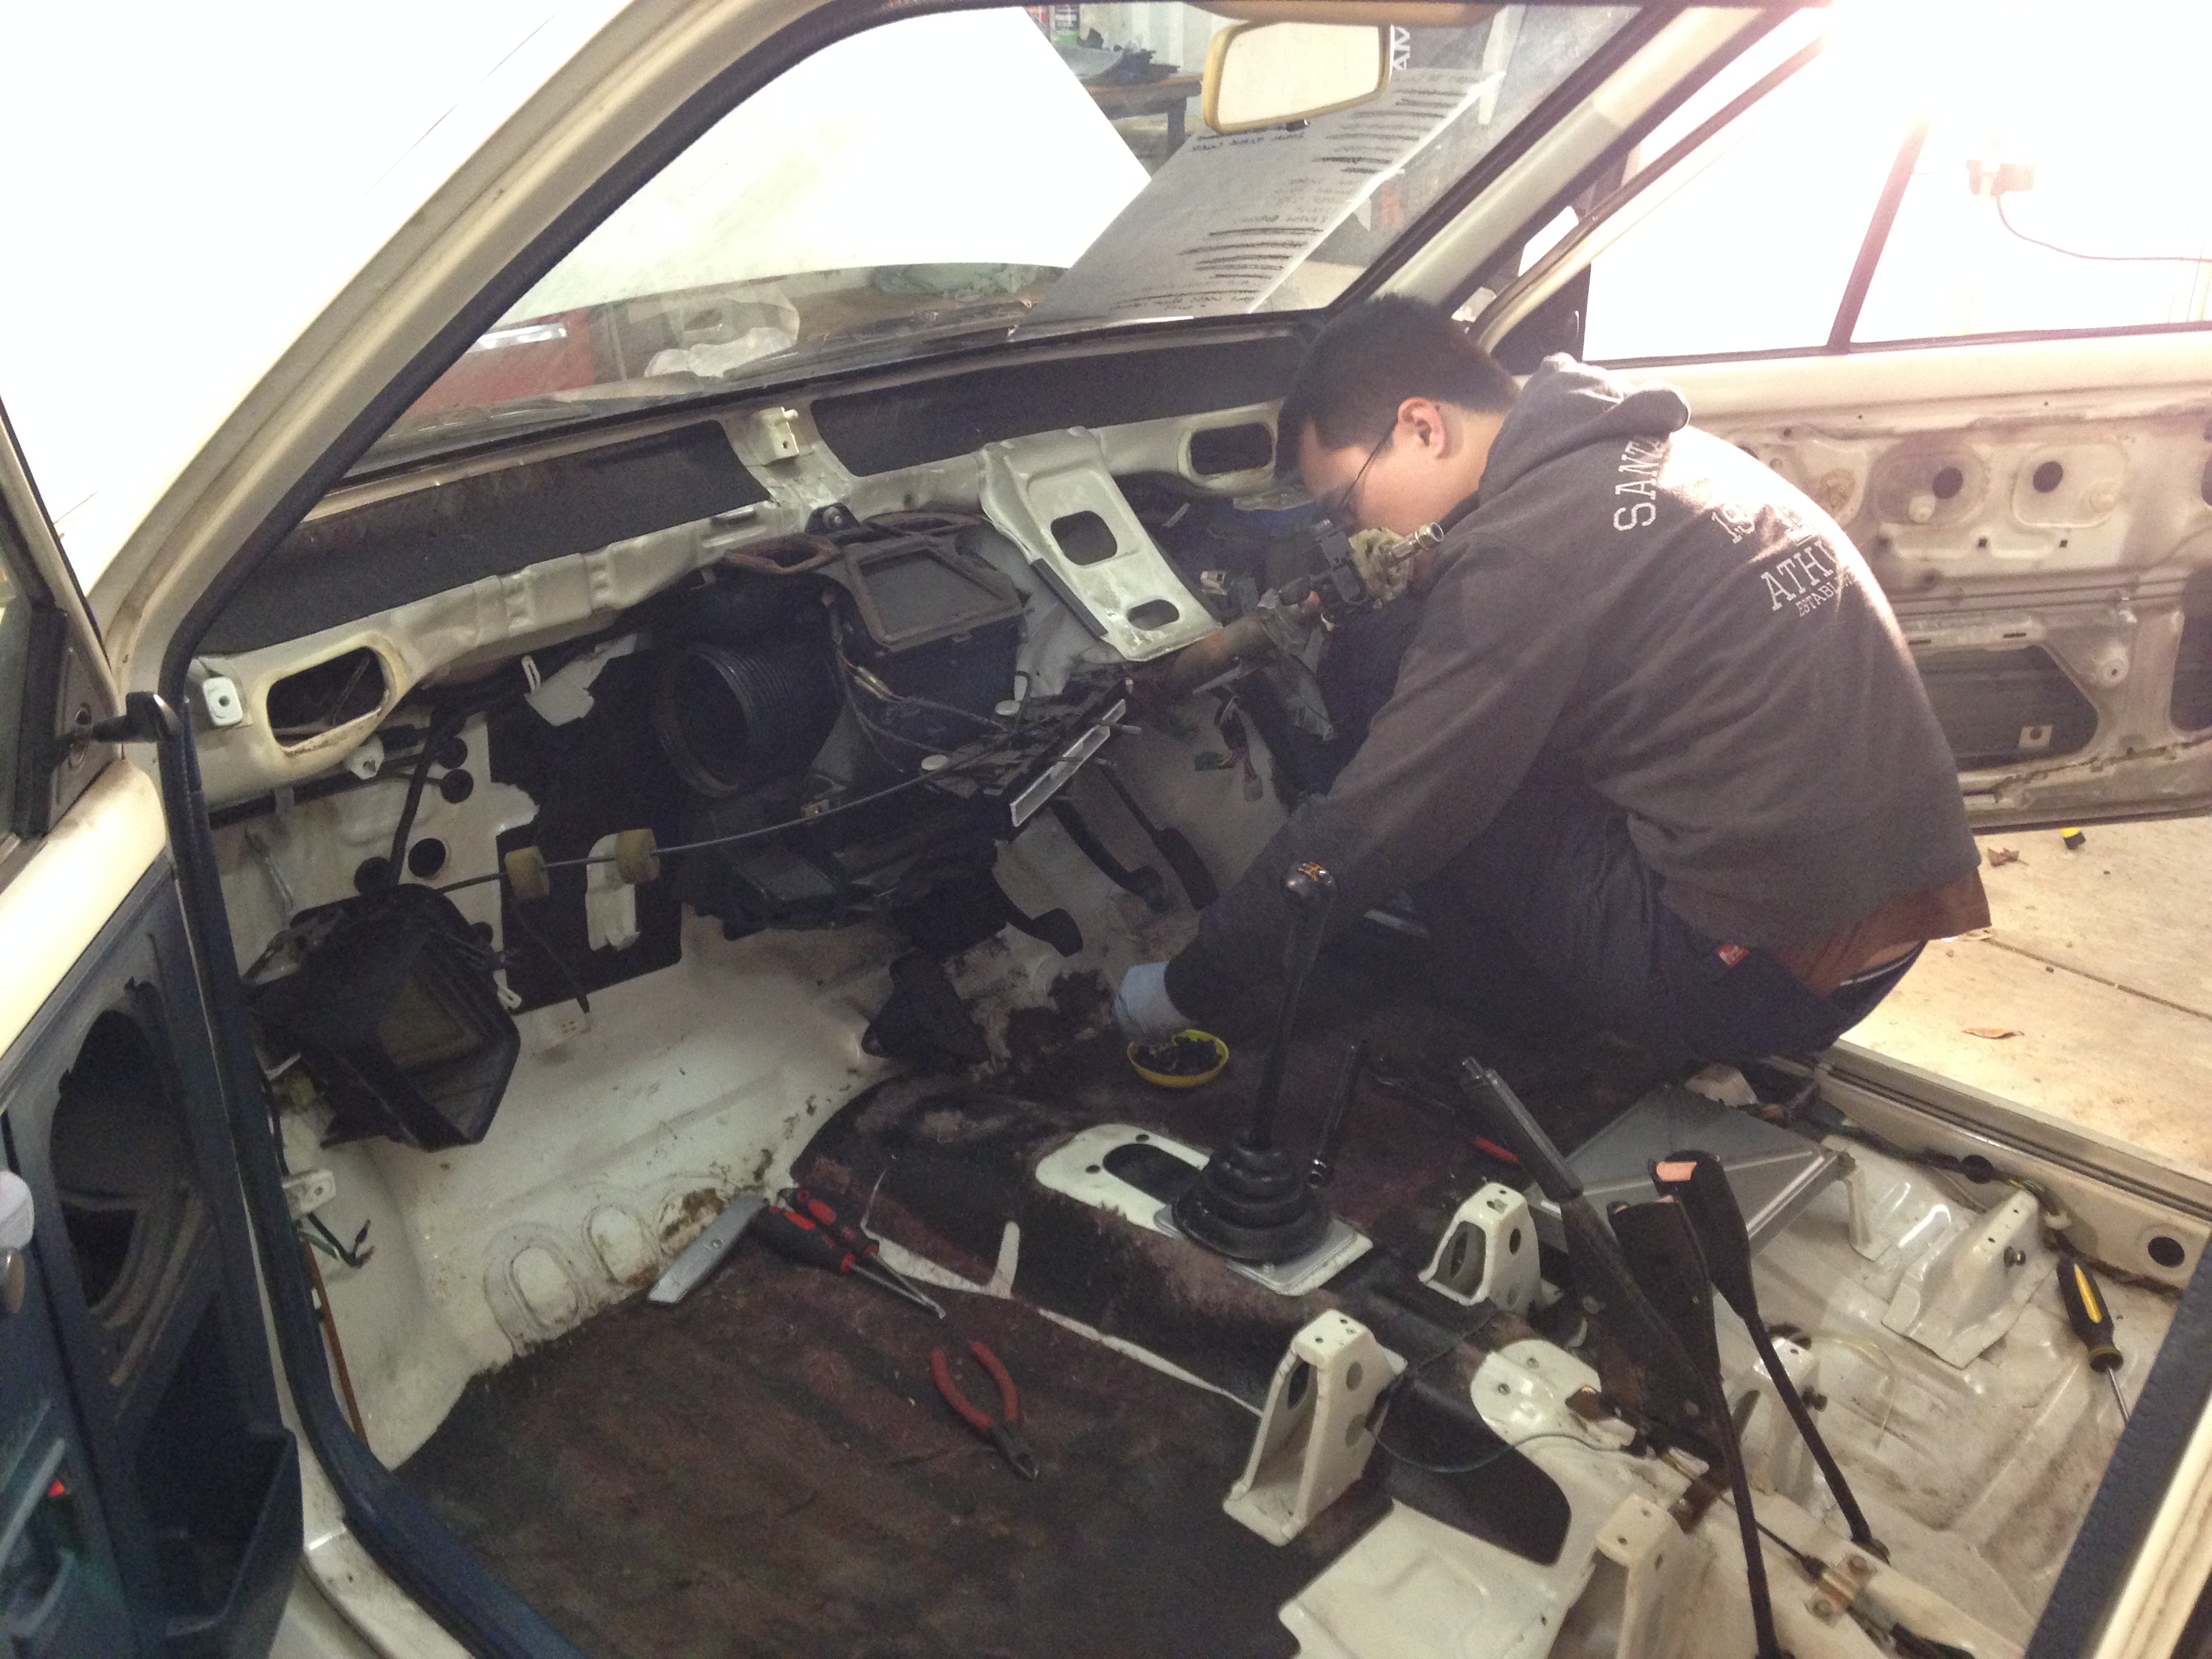
We finished removing the carpet/rubber firewall insulation stuff from behind the heater core. We refitted the fuse box, steering column, dash wiring, gauge cluster, steering wheel and driver’s seat so that the car can be started and driven if running properly.
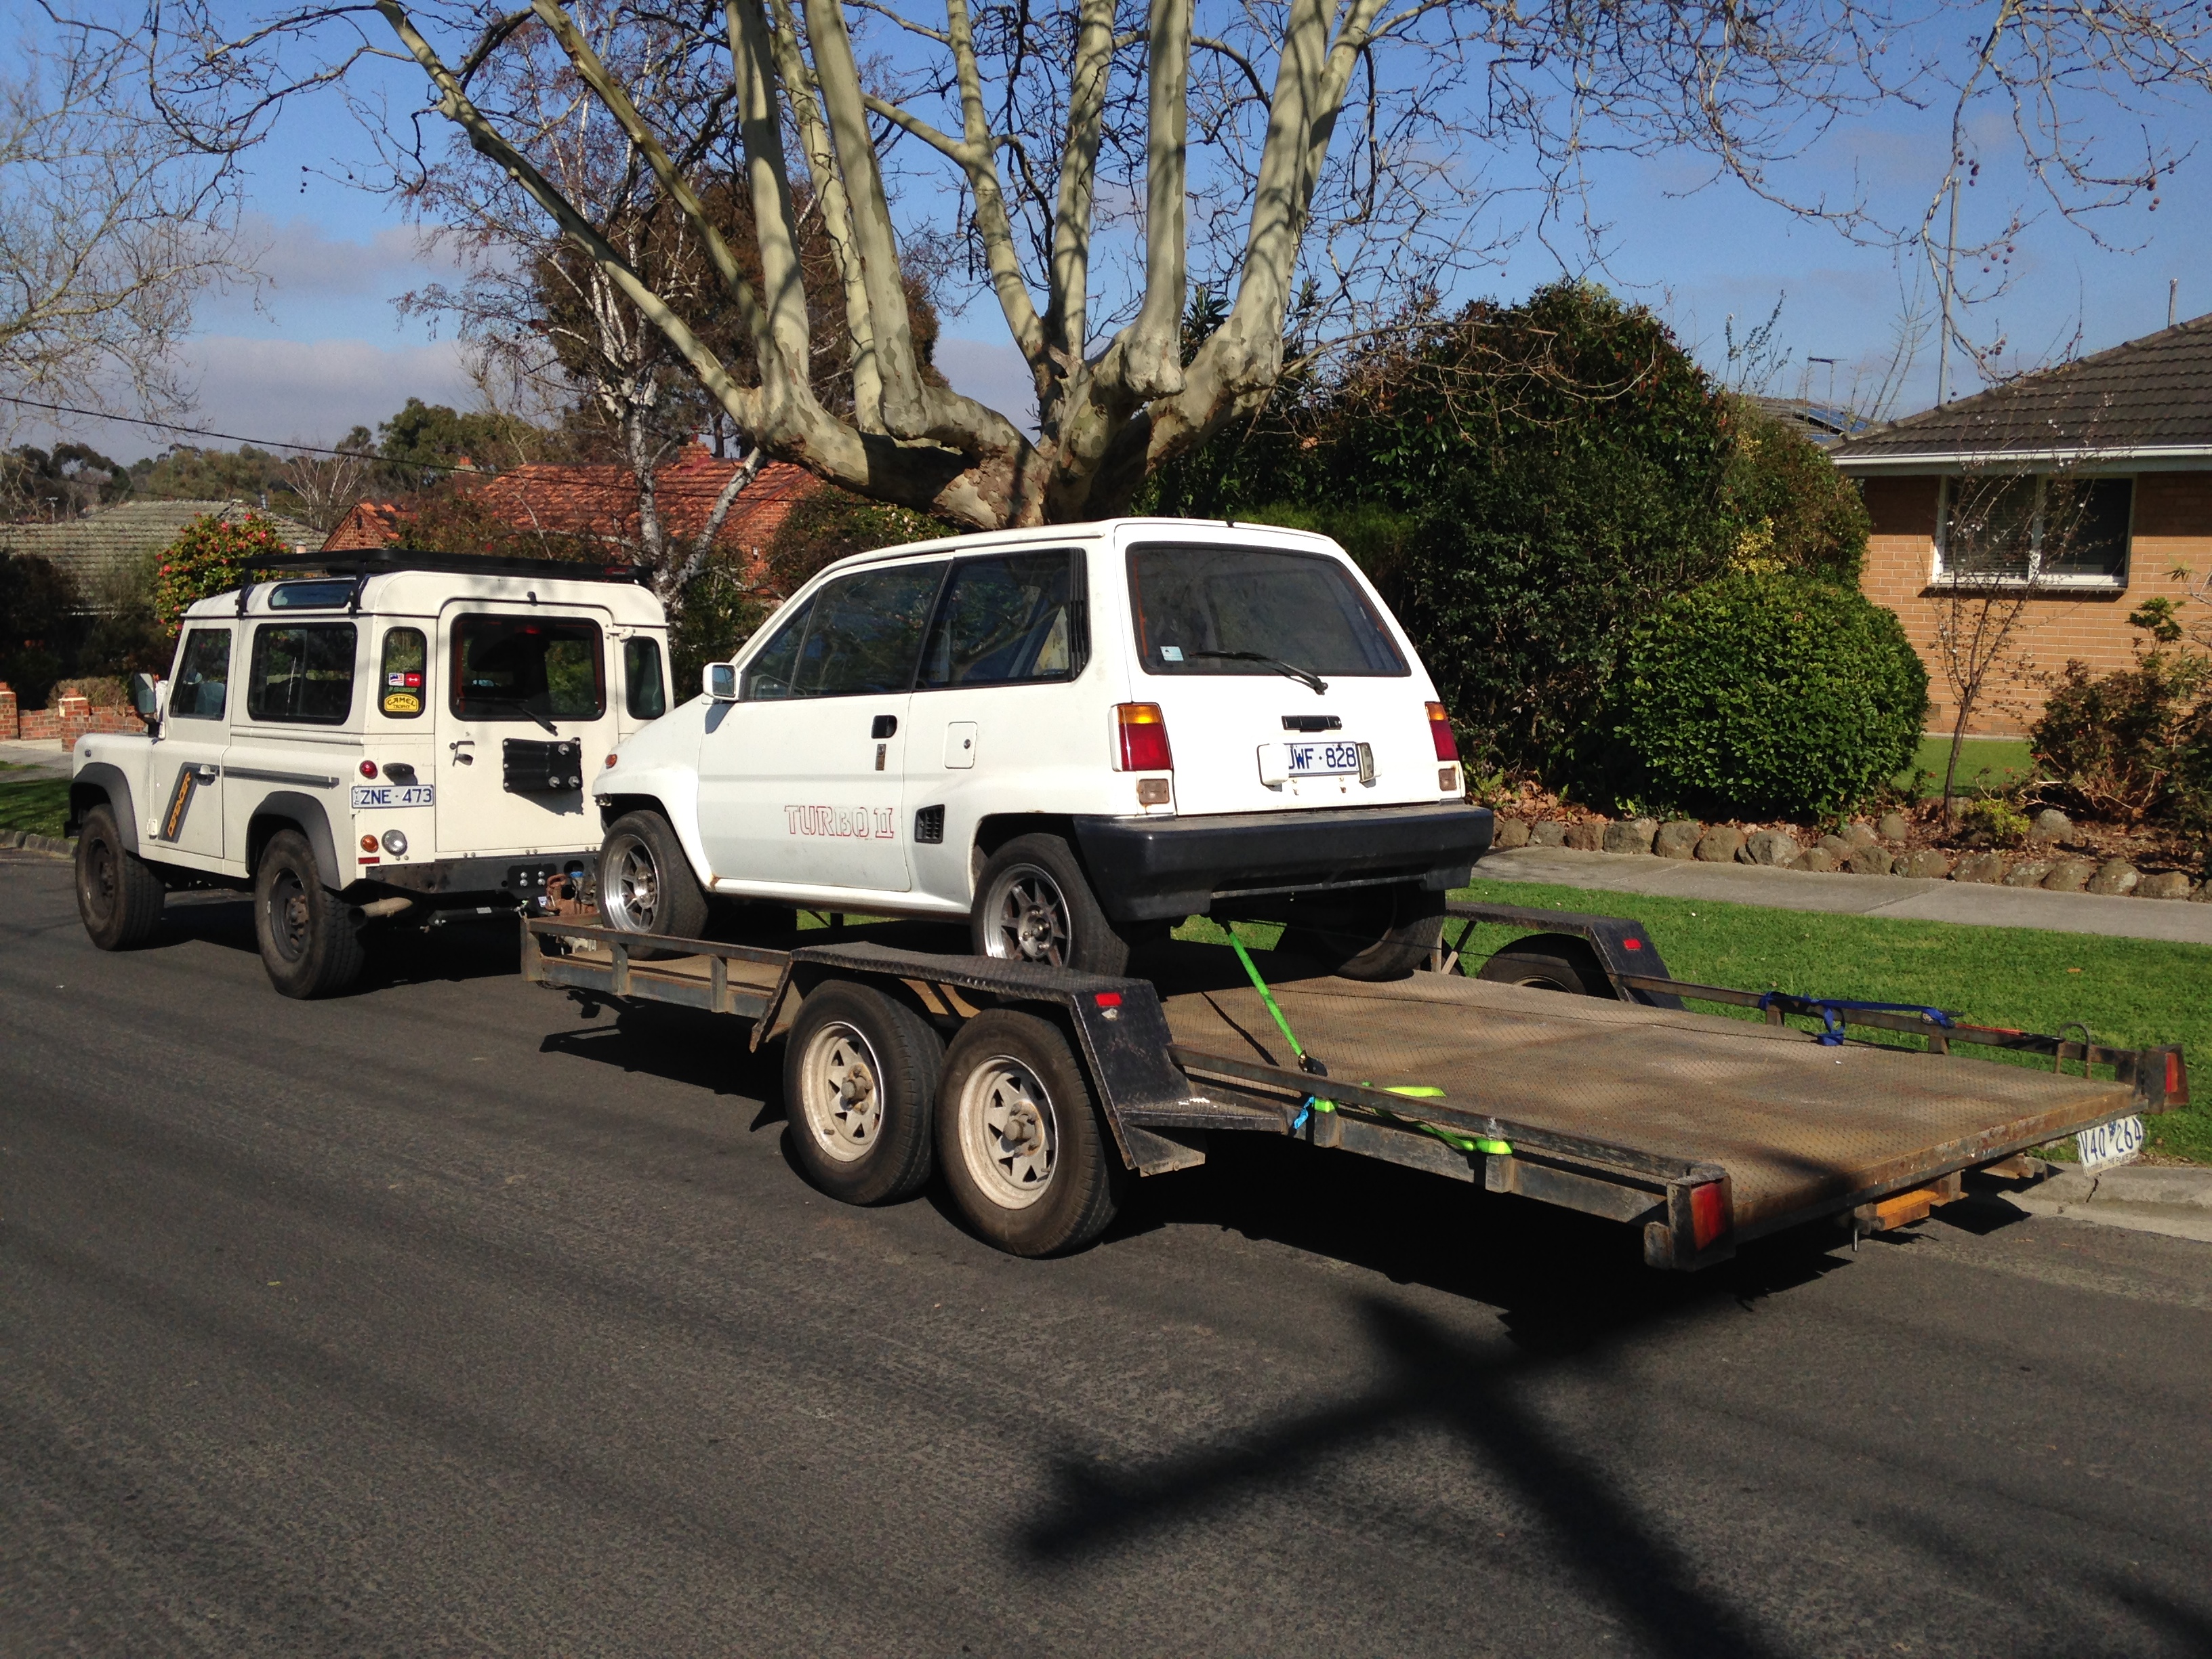
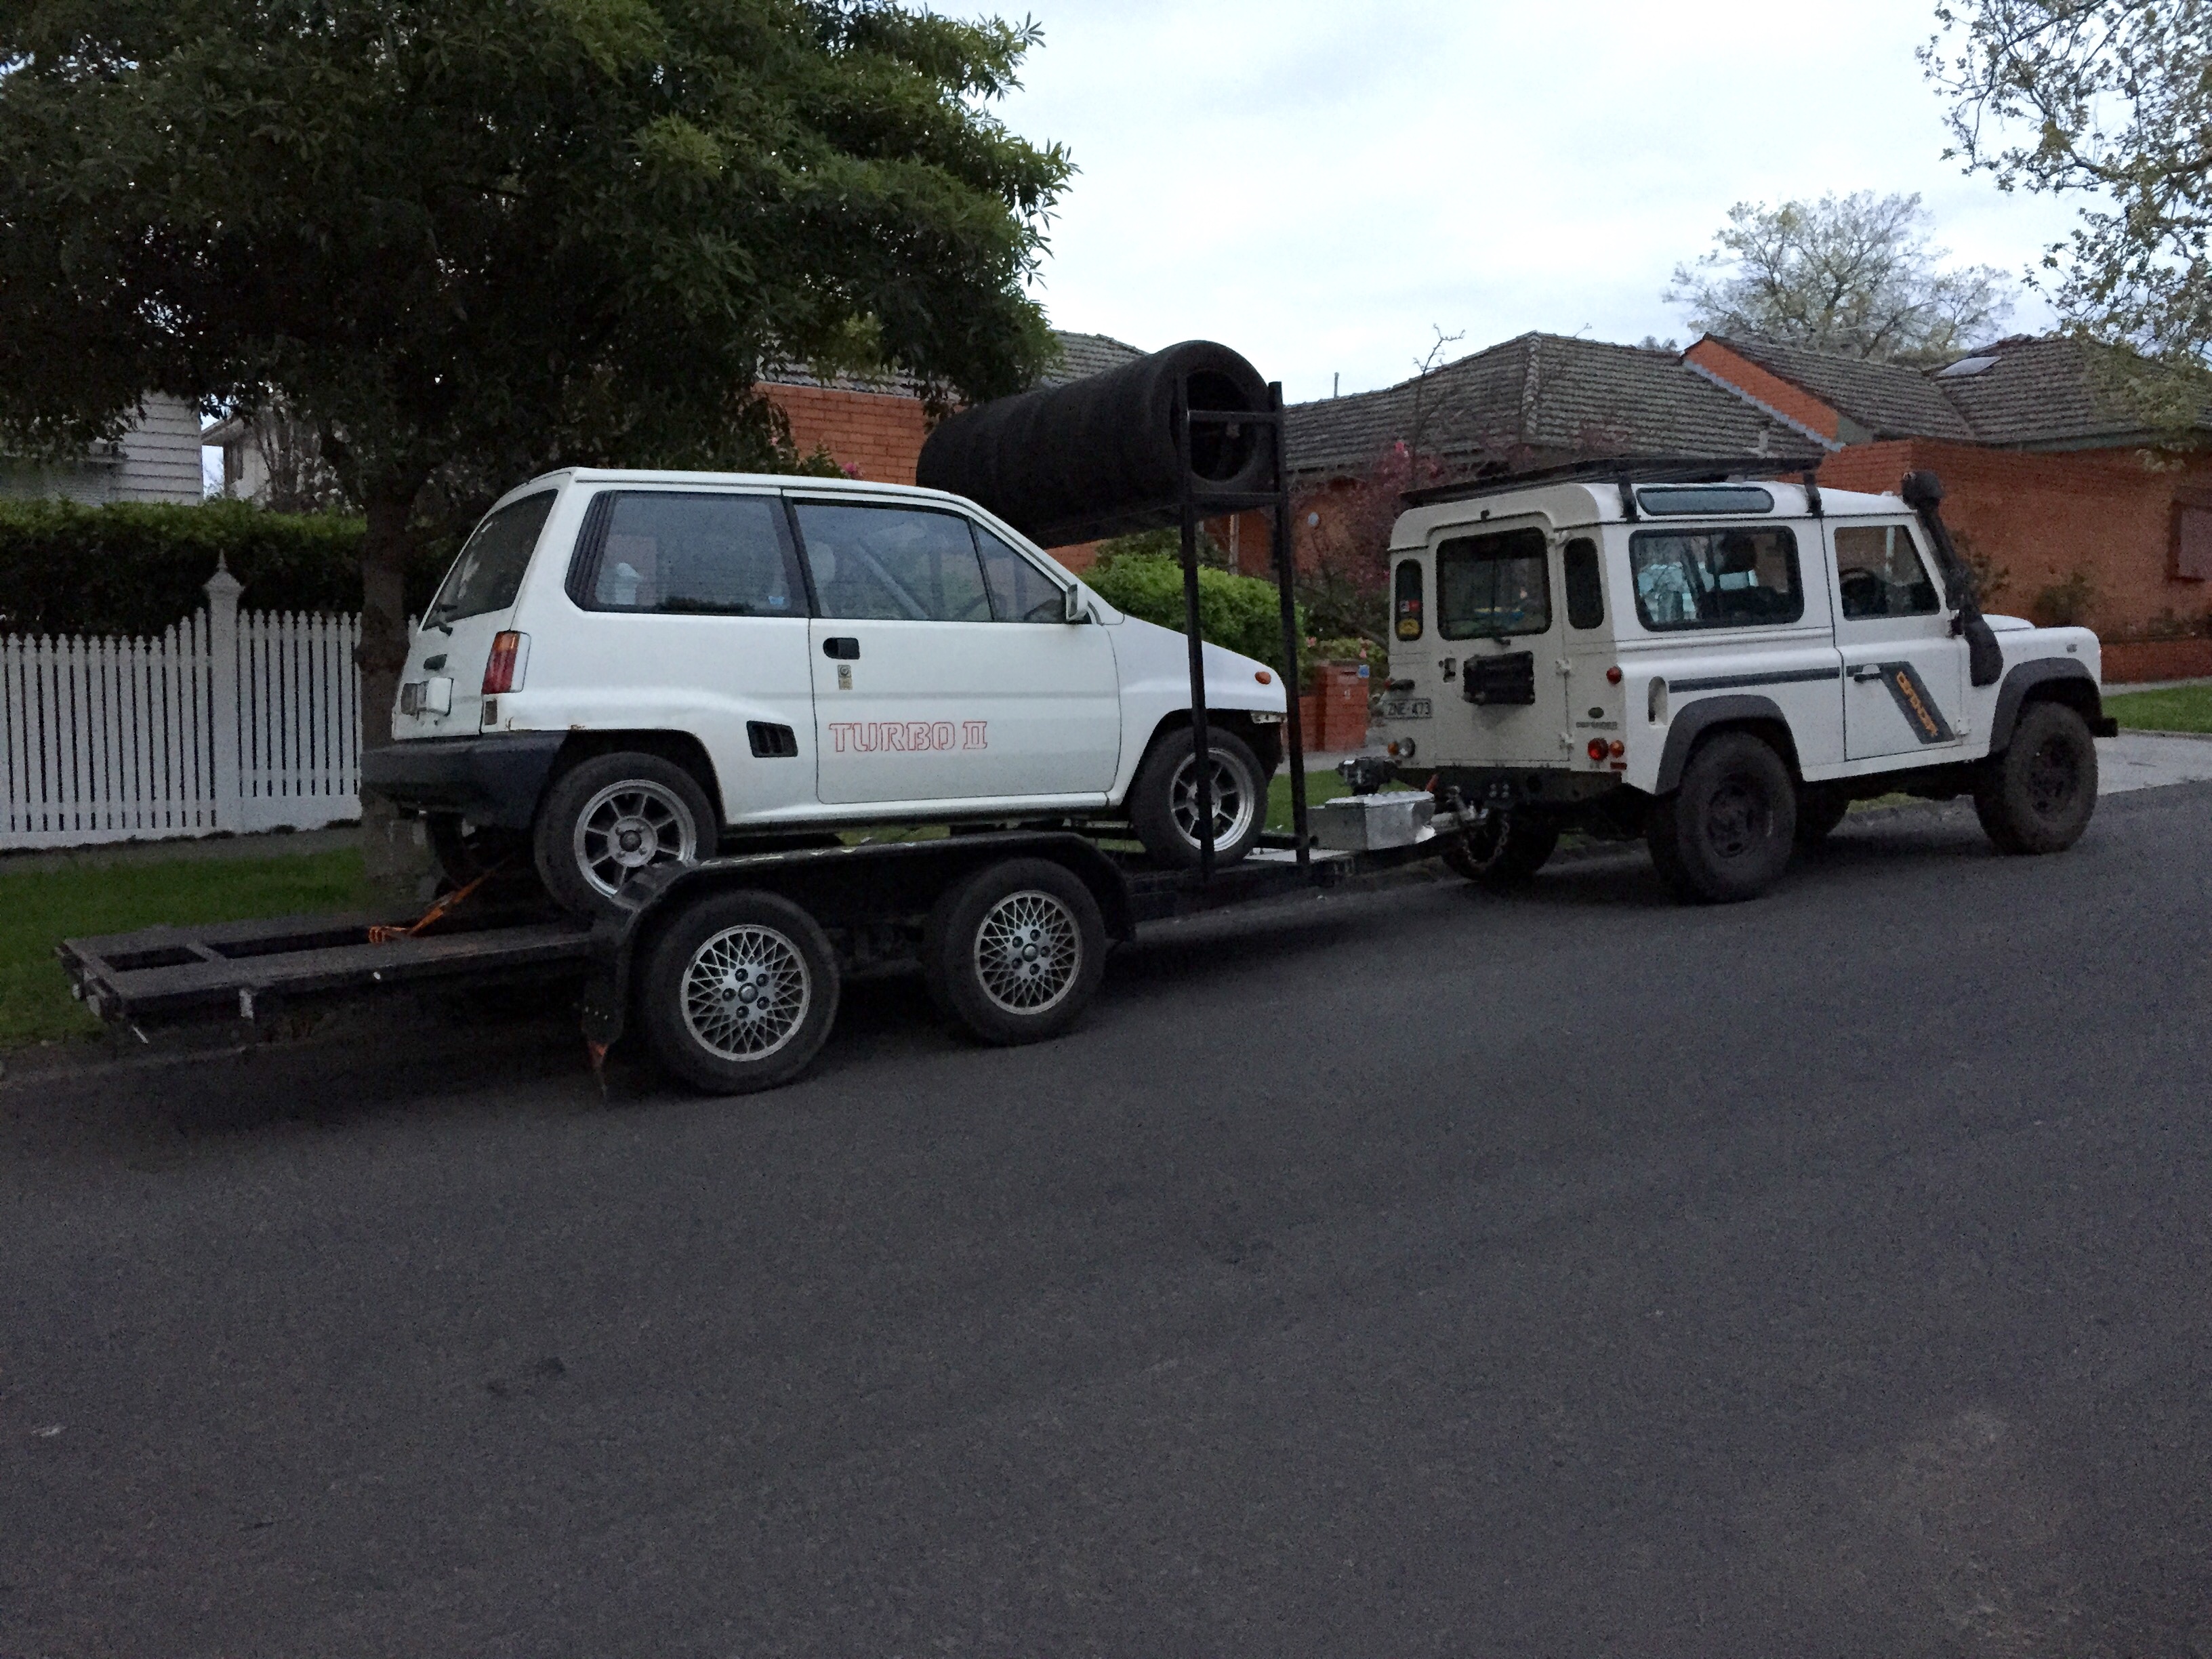
Then it was onto a trailer for the gentle drive out to Dandenong. Probs just use one of these next time we have to move it.

So kawaii!
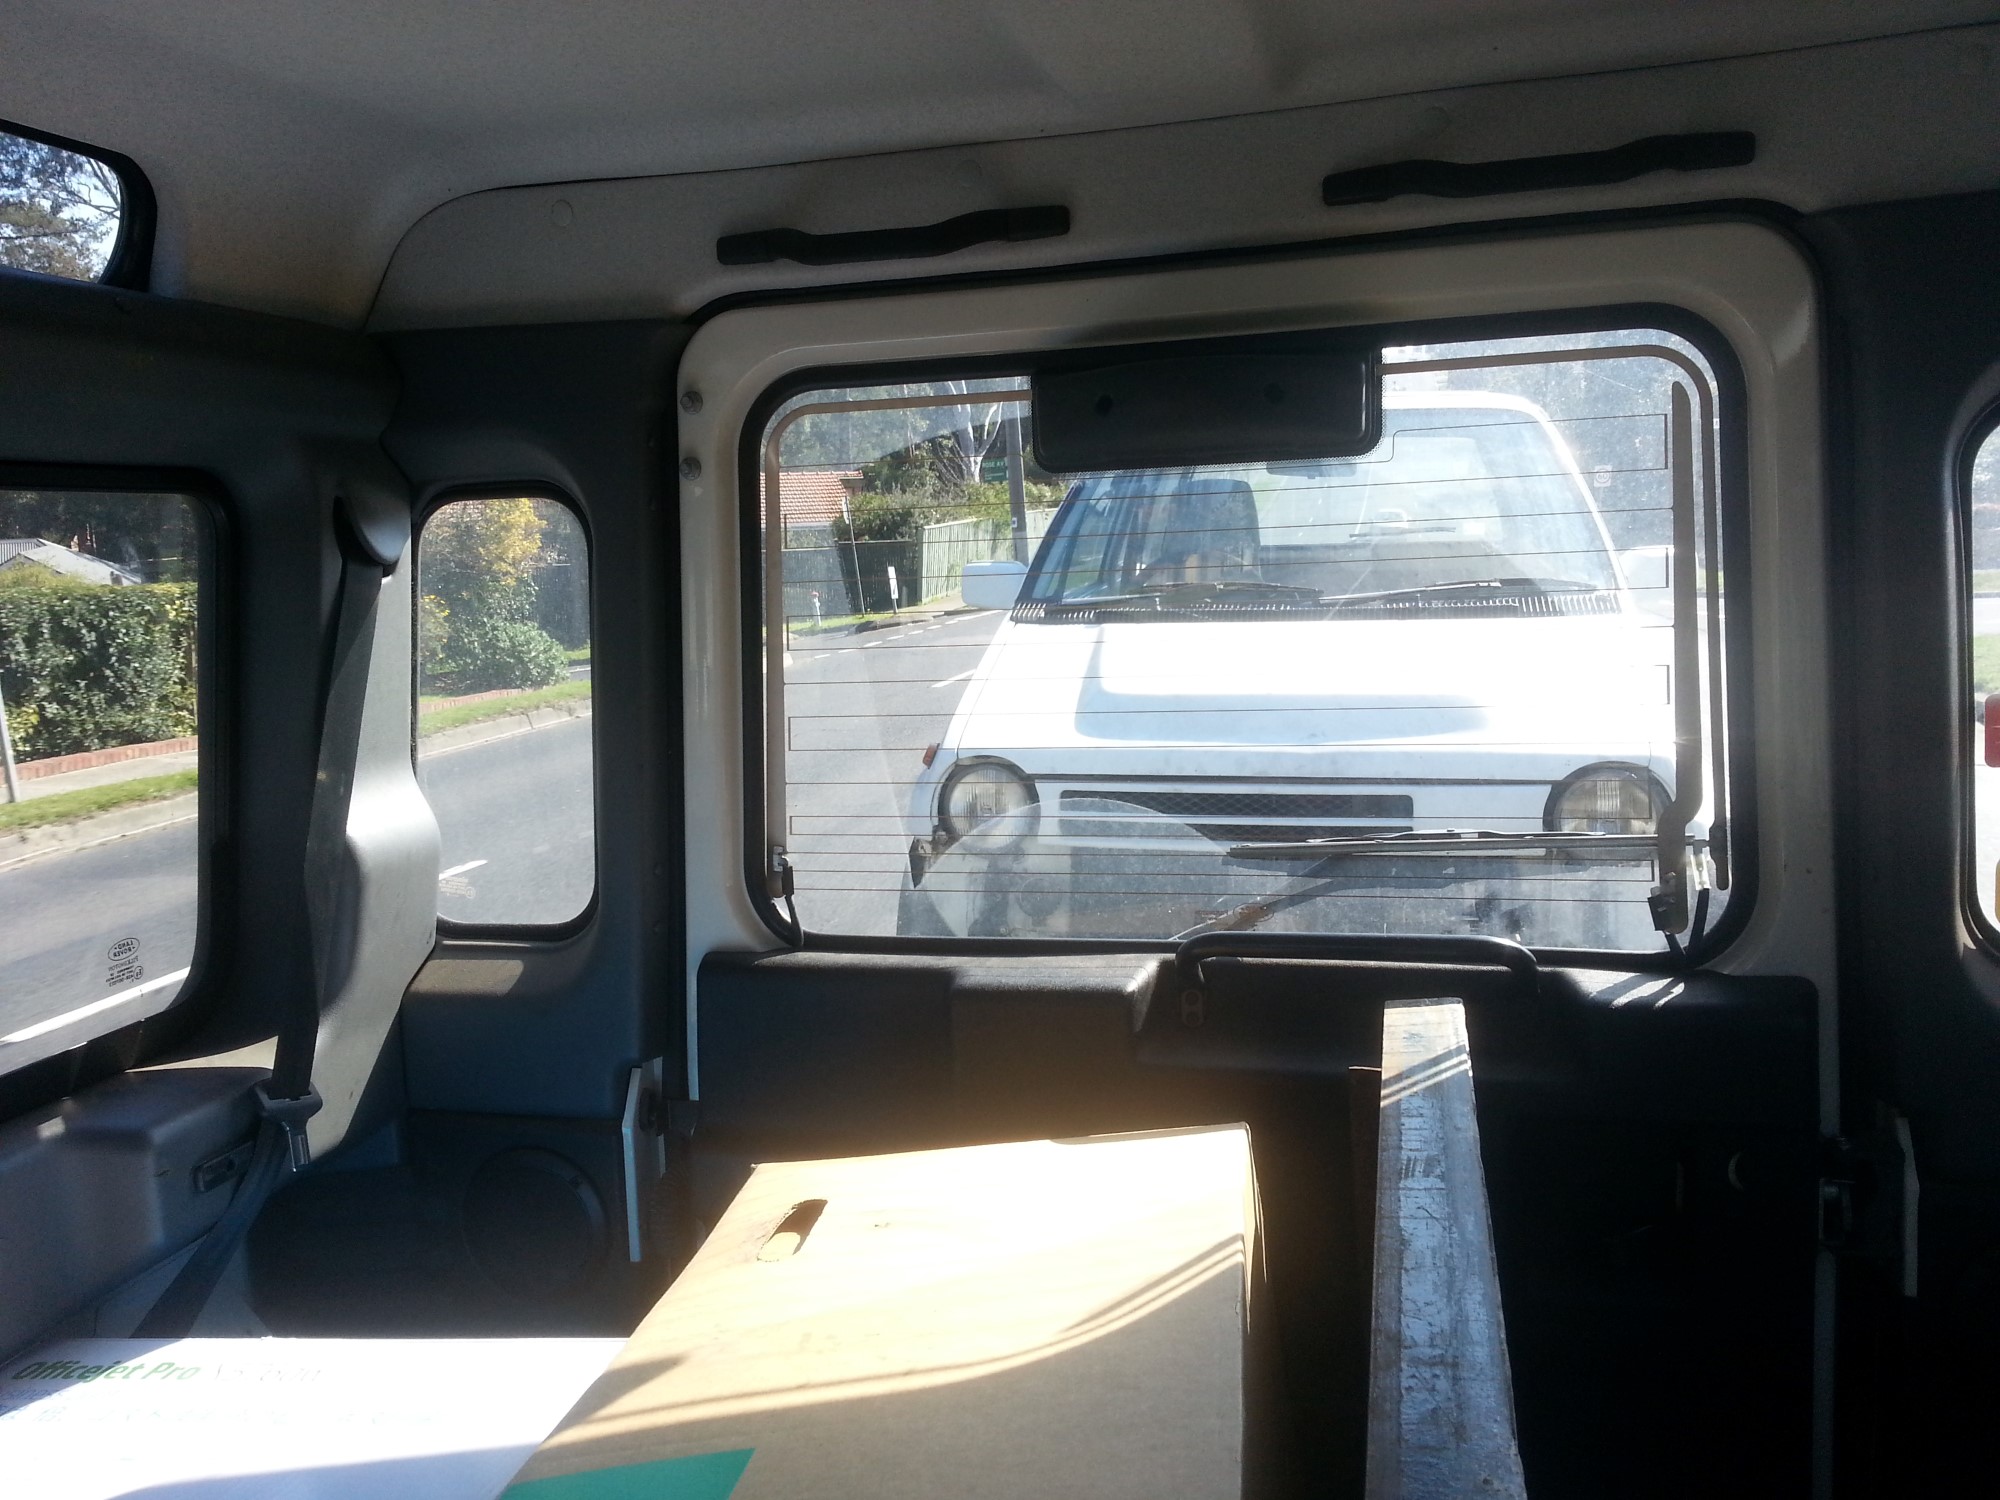
The Land Rover Defender tow car was borrowed from a mate and it was awesome. I want one.
MPW is the workshop looking after the exhaust fab. I don’t think our Honda could’ve been more out of place. There were about 20 cars in the yard and almost everything had an LS V8 in it, most of them twin turbo.

I was put in touch with Adam at MPW by an old friend in Sydney. He seemed totally cool and was happy to take care of it. All they have to do is bend and weld a short section of stainless to run from the back of the turbo down to the factory exhaust starting near the shifter.
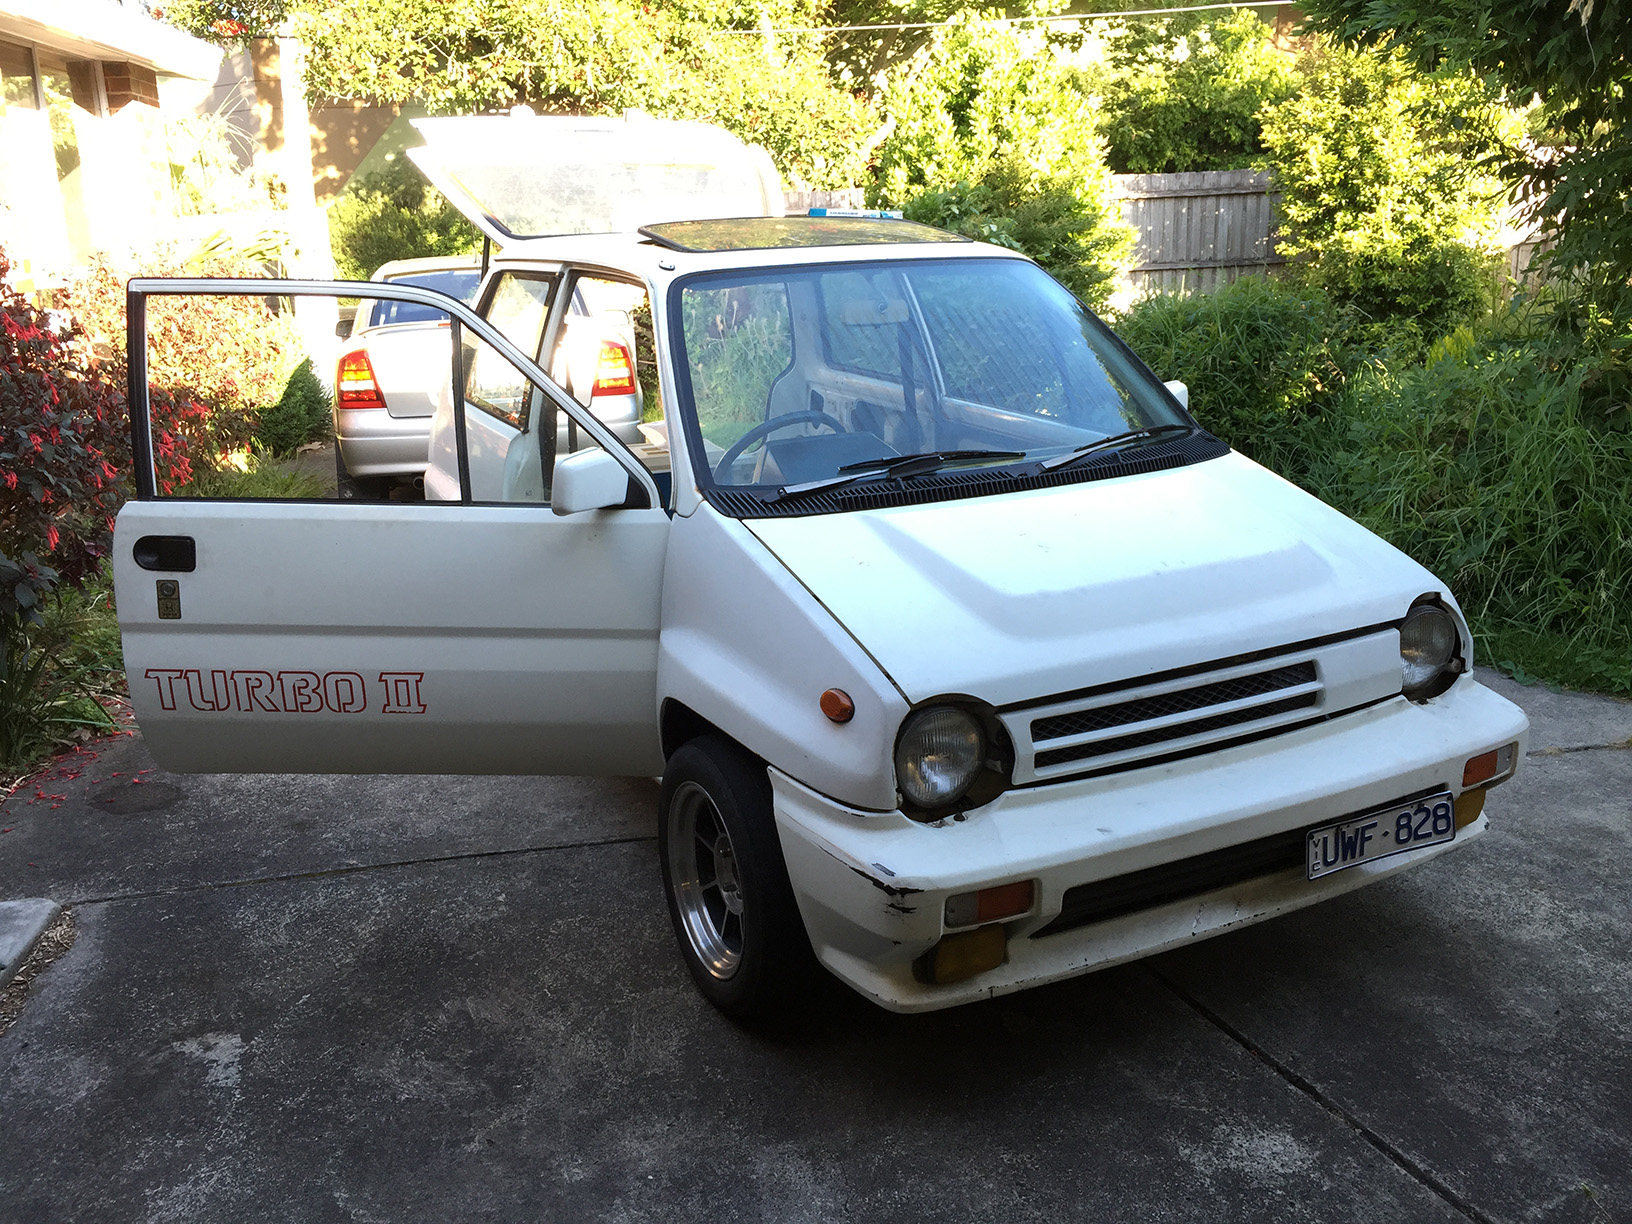
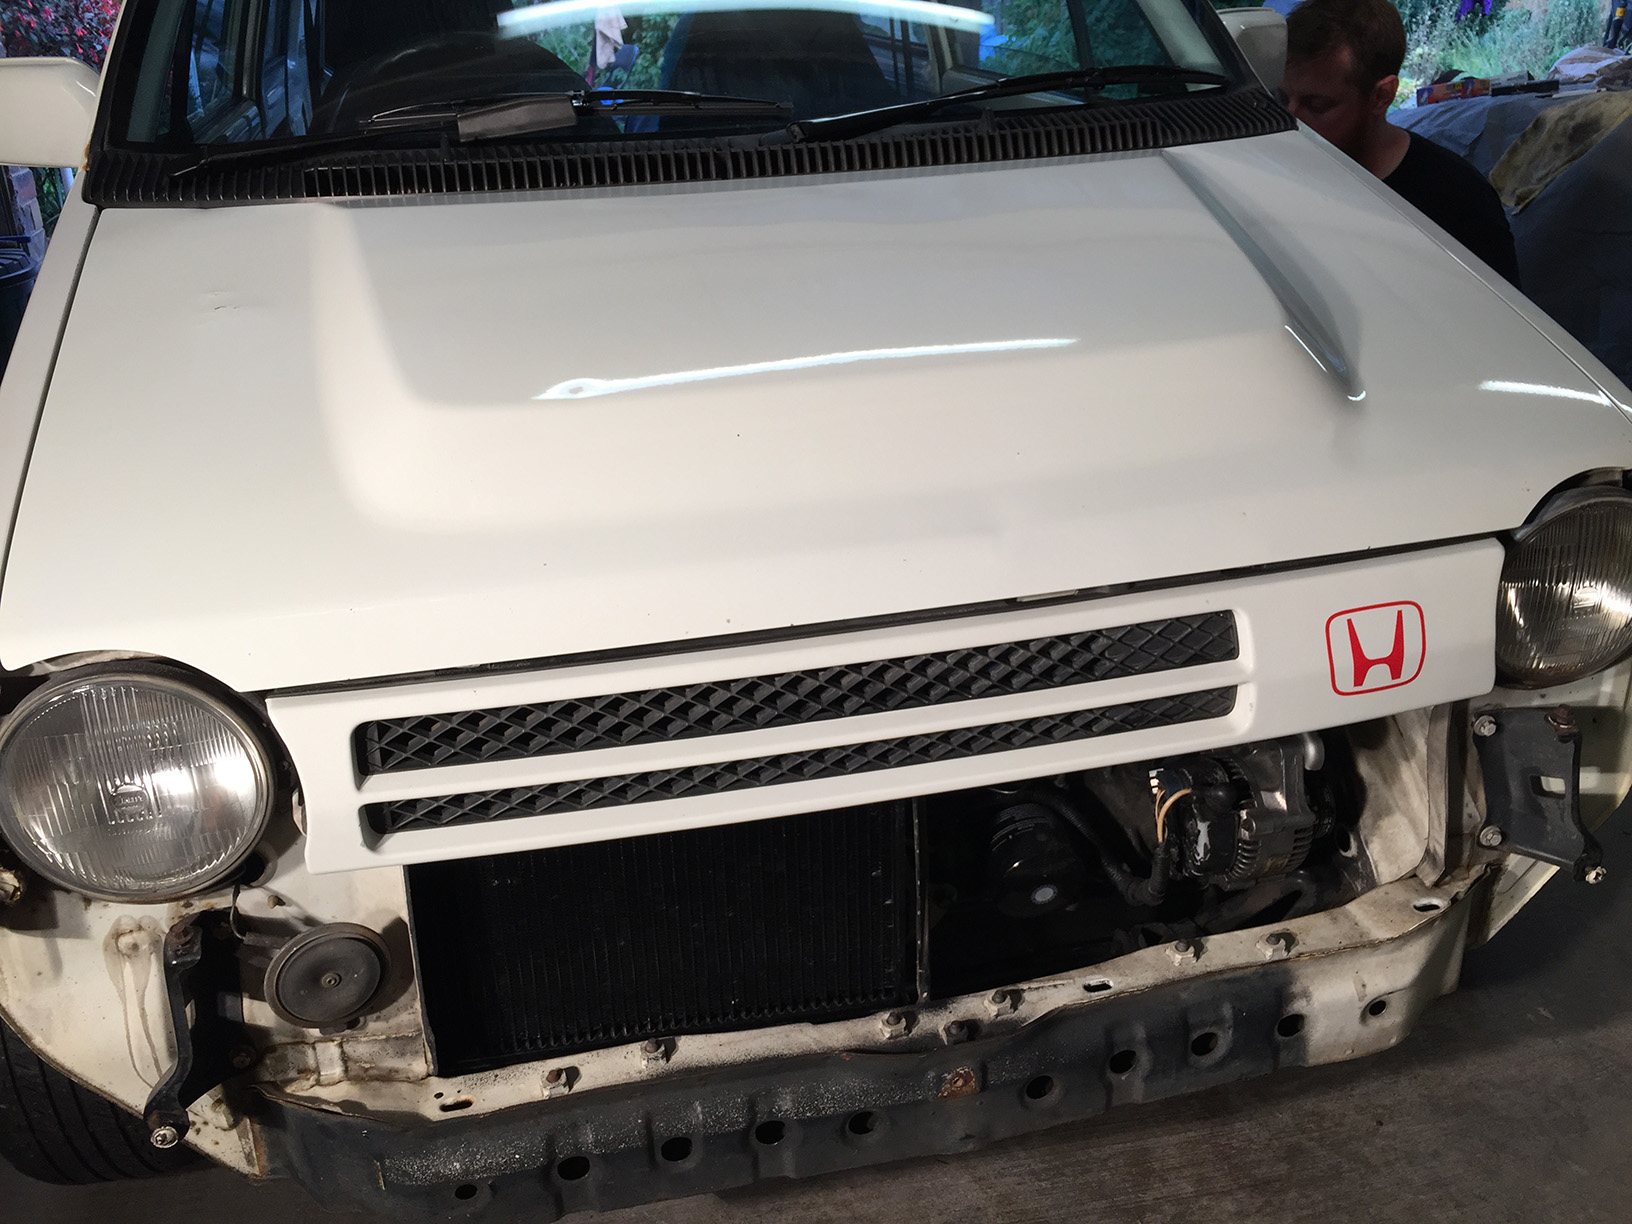
Tony and I spent a while looking over this thing. It’s a lot more interesting underneath the front clamshell than I thought it would be.
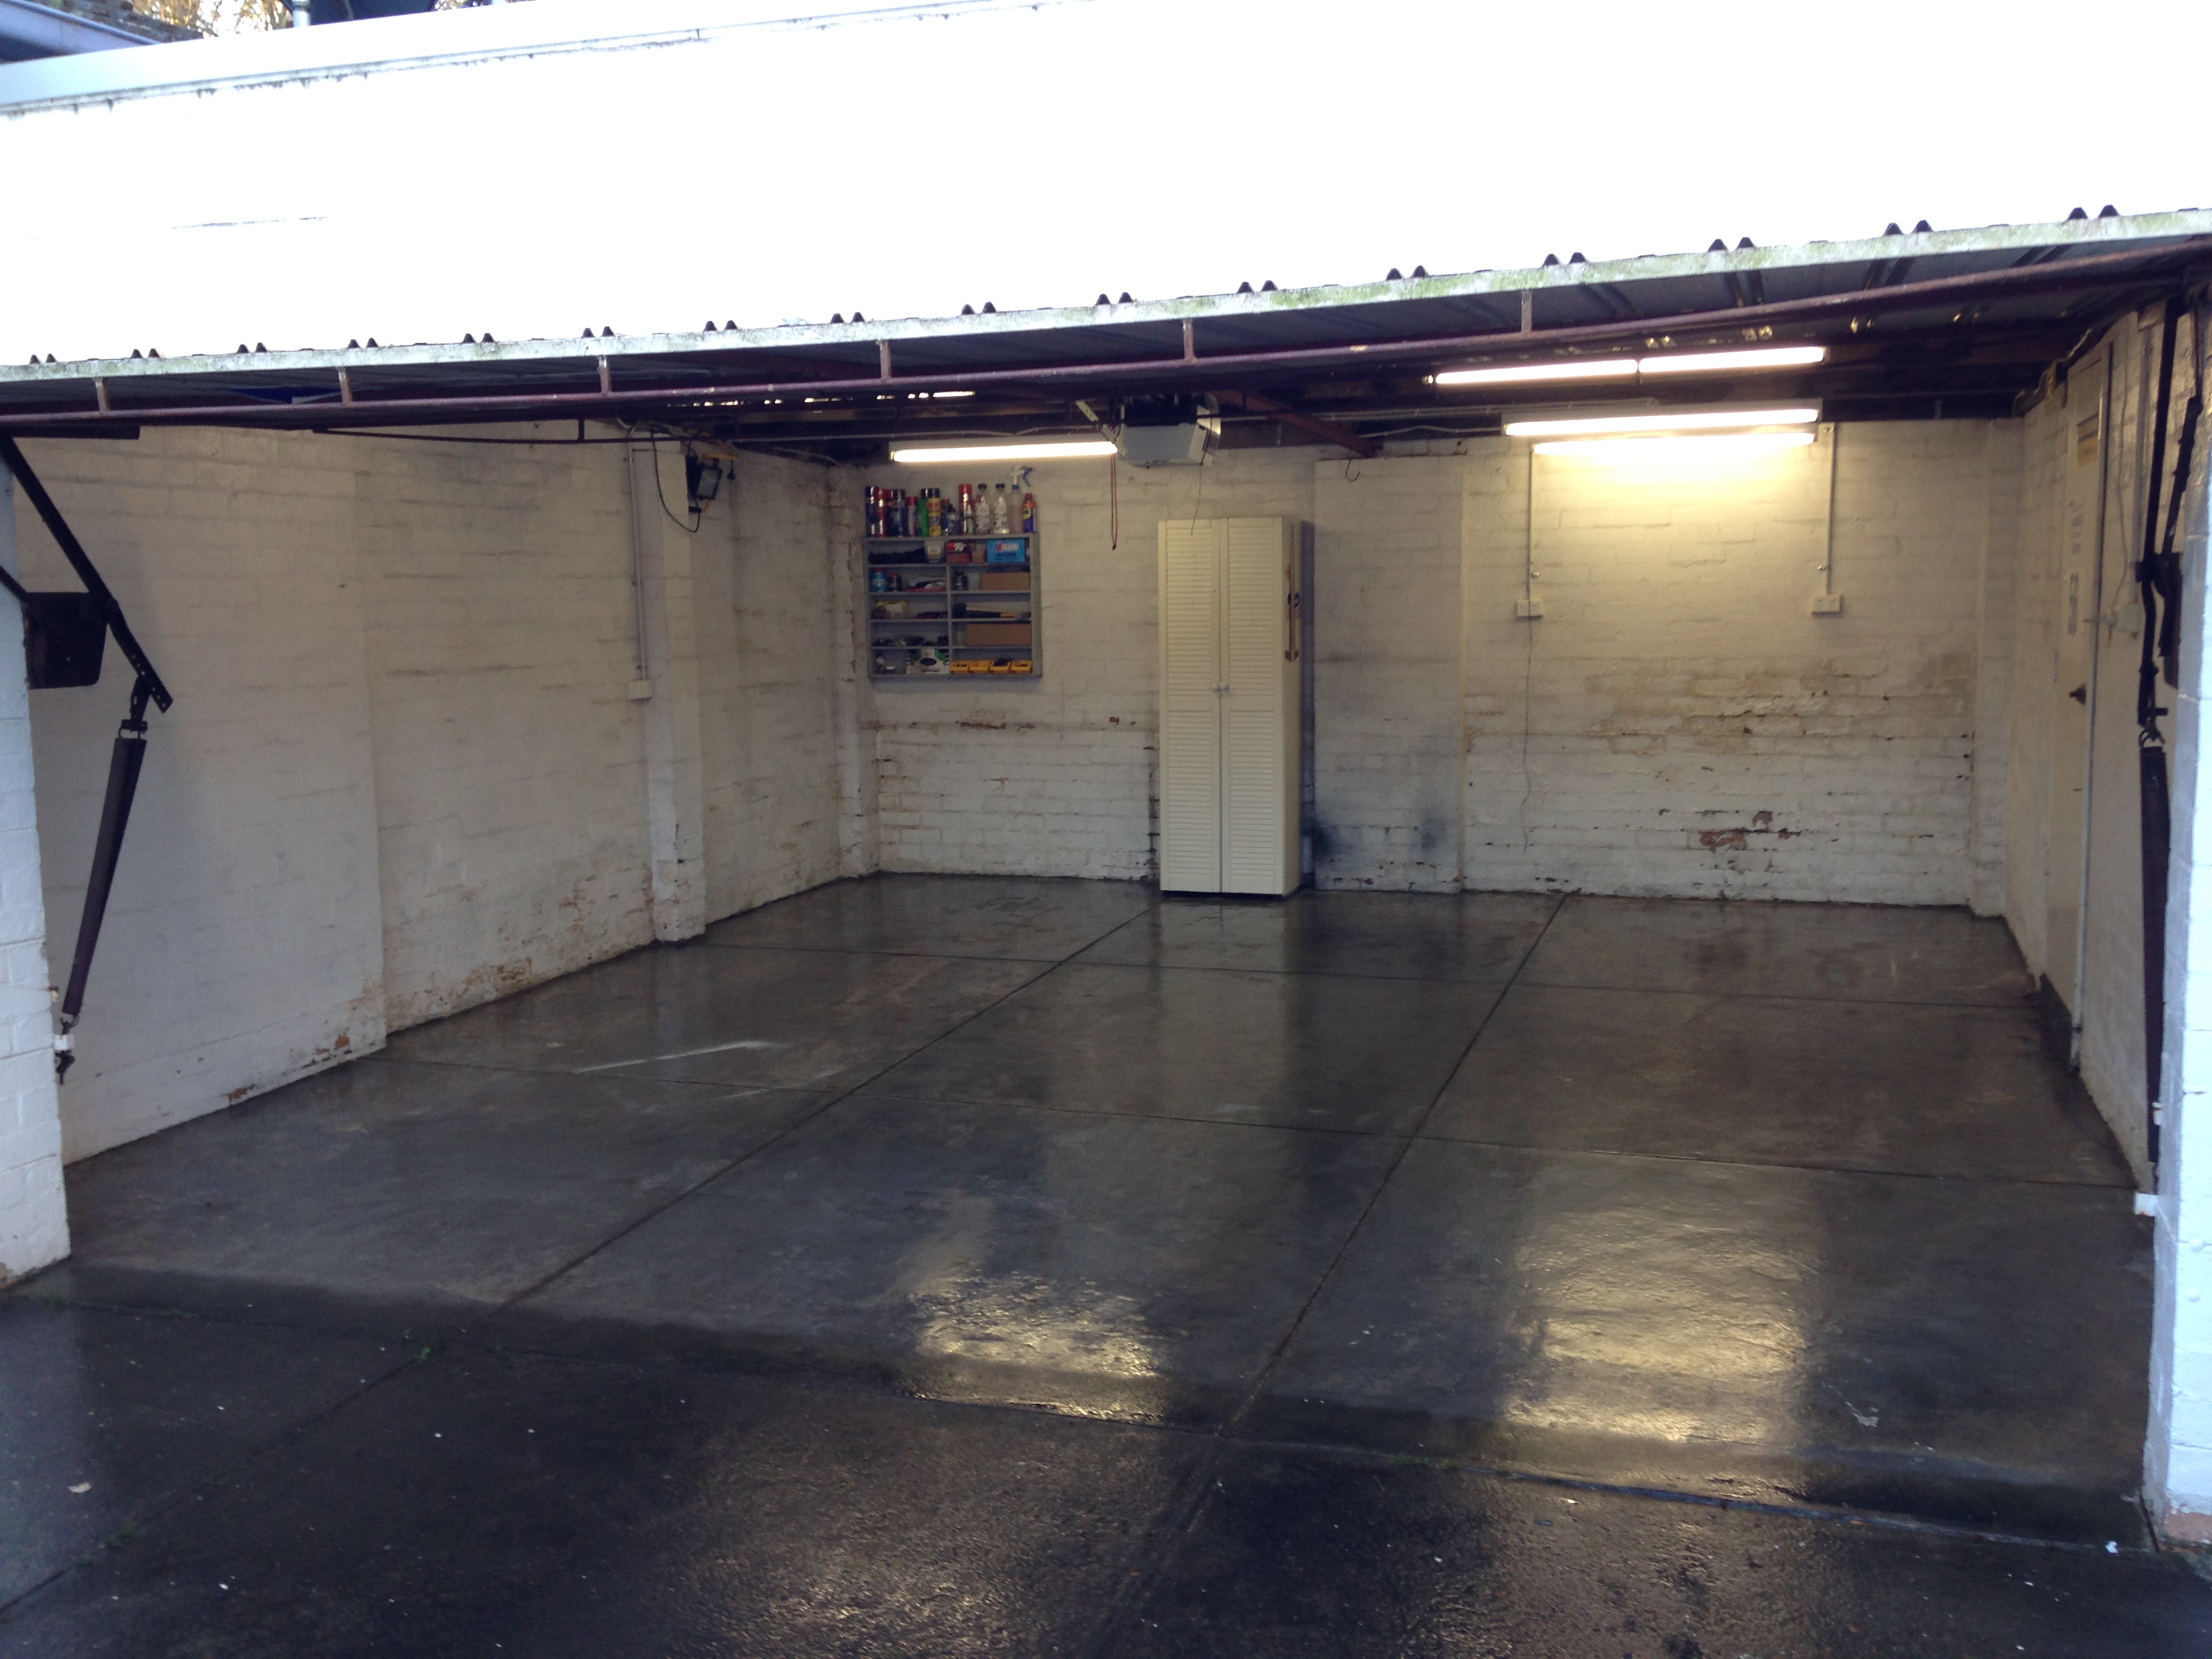
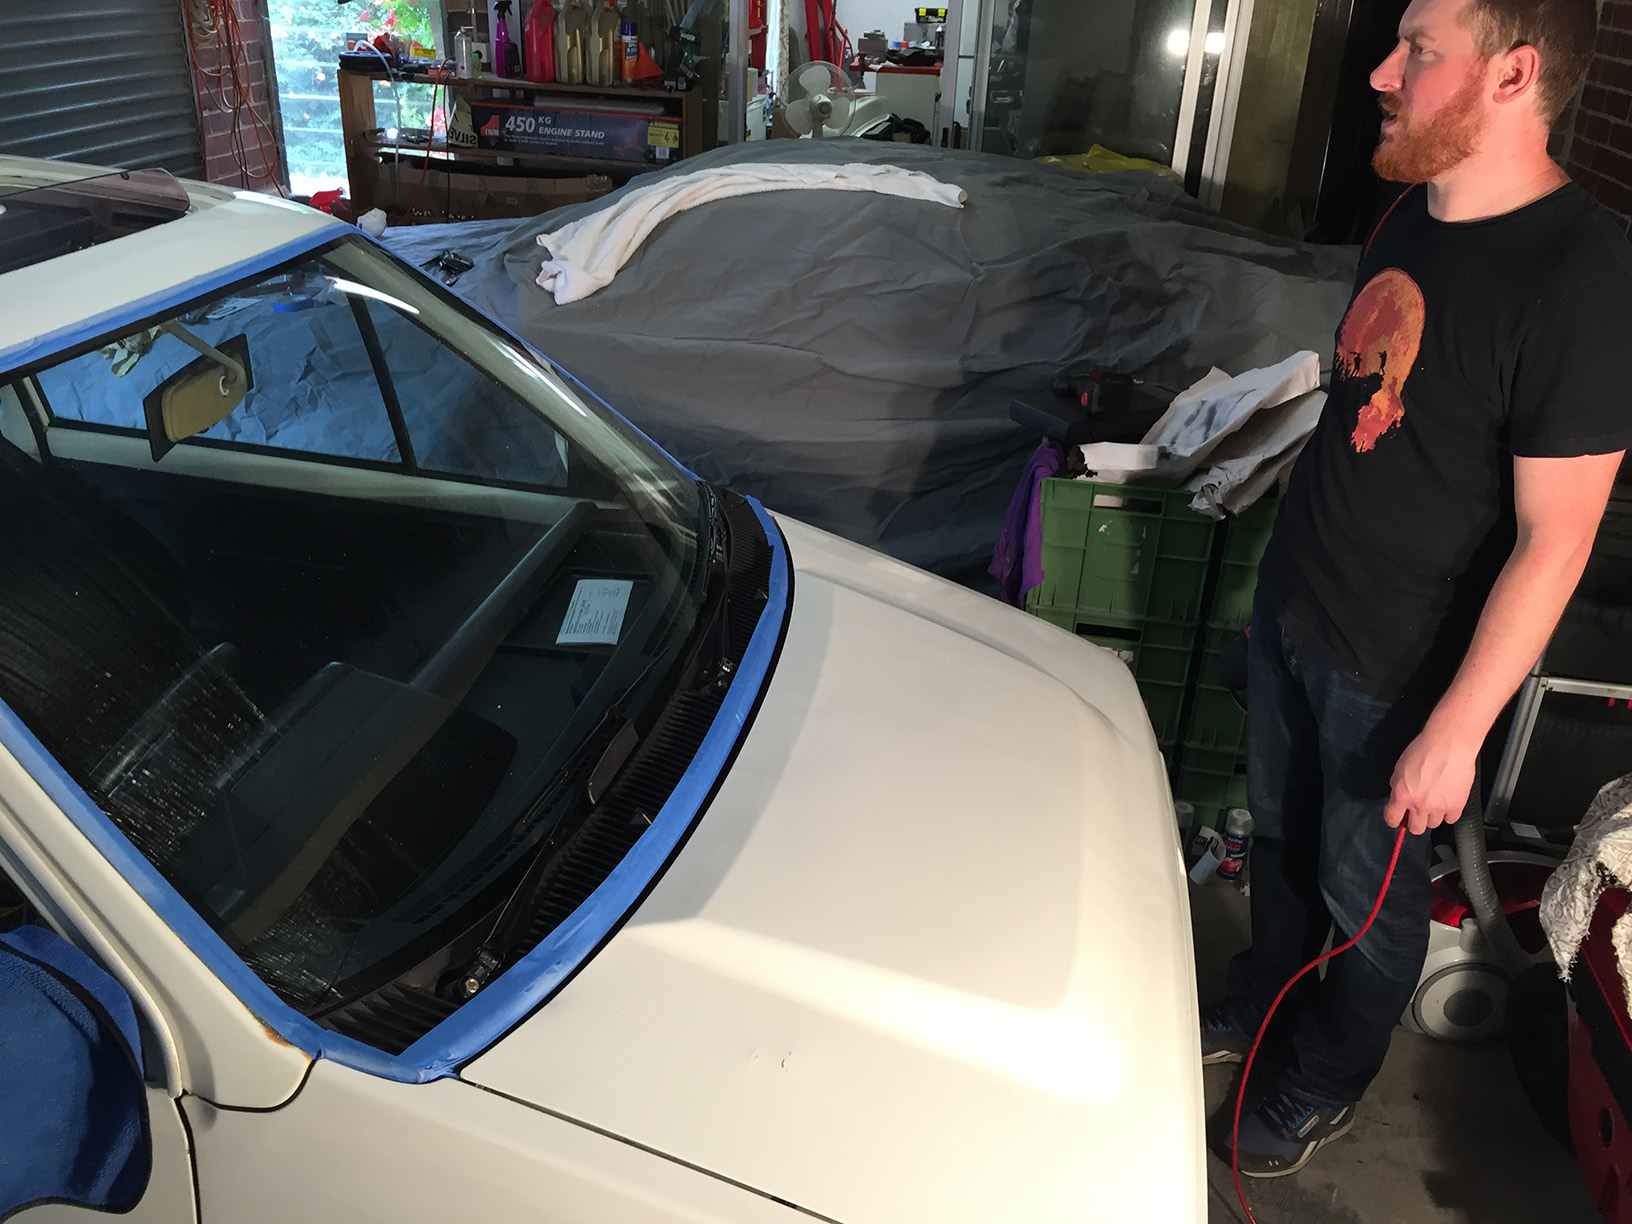
With the City out of the garage I took the opportunity to Spring clean. Clean garage clean mind!
Adam at MPW asked whether the car was running so we fired it up for him. It seems to be running really rich and that’s why it’s bogging down. I live in a unit and it’s just too loud to keep the car running with no exhaust. We’ve only started the car three or four times since the rebuild. Hopefully we’ll be able to spend more time diagnosing it once it’s quietened down.
It took a little while longer than anticipated, but the work is now all finished. Adam really looked after us. Can’t say enough good things about the bloke.
Here’s the new section he made up.
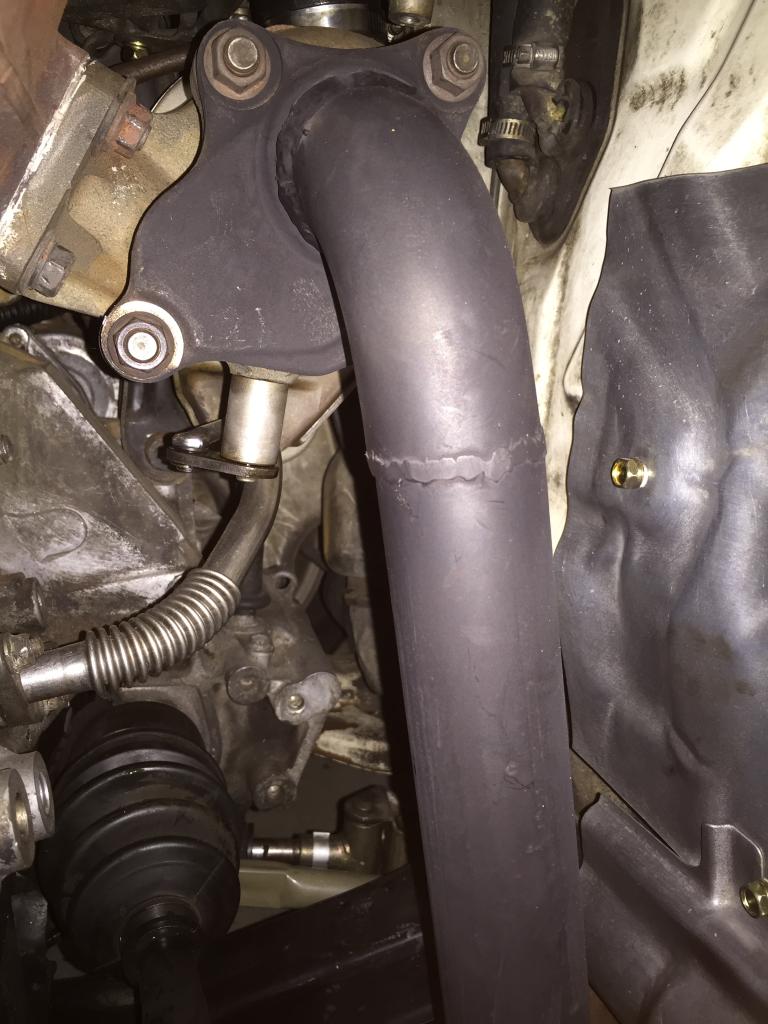
We’ve kept the same pipe diameter as stock, but deleted the cat converter for less restriction and to reduce the weight suspended from the turbo/manifold.
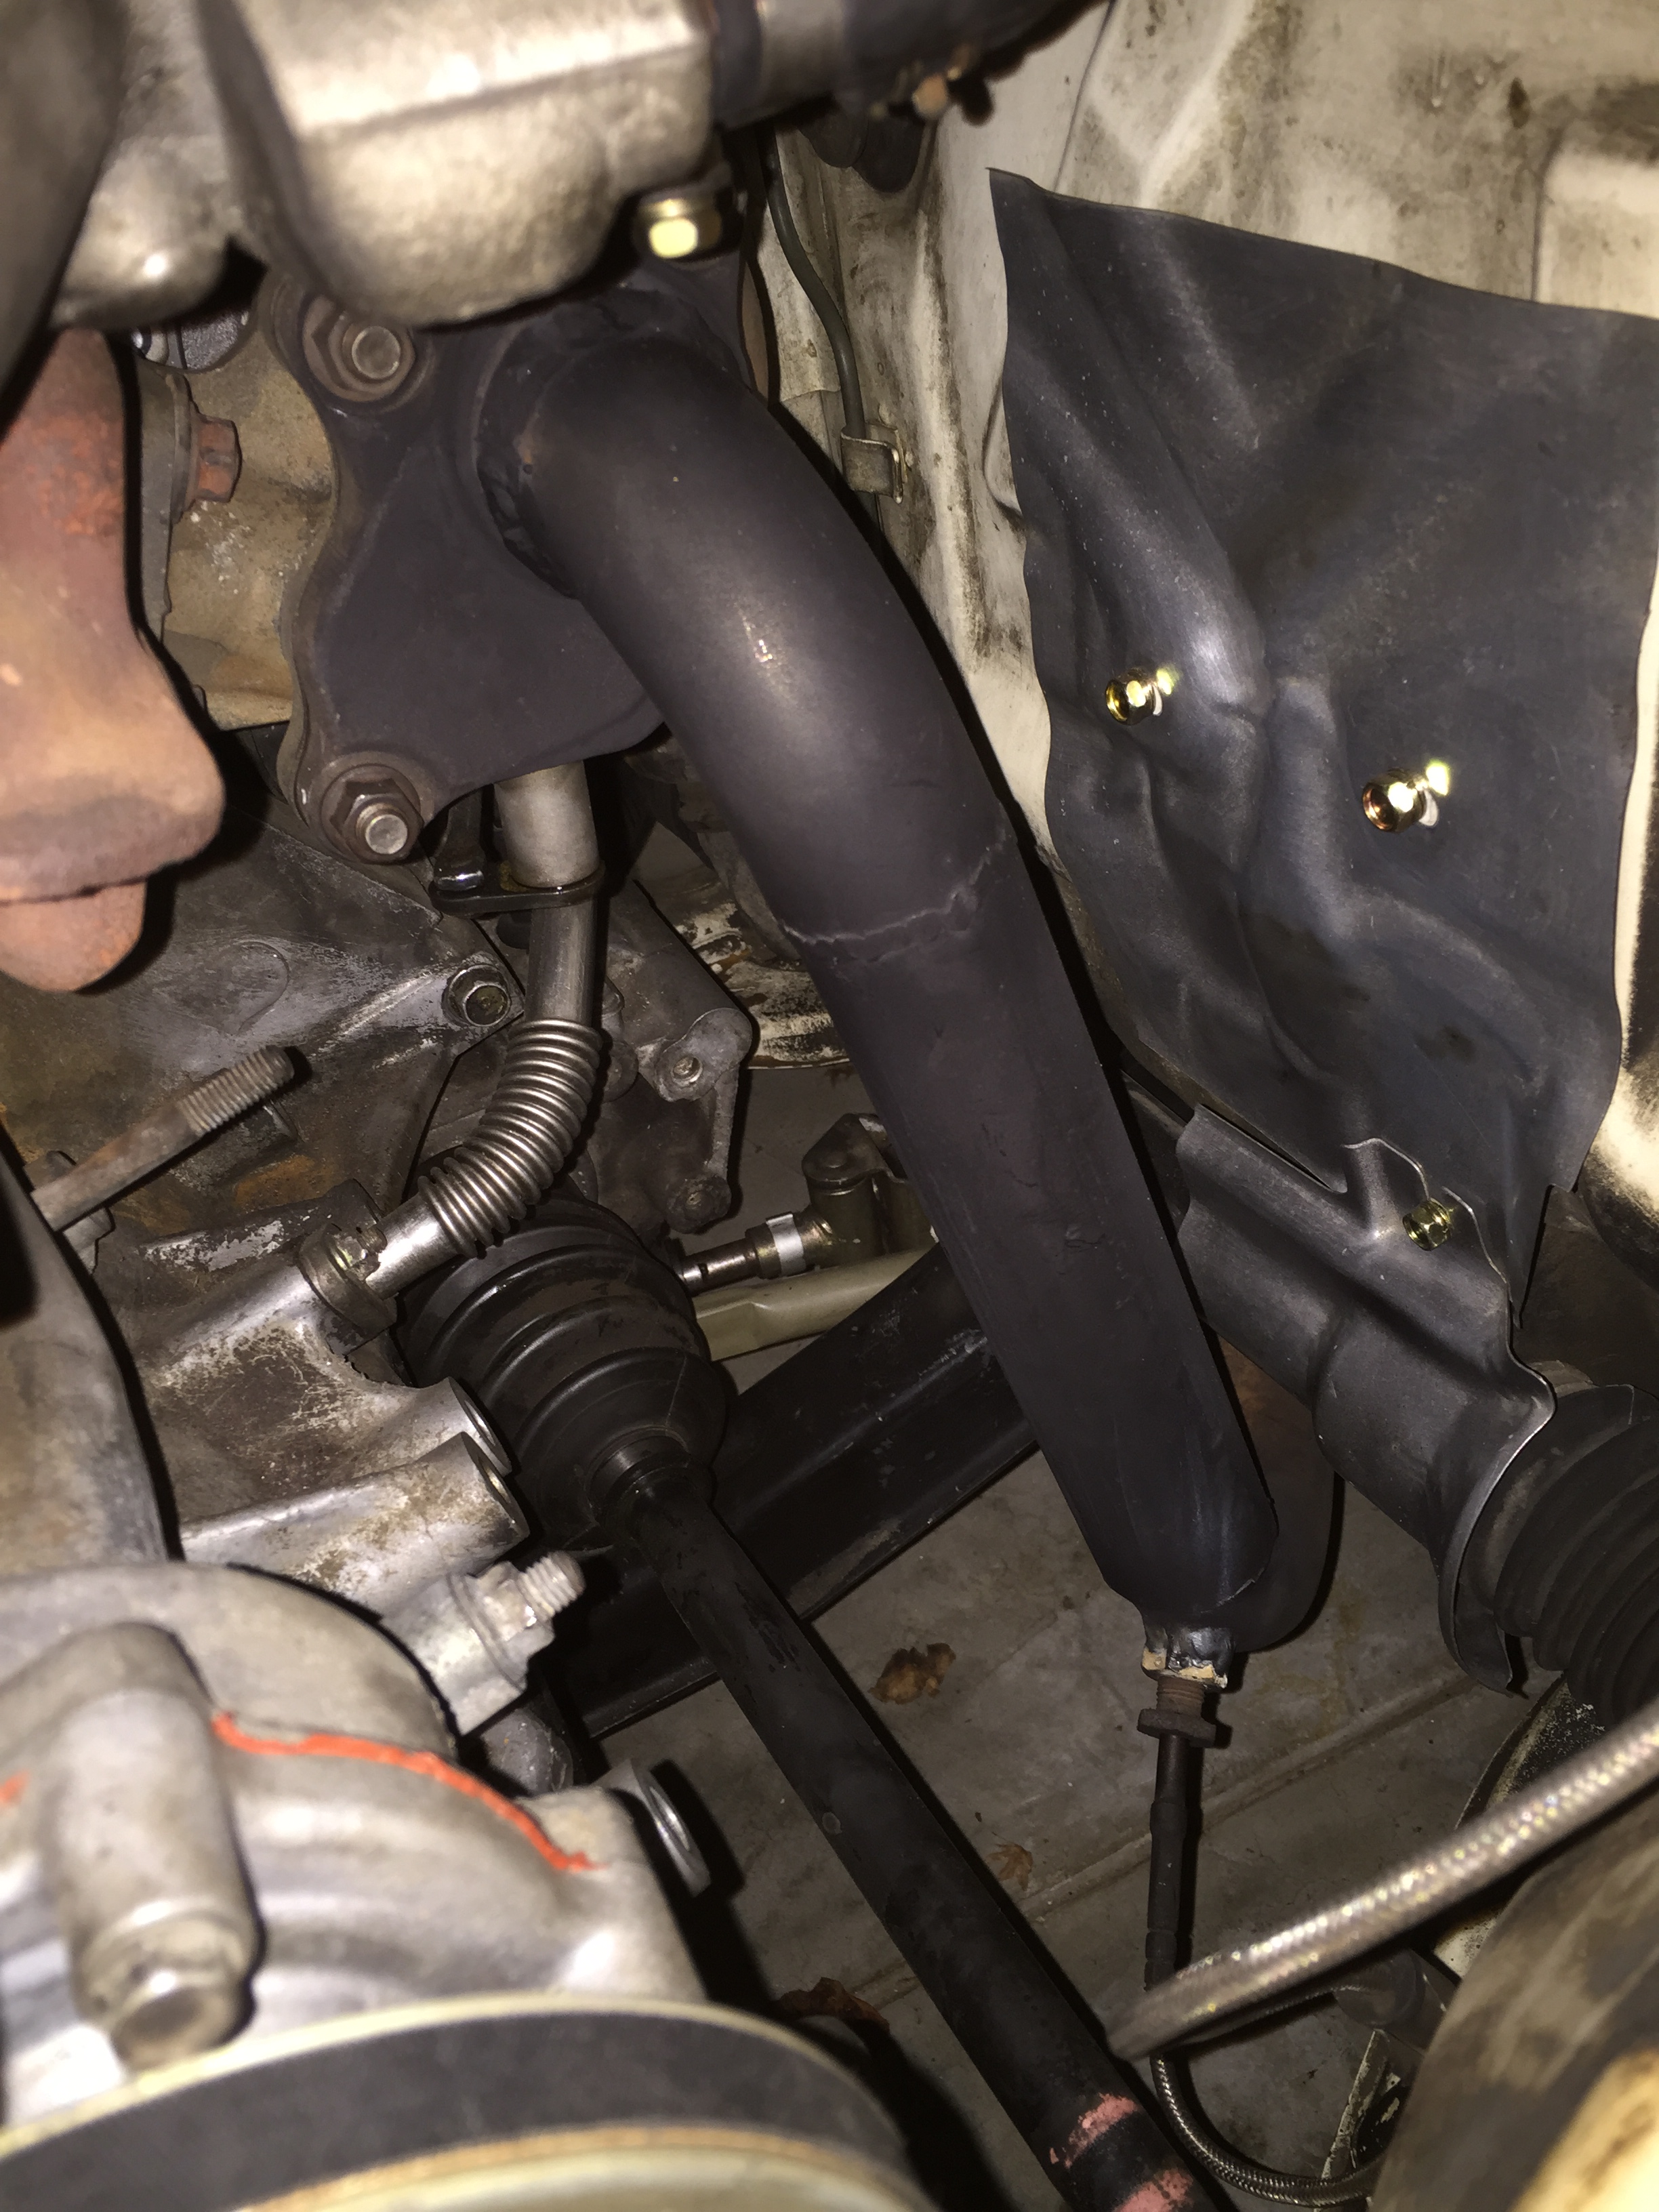
The factory cat has a bracket to brace against the block, but our car didn’t come with it. This seemed the better solution.

Underneath the new dump/front pipe joins the factory flex pipe and into the rest of the standard exhaust. The rear muffler is blowing a bit but that can be fixed later.
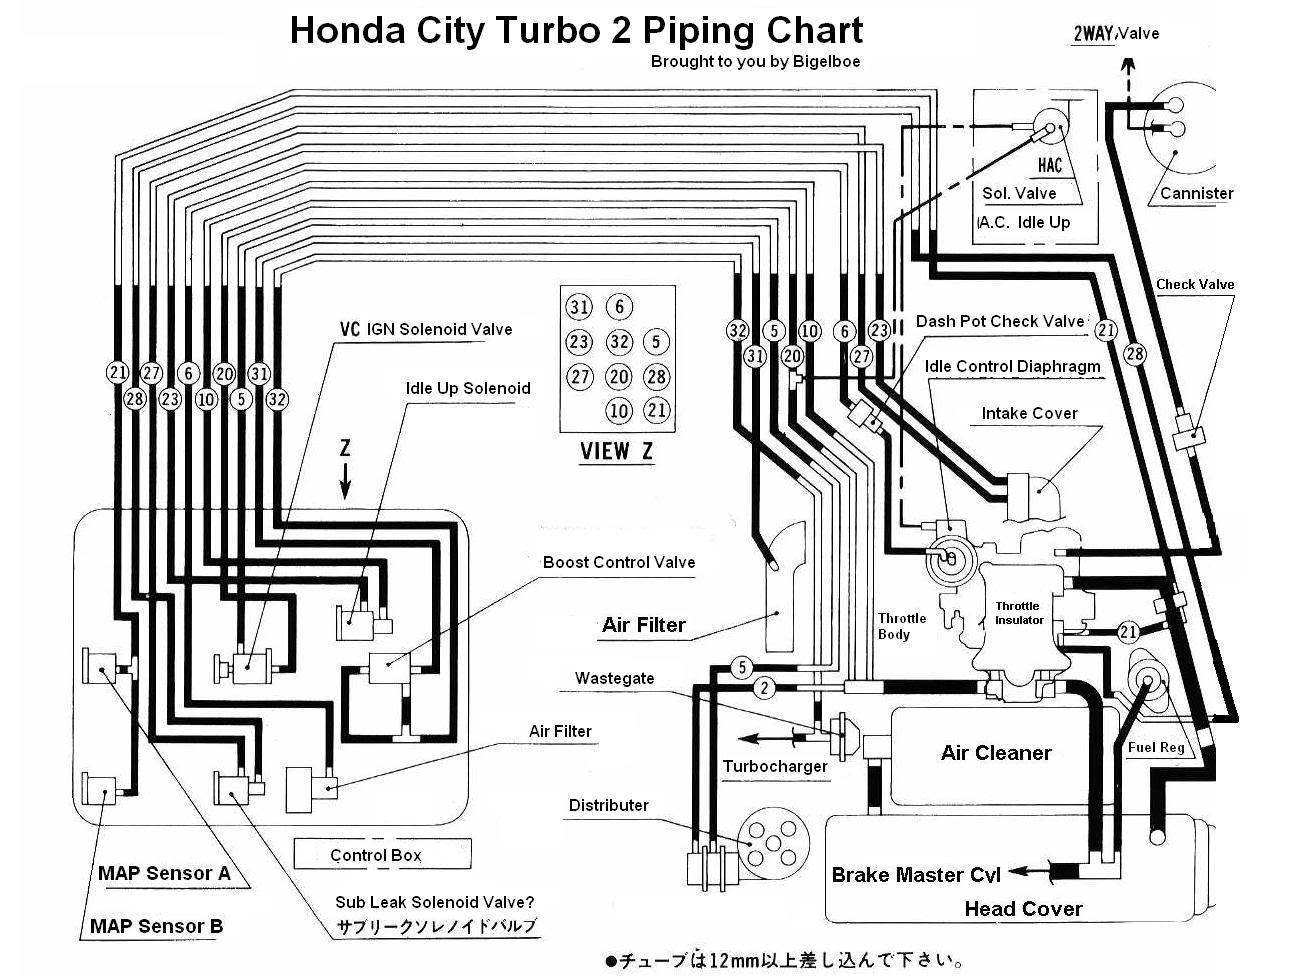
The best news is that it finally drove somewhere! It’s running better than when we dropped it off, but still not sorted yet. Adam swapped a couple of vacuum lines to the fuel pressure reg but there were no obvious issues he could see.
We’ve got a translated vacuum diagram thanks to CityTurbo.com, so we’ll start working our way through it one by one.
Other observations from the short drive:
– Rear engine mount is shot. Has to be replaced with something aftermarket.
– Gearbox and clutch feel fine. Reverse, 1st, 2nd and 3rd all good.
– Brakes works fine.
– Steering is pretty good.
– CVs and wheel bearings aren’t obviously buggered.
We fixed our problem! So stoked.

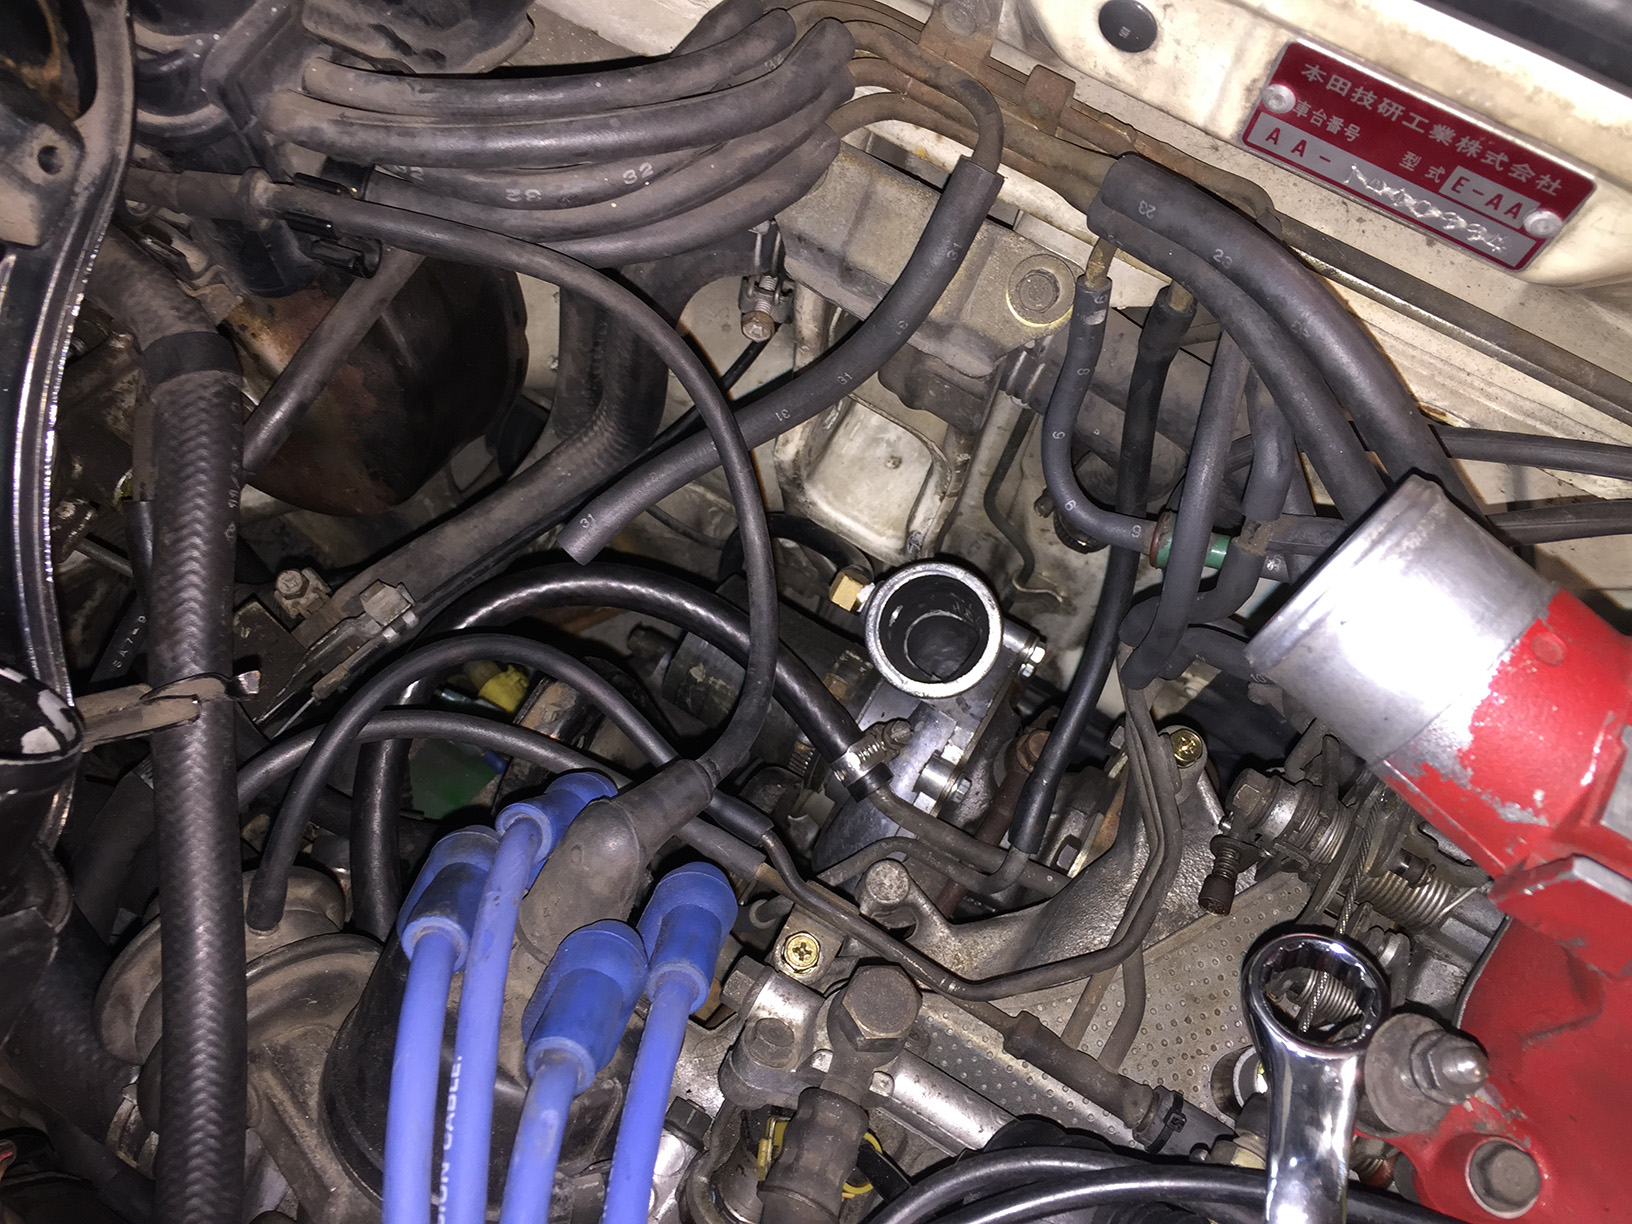
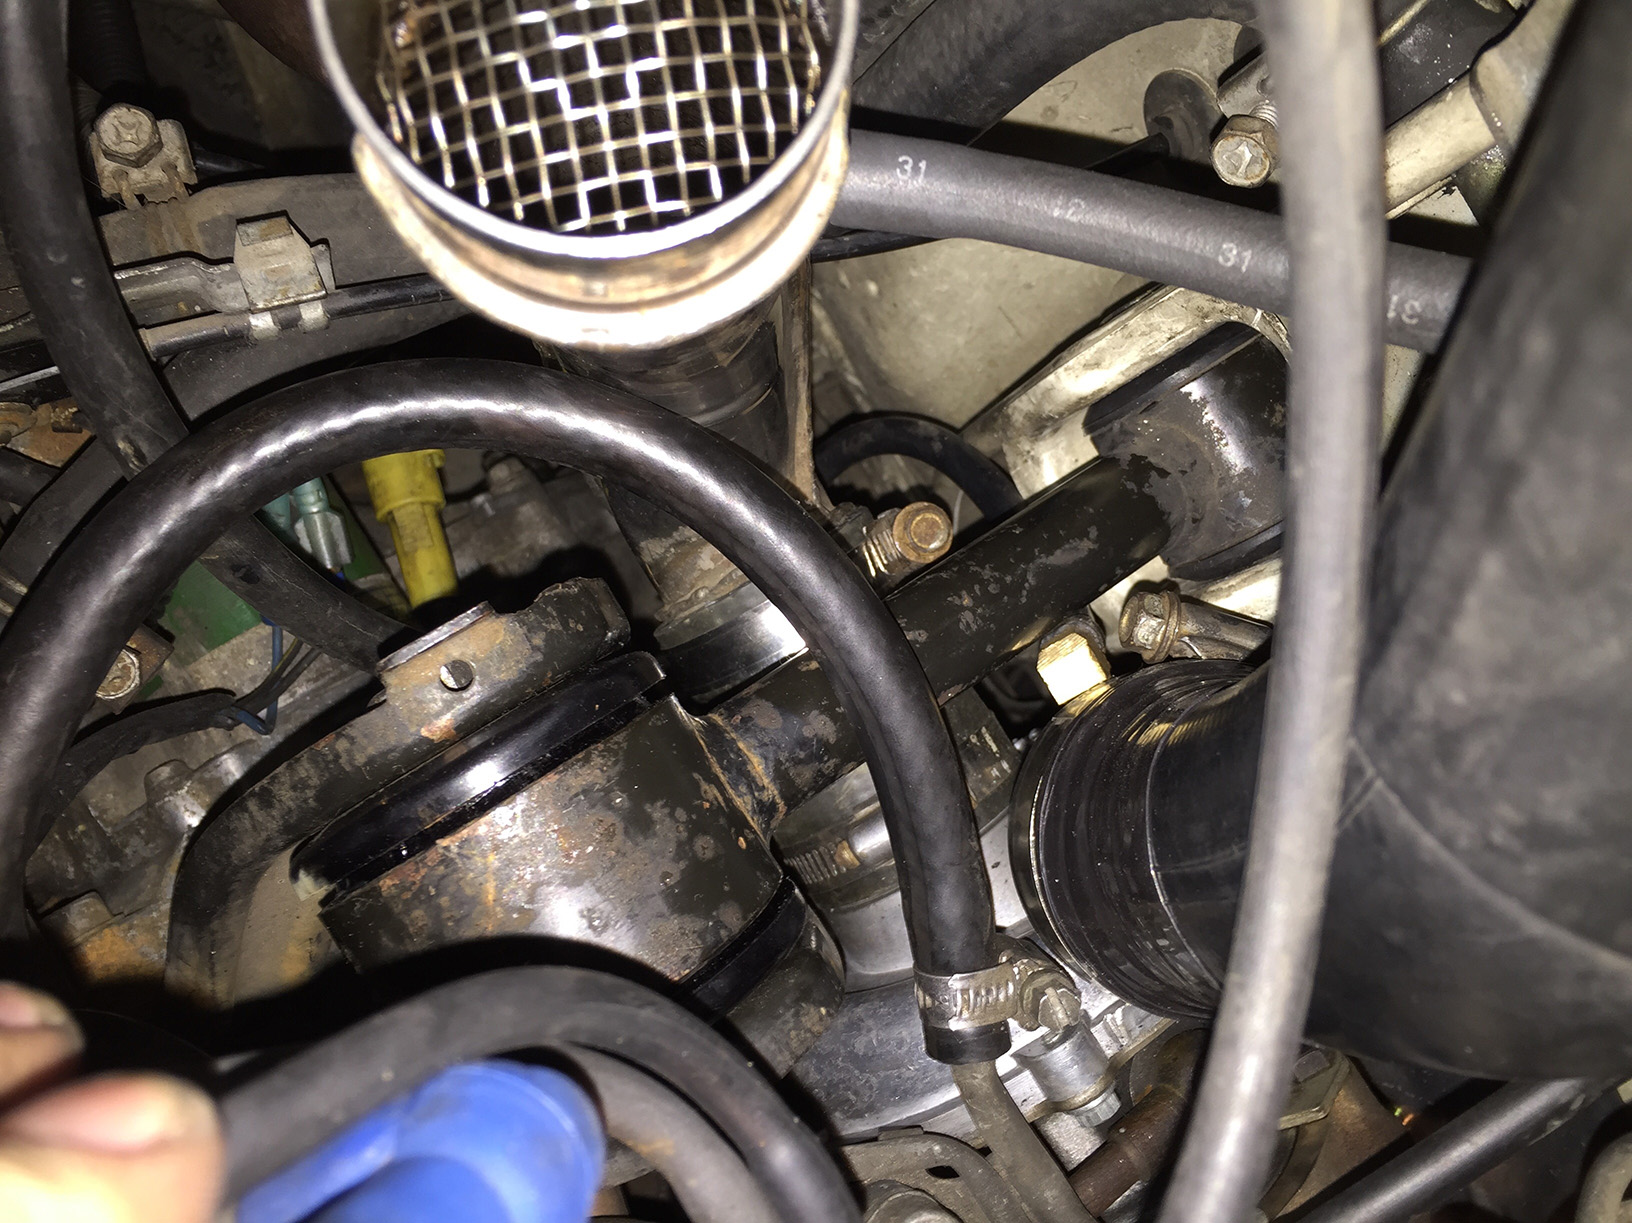
This is the auto choke mechanism.
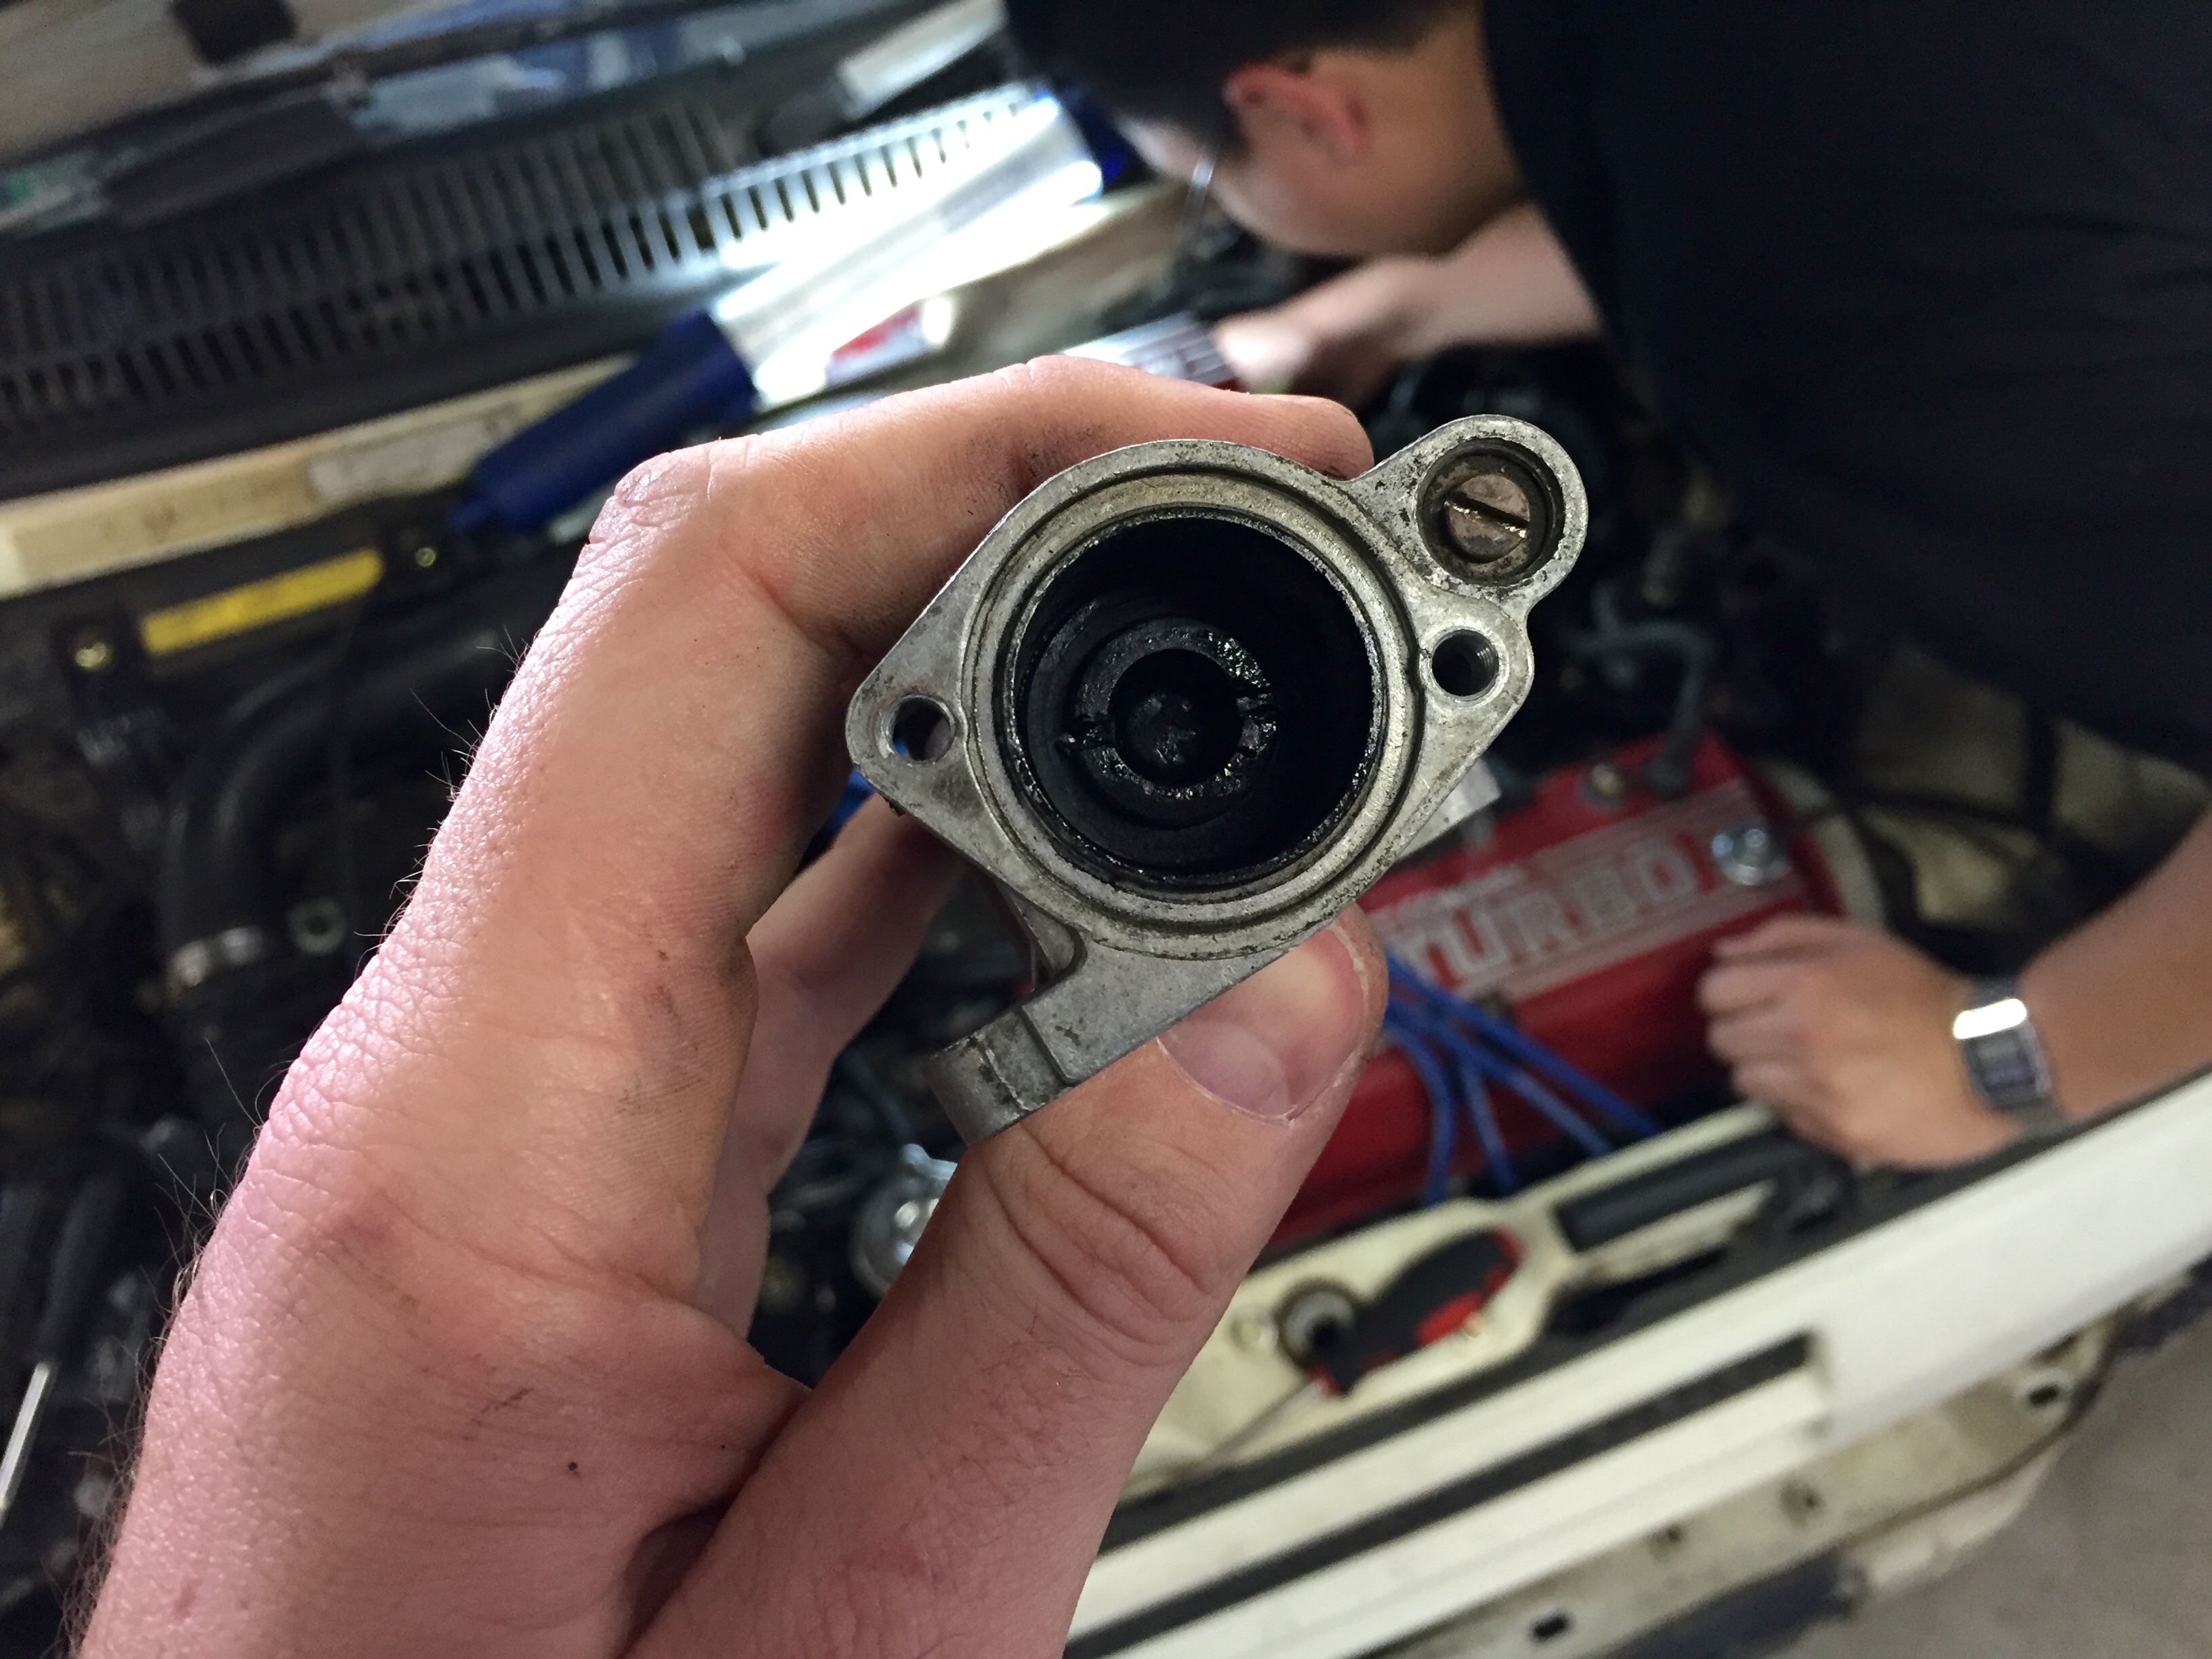
There’s a plunger inside that opens and closes the choke based on coolant temperature. Ours was staying permanently open so when the car was warm it was running really rich and hunting.
We manually closed the choke and had the car idling beautifully. The idle step up with headlights on also worked properly.

After testing the auto choke in a bowl of hot water the plunger was definitely working. Trouble is, when fitted in the car we weren’t getting coolant to the little bowl at the bottom of the choke mechanism, which is where the plunger operates from. So it constantly thought the car was cold and needed choke.
Next step was to clear the coolant hoses and then bleed the coolant system again. Felt great to have the issue diagnosed!
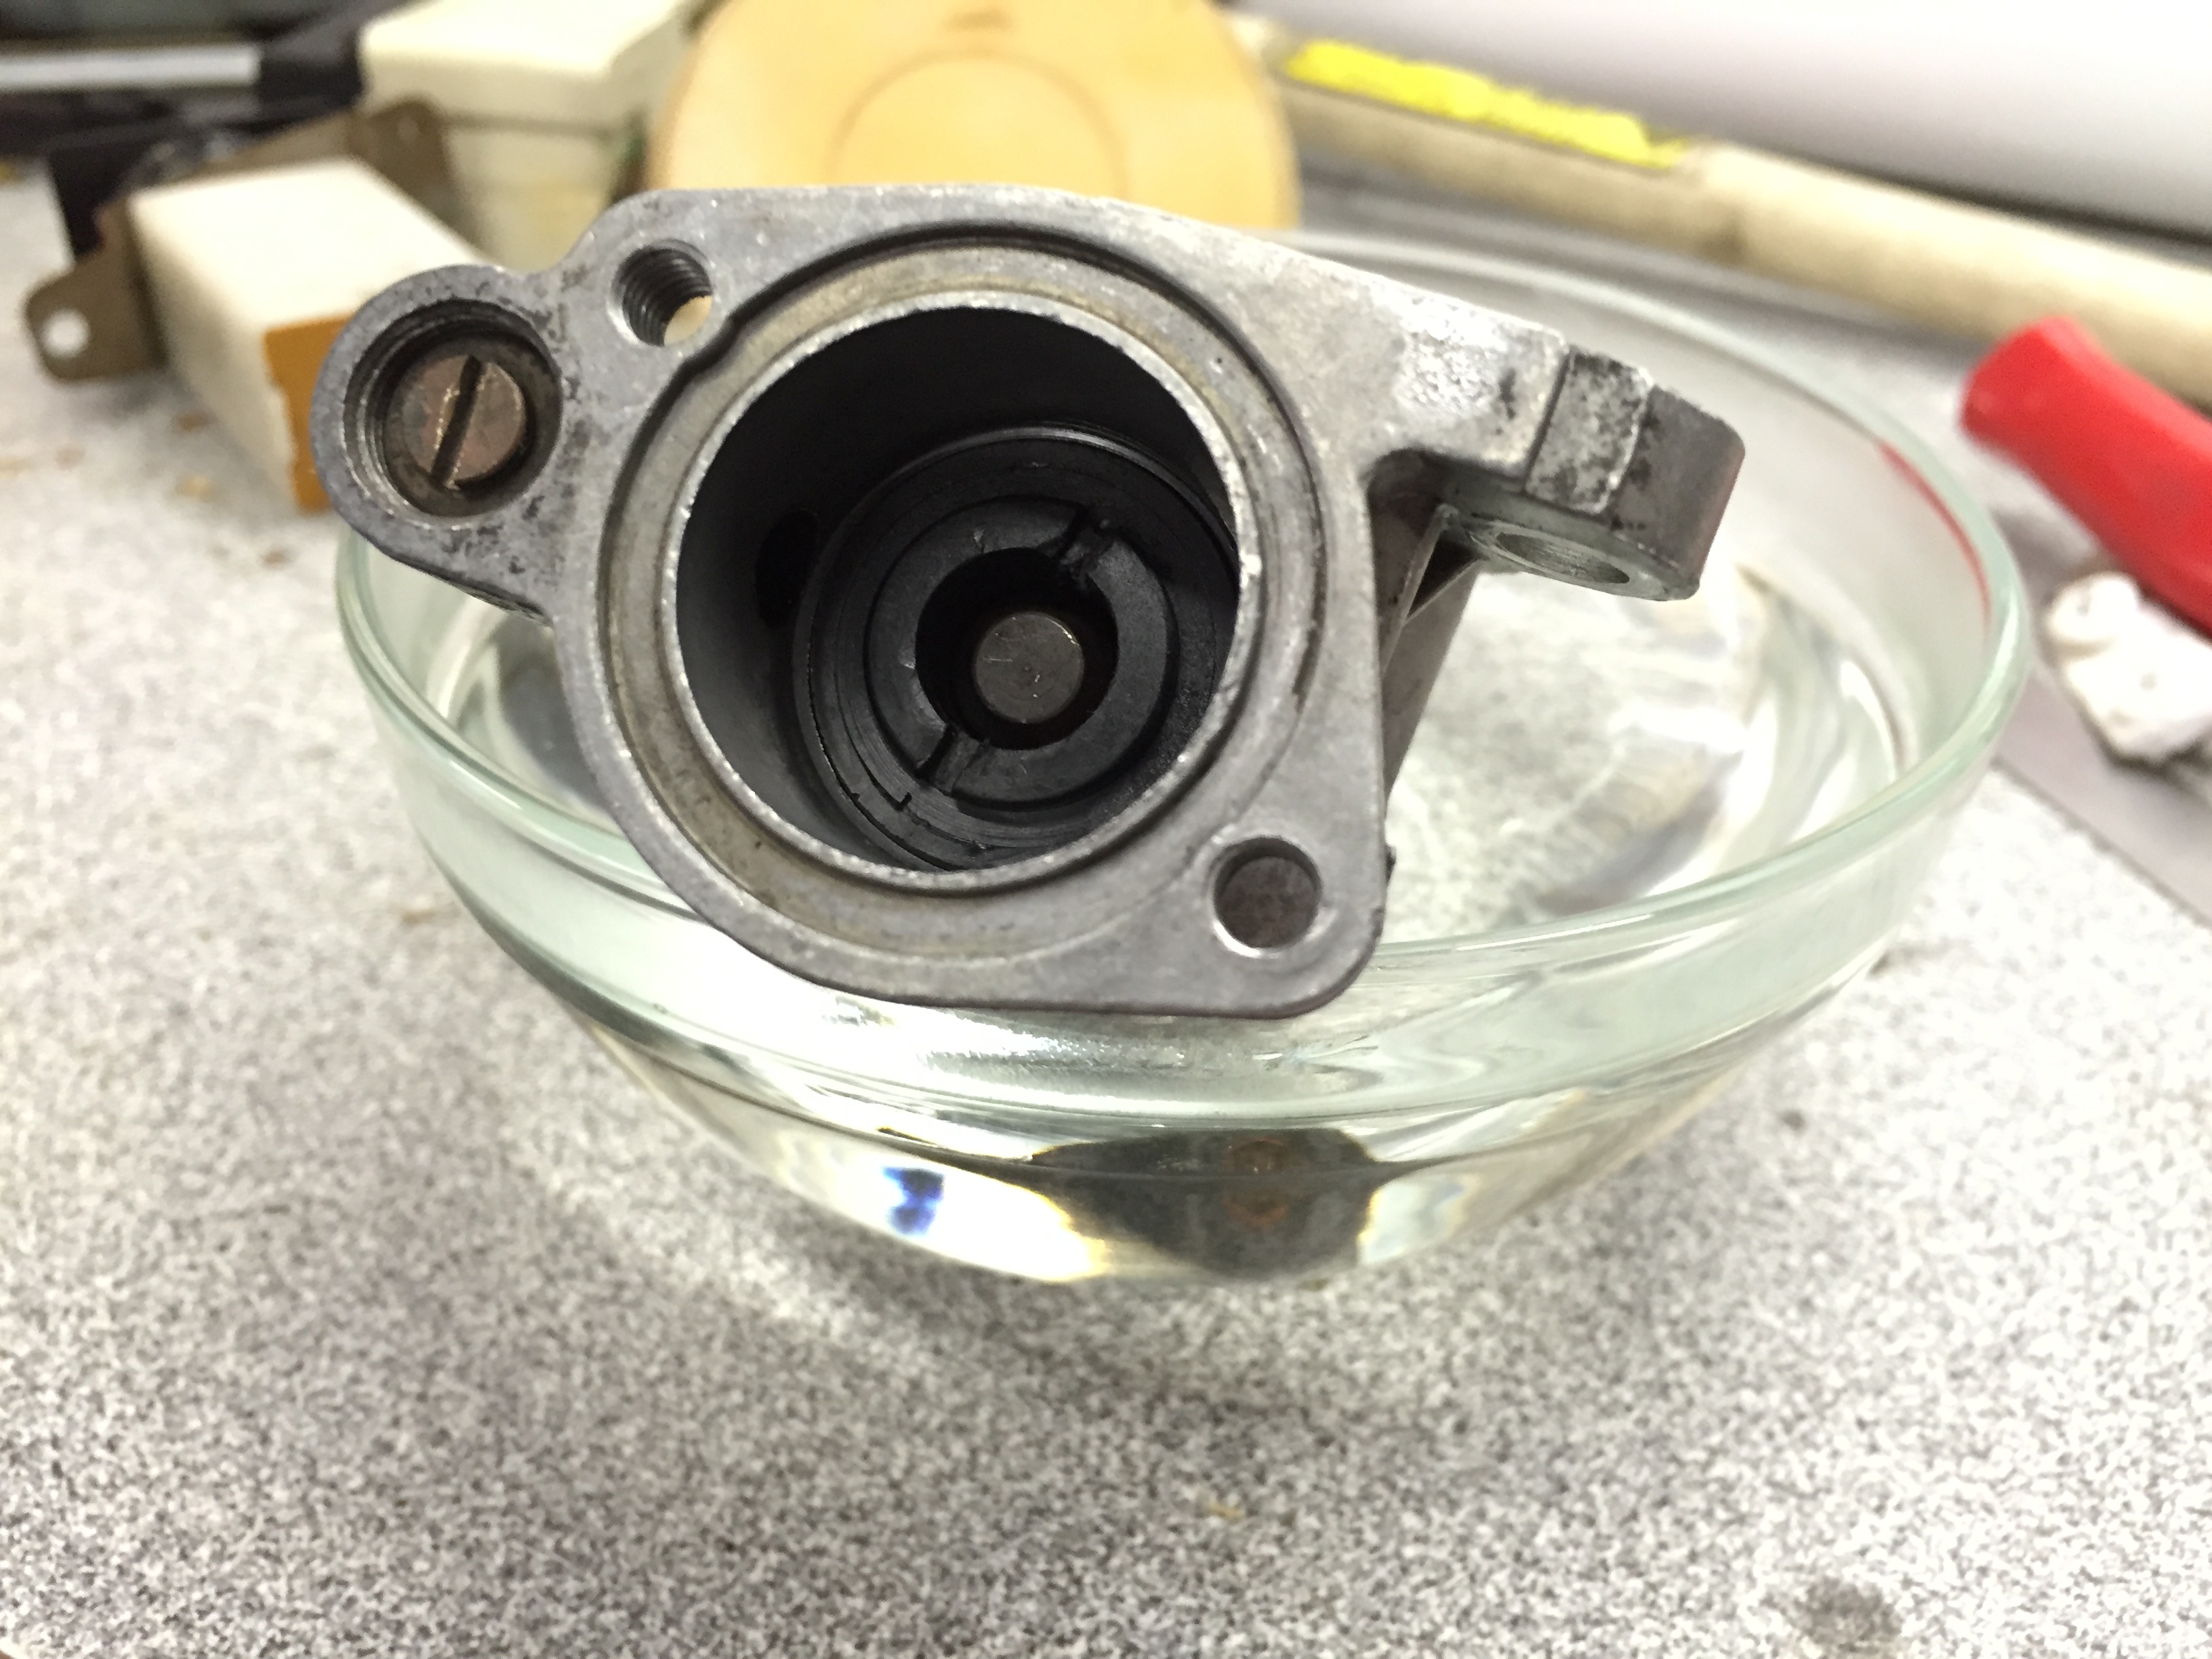
This is from our test of the auto choke after giving it a good clean up. It’s really hard to tell in this photo, but that little domed bit in the middle is the bit that moves up when the coolant is hot and seals against the inside of the black donut shaped piece. It’s closed in this pic.
It was easy to mimic a closed choke by sealing it at idle with a finger. That’s how we set the idle speed and managed to diagnose the issue.
Yesterday we finished the job. Gotta say, getting to the bottom of the issue was hugely satisfying. I was genuinely worried about how long it could take. But no more!
It was one of those rare days where you give it a crack and it just works. Very little fussing about and a perfect result straight away. Great feels!
After cleaning and flushing out the coolant channels we filled the auto-choke circuit with as much coolant as possible to get rid of the air before we closed it all up. From the moment it fired you could tell it was running better. The cold start was stable and dropped from ~2000rpm it used to be down to ~1500rpm. I took it for a quick spin around the block and revs dropped to a perfect 650rpm idle, which is Honda spec.
Went for another run after that to get video. Such dose!
Threw the passenger seat in and Tony took another mate for a lap.
So that’s basically everything sorted with the engine rebuild! We’ve got to fit a new engine mount which is sitting at the post office, then we can put the airbox back in and call it done.
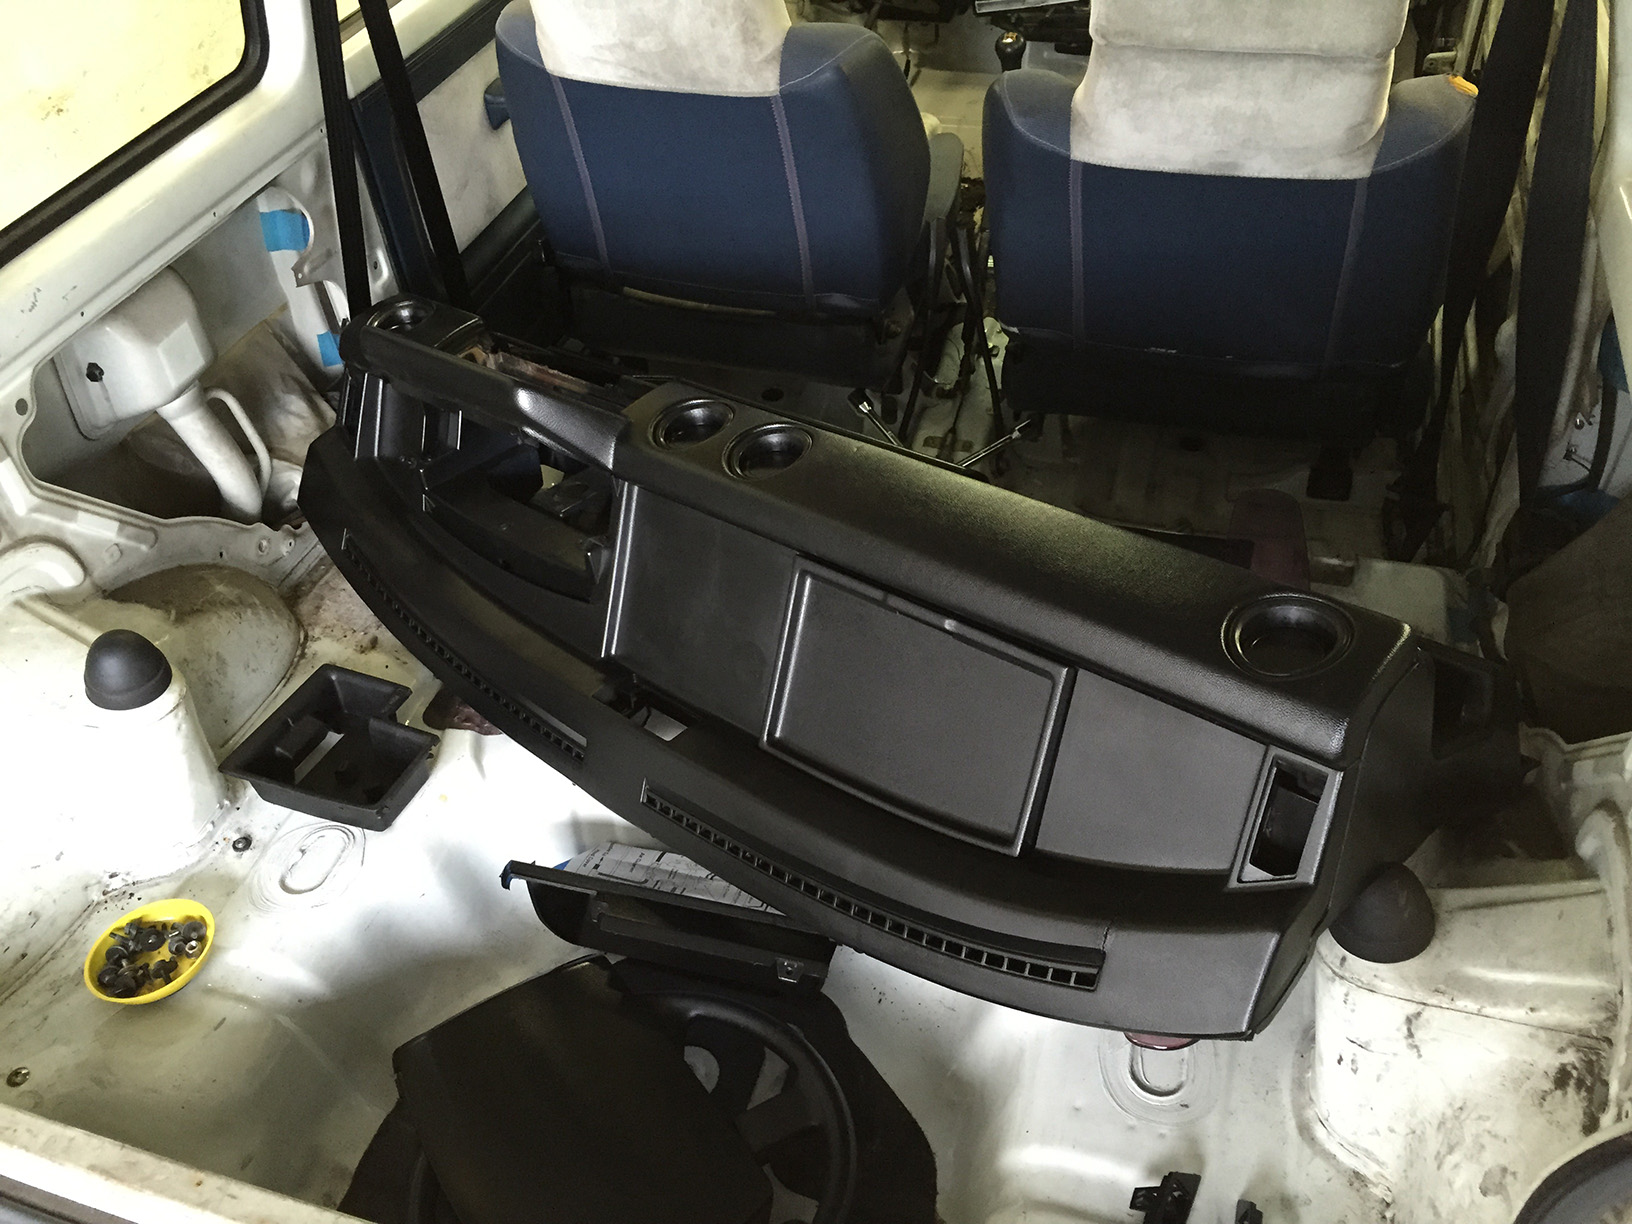
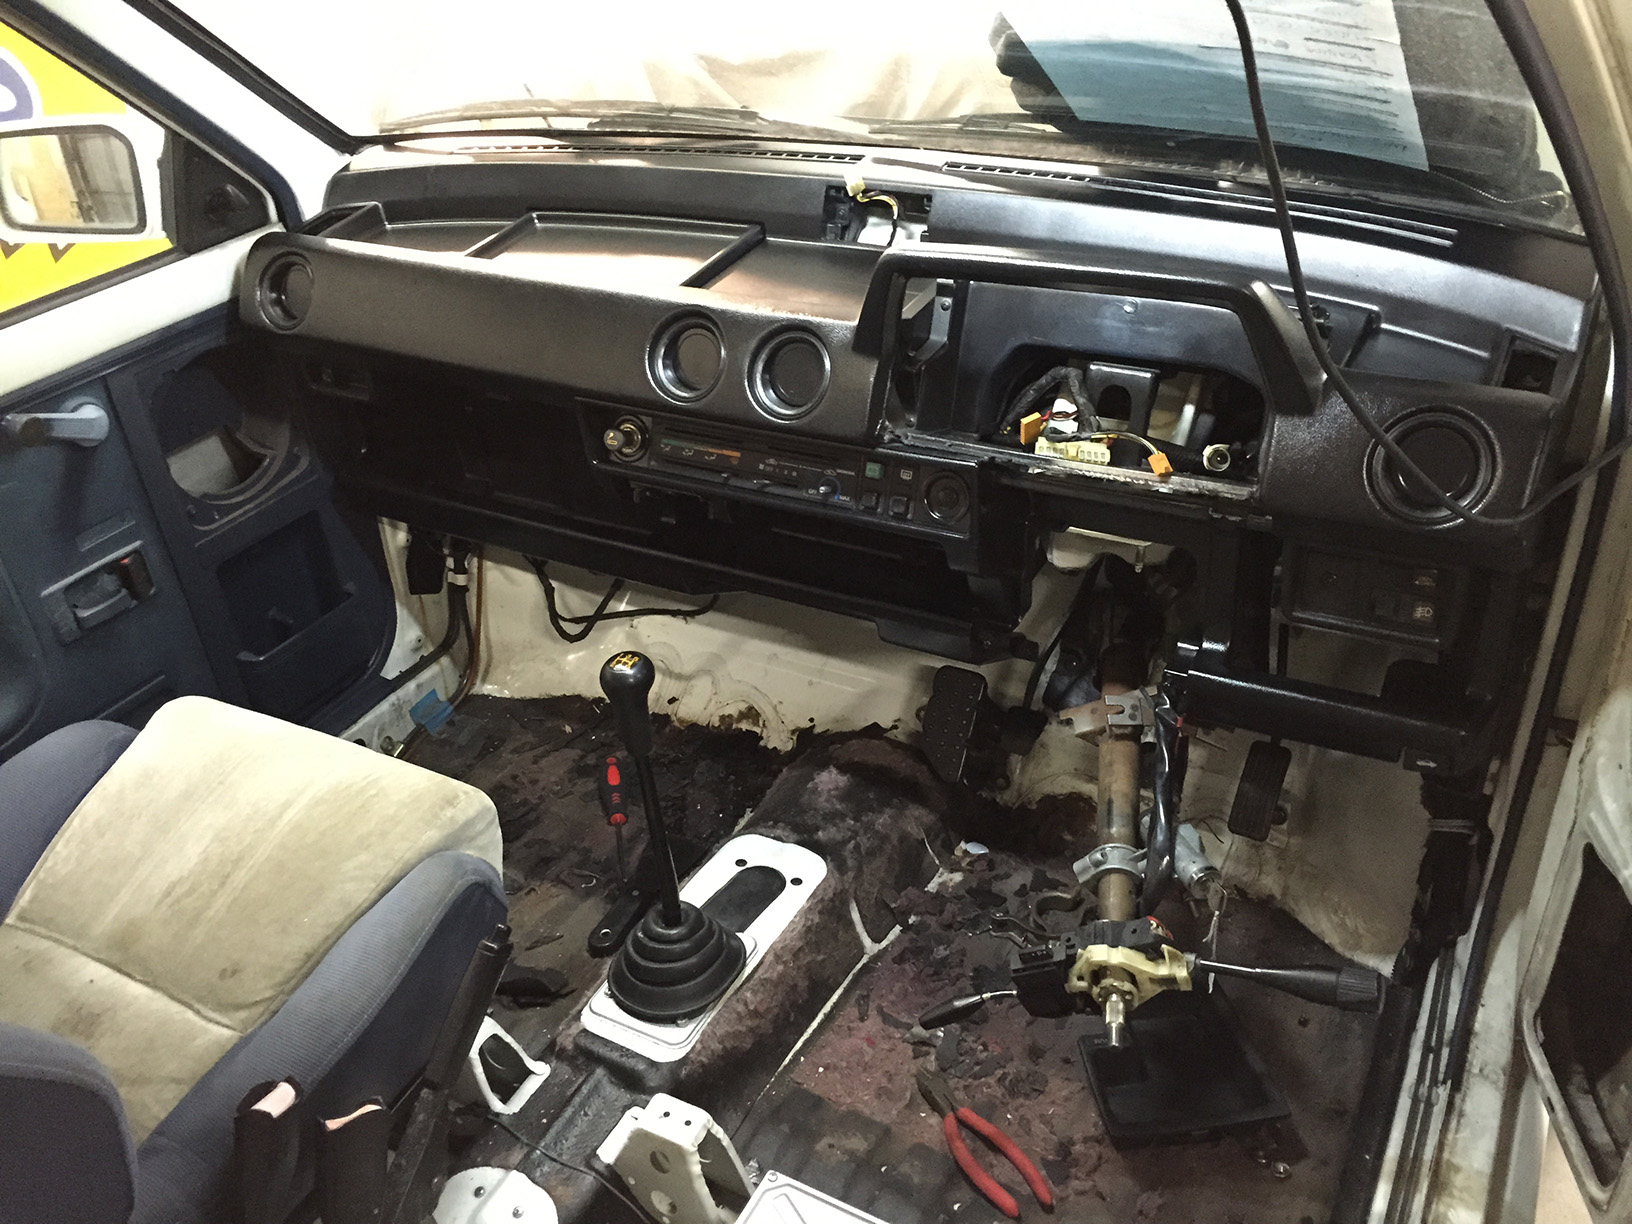
Next on the list is the interior and then exterior. We got started on the interior today.
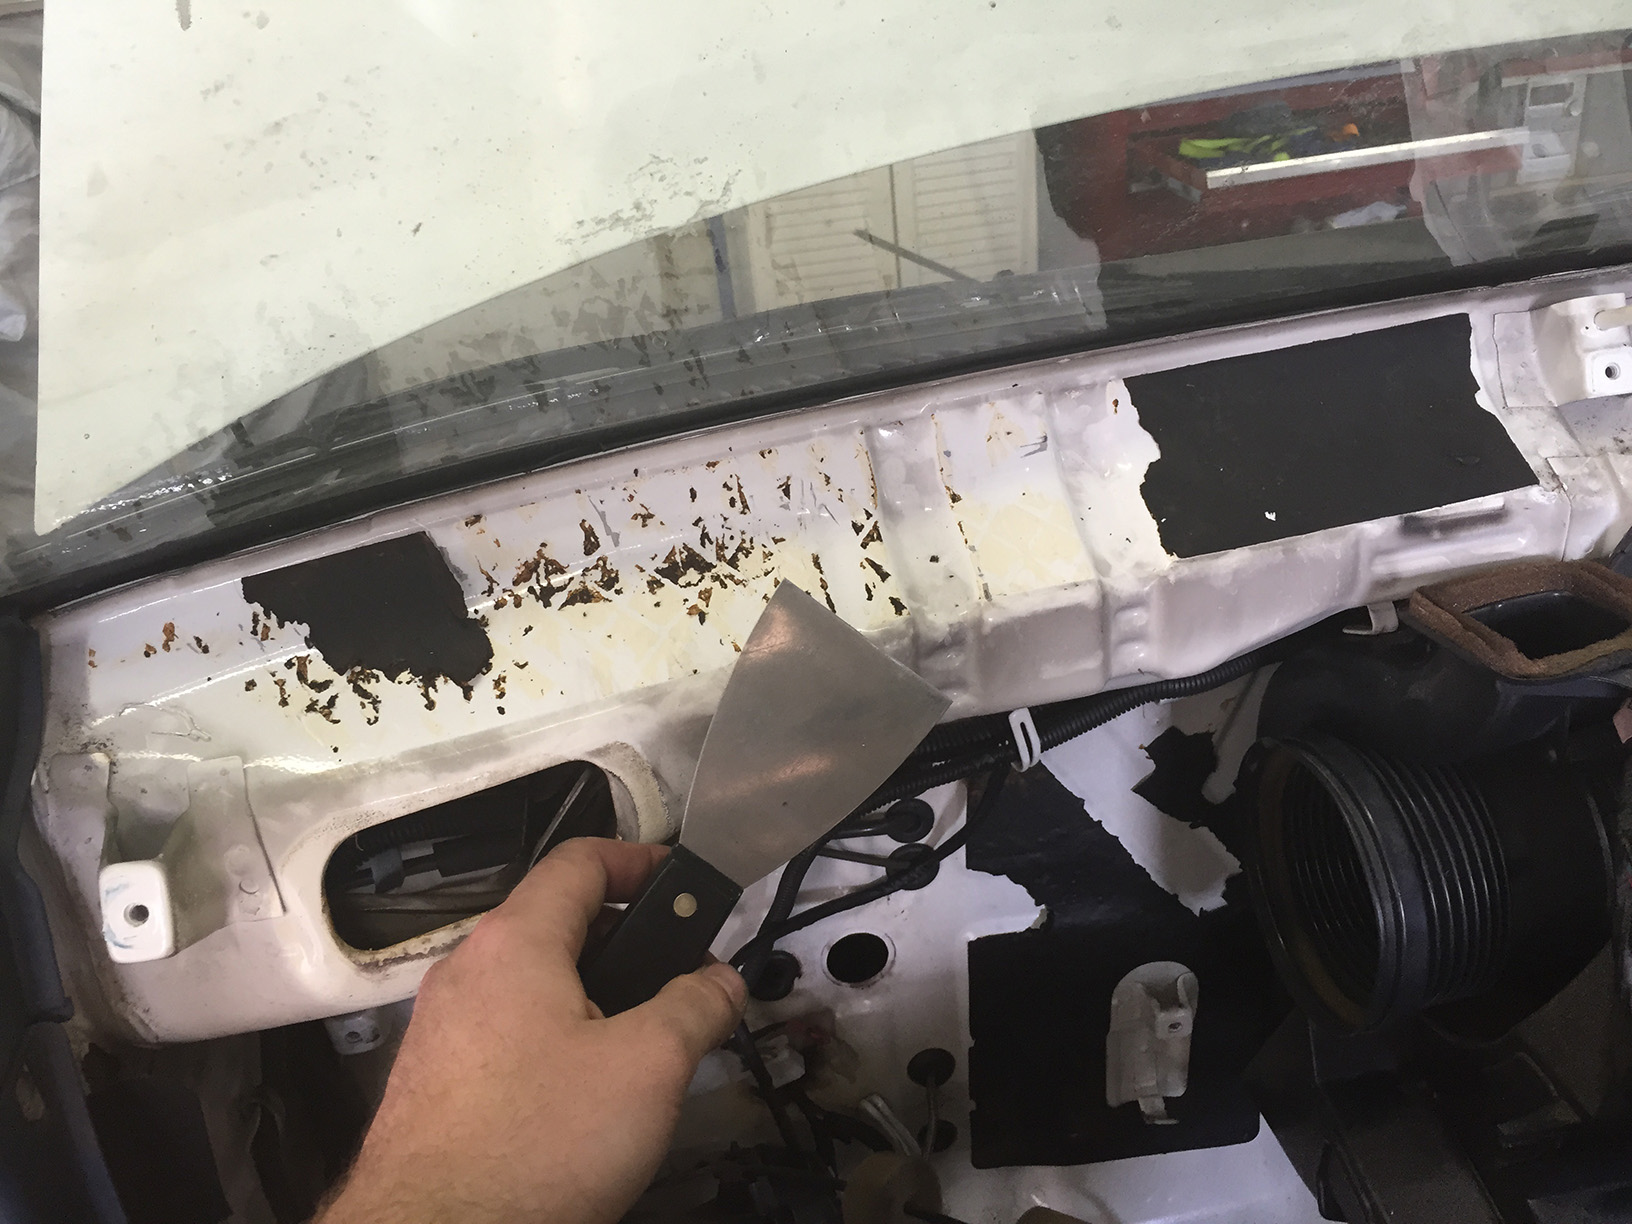
Getting rid of the sound deadening so we can refit the dashboard.

It’s not pretty, but it will all be hidden anyway.
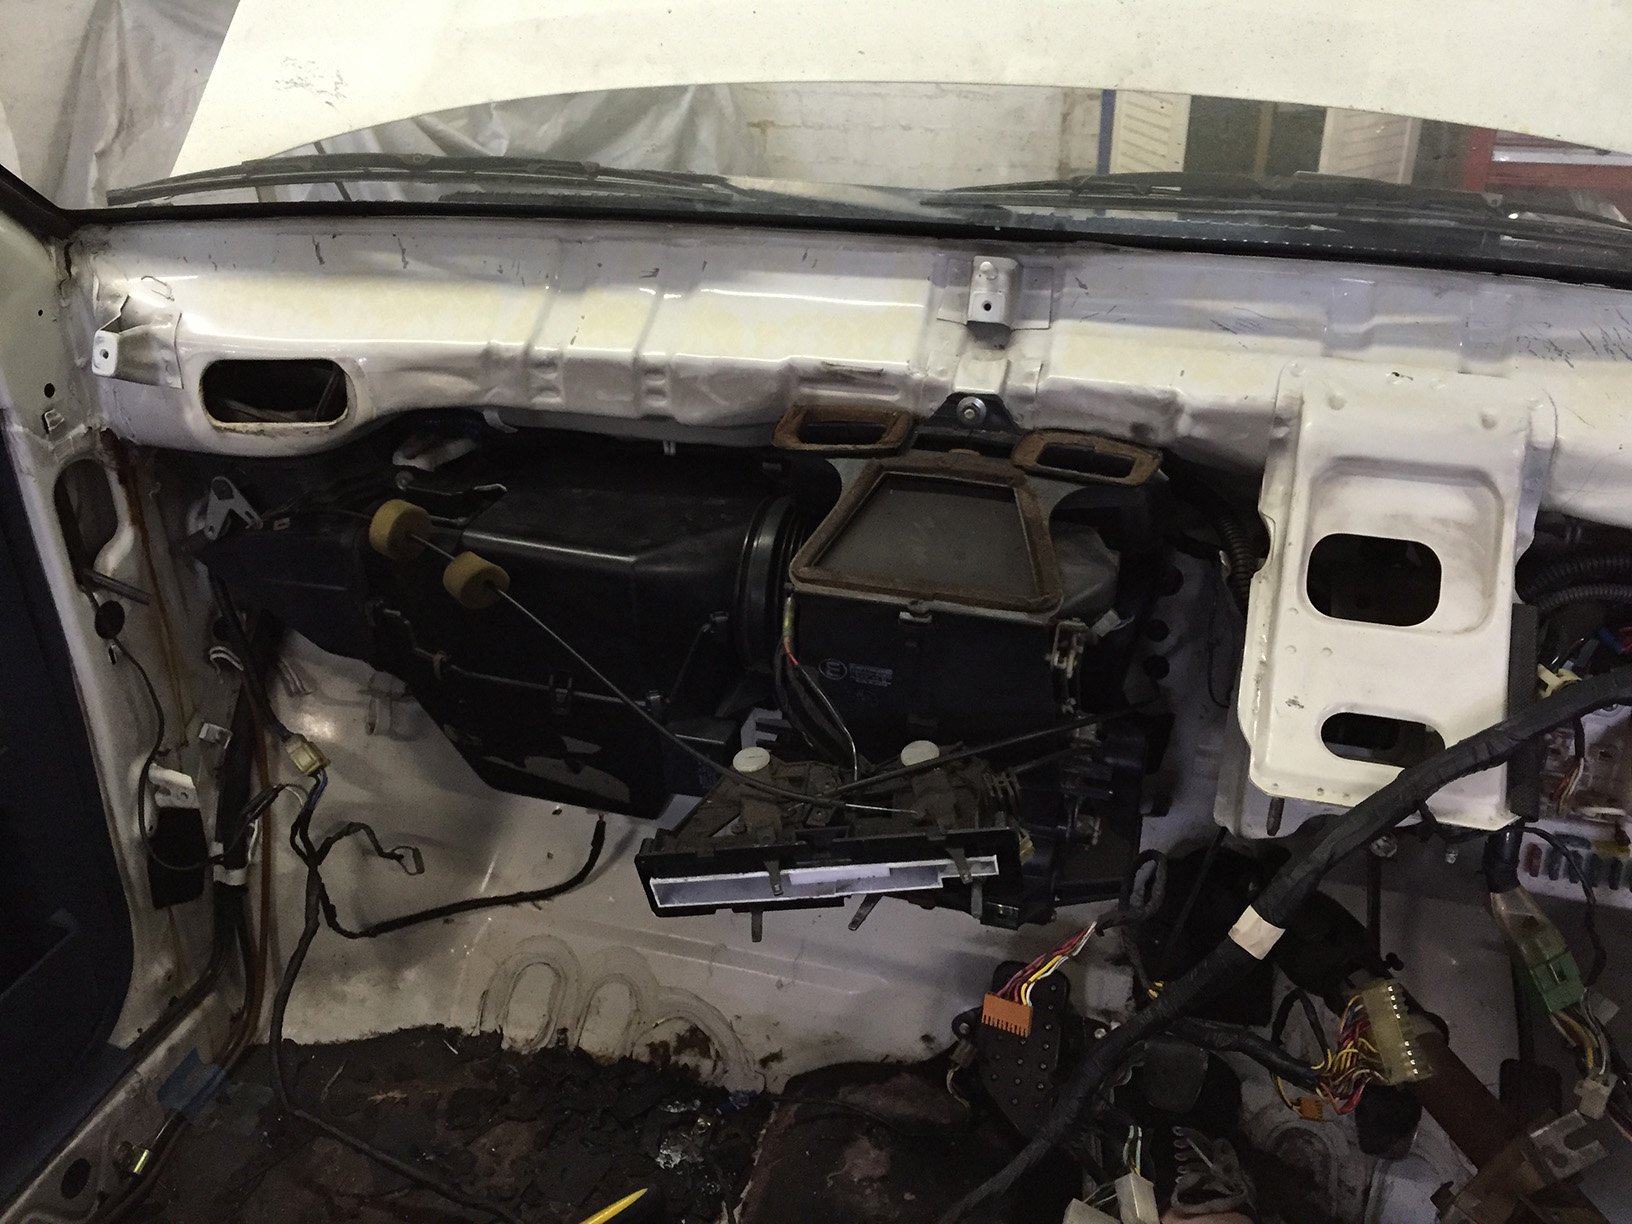
Cleaned up dash and the A/C evaporator box fitted with all its insides gutted. It needs to be there for the normal fan blower to get air from outside. Should work well like this.
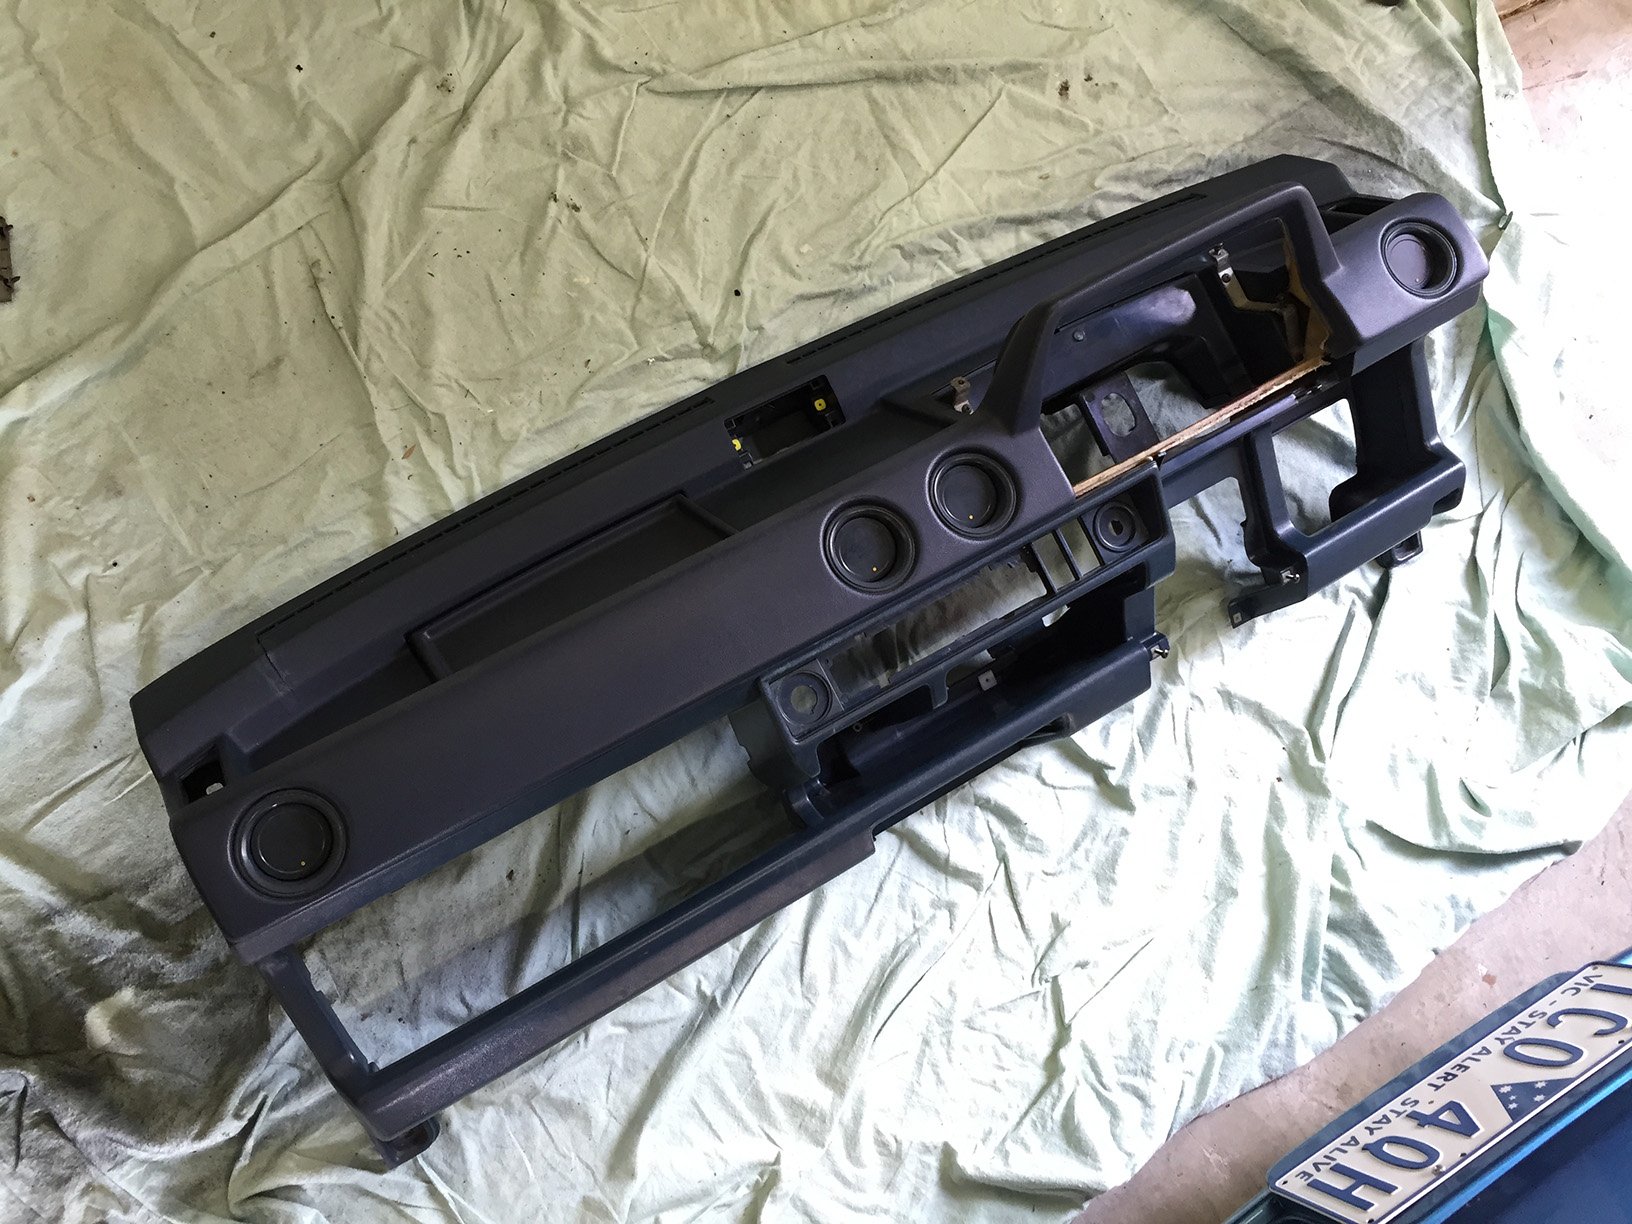
Next step was preparing the dashboard to go black. One of the wrecks we stripped parts from has contributed a bunch of factory black dash bits, but the stuff individual to this Japanese model is getting vinyl dyed.
Looks pretty damn good! I did this in another car years ago and was happy with it. Can’t wait to see it installed.
We ran out of time to fit the dash after dying it today, but later this week we should have an update.
– – – –
So I wasn’t quite right in my last update when I said that was it for the engine bay side of things. There were a couple of issues to attend to.
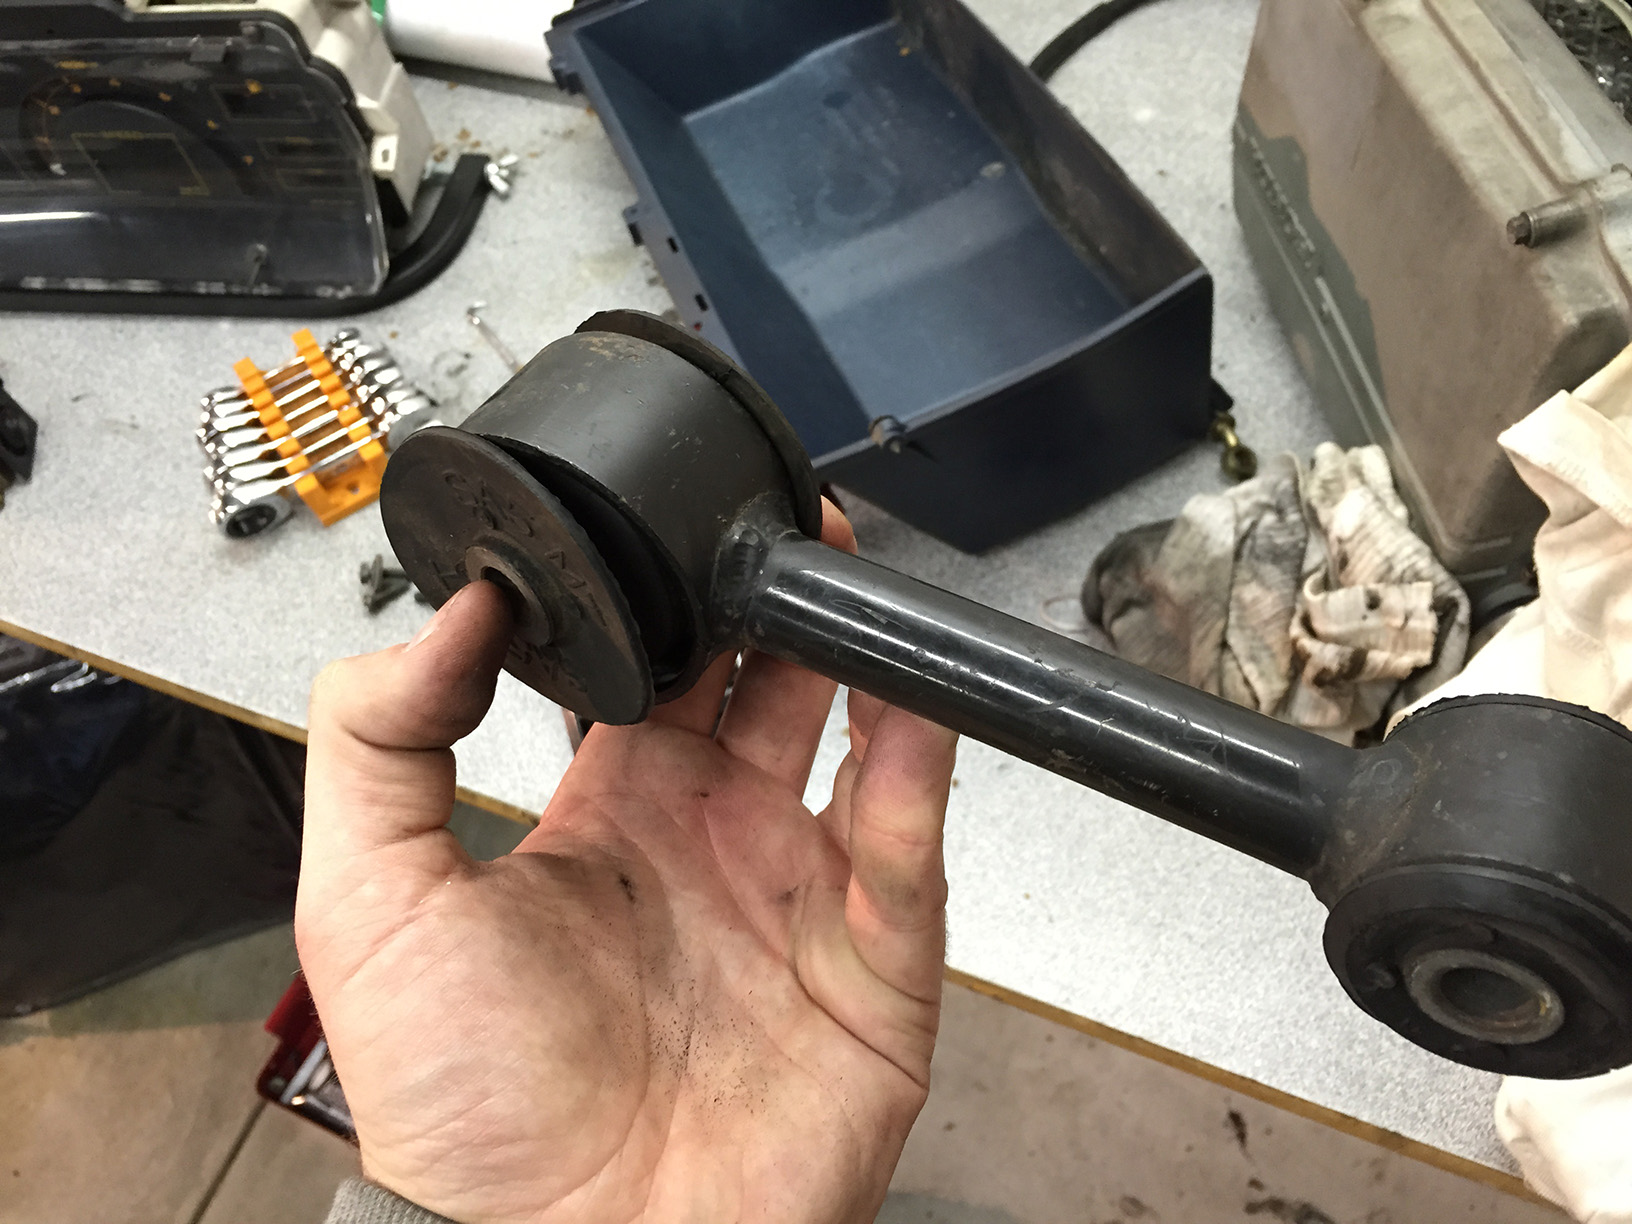
The major problem was the rear engine mount/torque arm bushing. It was properly shot. Here’s a quick video showing how much play we had.
Tony and I checked a few other turbo and non-turbo Citys and they’re all the same. Seems the large bushing on the engine side of the arm is prone to wear and allows the engine to rock back and forth.
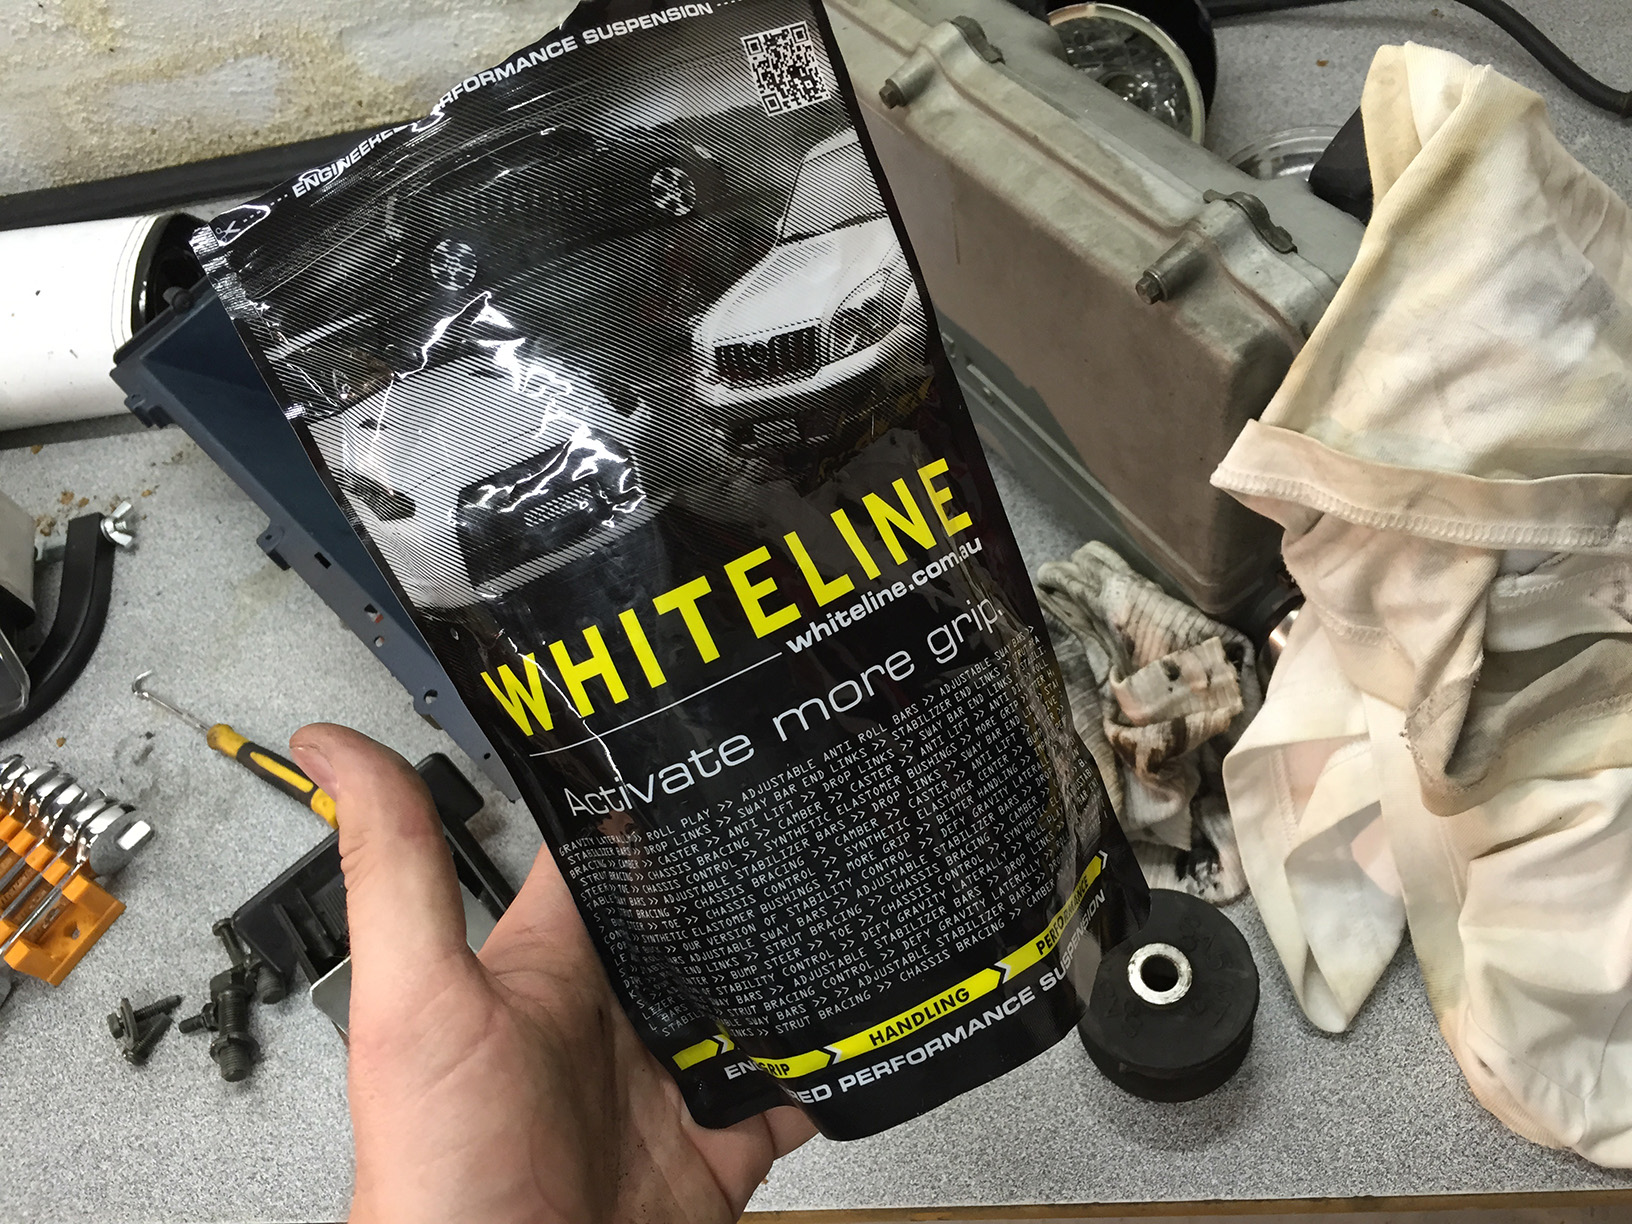
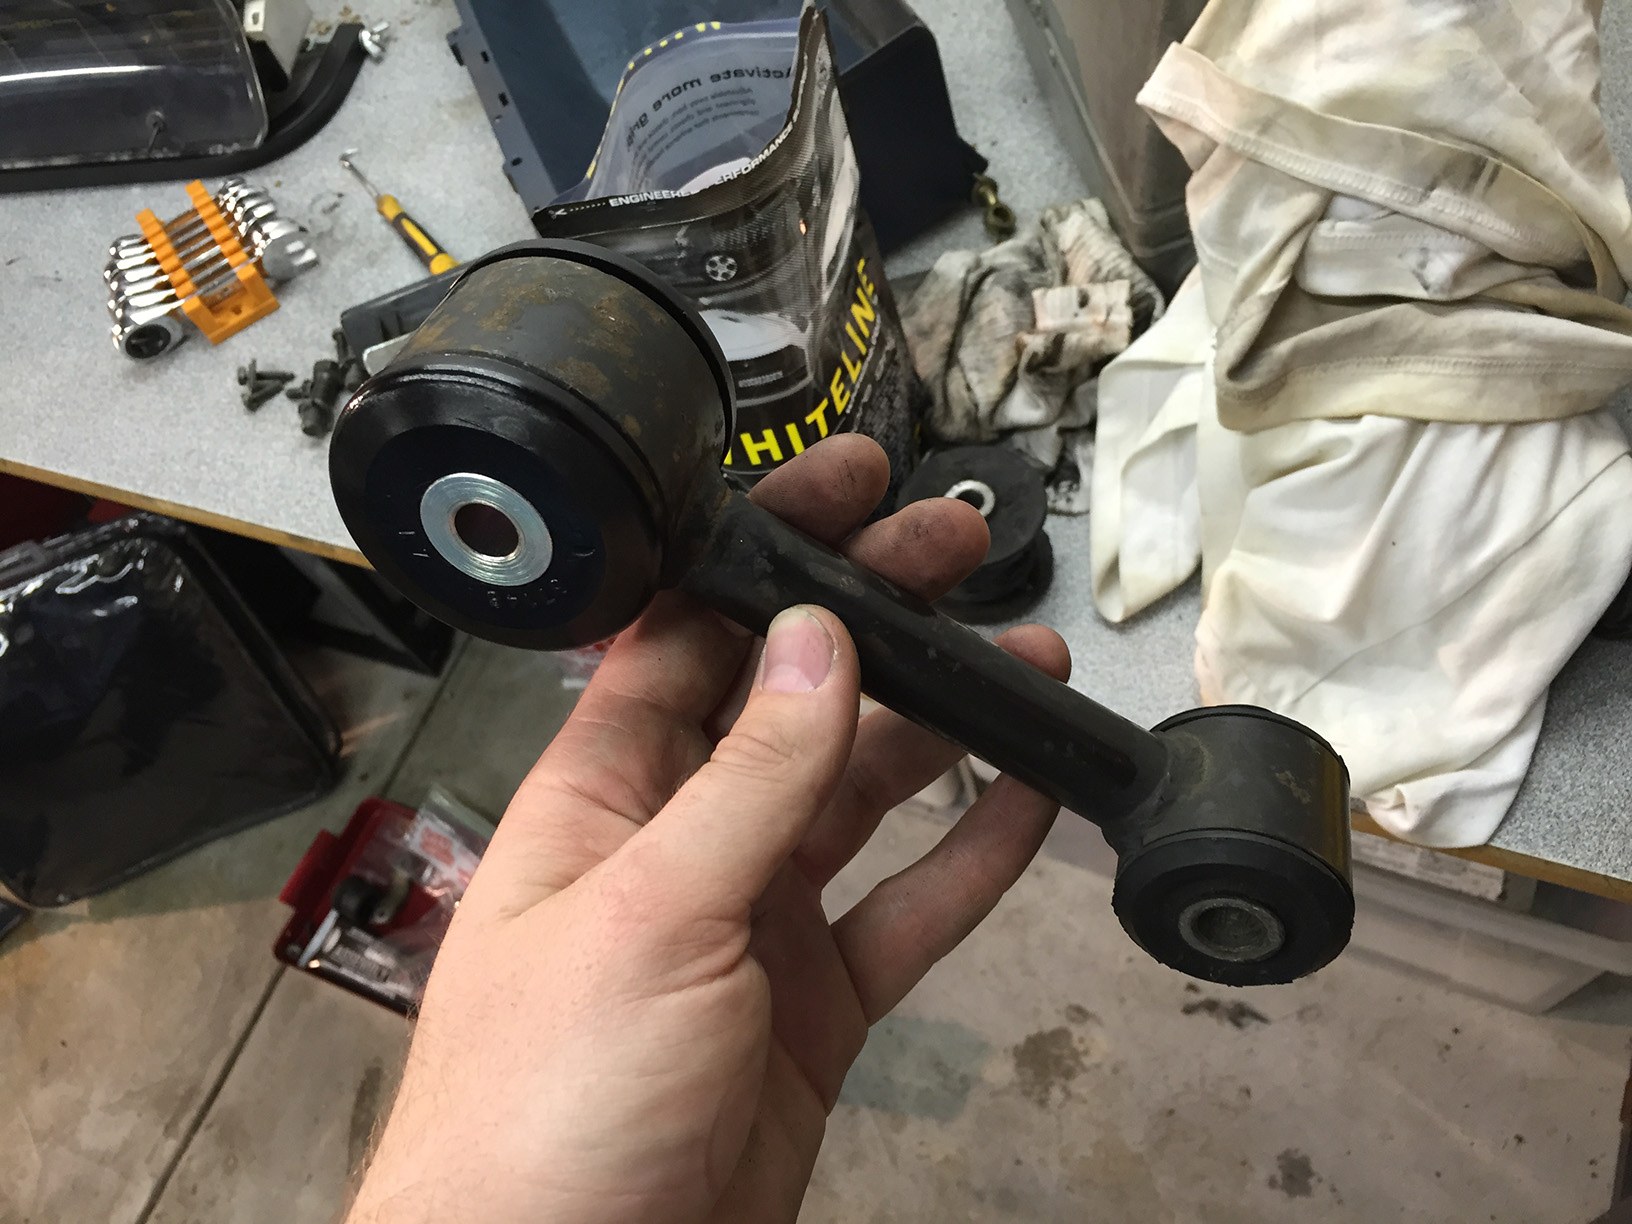
One of the blokes on CityTurbo.com researched an alternative and found that Subaru Impreza MY08-11 diff bushings are exactly the right size. So we ordered some.
Then I went digging in the back of the ‘bay to get the arm out.
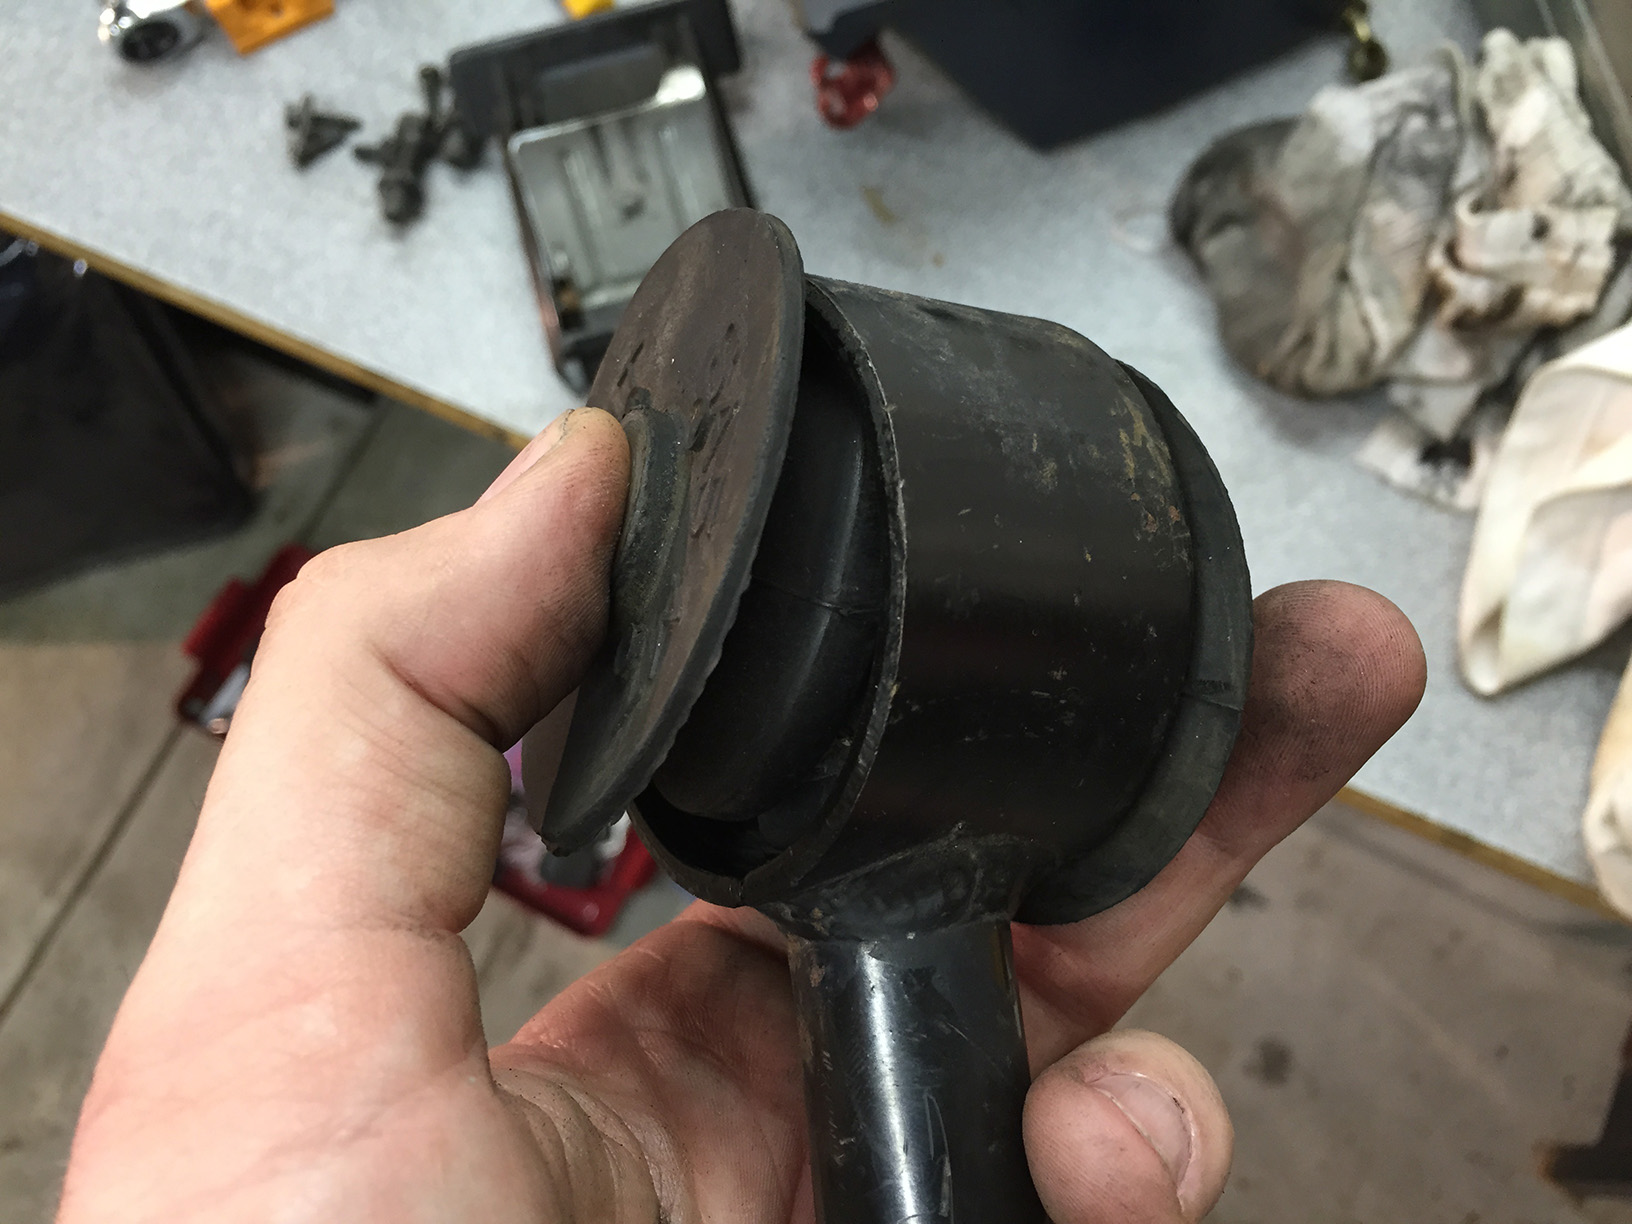
The bushing is so loose that you can easy push it straight through the arm.
And here’s the replacement ready to go.
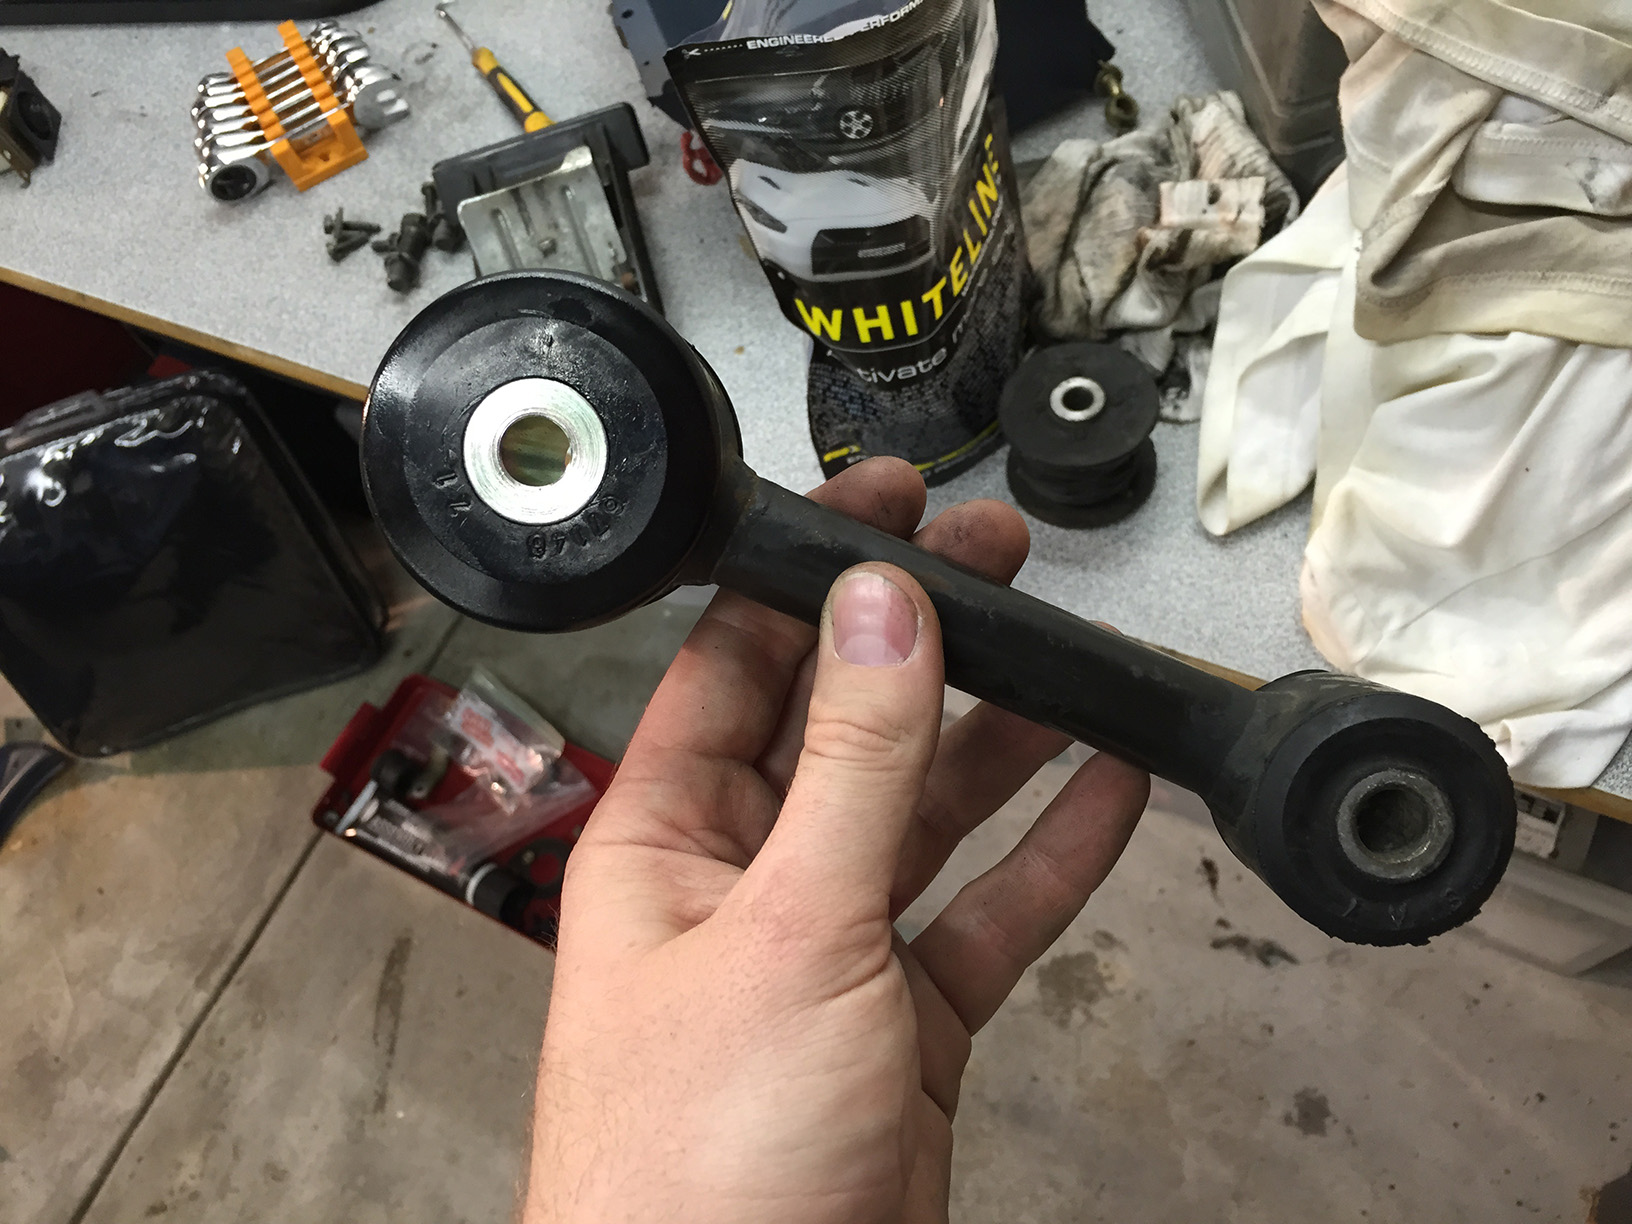
Squeezed back in and bolted up.
The arm bolts to a tall bracket which is connected to the gearbox. During this process I noticed that the two bolts holding the bracket to the bellhousing had rattled loose, compounding our issue. Now that everything is tight the engine is held in place firmly. Much better. There’s a tiny bit of play from the smaller bushing on that arm, but it’s nothing compared to before.
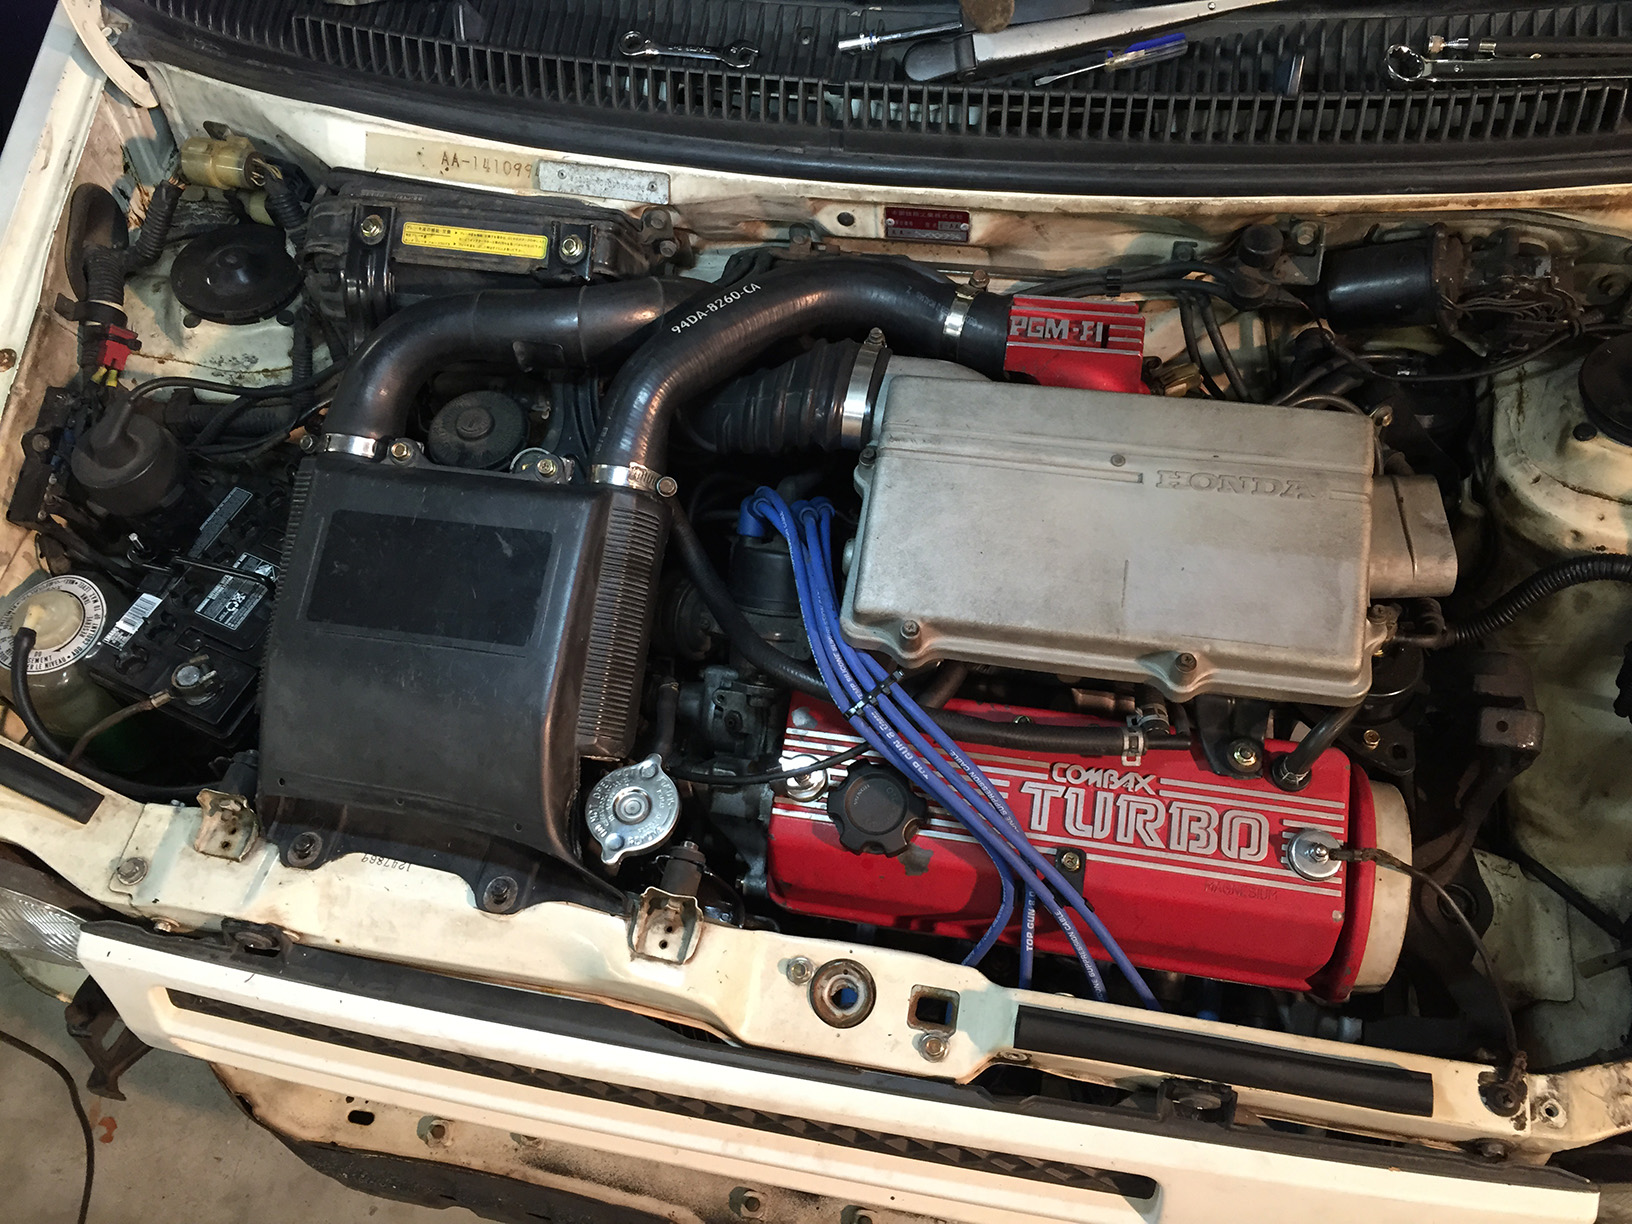
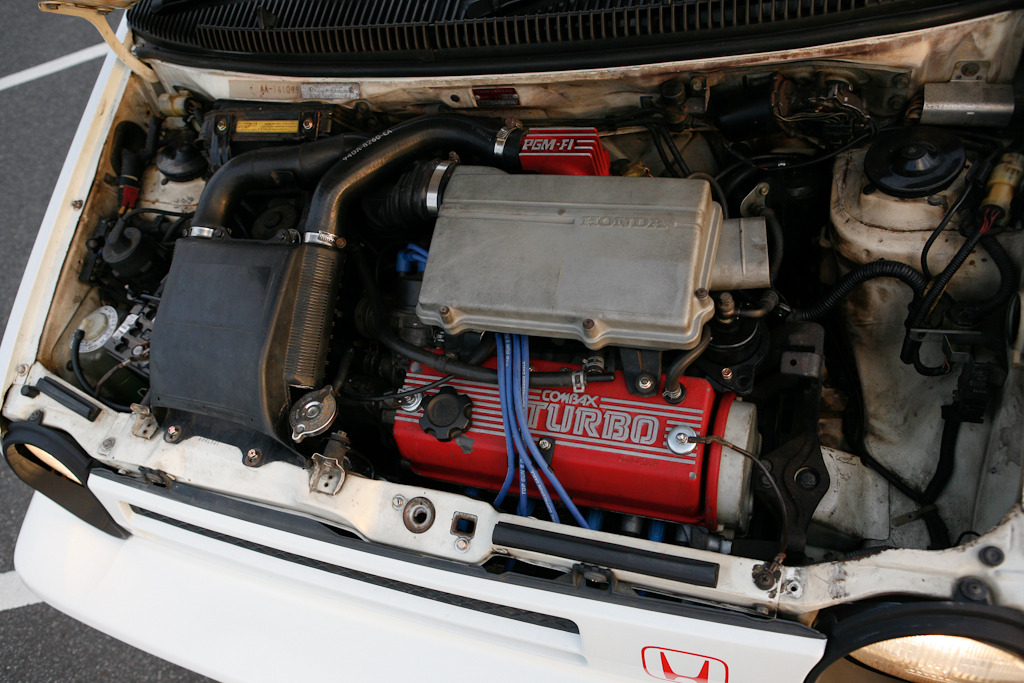
After that I repaired one of the intercooler hoses and replaced another bit of vacuum line then put everything back together for good. I was saying to Tony that it feels like I’ve taken this same photo so many times, but this is actually the final engine bay with everything done.

Interior is next. I put that tinted wind deflector thing back on the roof after finishing the engine last night then realised it was 12:30am and went to bed. More soon.
– – – – –
Time for another progress report. We’re hoping to have the City out at Classic Japan on December 7th, so the garage is firing on all cylinders at the moment.
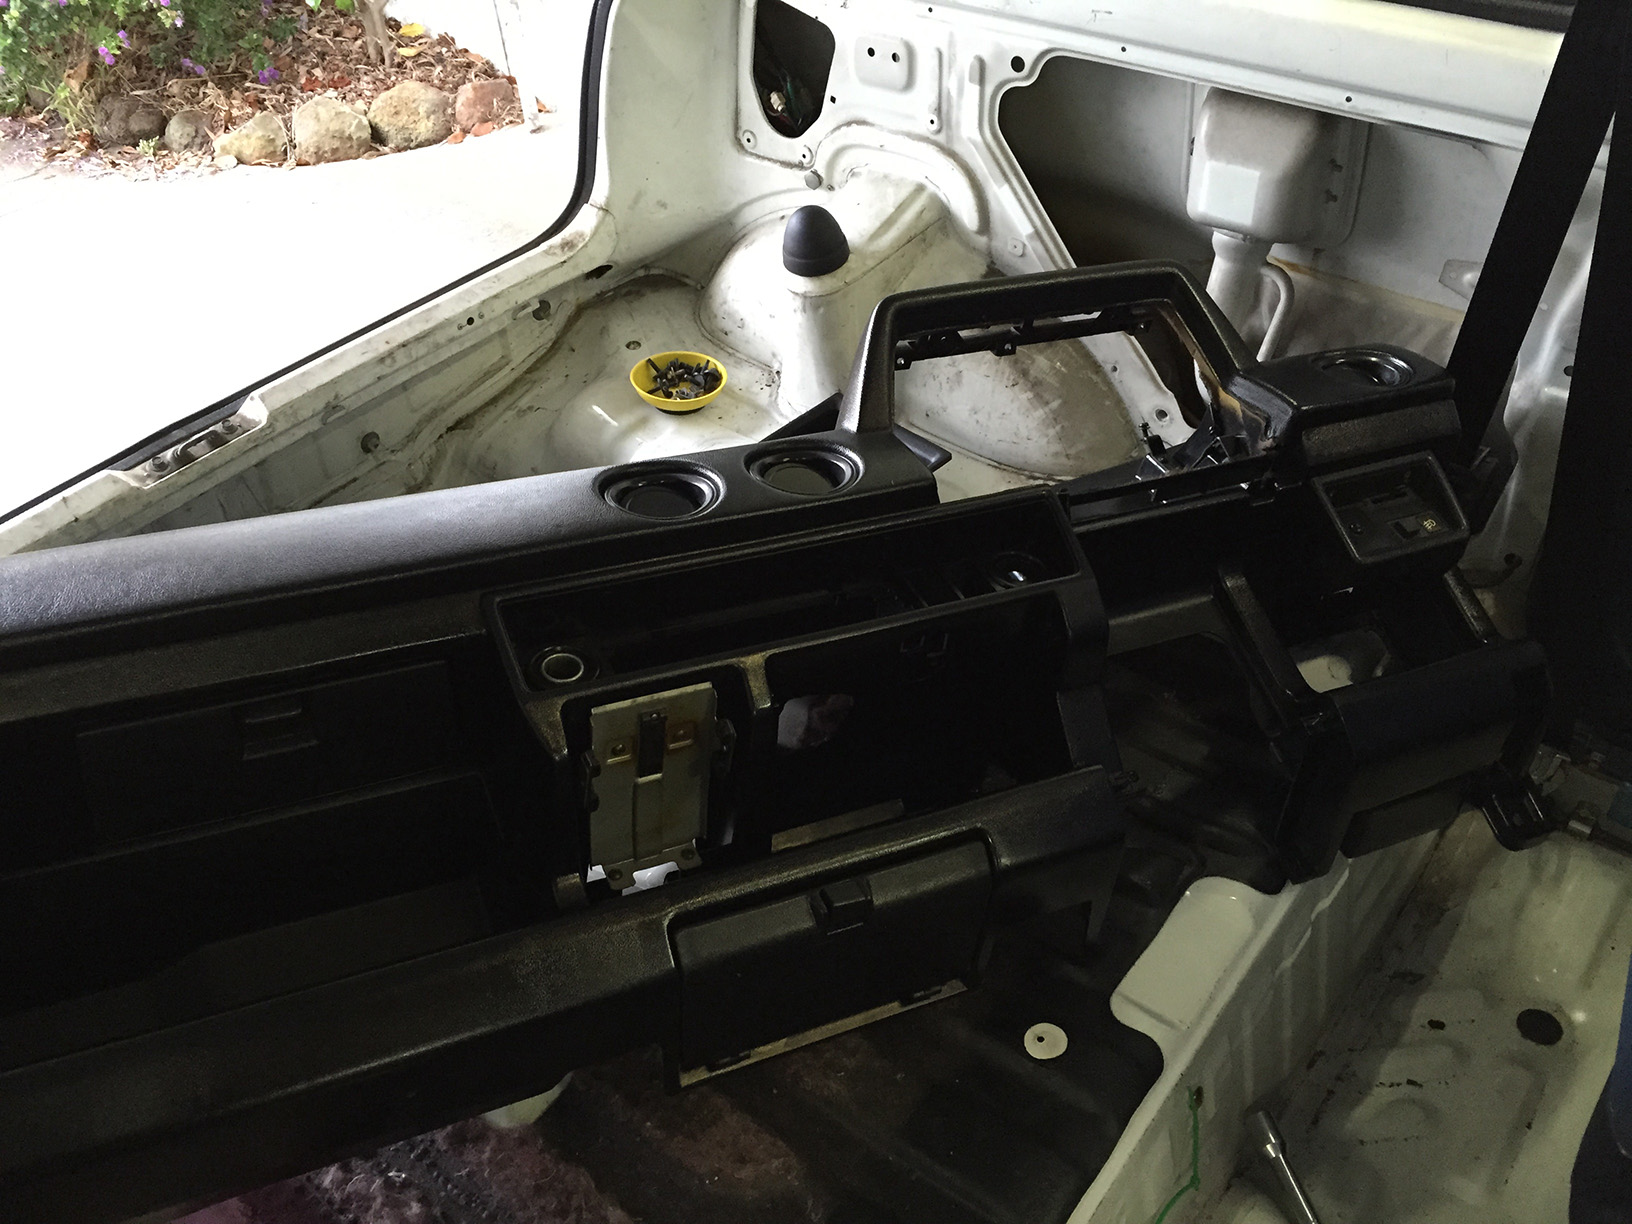
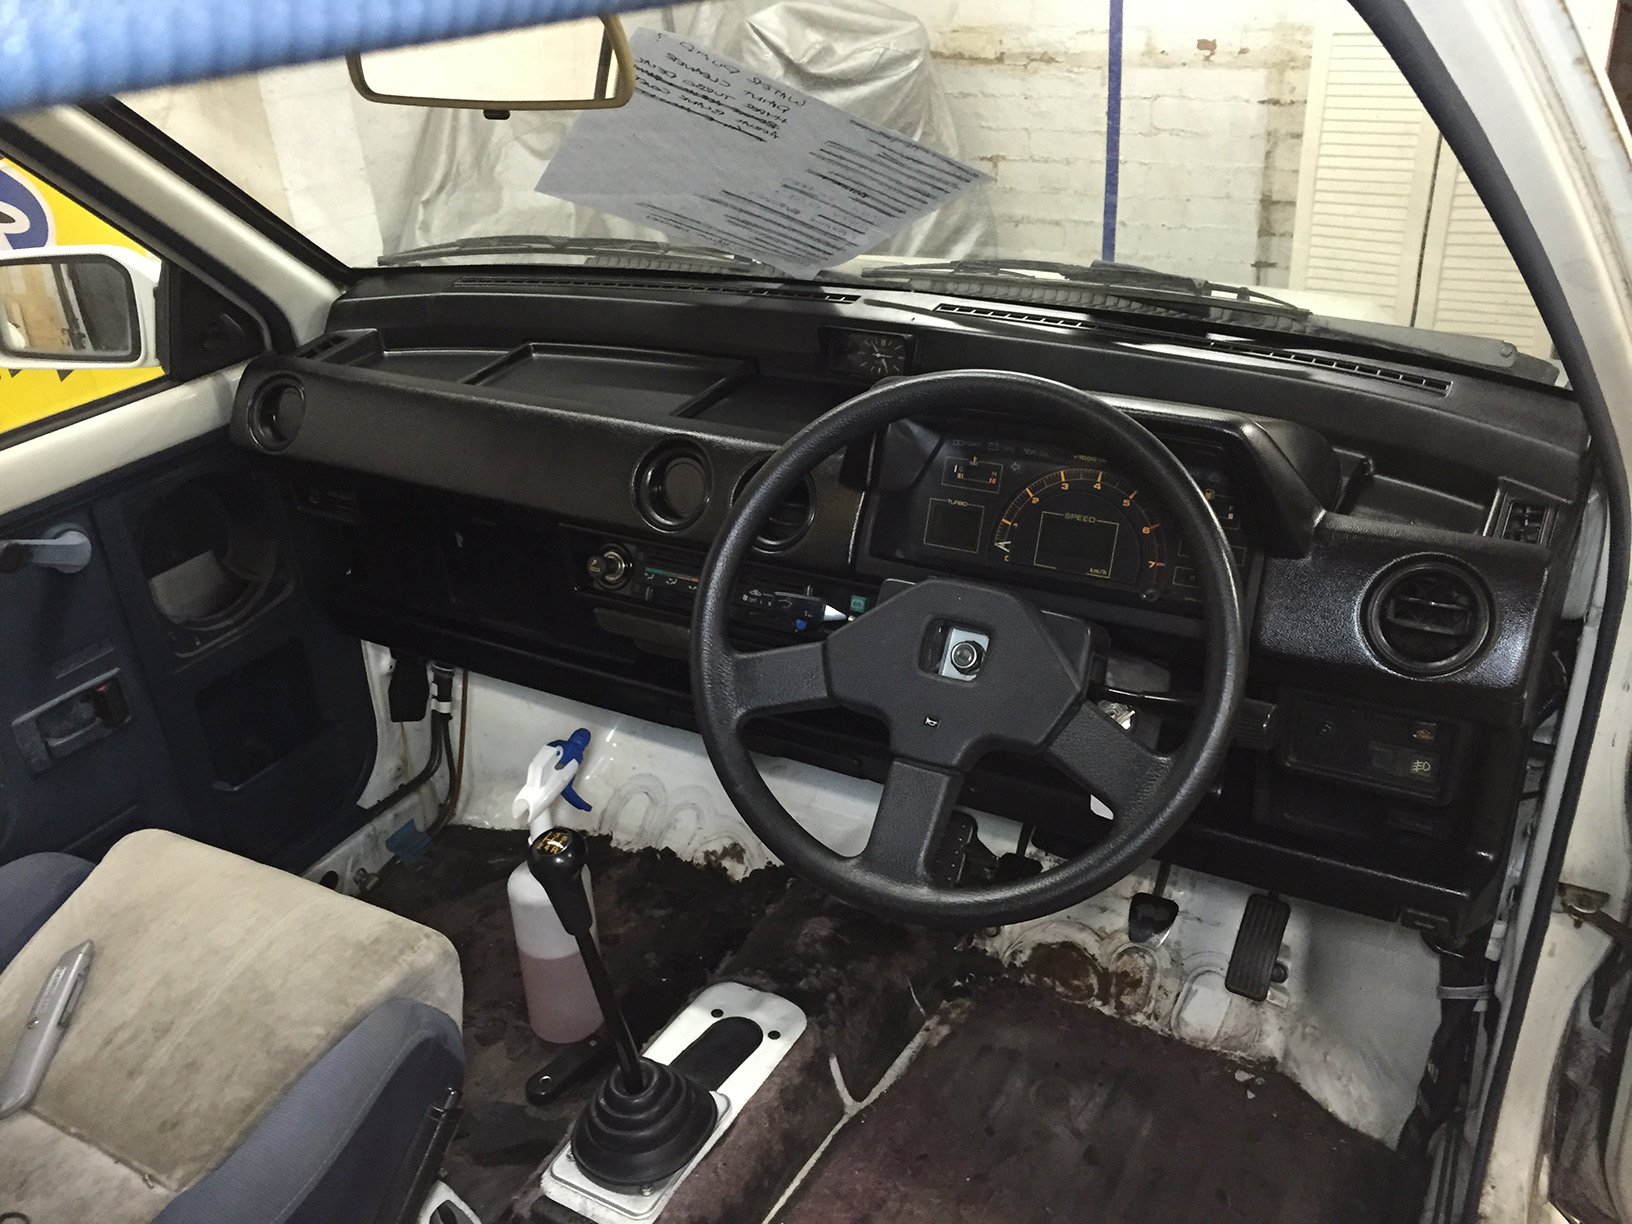
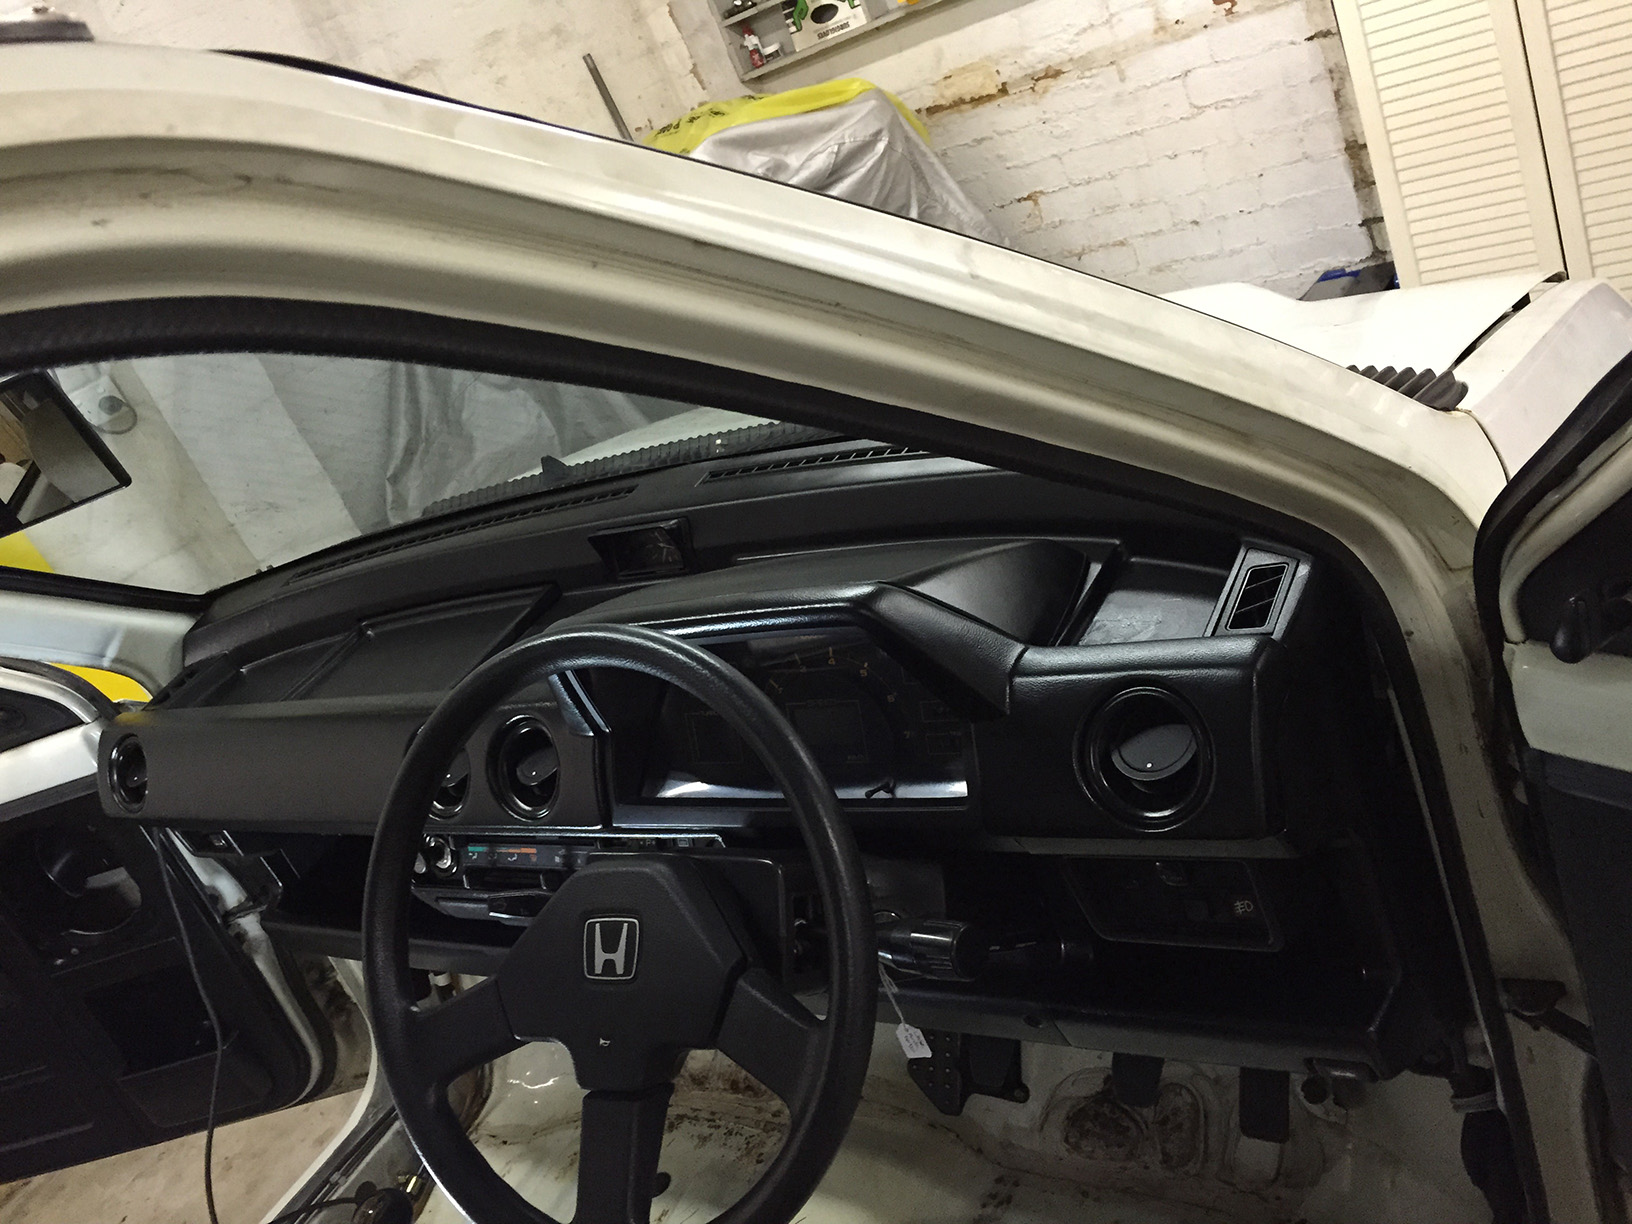
Dash went in fairly easily. Trickiest part was routing the wiring correctly so that all connectors fell in the right spots for the washer/demister/fog light buttons and gauge cluster without holding the dash off its mounting points.
From there I kept adding things piece by piece. Where I finished up doesn’t look a lot different but all the small bits add up.
Tonight so we should get the dashboard and steering column totally finished. From there we work from the doors back before tomorrow night when we tackle the floors with dry ice.
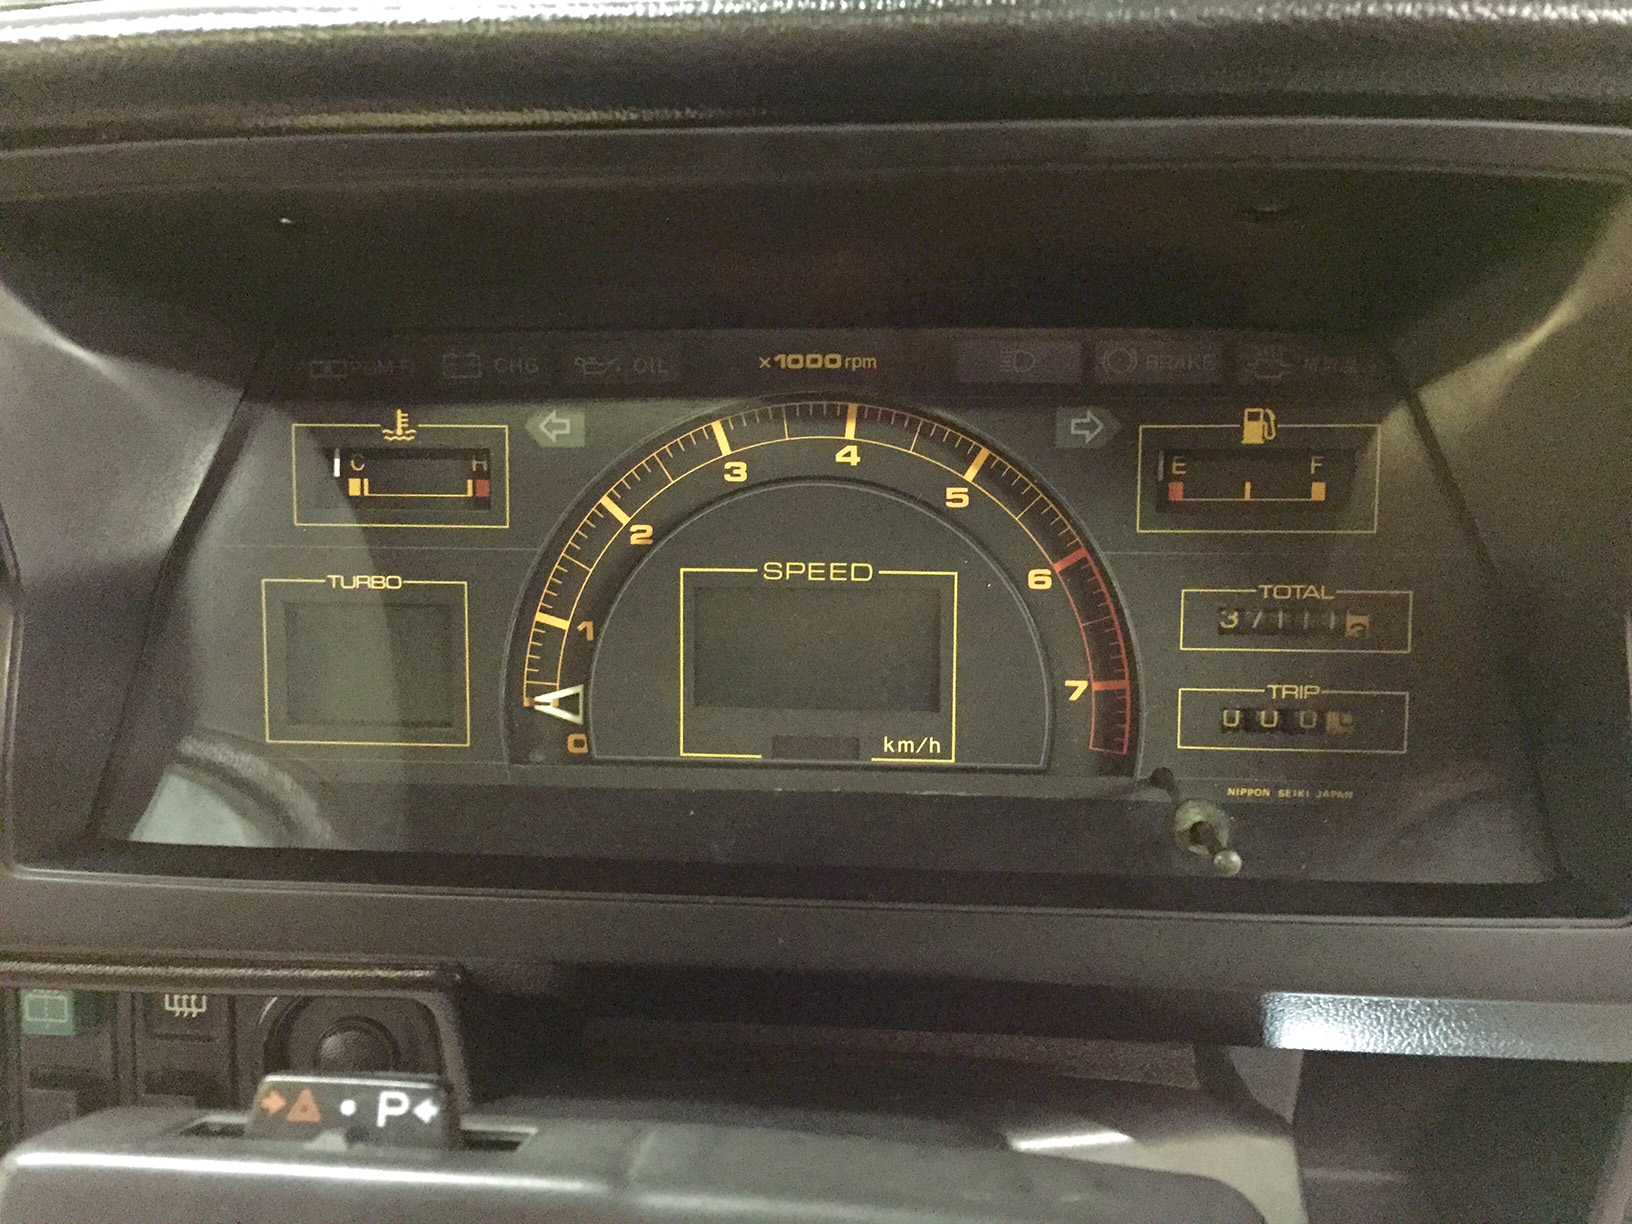
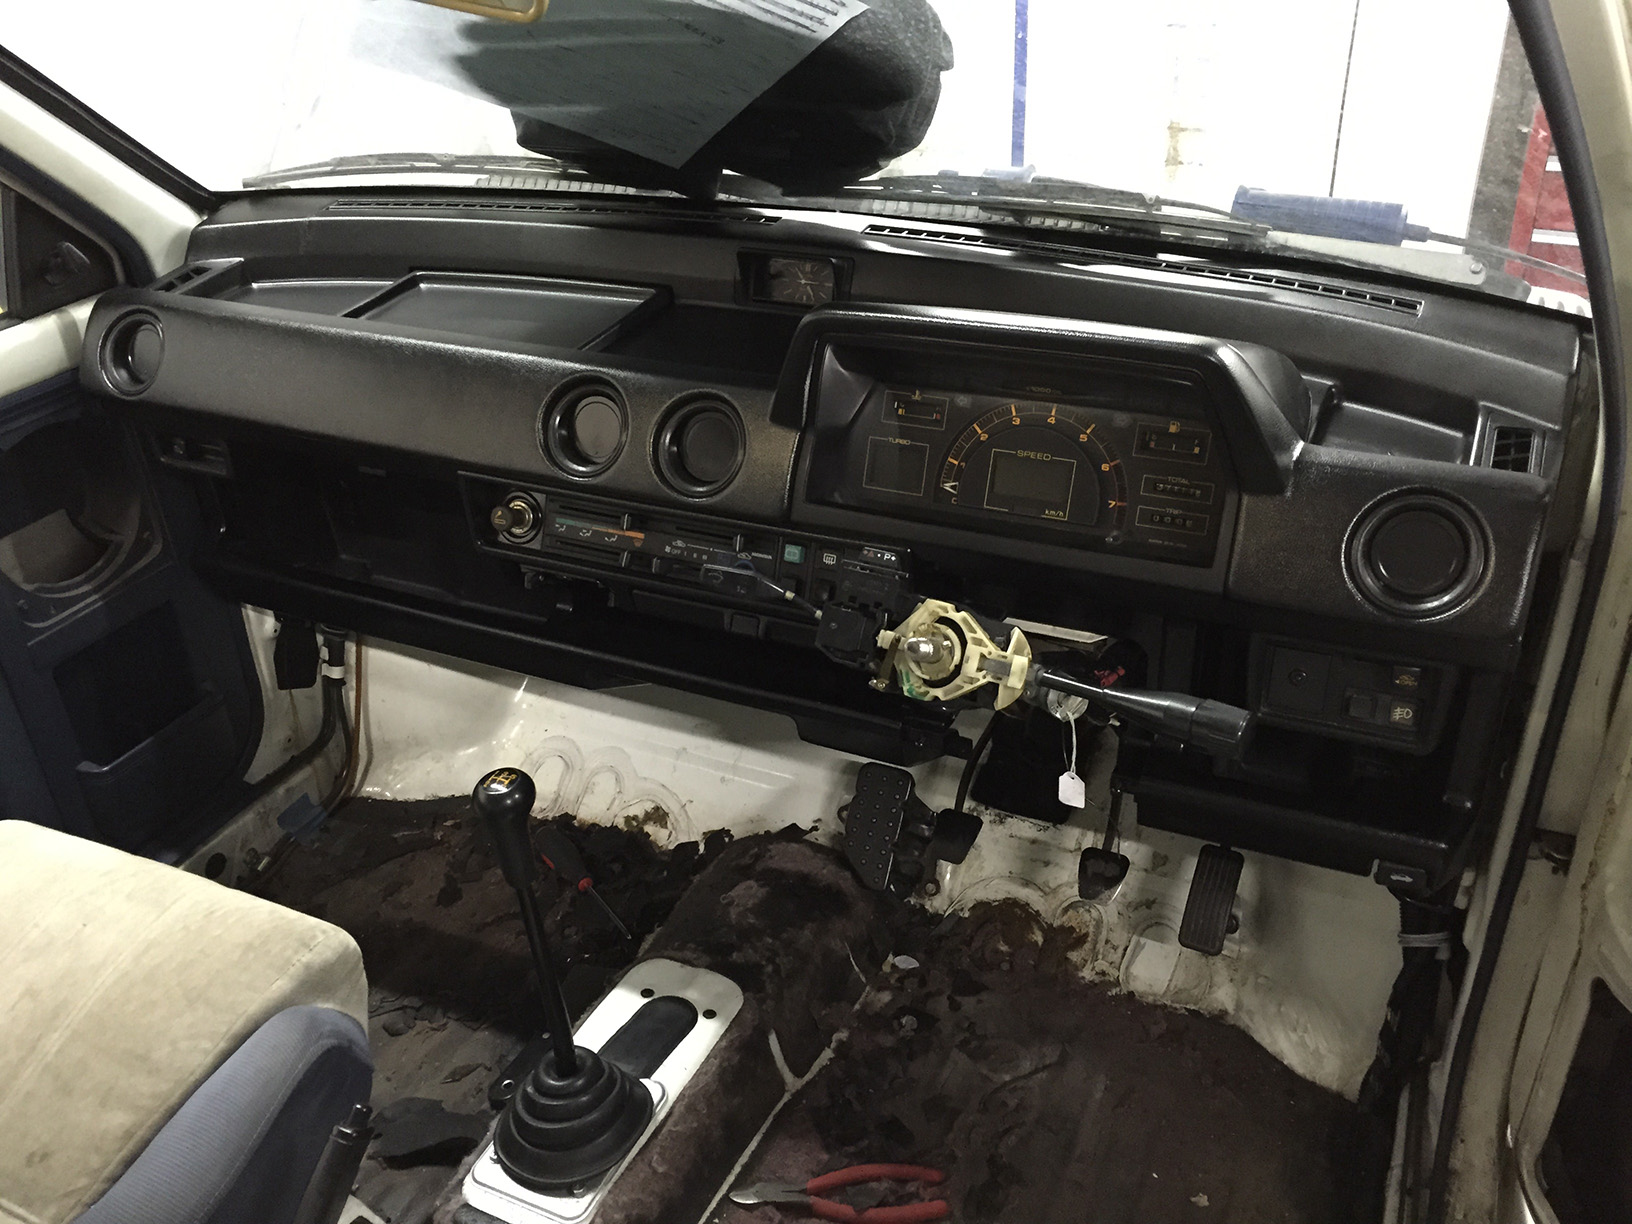
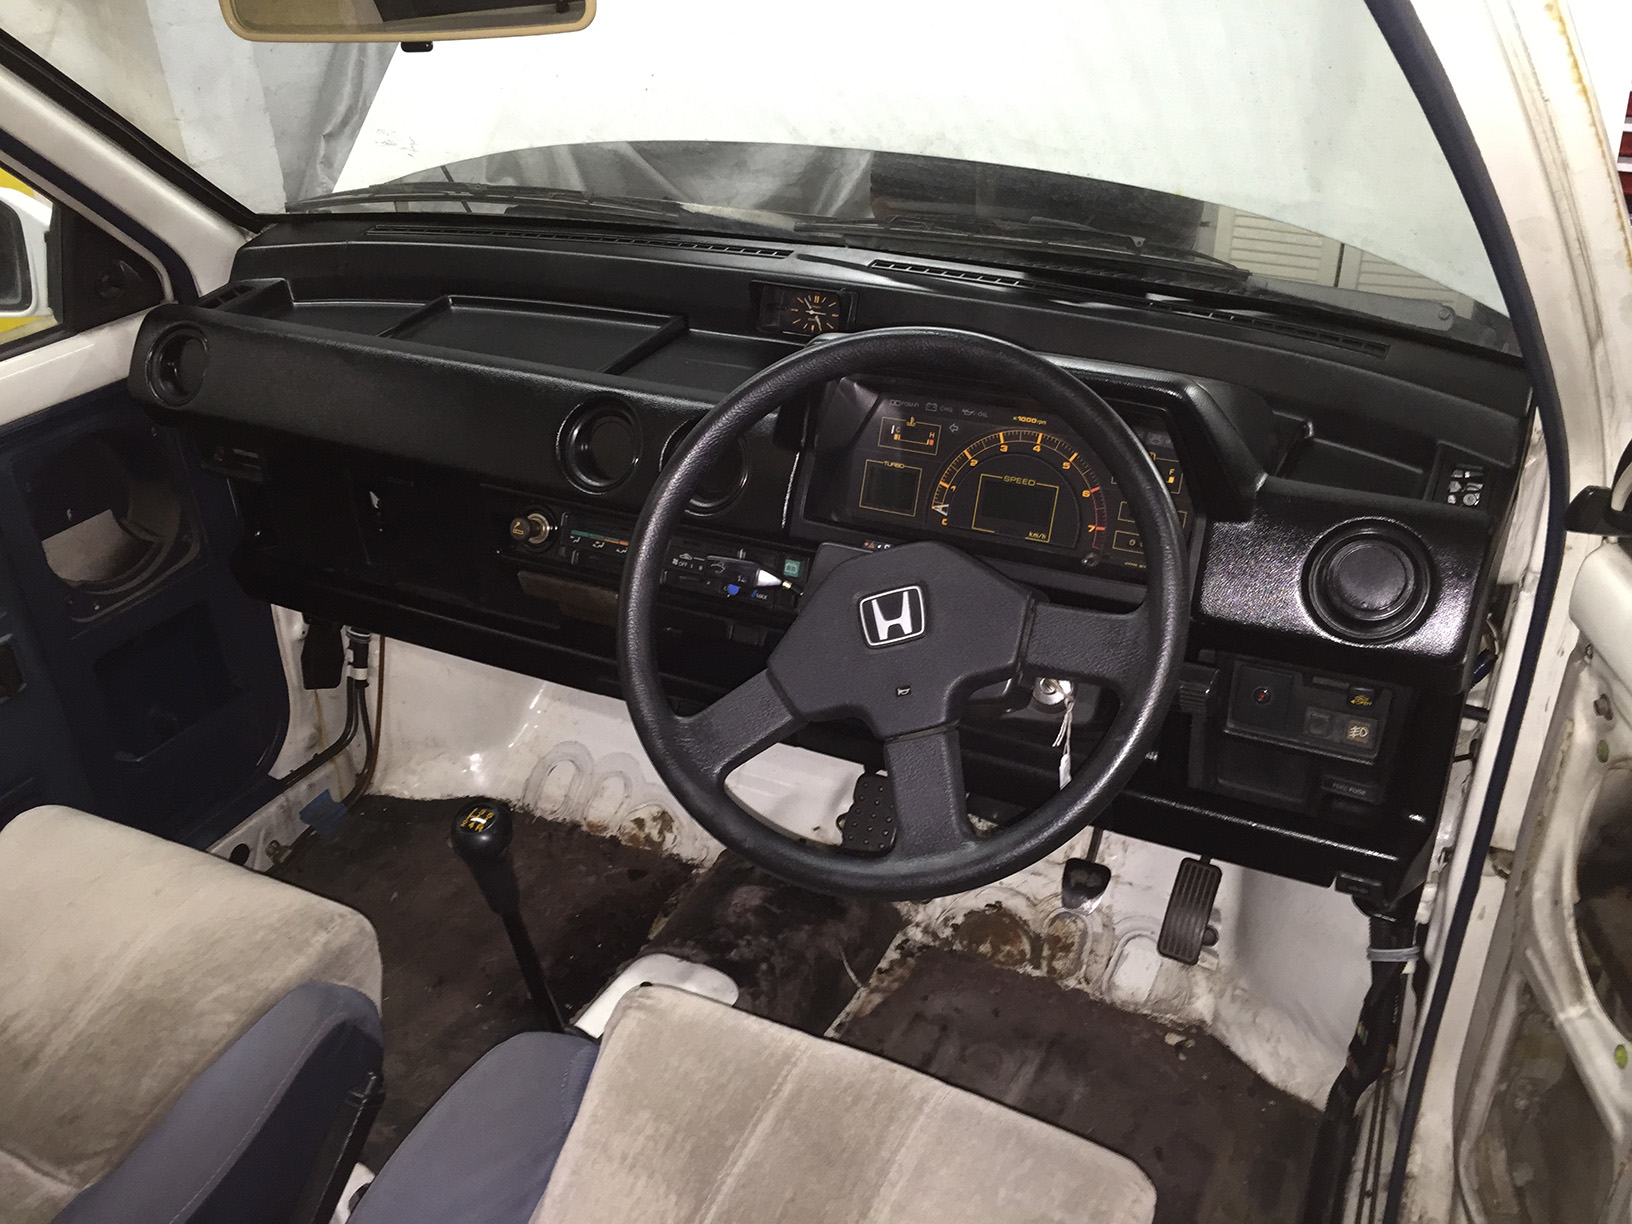
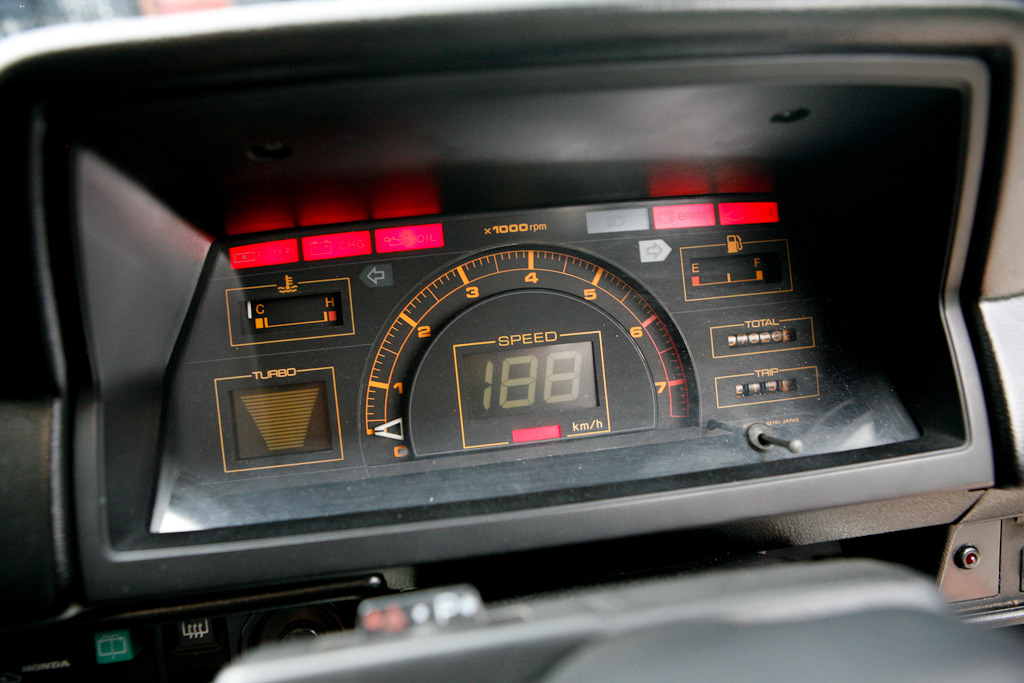
Dashboard almost finished! Steering column surrounds in place, steering wheel on, all the little pockets and the ashtray in place, bonnet release secured, basically done.
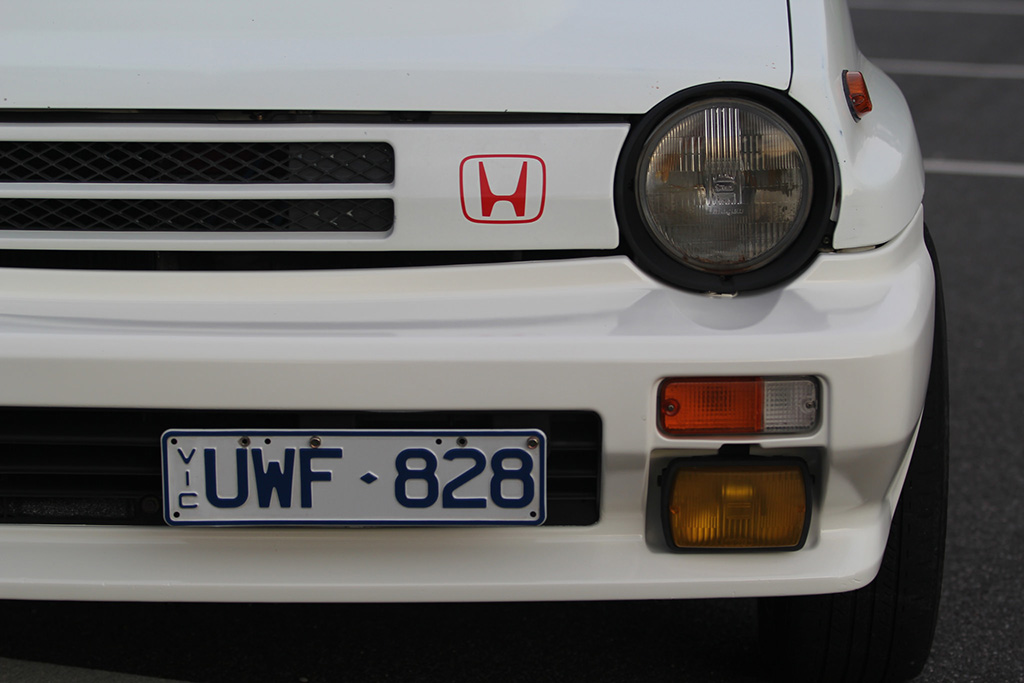
And there it is. The mint Honda badge was the finishing touch.
Some of the bulbs on the gauge cluster aren’t working so it needs to come out again. And we’re not getting power to the cigarette lighter either. Not a major issue but it irks me. Everything else works fine.
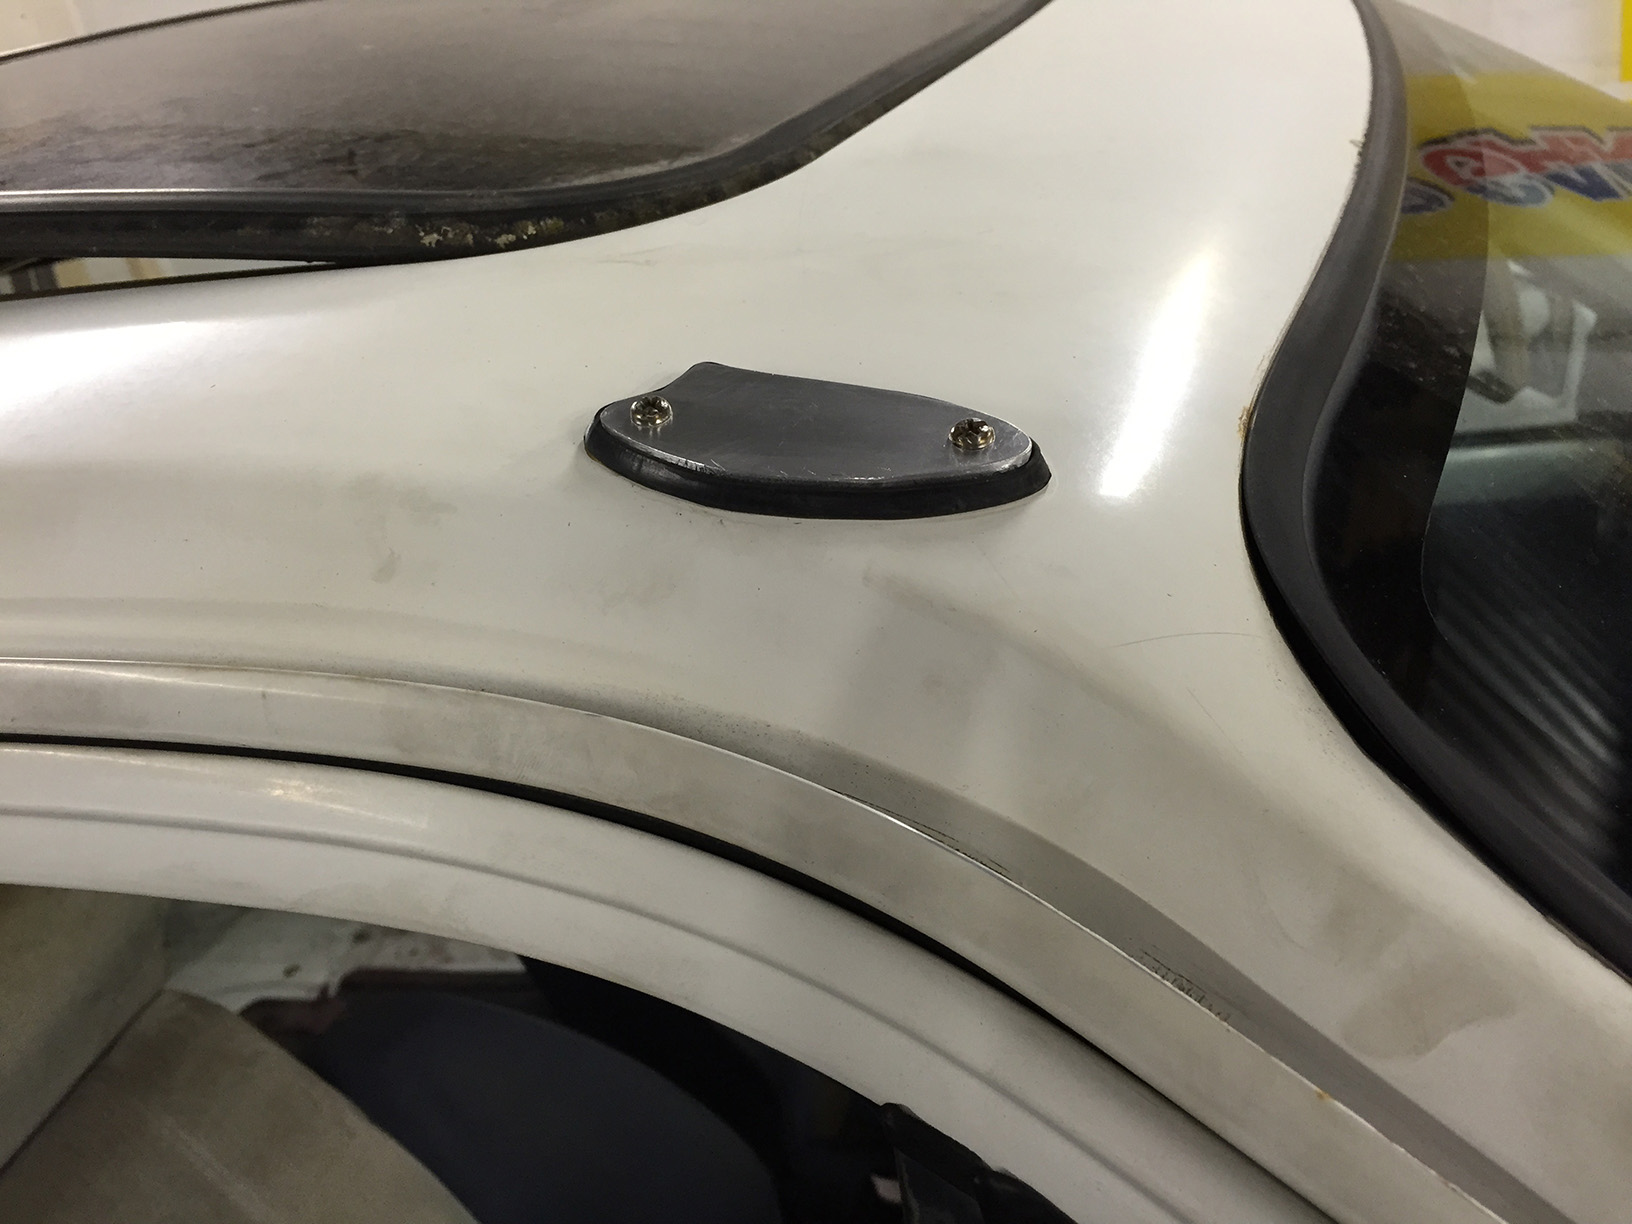
Tony made a blanking plate for our antenna delete. I really like it.
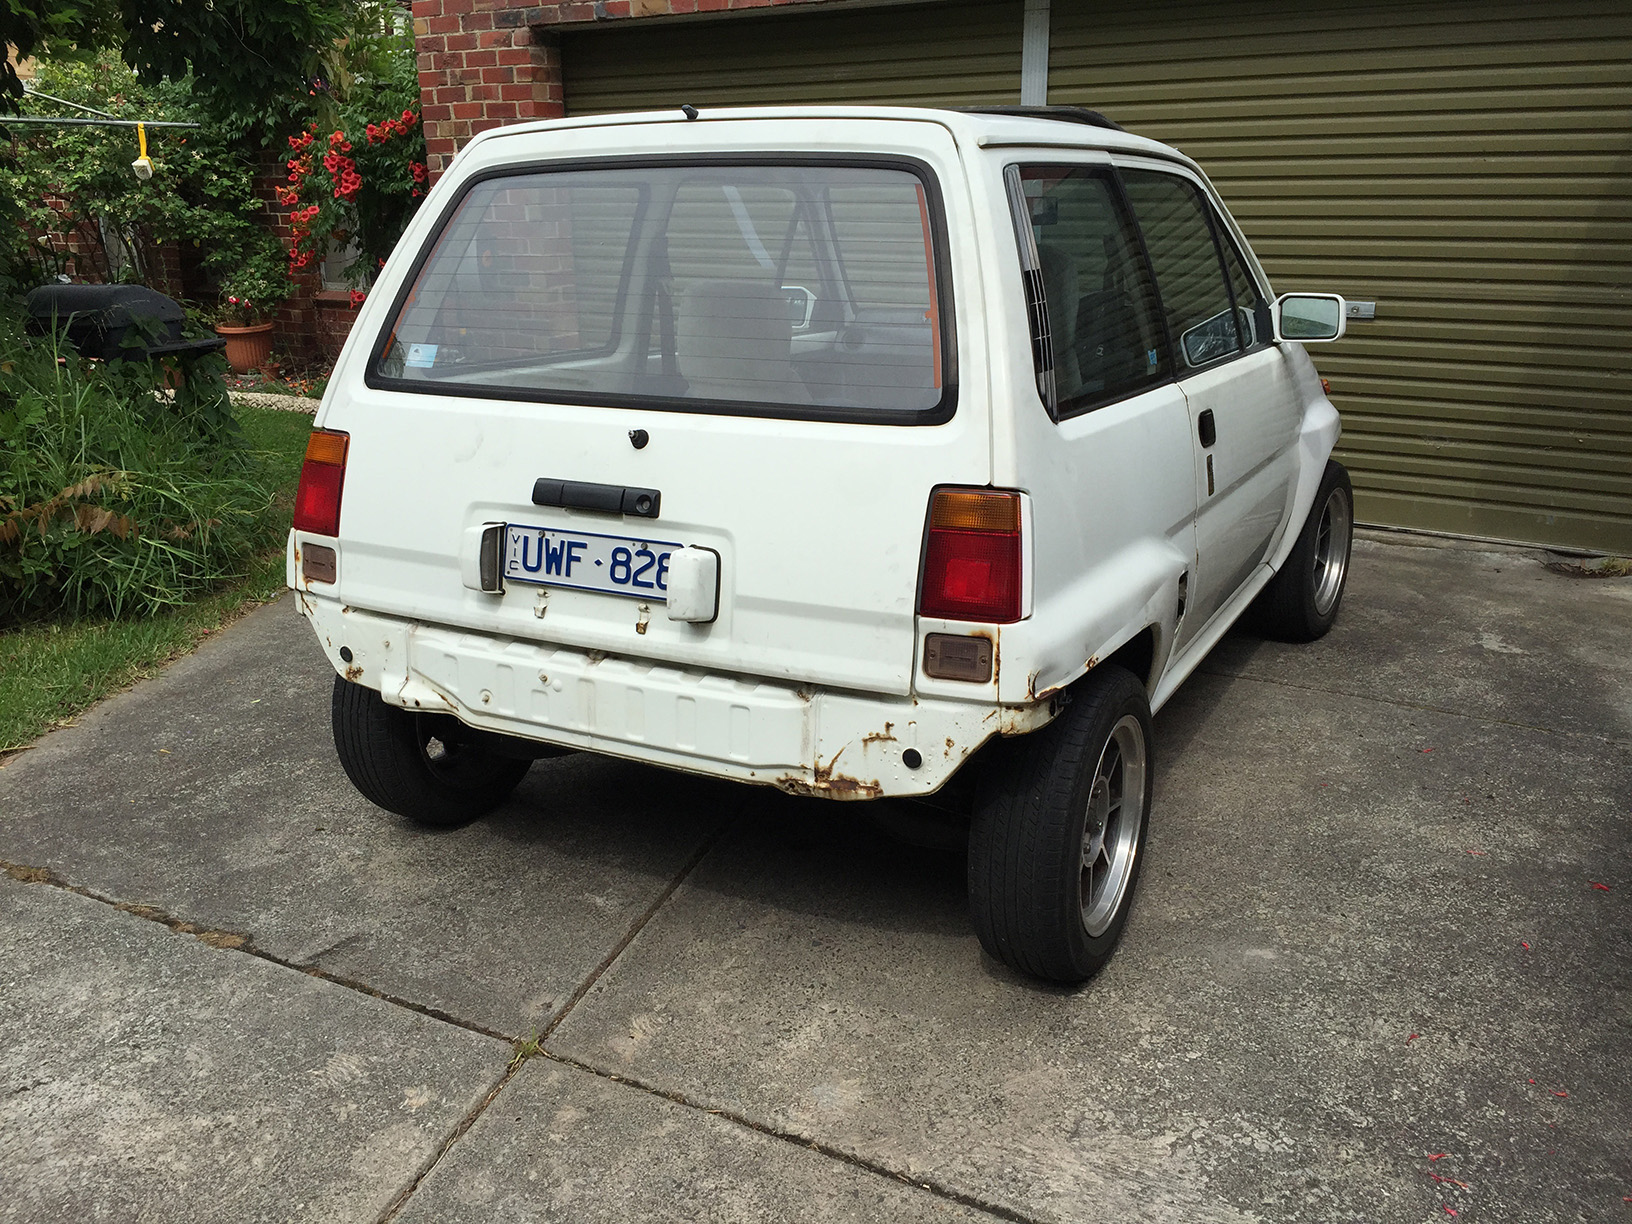
Bumper back on! The car goes to Tony’s tonight to strip the sound deadening. We thought it would be a little less attention grabbing if it had the bumper on it.
So much clear space around it in the garage now. We’re almost down to having no parts waiting to go back onto it.
– – – – – –
Yesterday we moved Honderp to Tony’s as there’s a bit more space between his neighbours to make loud banging noises with hammers and things. In the end that didn’t really matter too much.
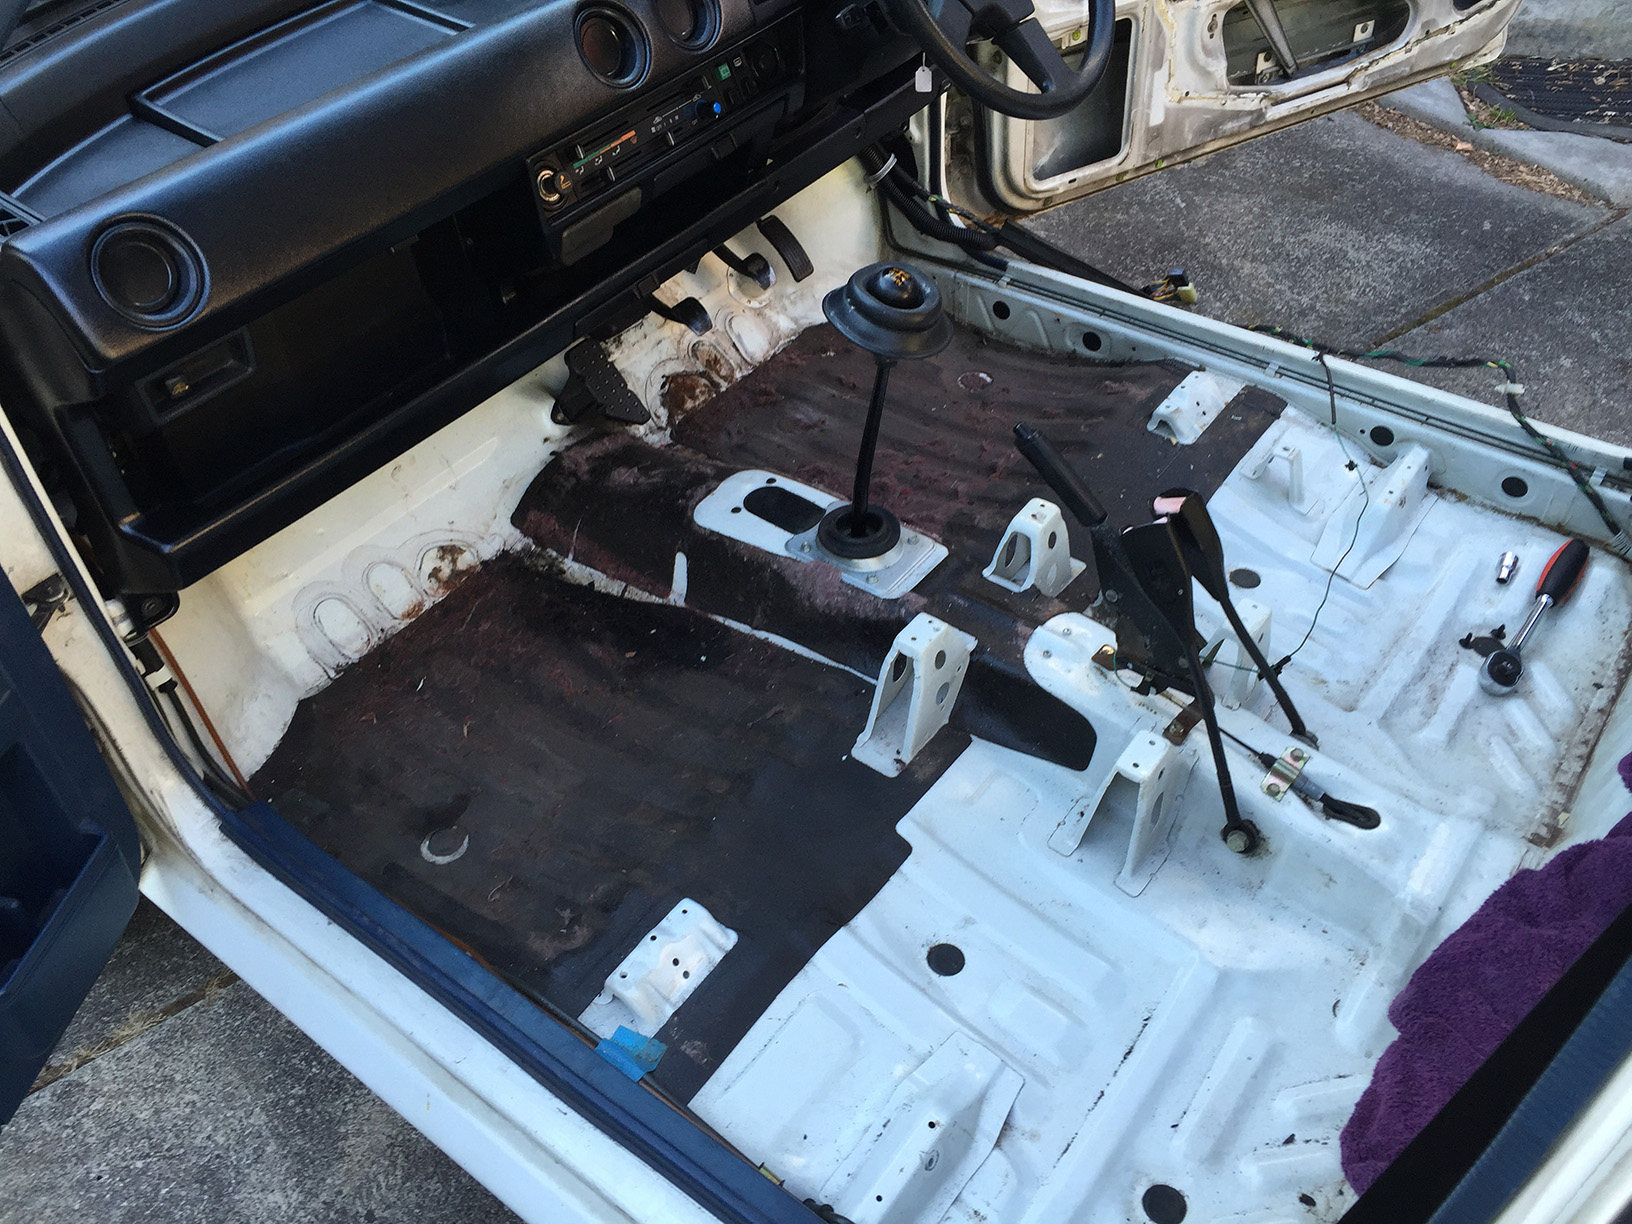
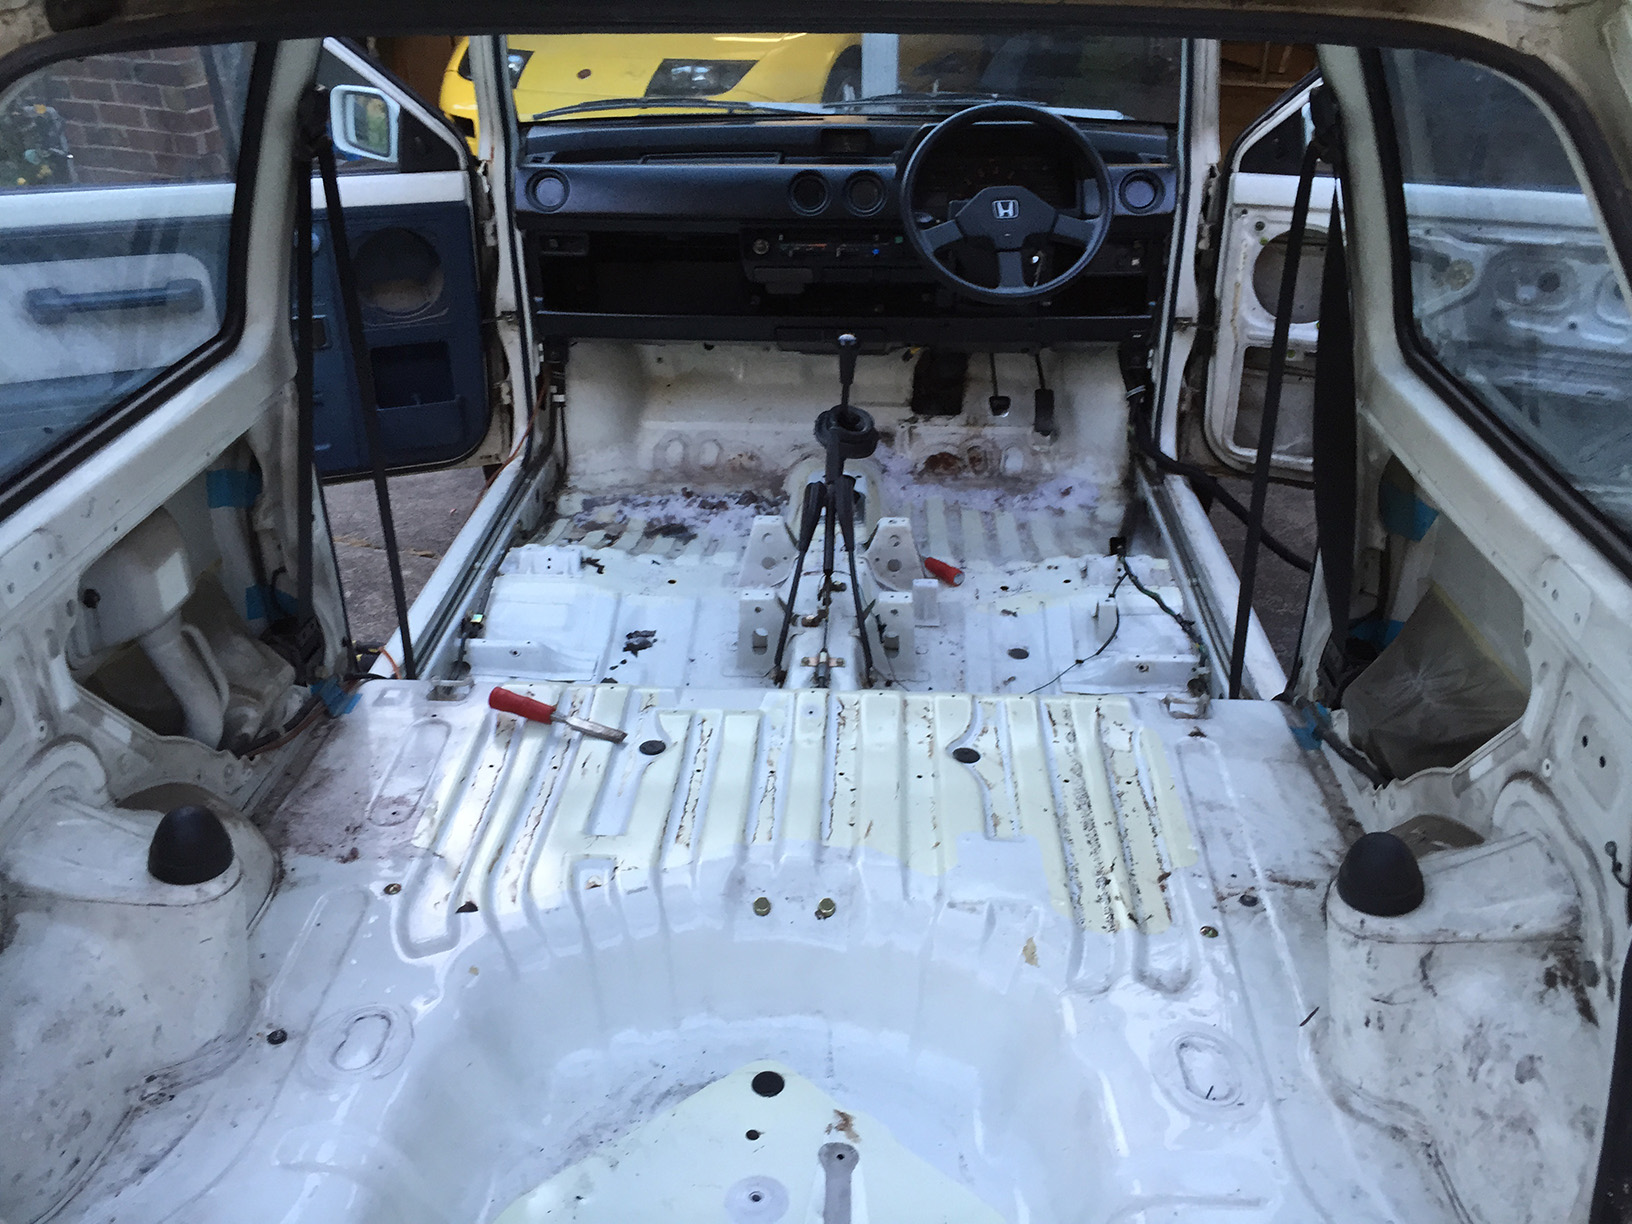
The big job was stripping the sound deadening. Tony picked up 7kg of dry ice pellets from BOC that afternoon so we got to work as soon as possible.
I’ve always wanted to try this. Tony used the same method on the back half of his Z32. He had two types of tar matting in that car, one that responded well to dry ice and one that didn’t. We weren’t sure what the City was going to be like.
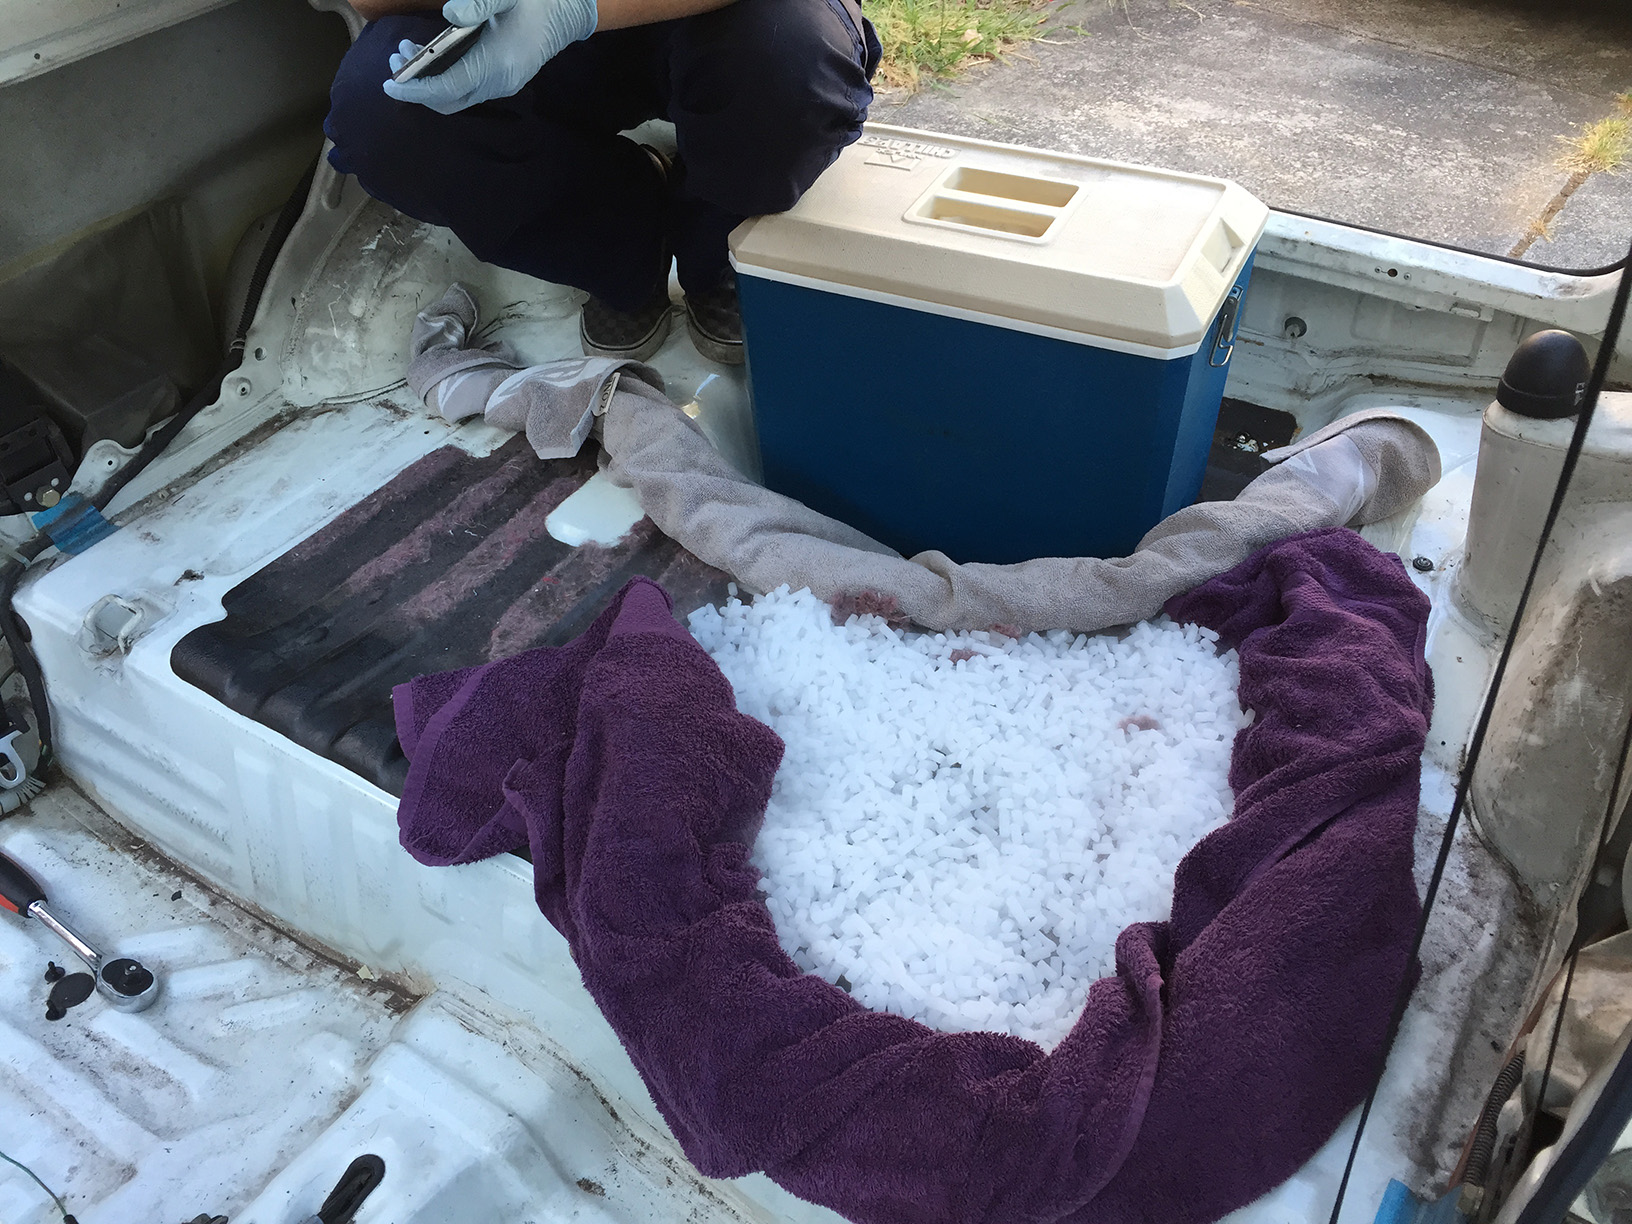
But it soon became clear that this was going to work out well. You could hear the black matting start to crack very quickly once the ice touched it.
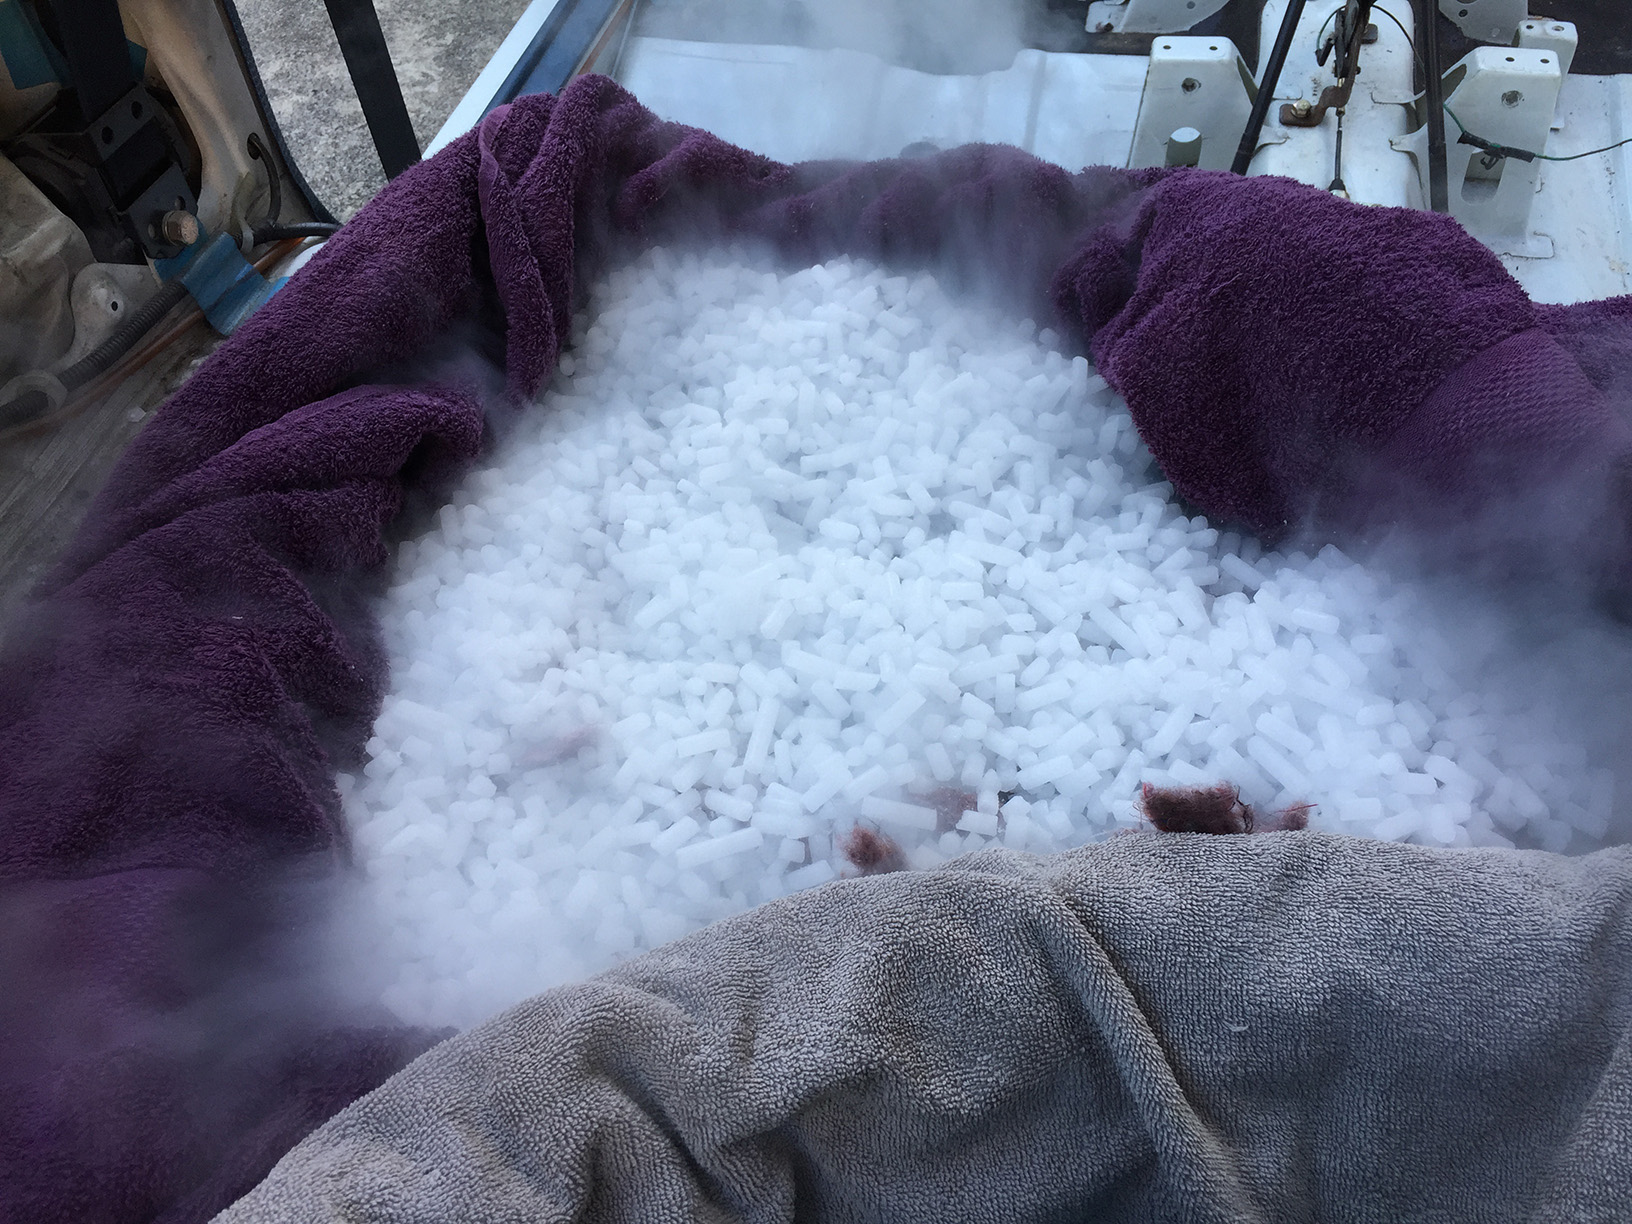
Awesome stuff. By far the best way to do it. Most of it lifted off by hand. We barely needed to chip away at it.
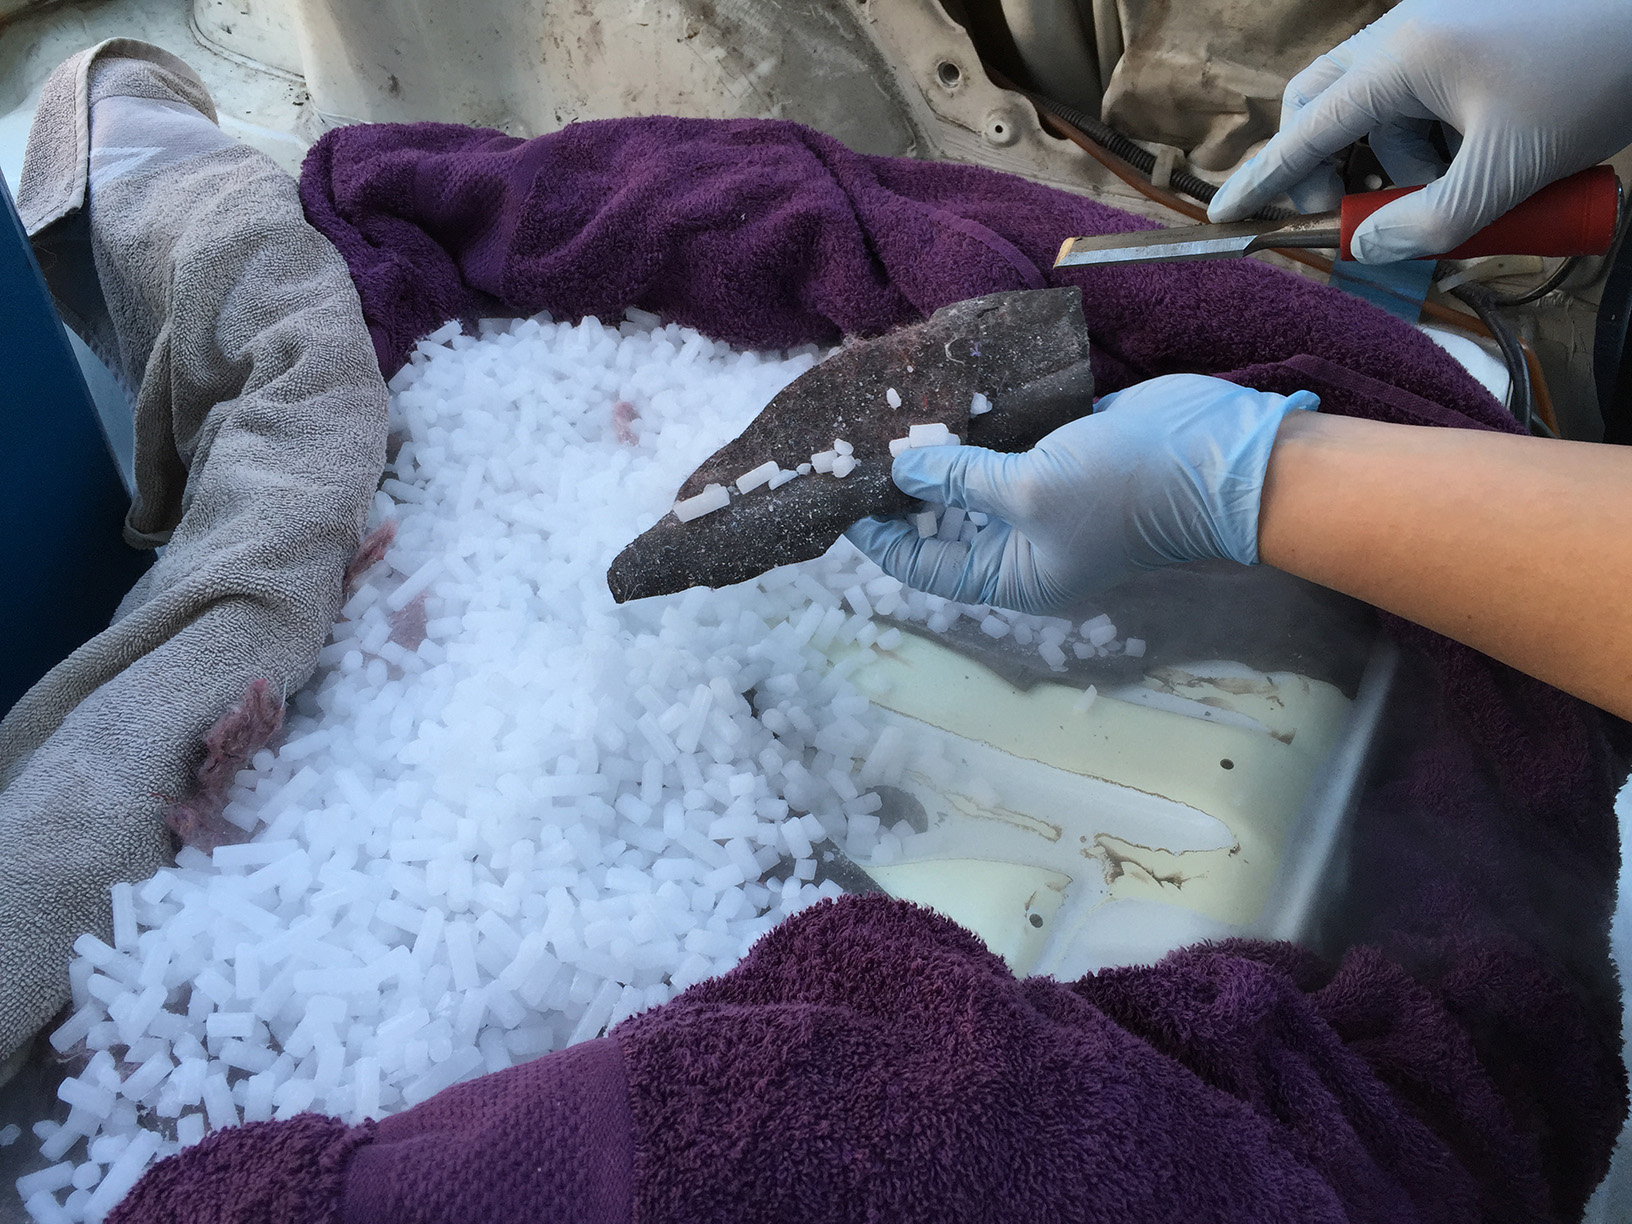
The back half seemed a little easier to lift off, most of it coming away in big chunks like this.
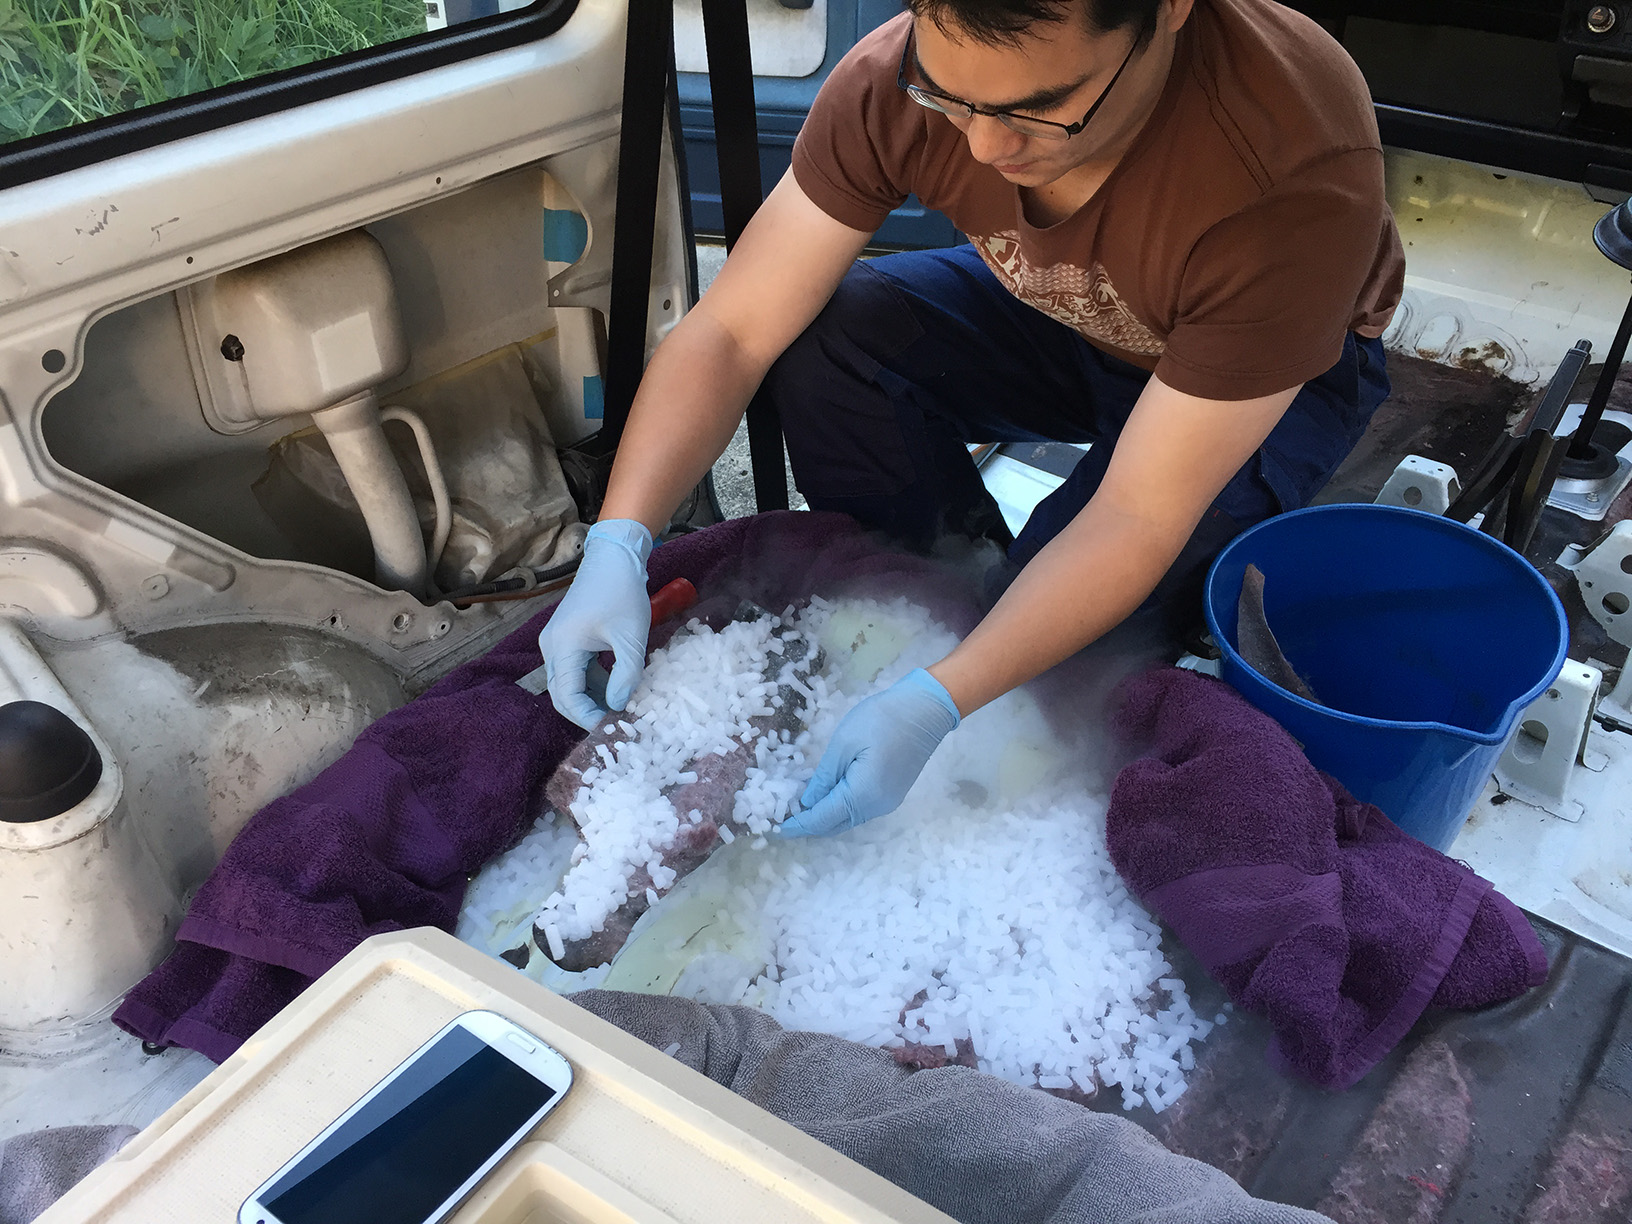
We started to worry about running out of pellets so I stopped taking photos and we got to work on the front half. In the end 7kg worked out to be the perfect amount. We had a small amount left which is what you can see evaporating in the footwells.
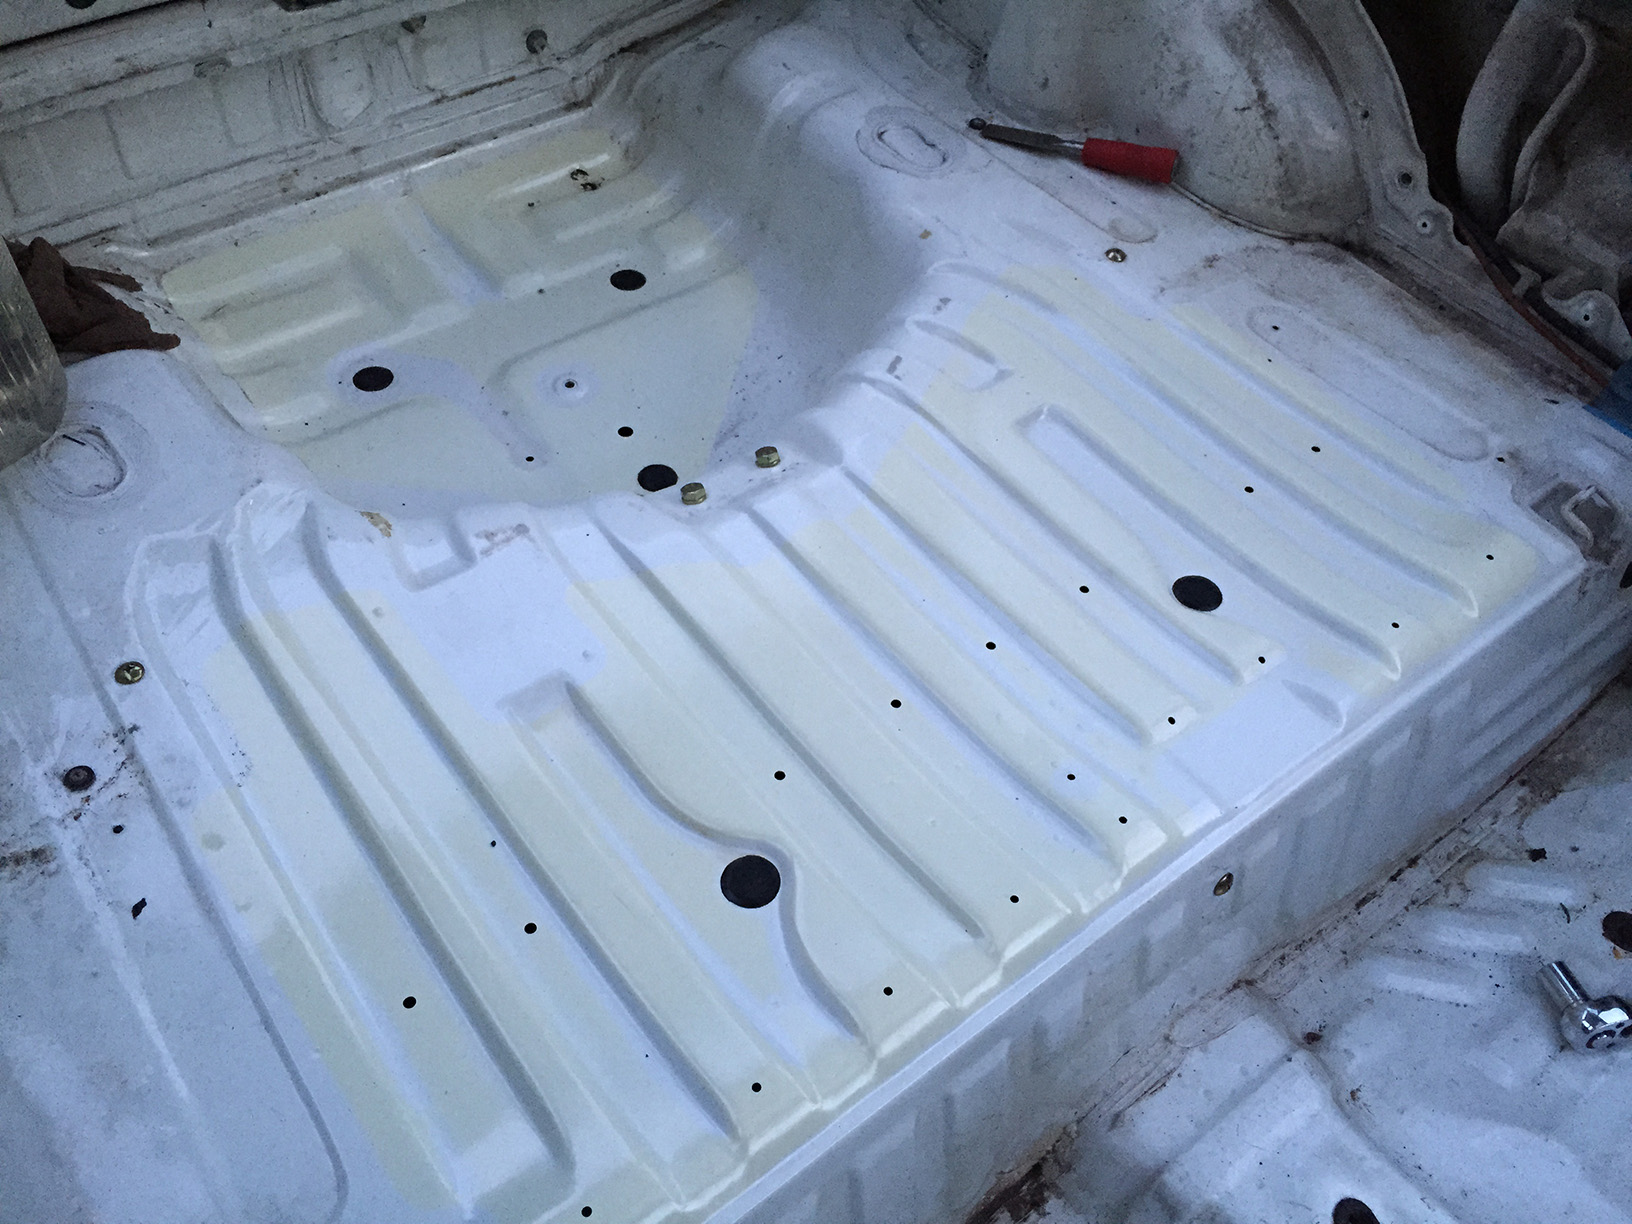
A bit of turps takes care of the leftover residue. This is how it looks after a quick clean.
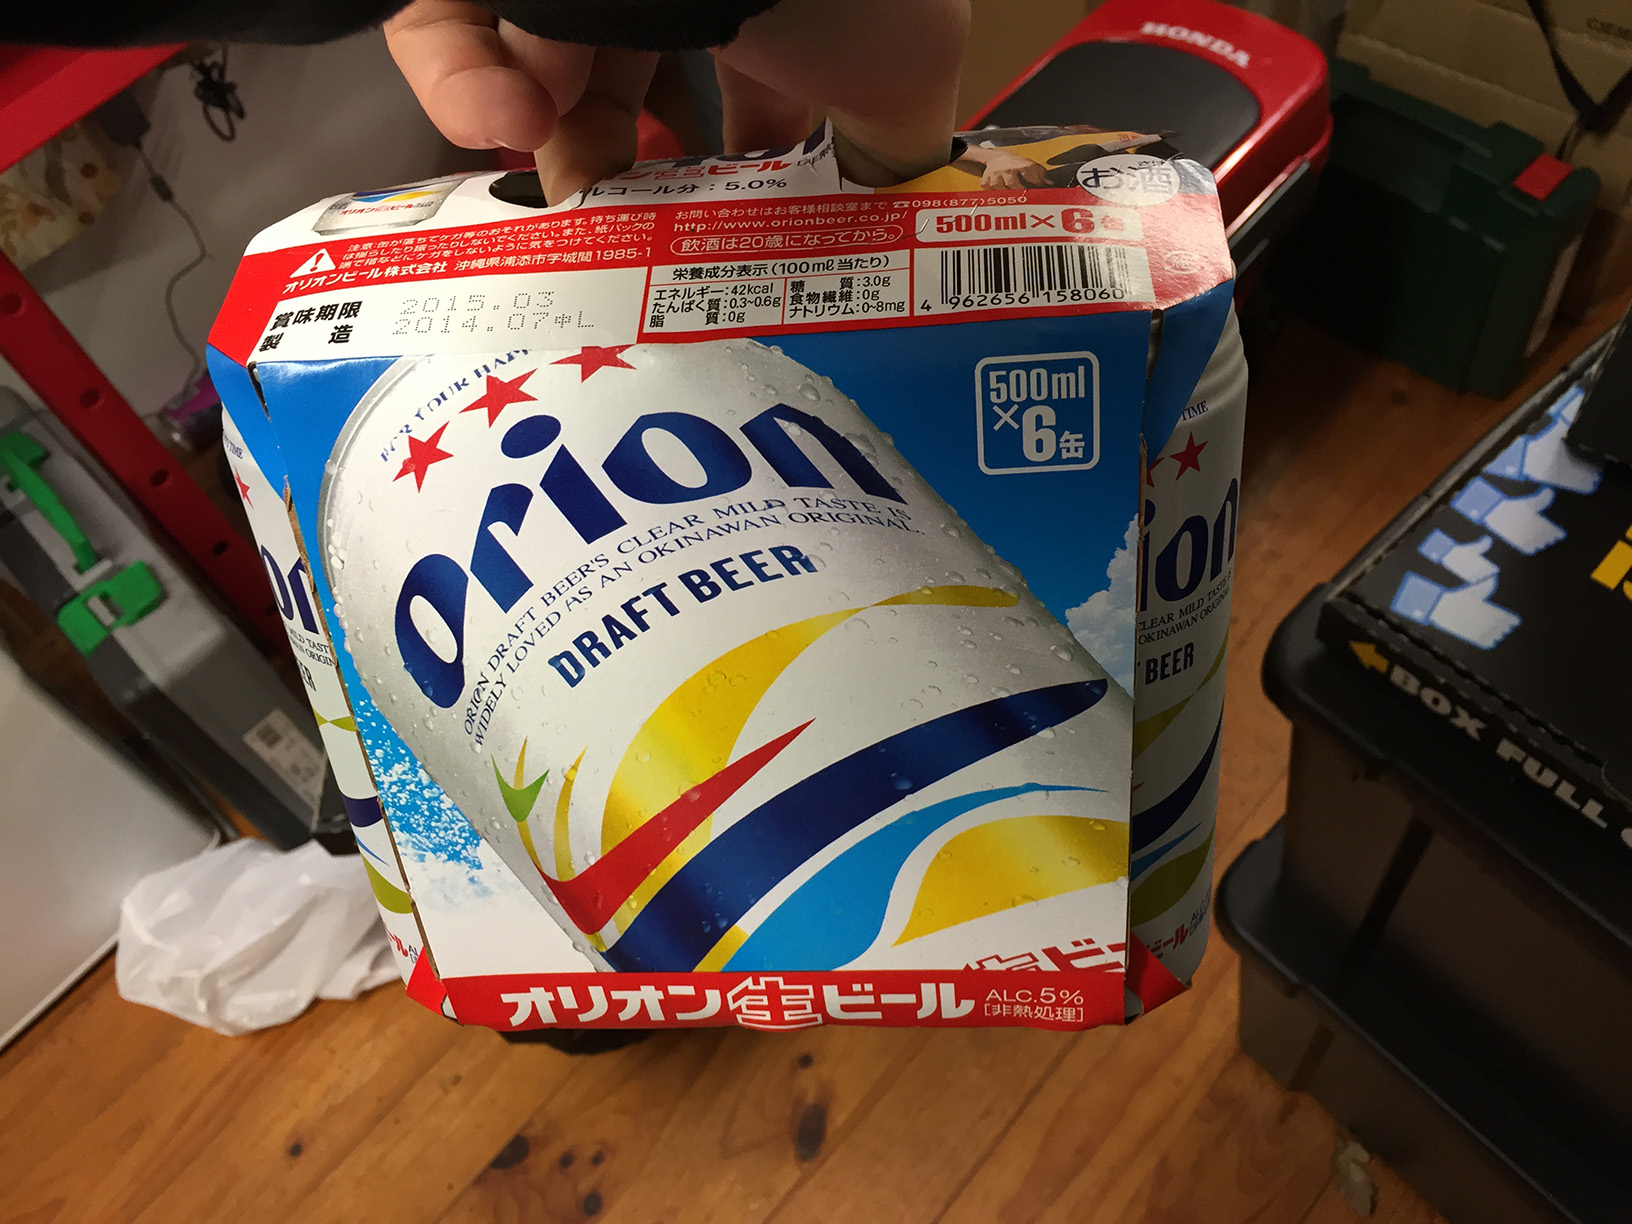
Dinner time essentials.
We moved the car into the garage and Tony hit the front half with turps. It got dark and I didn’t get a snap of the whole floor cleaned up. Will do soon. It looks good!
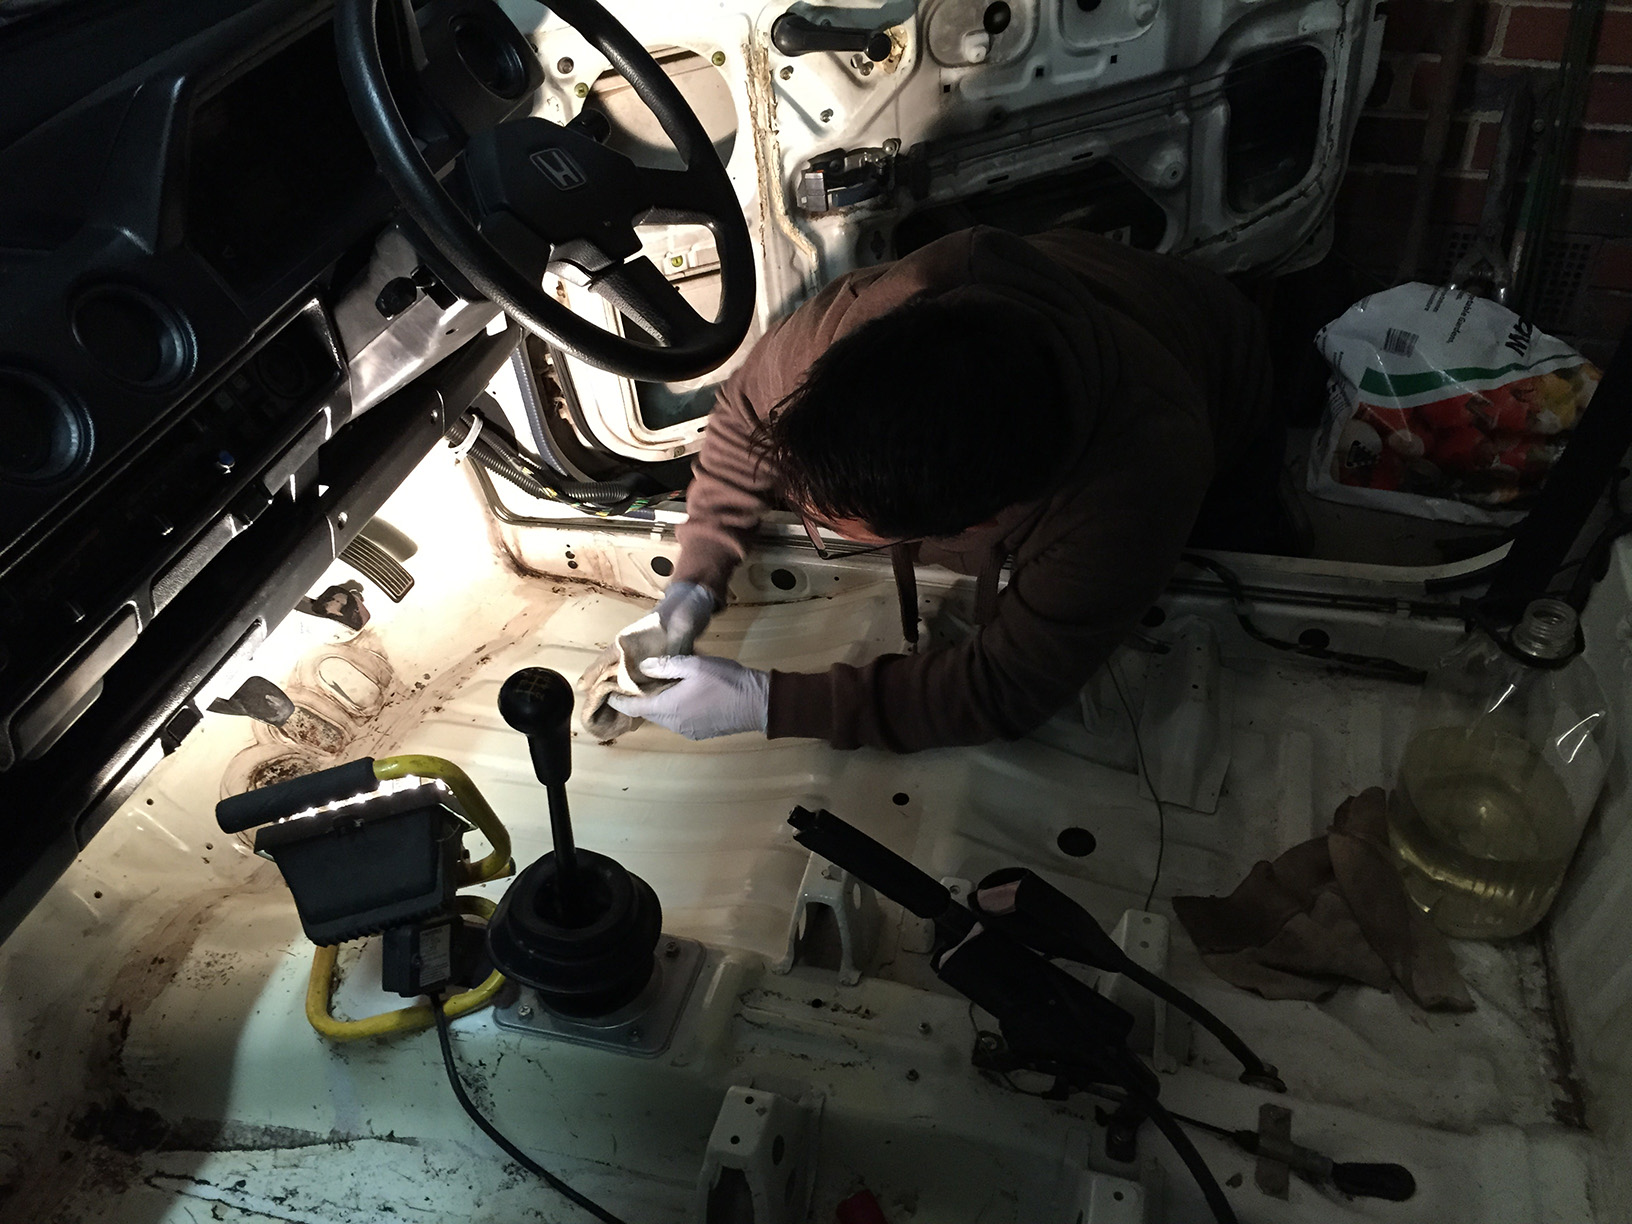
I started cleaning off the old decals with a caramel wheel. Great tool, this.
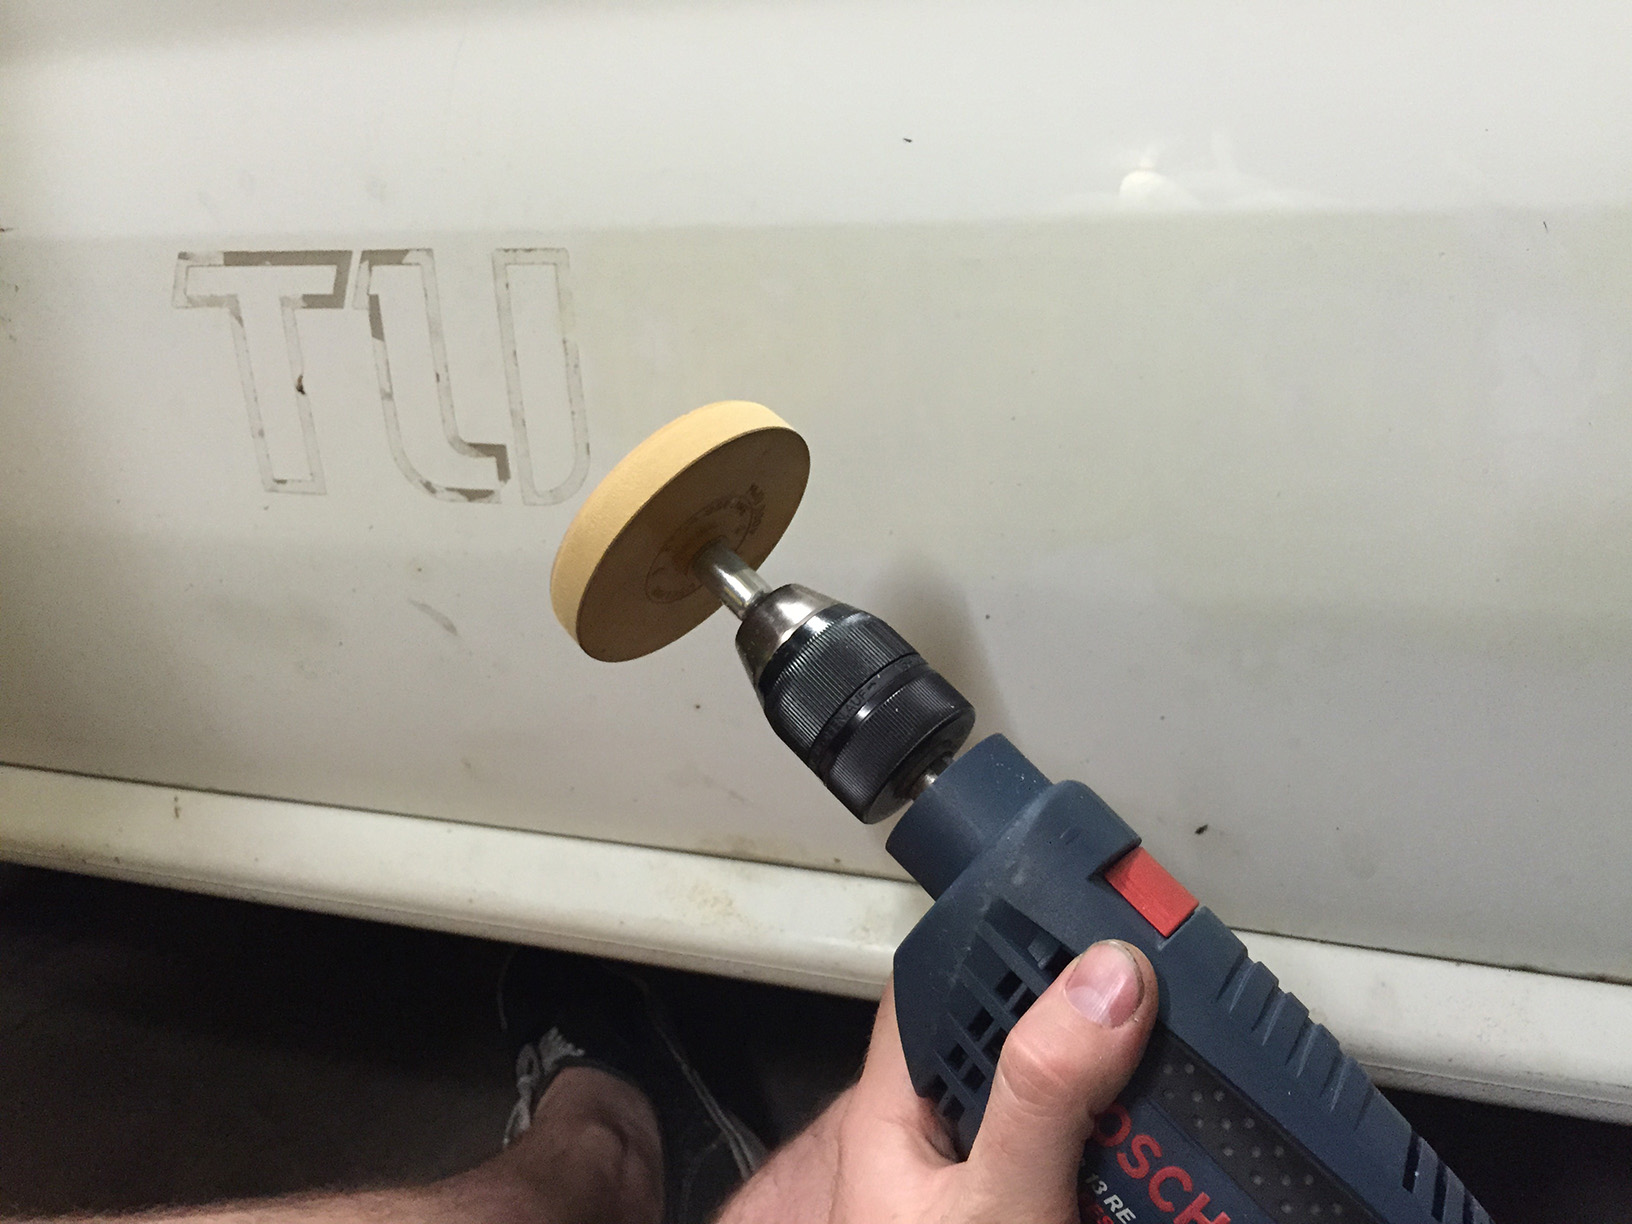
I used a solvent paint cleaner on the door and front quarter panel to see how it would scrub up. Surprisingly not too bad!
Plan is to go over the whole car with this stuff and get rid of all the greasy fingerprints, then give it a good wash to bring the paint up as much as possible before applying the new decals.
Front and rear bumper bars will get a new coat of paint at the same time. All of this hopefully before next Sunday! Wish us luck.
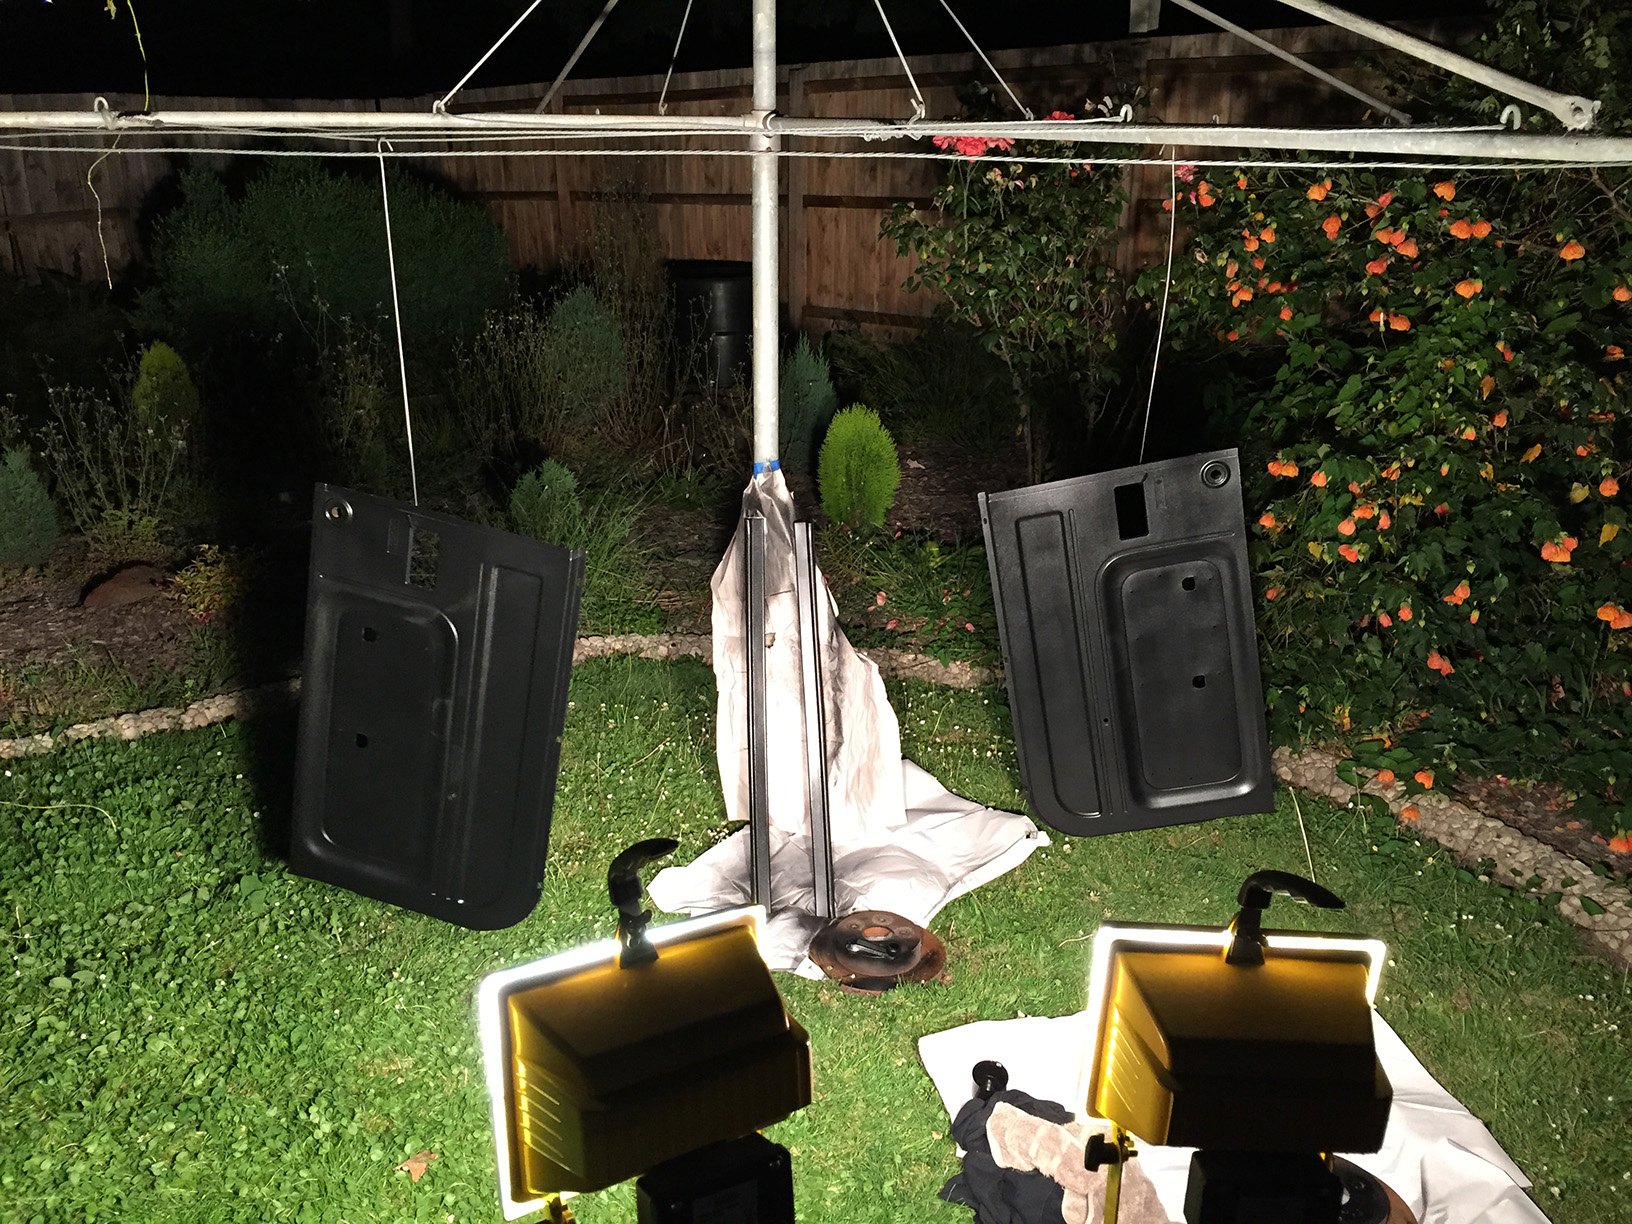
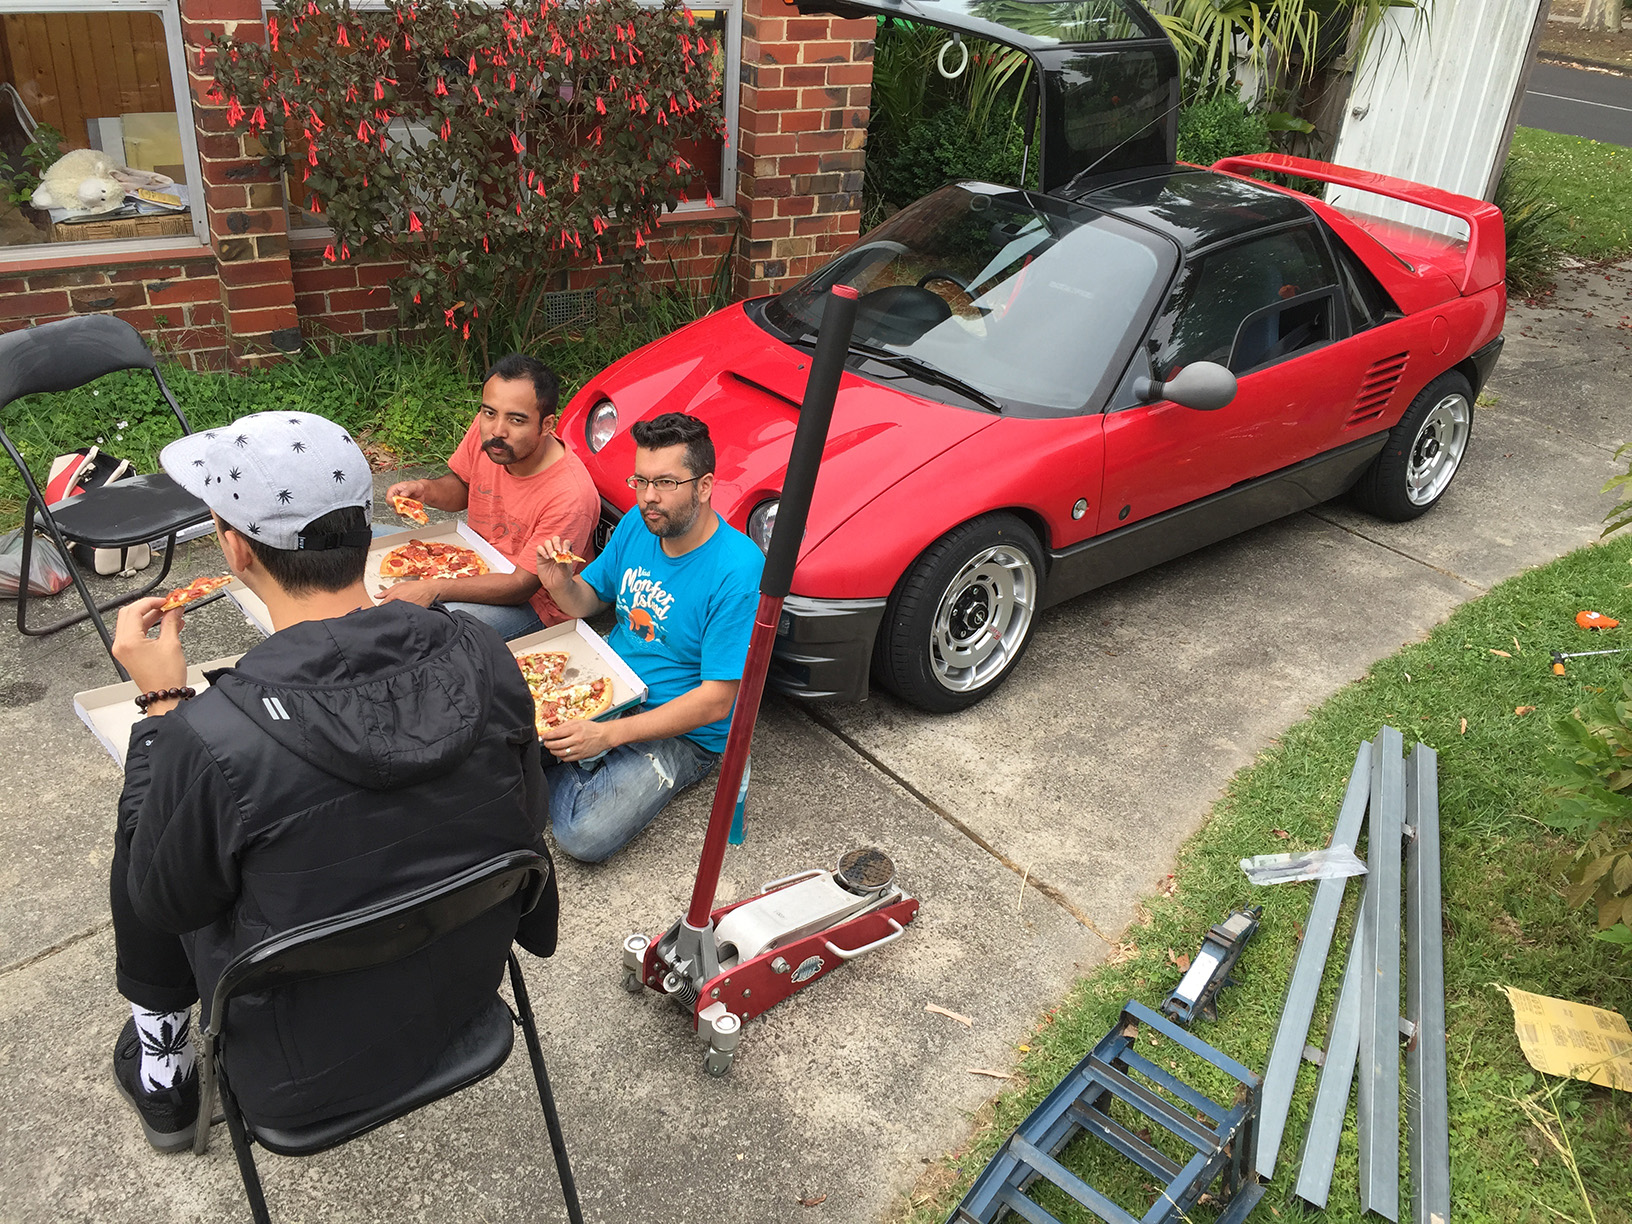
Worked on it in between helping a couple of mates change rear brakes on an AZ-1 in prep for its RWC retest today. It’ll hopefully be with us at Classic Japan. The trusty Hills Hoist doubled as a vinyl dye spray booth.

Turning everything black. Including the grass.
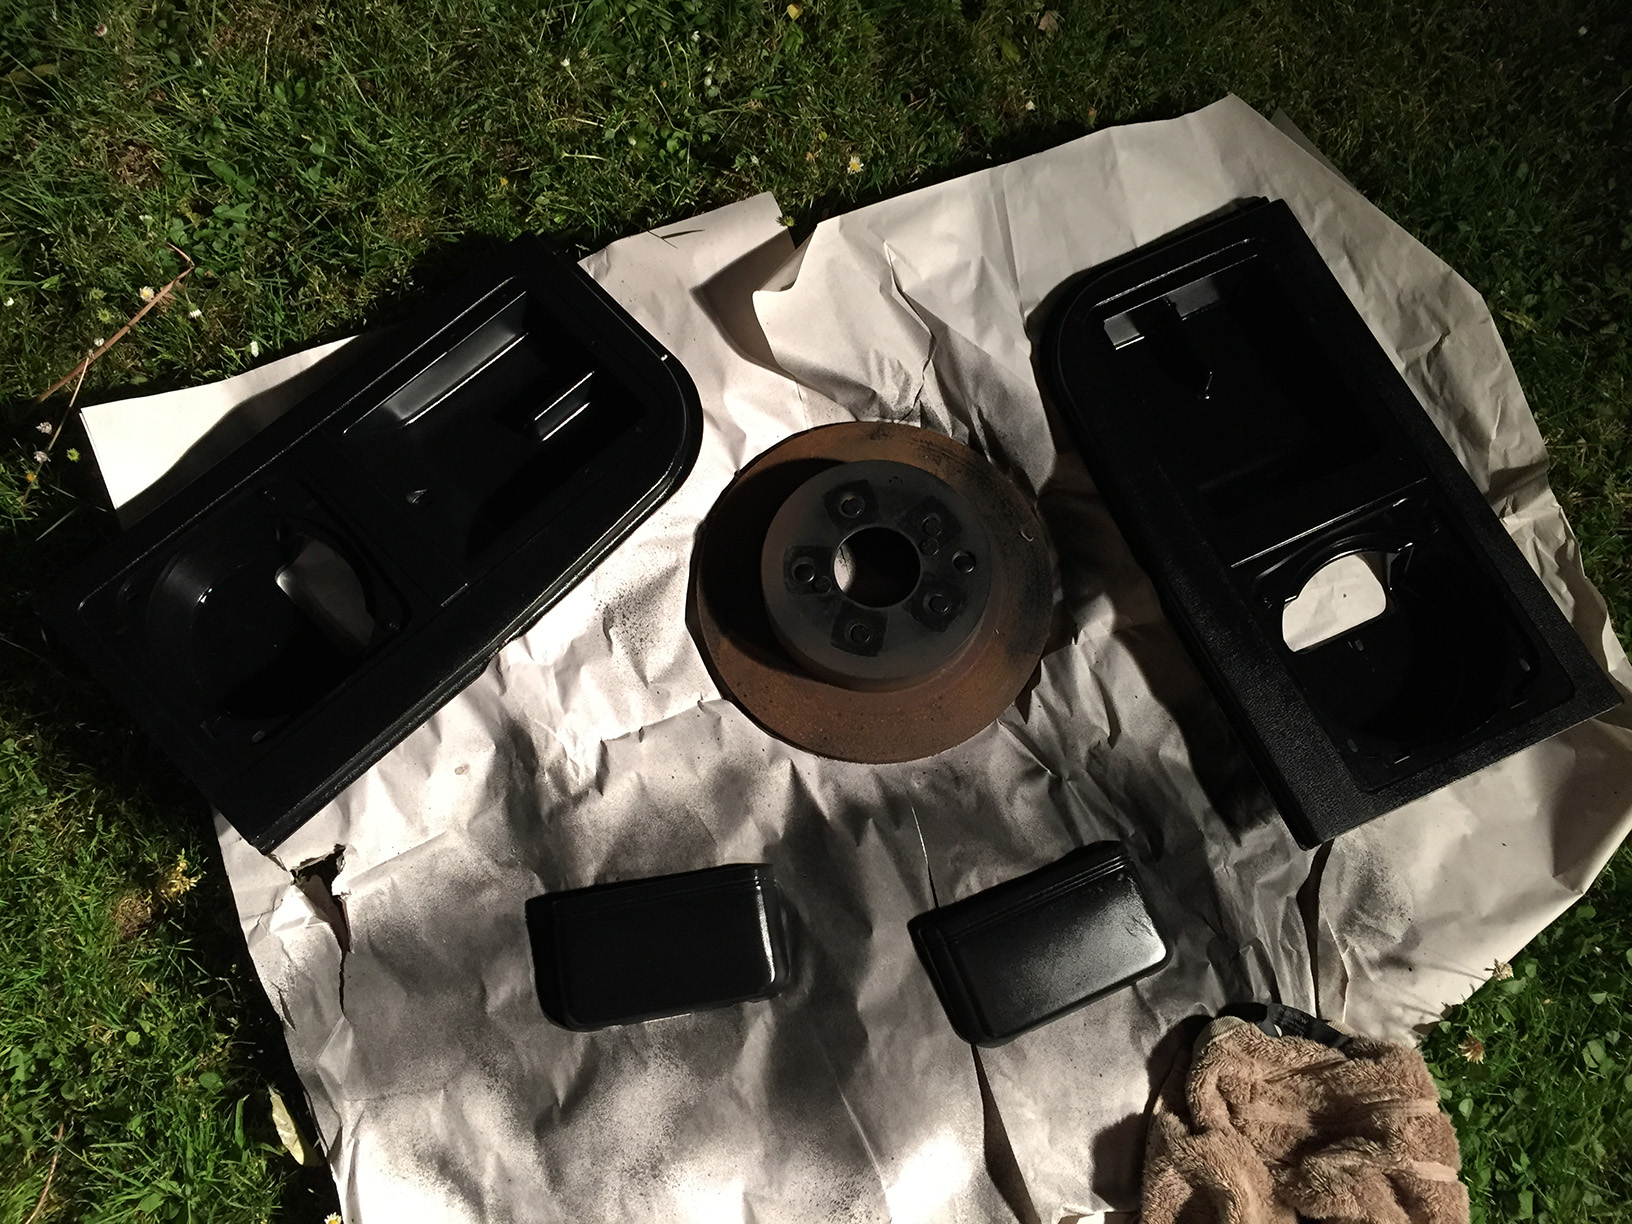
An old brake rotor was the perfect holster for the little press clips I needed to dye.
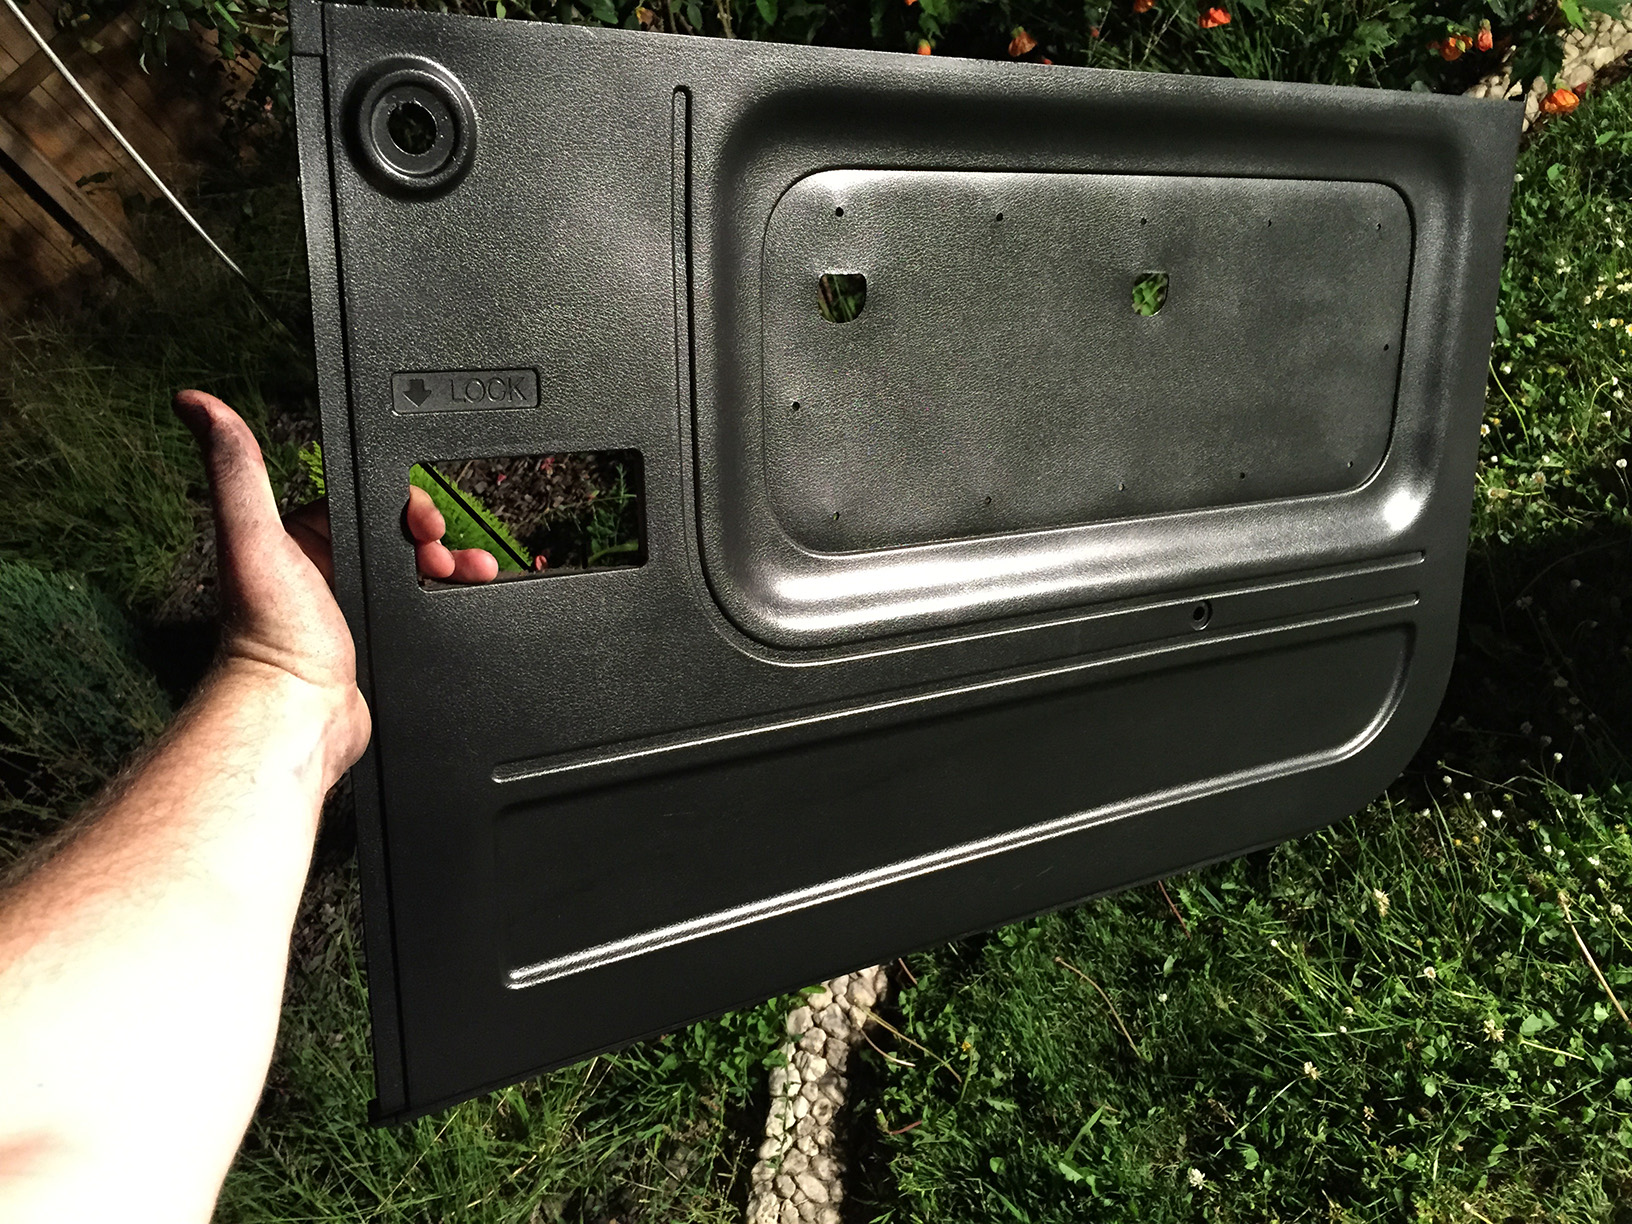
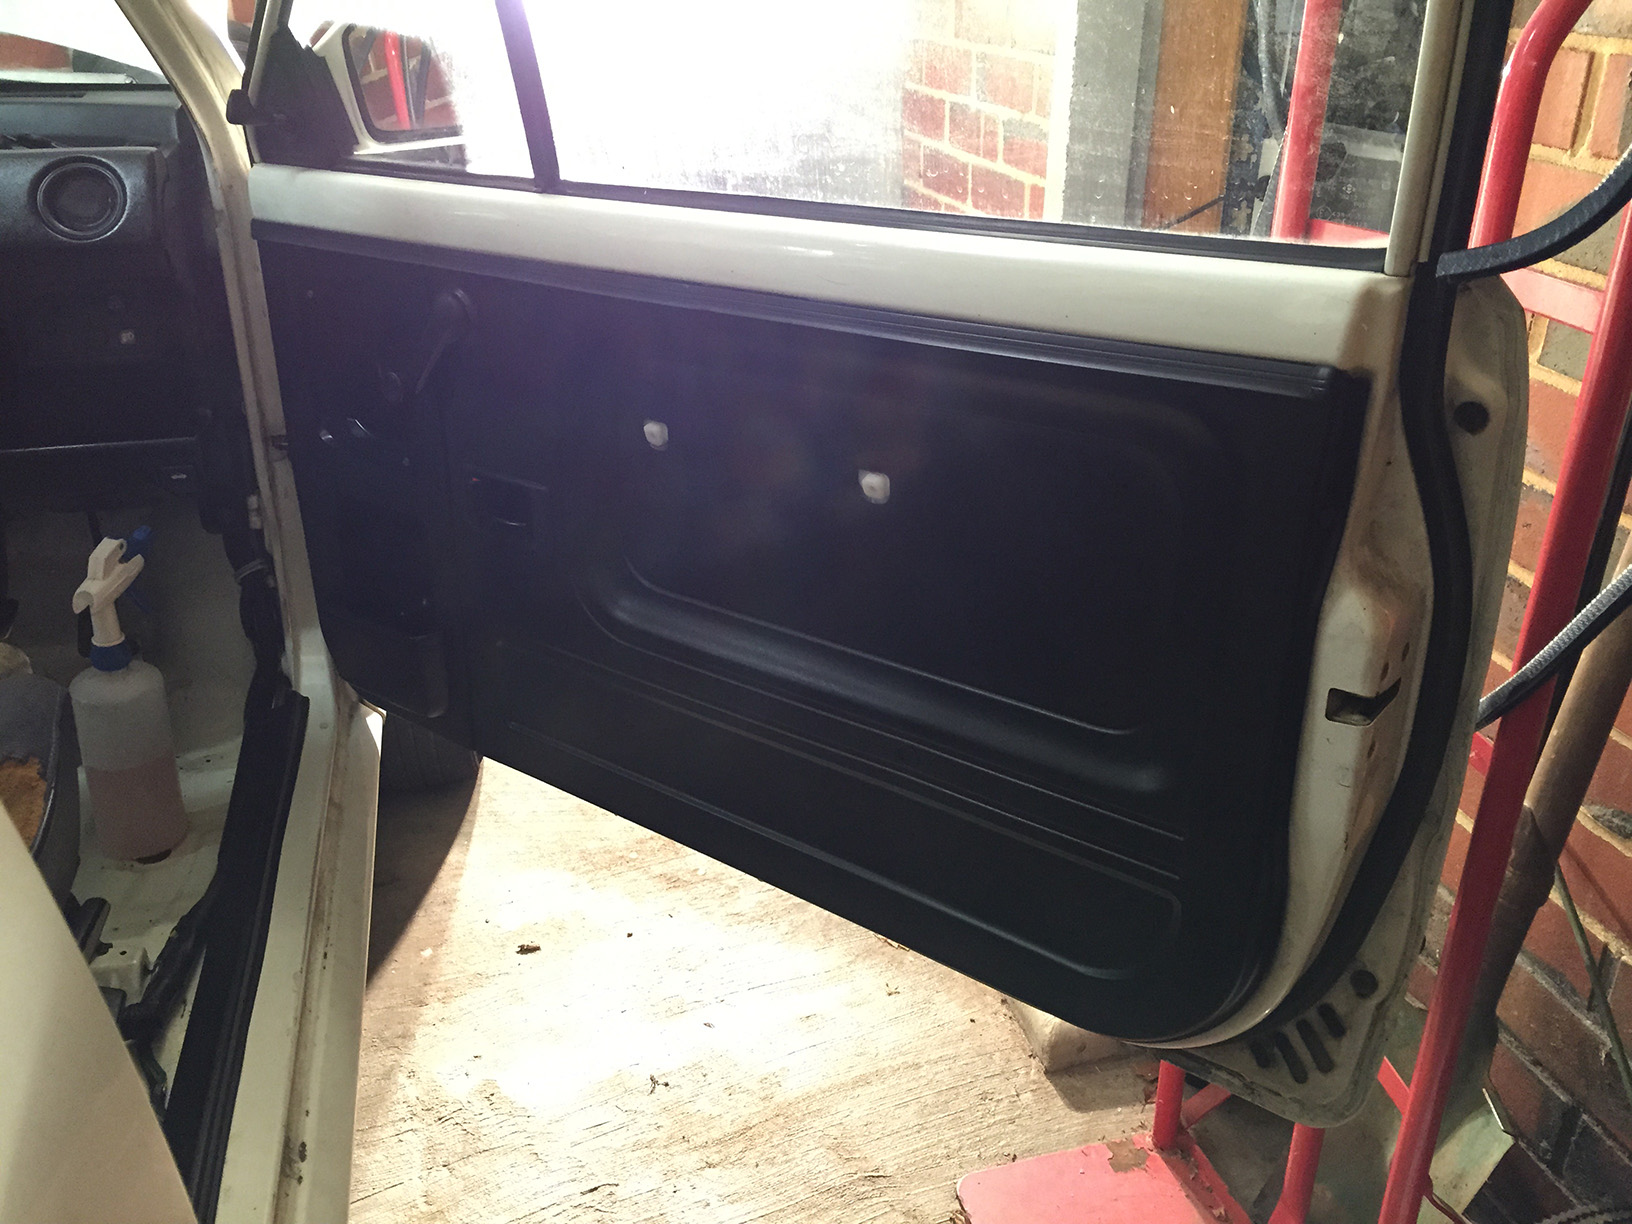
Quite happy with the finish on the doors. Unfortunately both sides had been badly sun damaged, so the dye is a little uneven in patches but it’s way better than the faded mess they were before. You’ll also notice the speed holes from where I removed the fabric inserts.
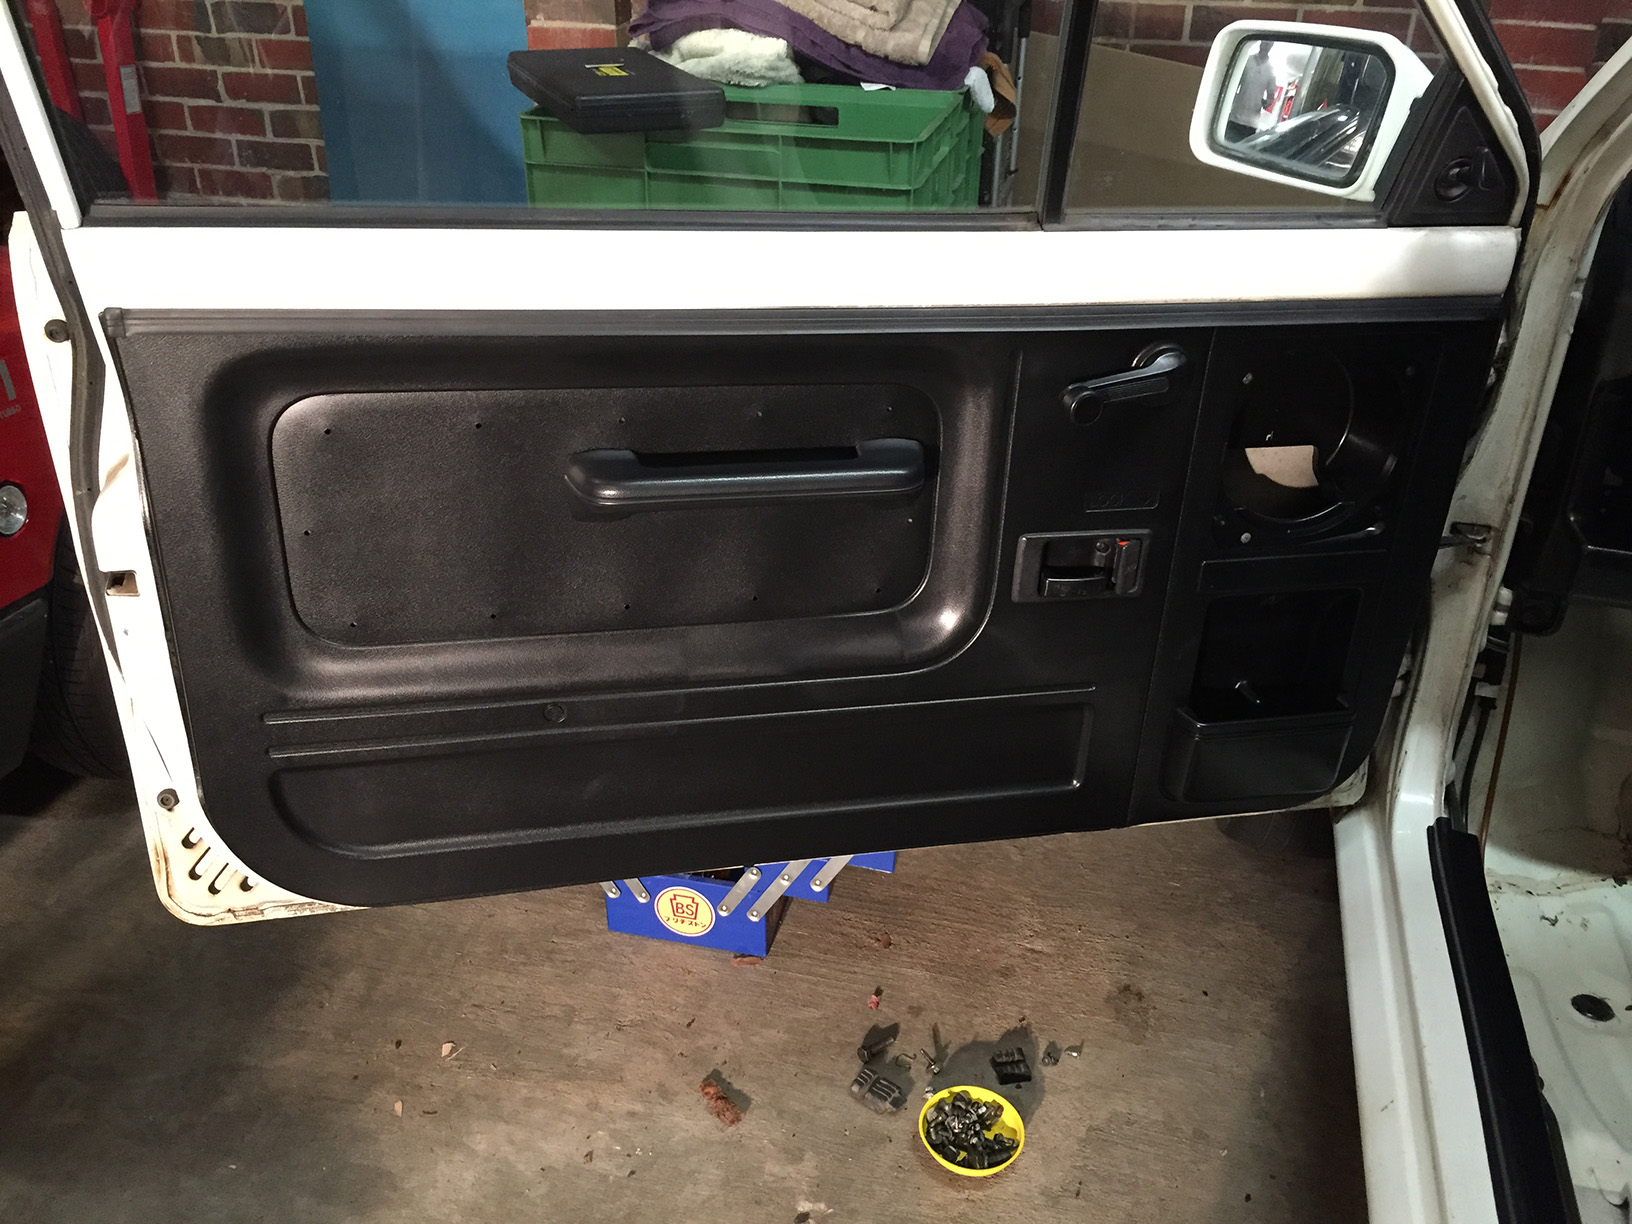
Passenger door finished. We’re leaving the speaker grilles off as ours were ruined by having aftermarket speakers drilled into them.
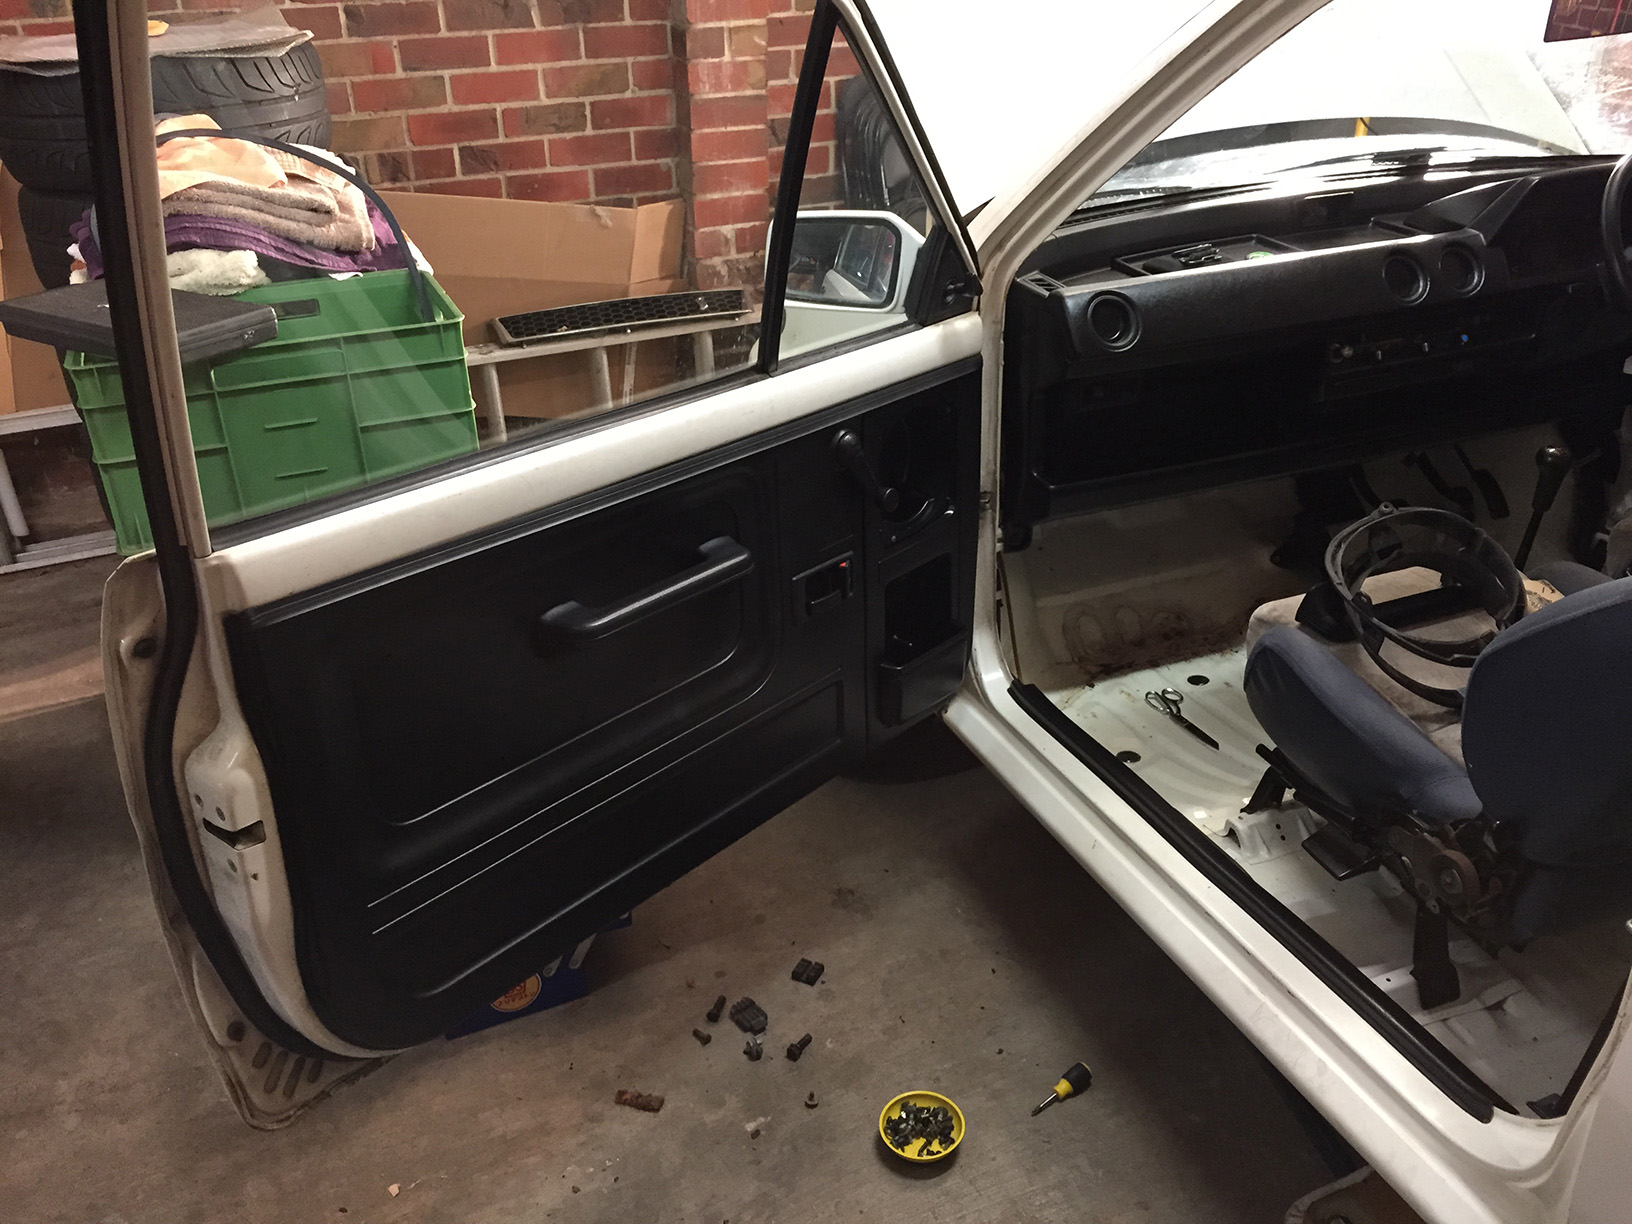
You can see the strip that runs along the bottom of the door opening is also dyed black now. We’re sorting out some black pinch weld to go around the rest of it. Our seats are really letting the interior down now. We’ve got a couple of black covers to throw over them but if anyone sees anything suitable for cheap, let us know.
 Driver’s side done with the exception of the inside handle. I forgot to bring the screws for that.
– – – – – – –
Woke up this morning with a head full of fumes. Here’s what we’ve been up to.
Last night we started work on the bumper bars. This is a budget build after all, so we’re doing the work ourselves. The front bar was in a right state when we got it, and the rear bar is from a Cabrio and has no paint at all, so we figure we can’t exactly make them any worse.
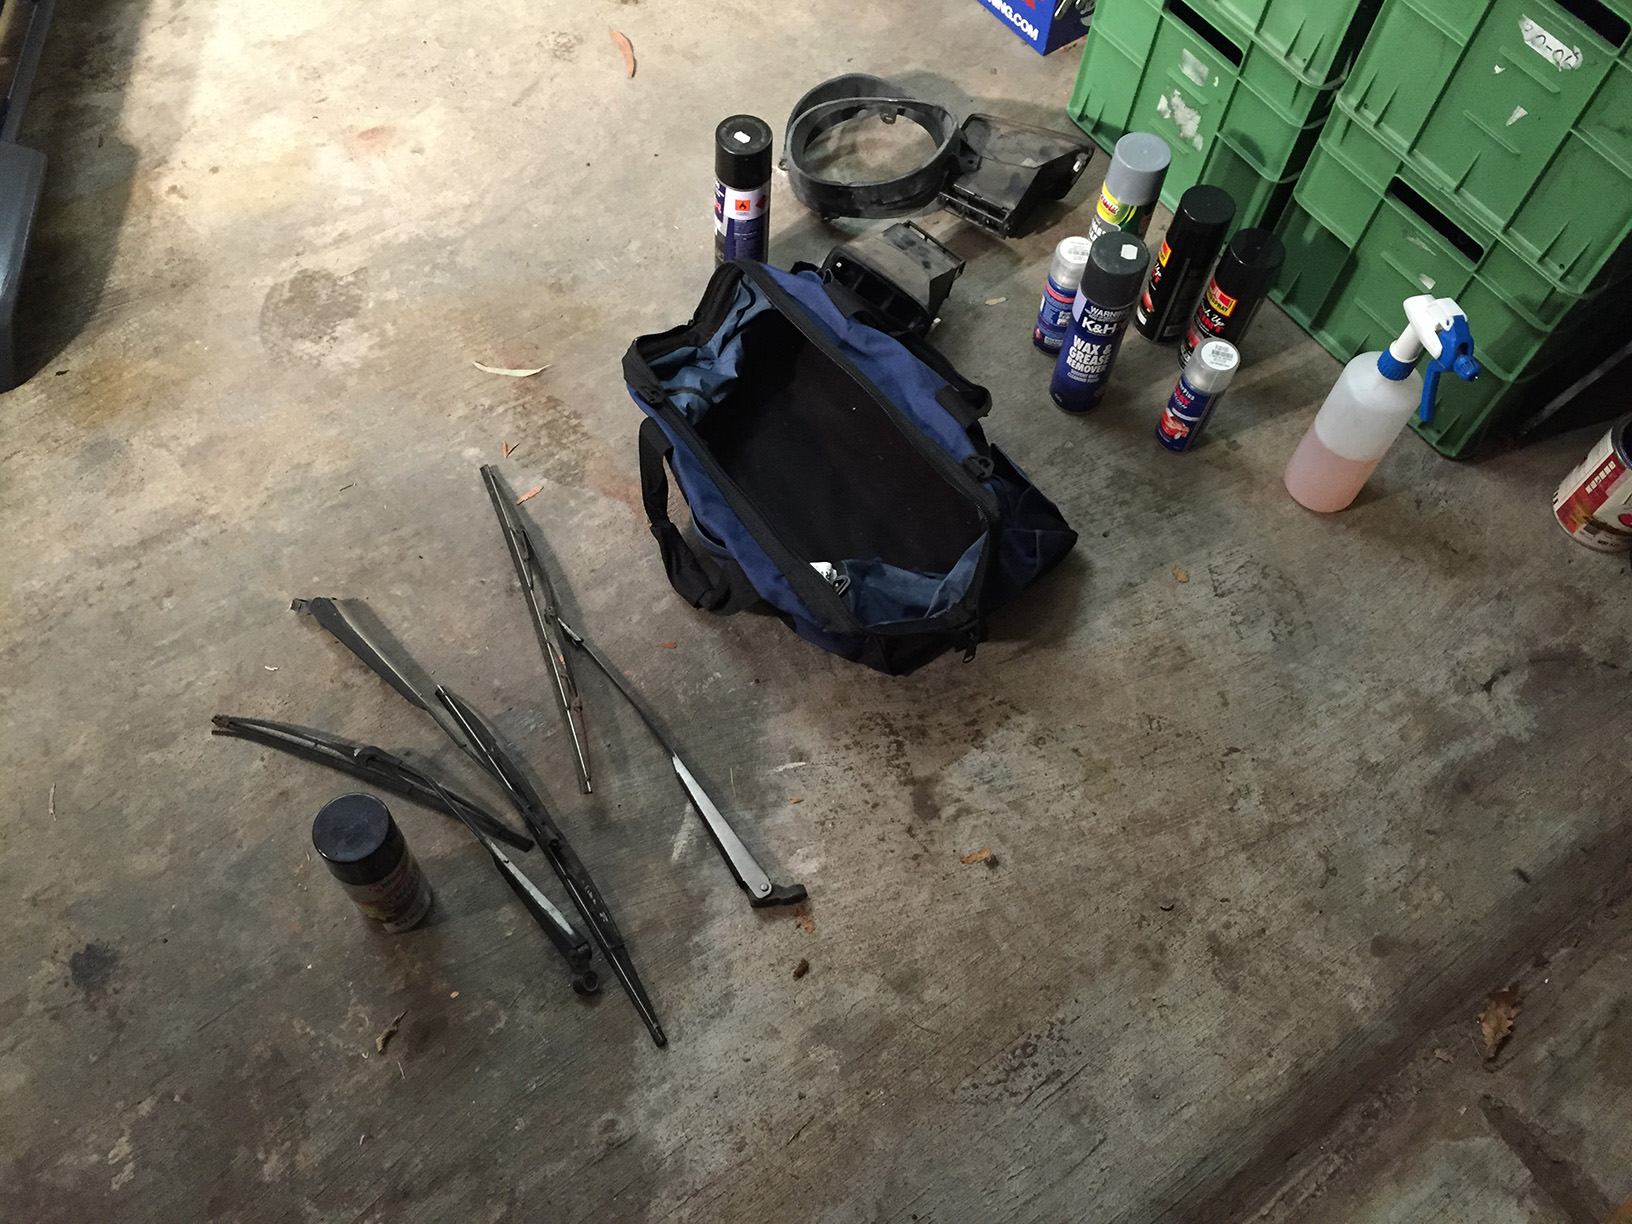
We’re painting them at Tony’s place. I also took the wiper arms, headlight surrounds and side ducts over for a lick of duco.
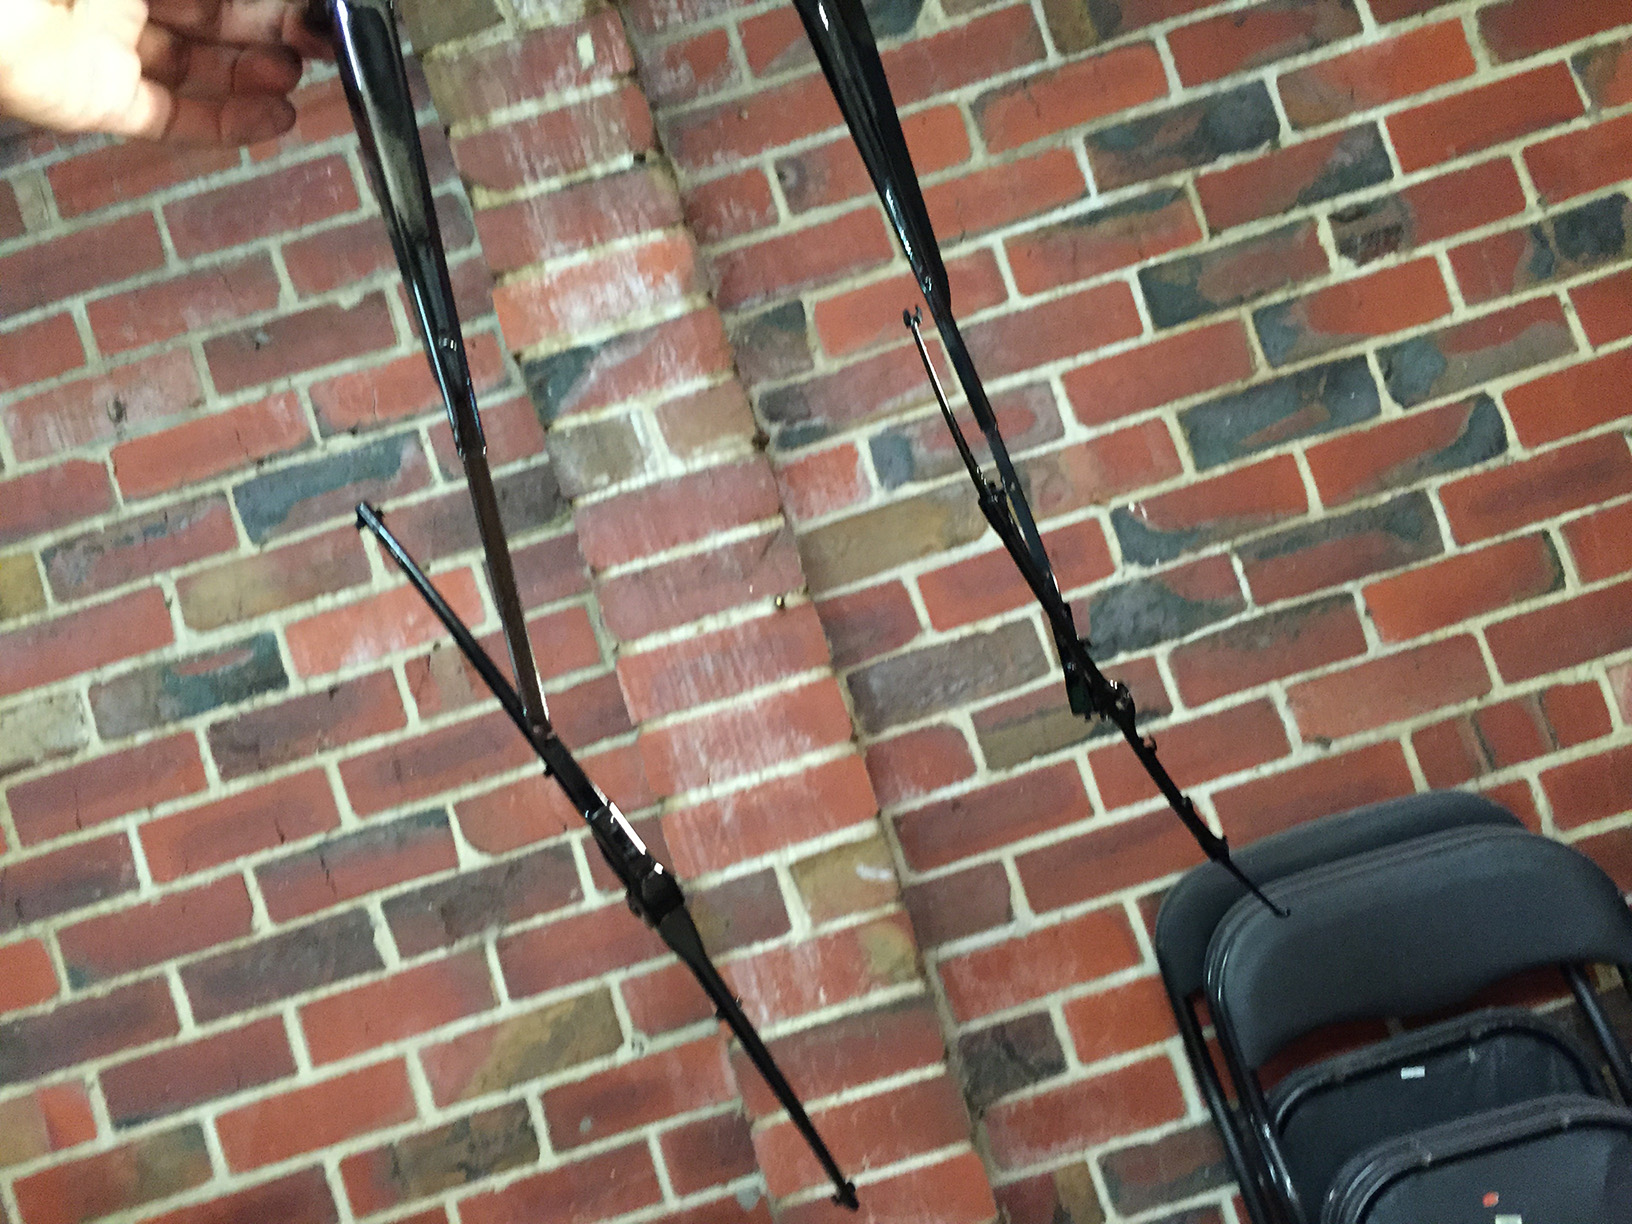
Hit the wipers with a quick coat of some old Motortech gloss black I had in a rattle can. This stuff costs less than $4 but the wipers came up well with absolutely no effort at all.
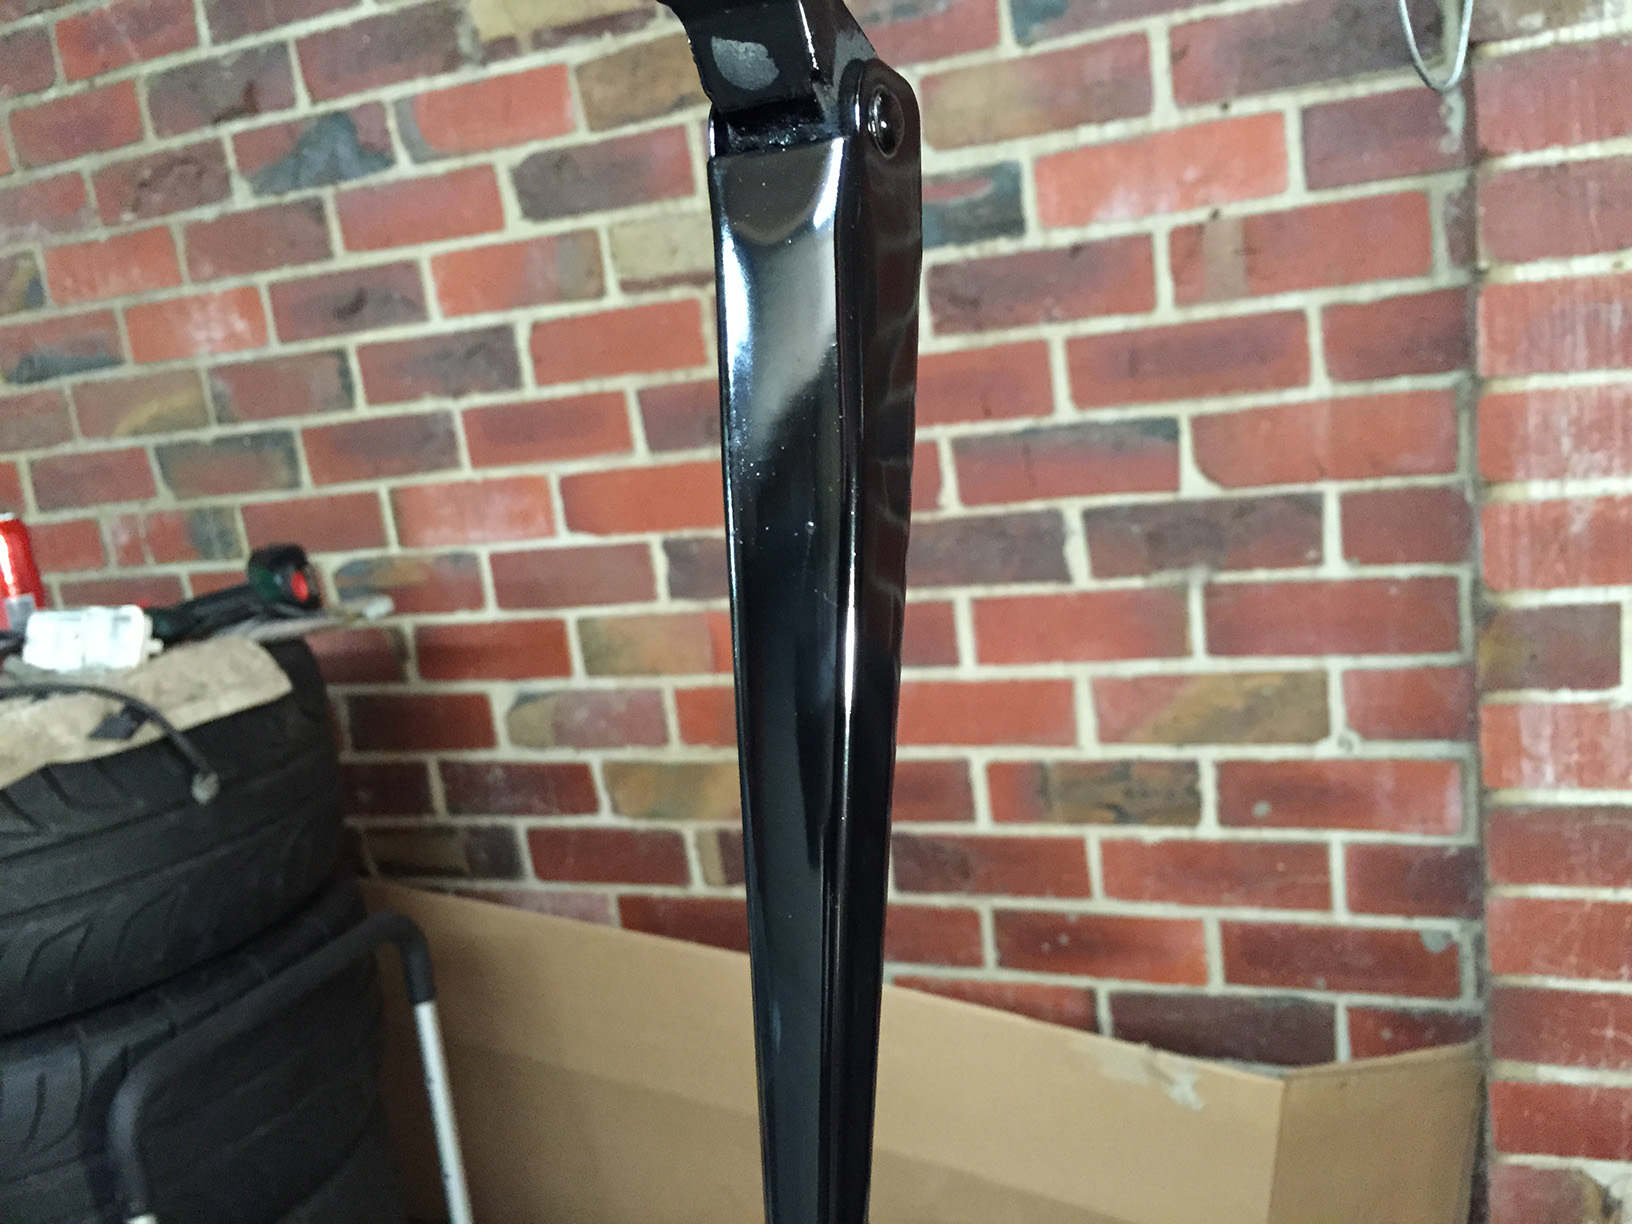
Honestly, this was the laziest spray job, but they’re so nice and glossy. We’ll see how long it lasts.
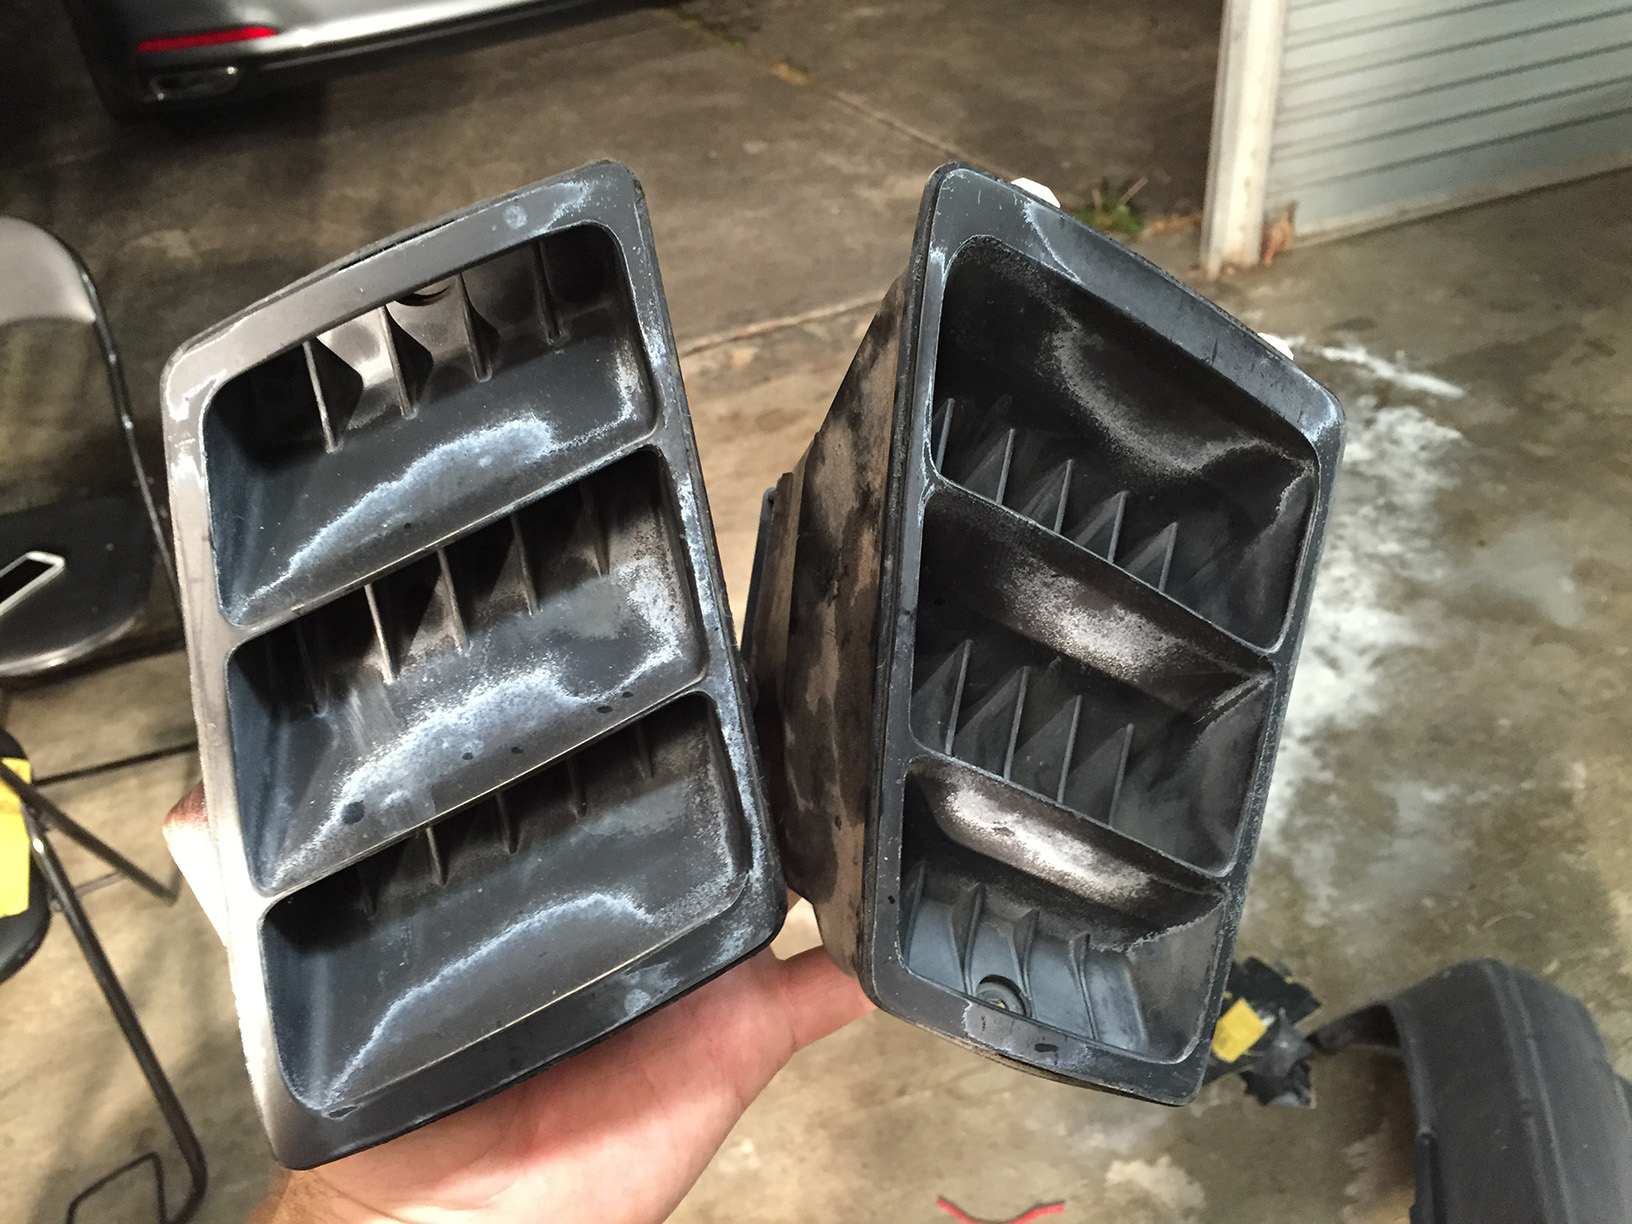
Side ducts in desperate need of paint. I used plastic primer followed by K&H Bumper & Trim paint.
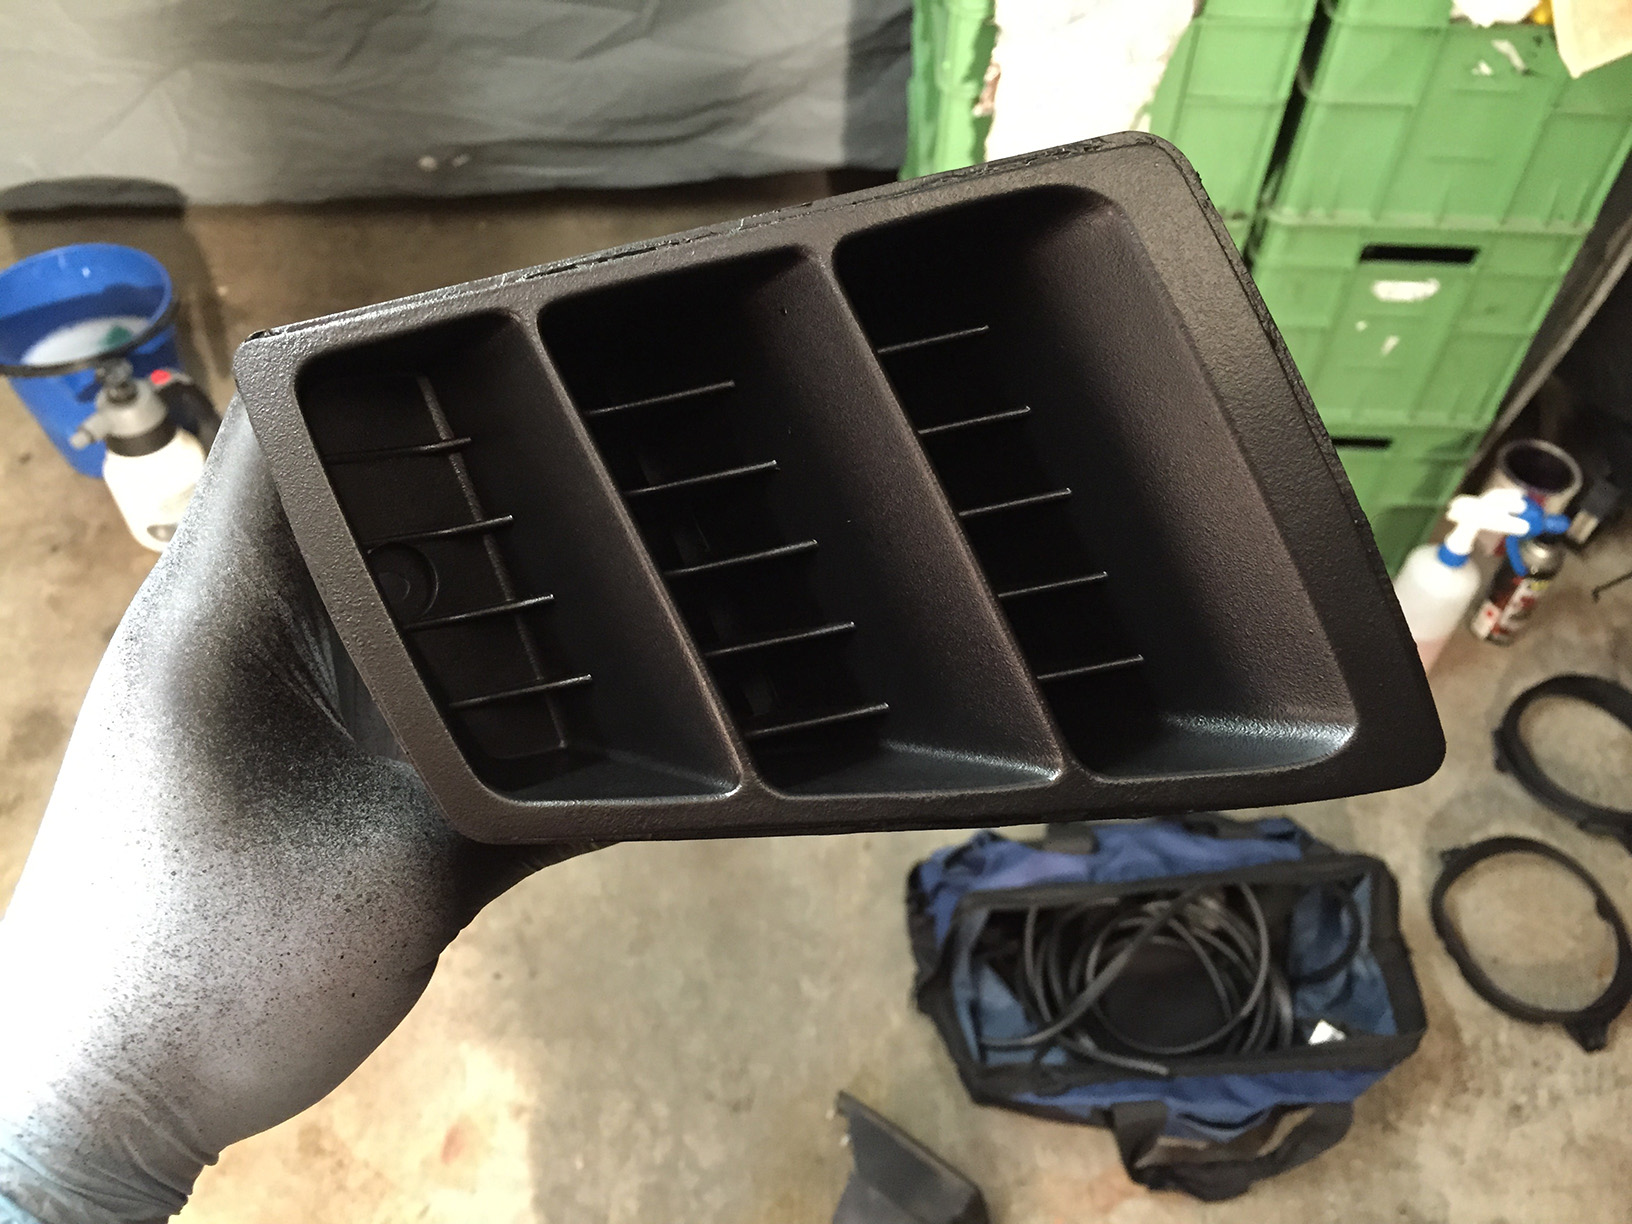
Love the texture of this stuff.
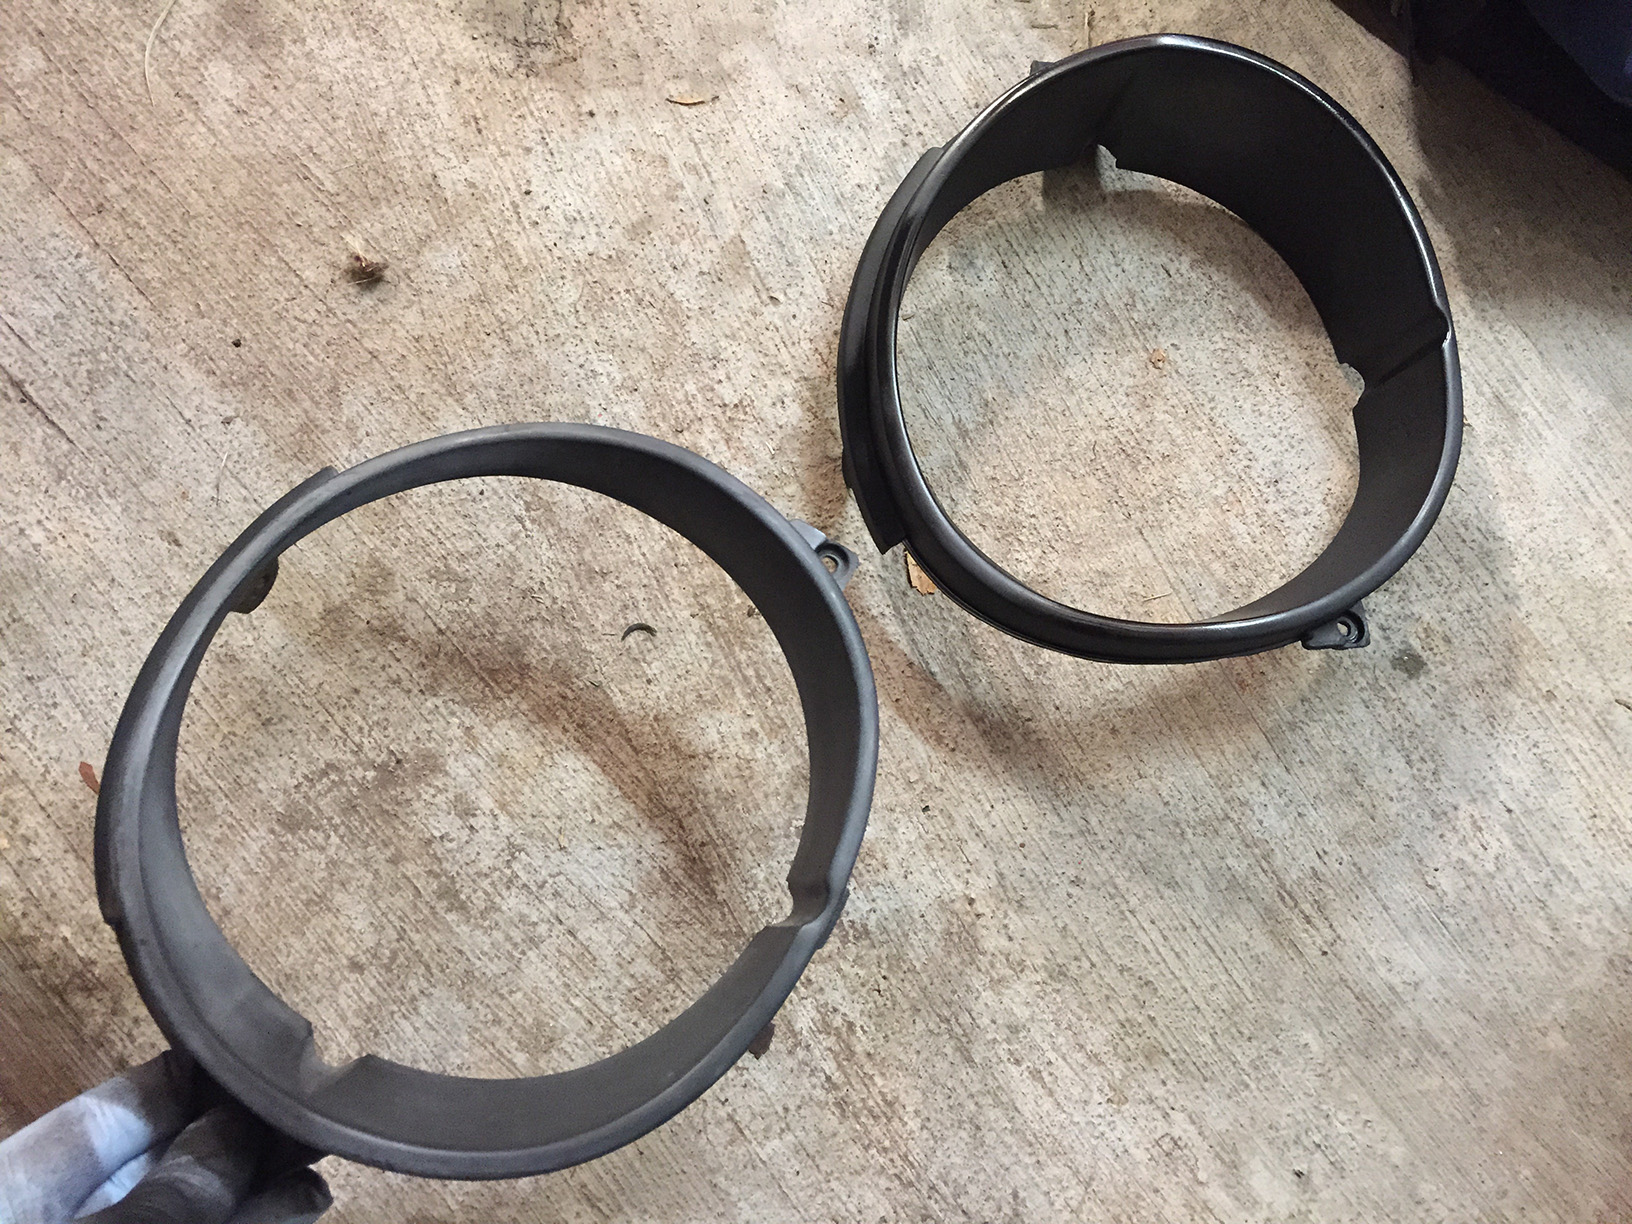
Headlight surround on the right has a coat of VHT Roll Bar & Chassis black, left one is ready to be painted.
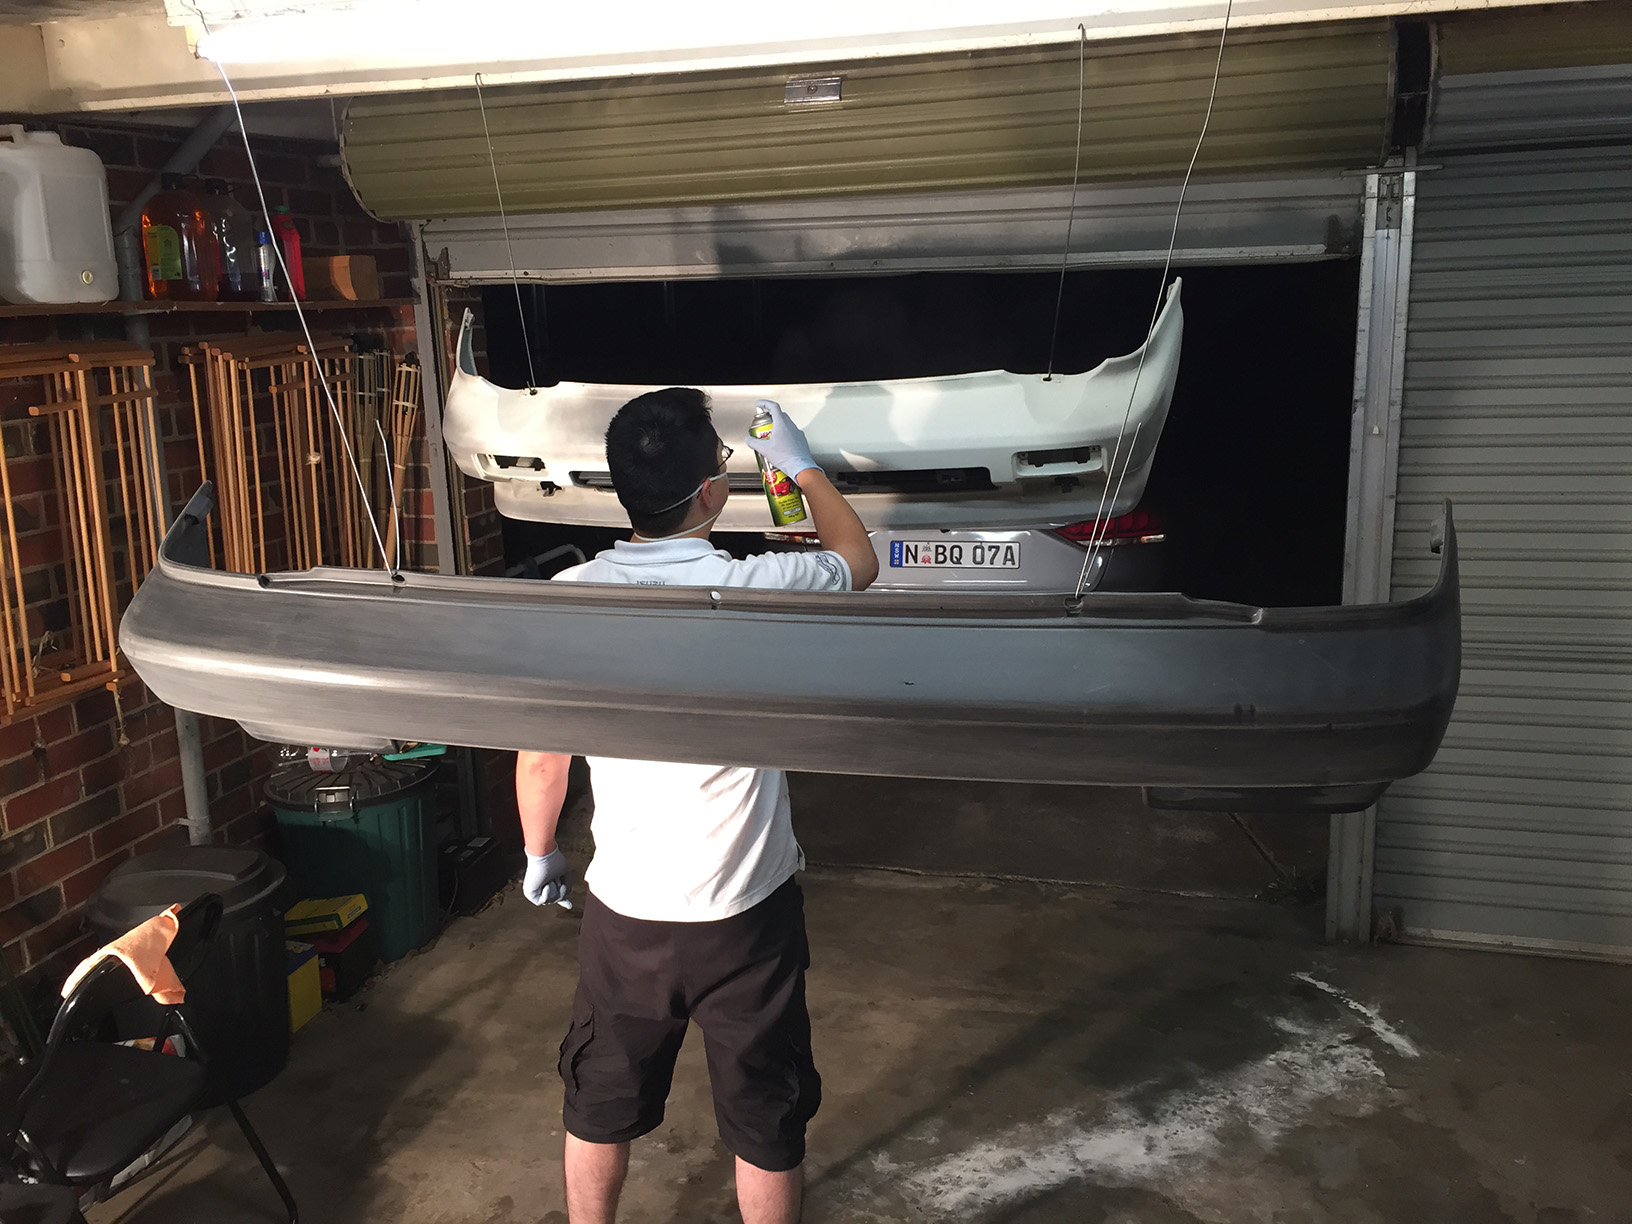
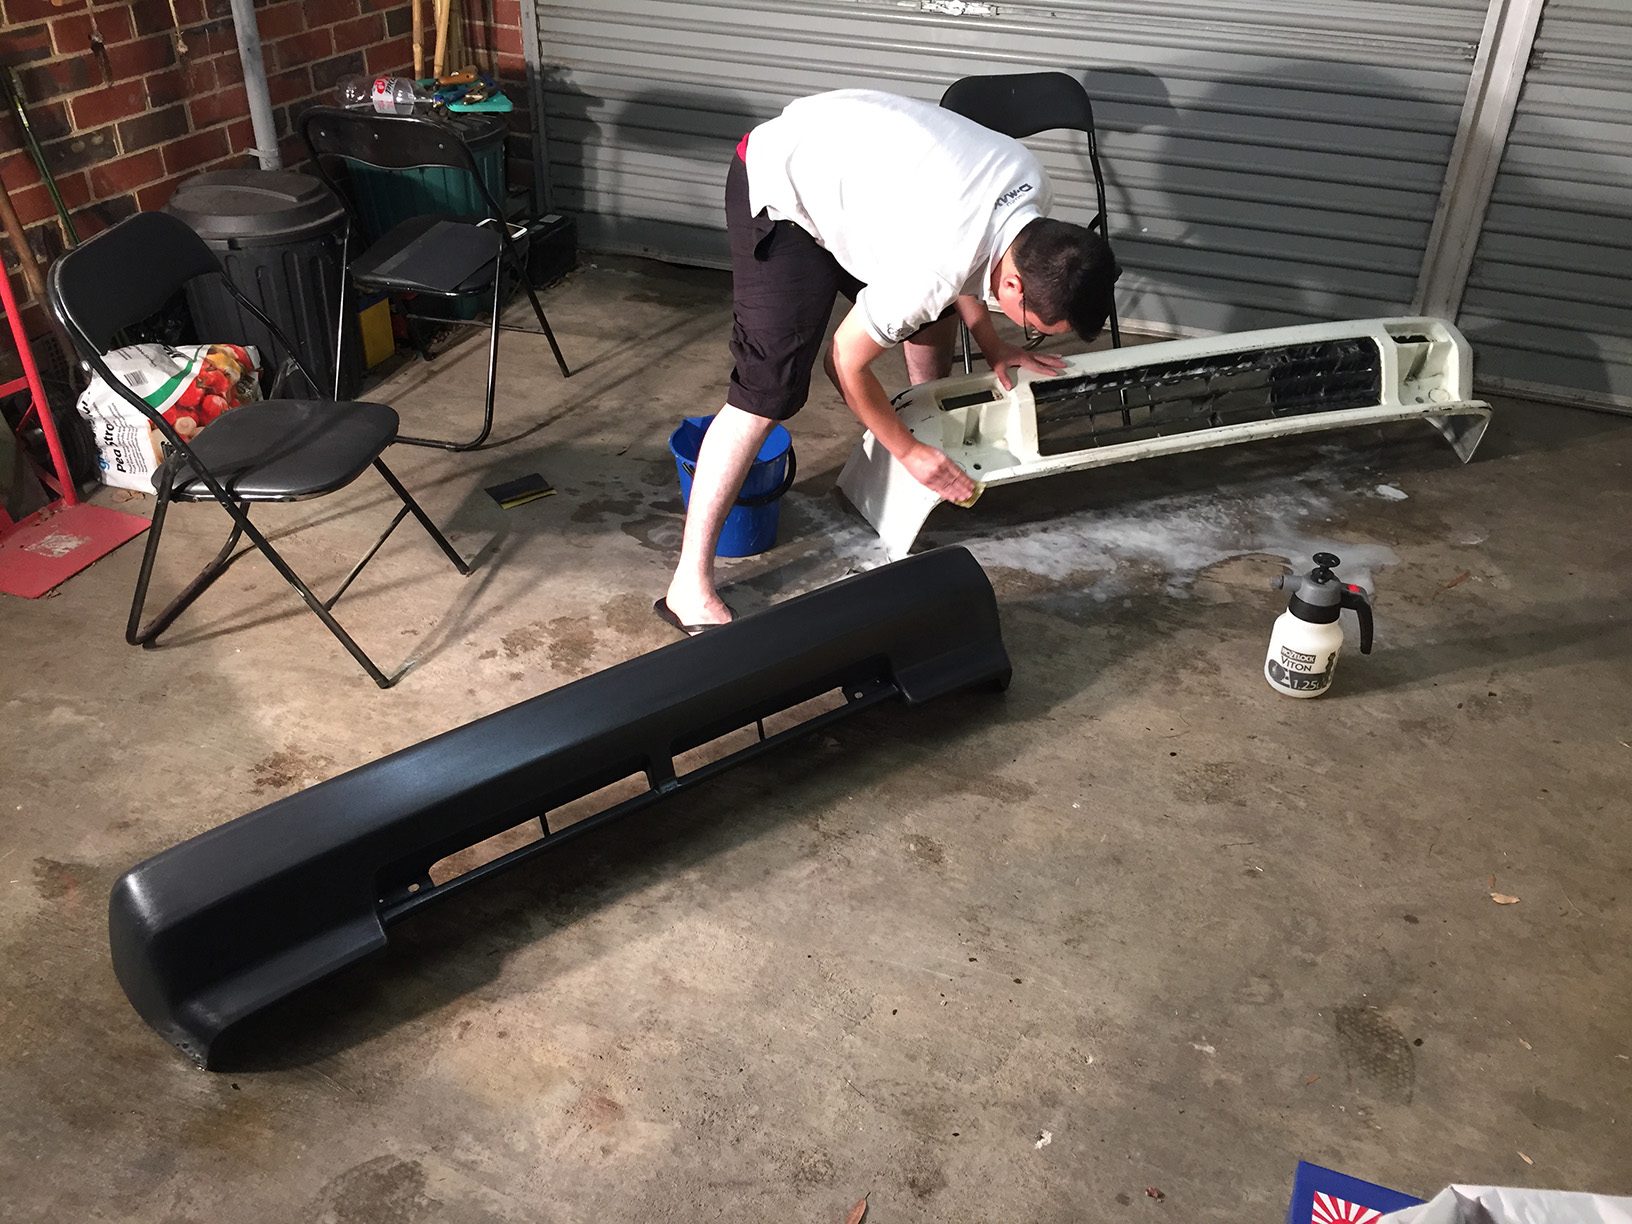
Tony using plastic filler primer on the the front bumper after sanding down the rough spots. He’s working on both bumpers again today, blocking them back, laying down more filler primer followed by colour and clear.
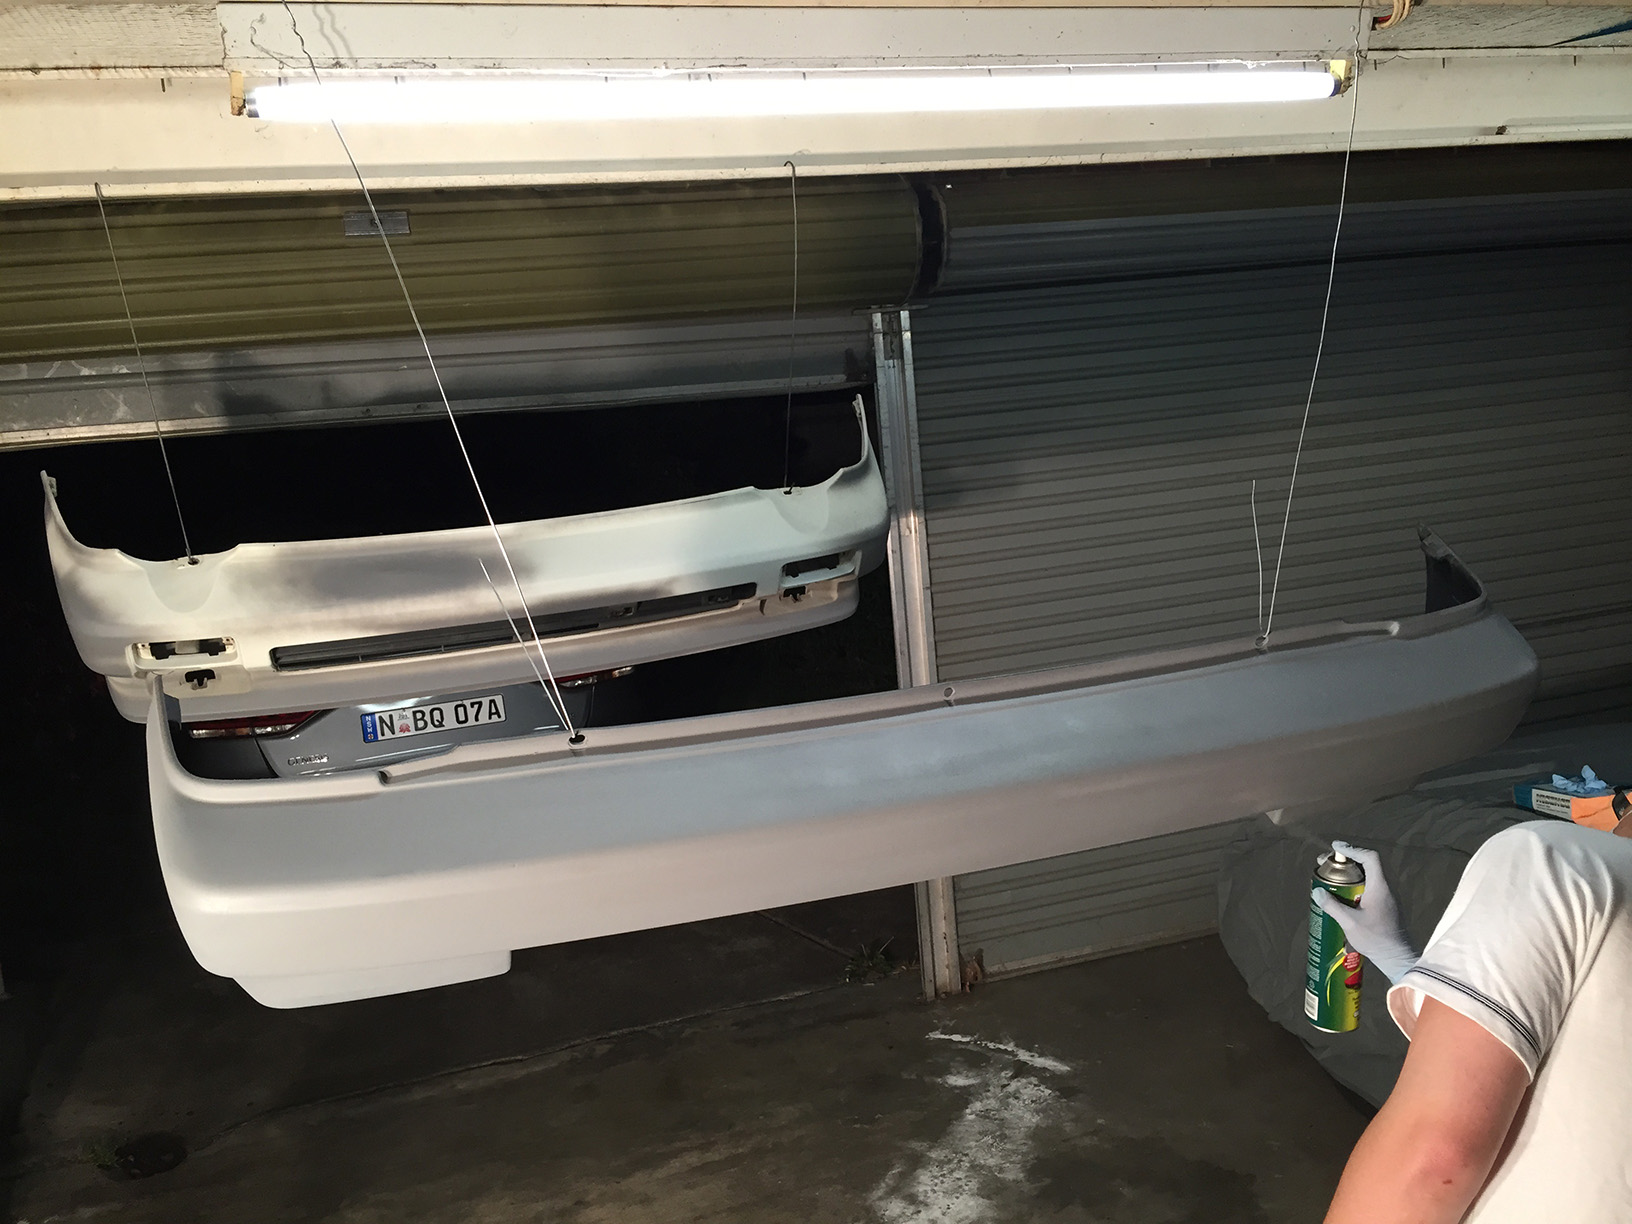
And more primer on the rear bar. The OEM colour we’ll be painting them in is ‘Greek White’ (NH-82). We had two aerosol tins of paint mixed up at Autobarn. Hopefully the colour match is good enough.

One thing I managed to mess up was the perfect finish on the dashboard. I was dying the reverse sides of the rotating air vents and managed to overspray onto the front of the dashboard where the dye had fully cured. You can kinda see it around the middle vents in this pic. With no prep on that finished surface there was no key for the dye to absorb into. The overspray ‘bloomed’ and dried matte. I was absolutely kicking myself.
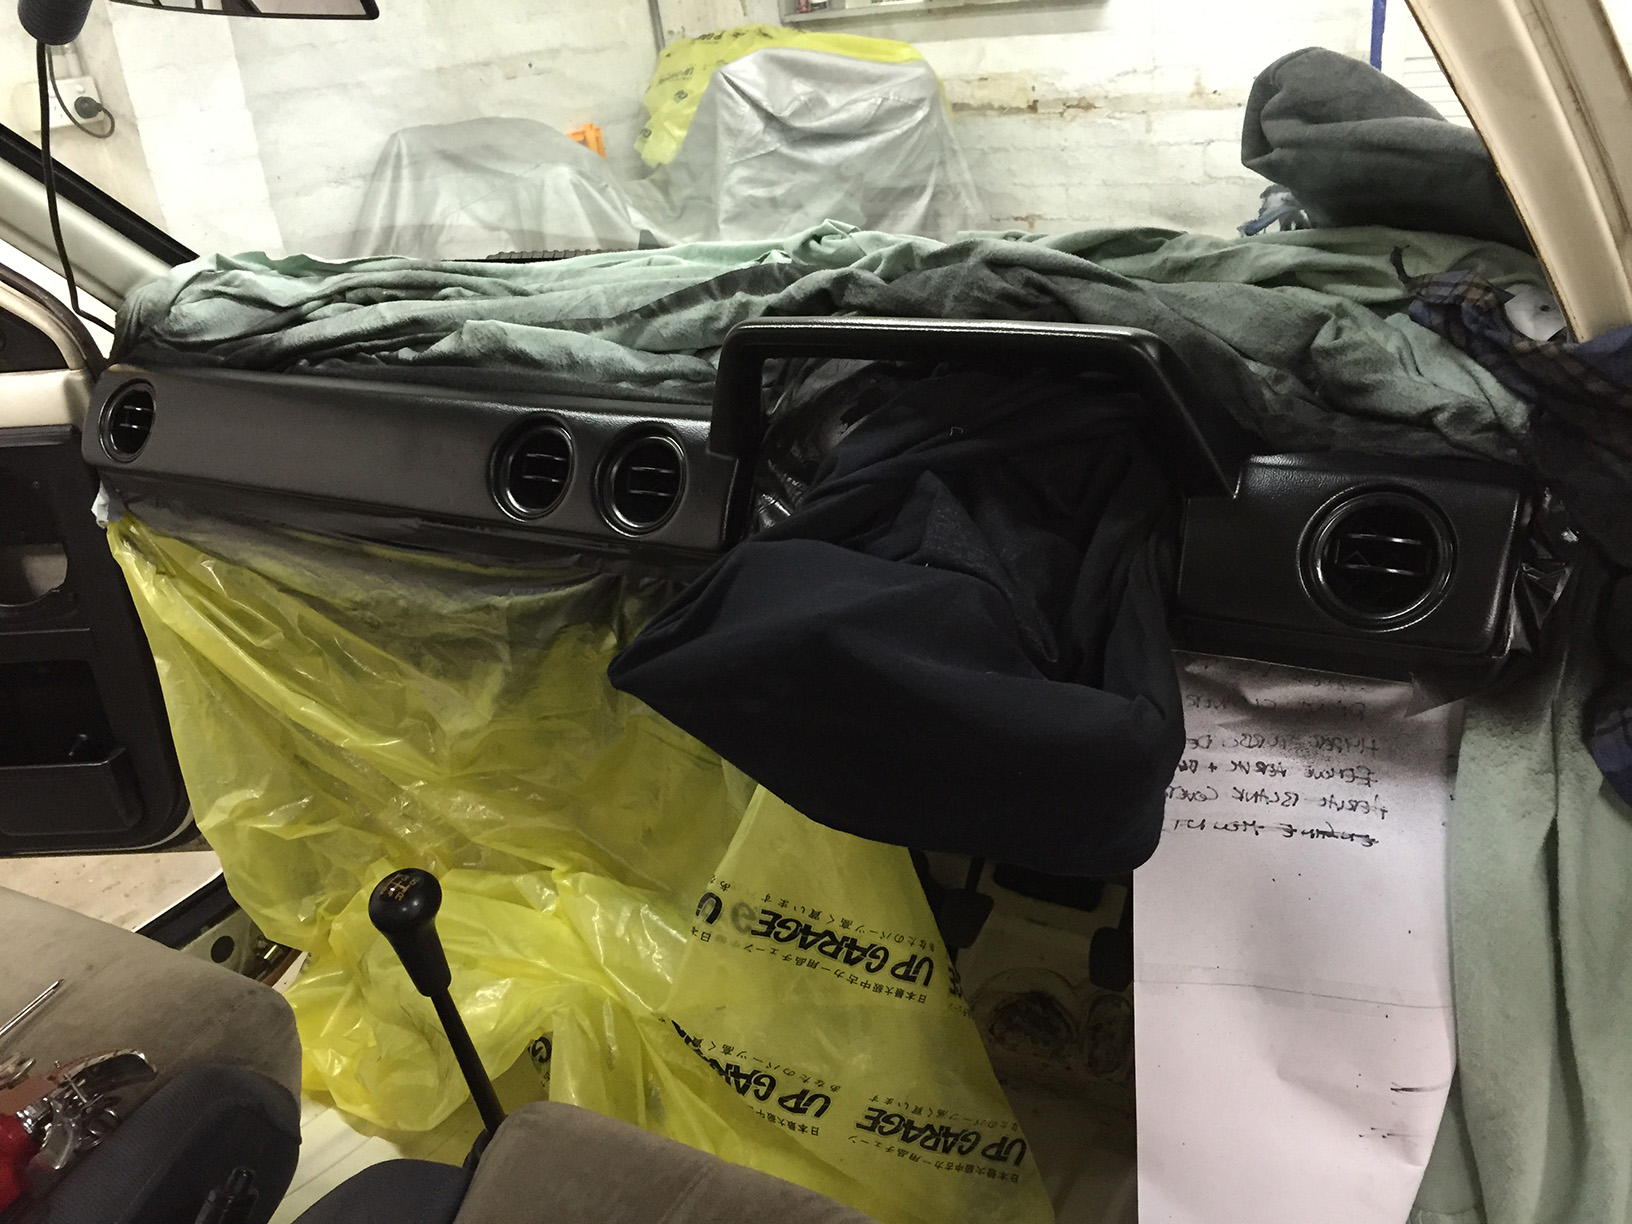
It took ages to rub back the whole face of the dash with a Scotchbrite and some wet and dry, then clean it up with wax and grease remover before putting three layers of vinyl dye on top to get the nice glossy finish back. Such a nuisance. Looks good again, though.
Quick snap showing the black pinch weld around the door aperture. Not a cheap thing to replace just for the sake of black vs blue, but it was necessary!
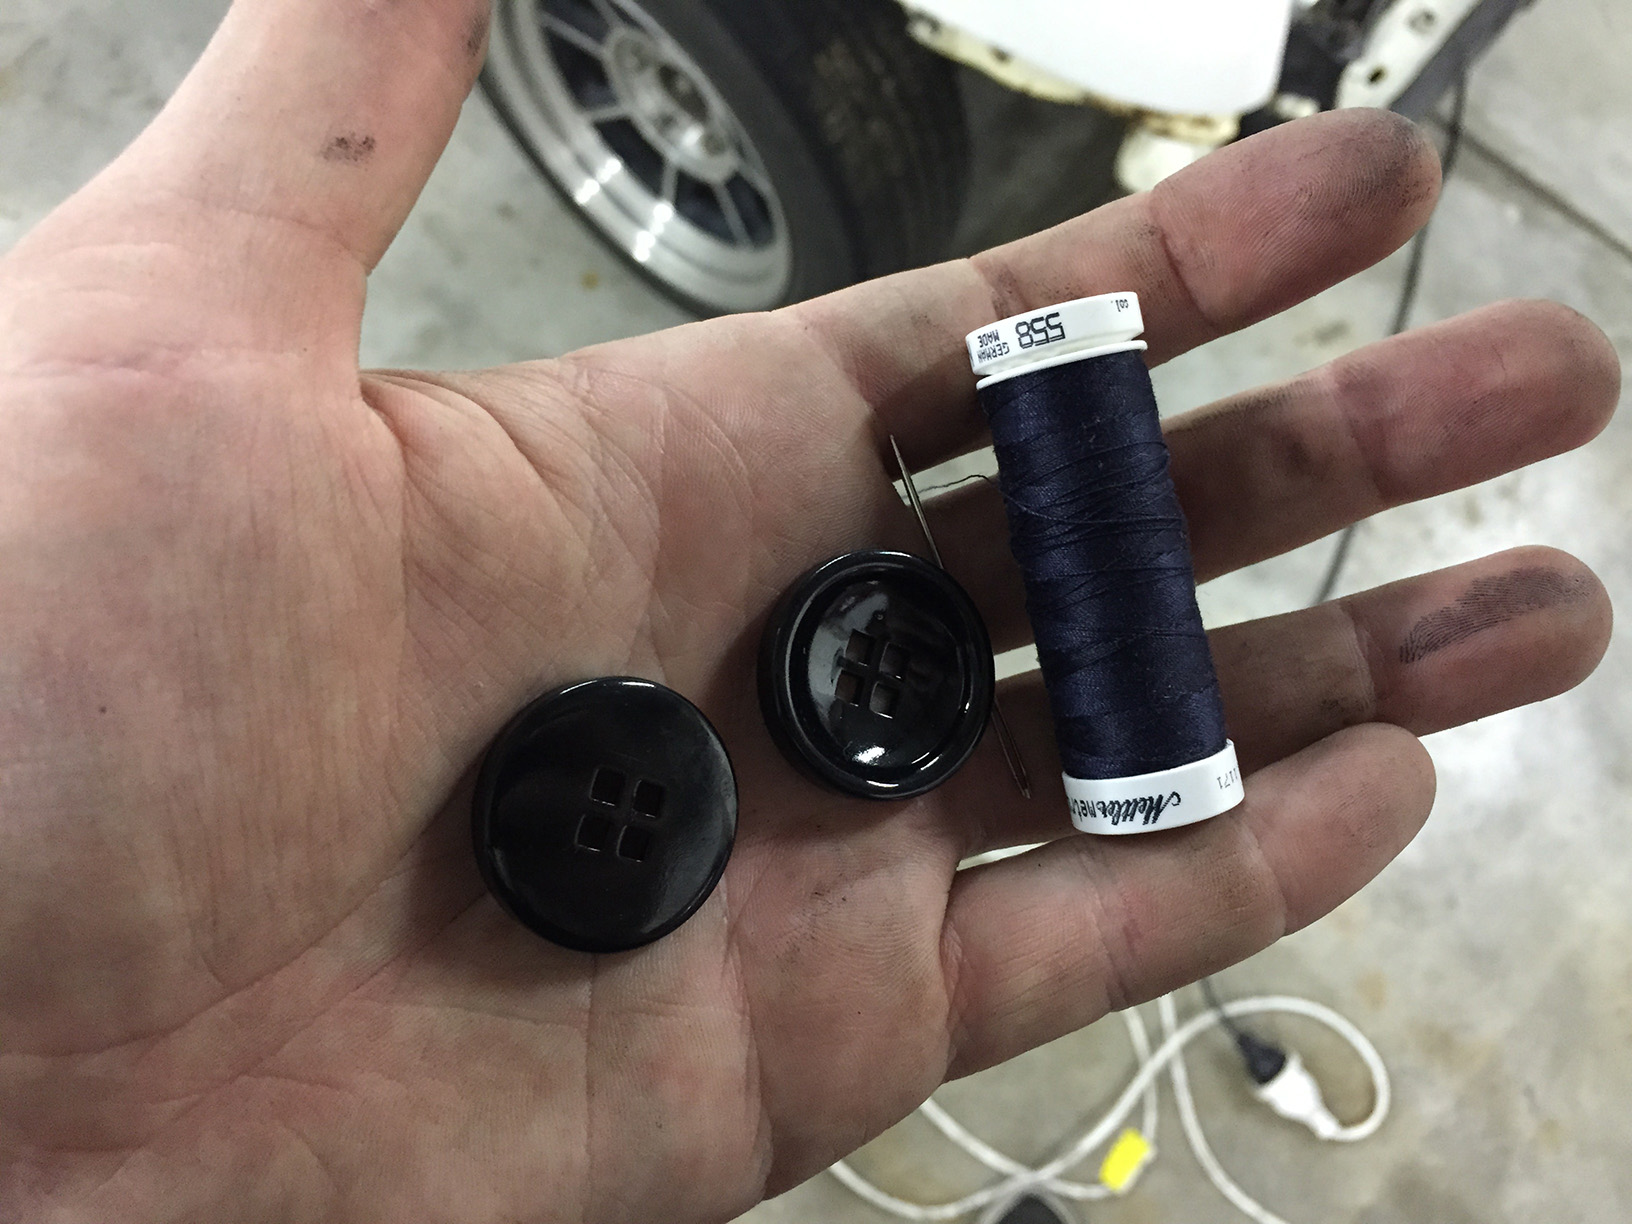
Next up was me getting my seamstress on. I’ll probably re-do this later when the dark blue thread gets to me. My wife didn’t have any black thread left.
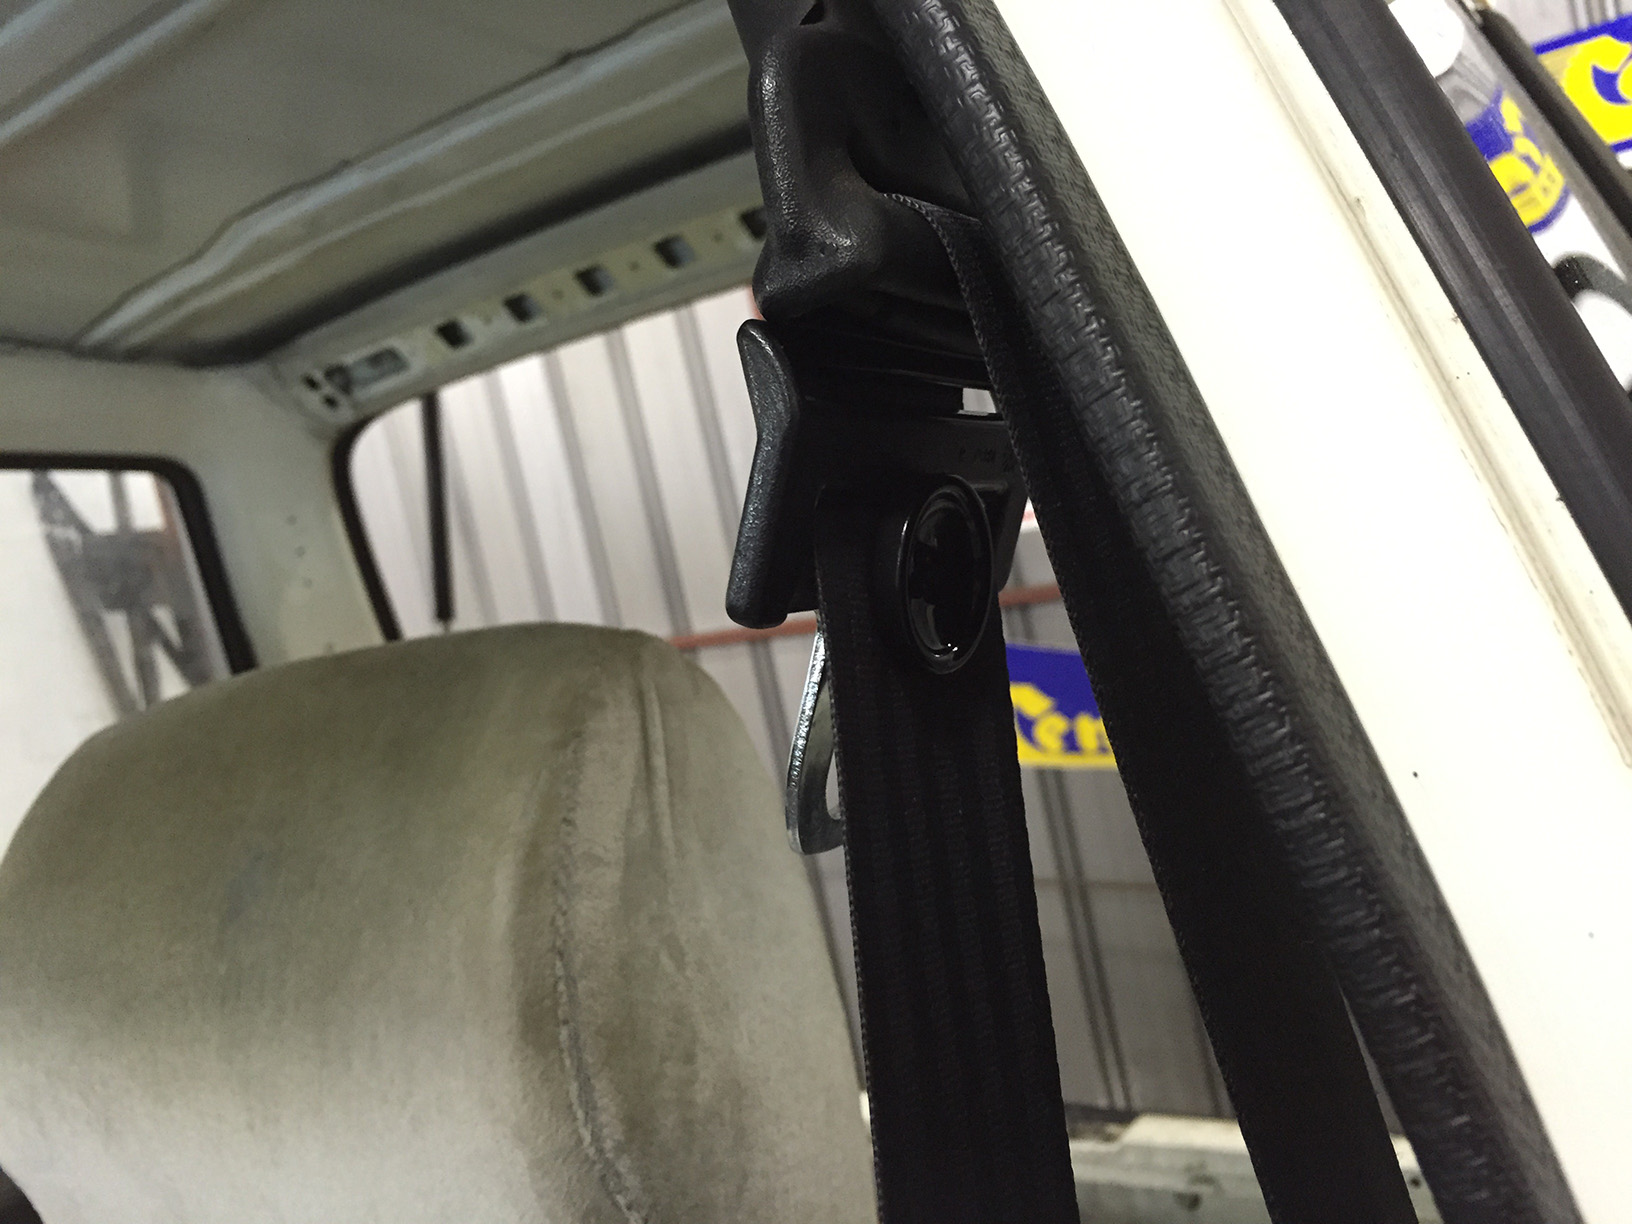
Added a button to each seatbelt so we don’t have to go fishing around for the buckle every time.
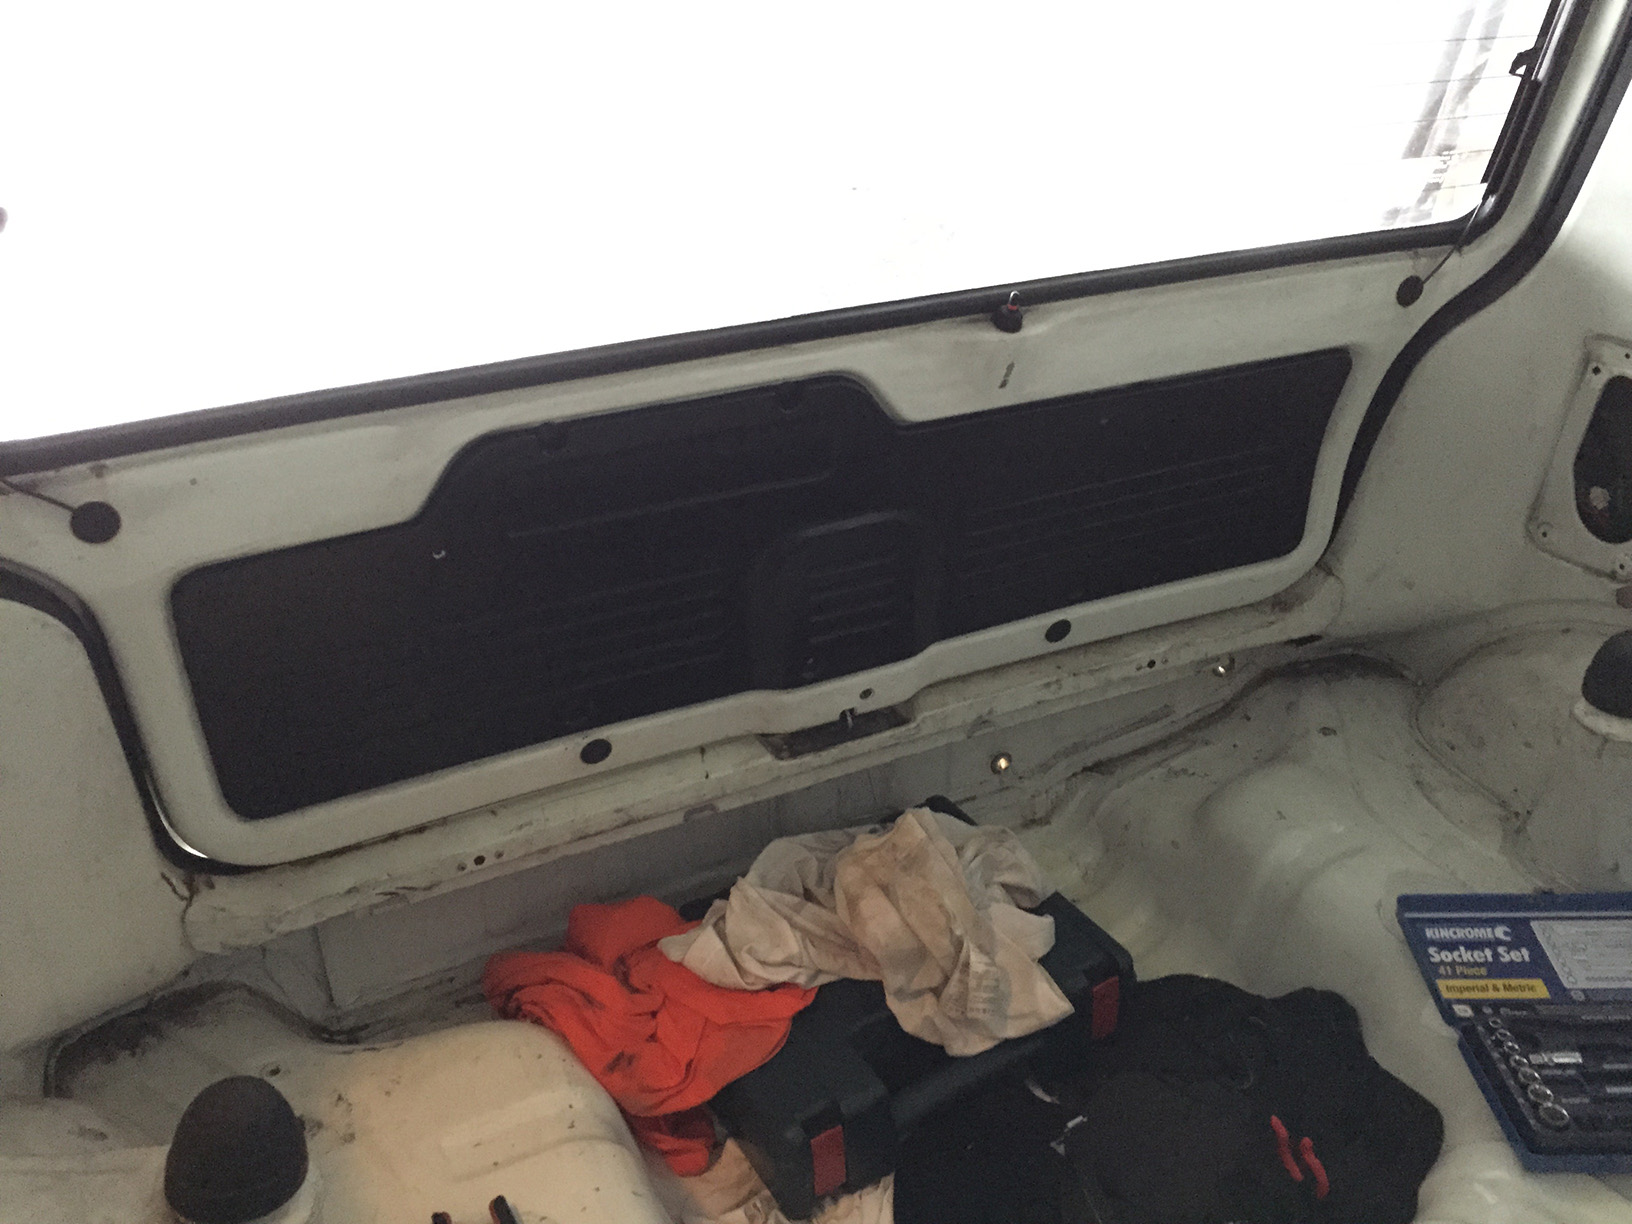
Lastly here’s a quick shot of the hatch panel now in black. That’s the last thing that needed to be dyed. All the paintwork inside will be cleaned up tomorrow.
– – – – – –
We owe a huge debt to another mate, also named Ryan, for being a complete legend and single-handedly bringing the biggest transformation to the car since getting the engine running. Can’t say enough about how much better the paintwork looks after his hard work.
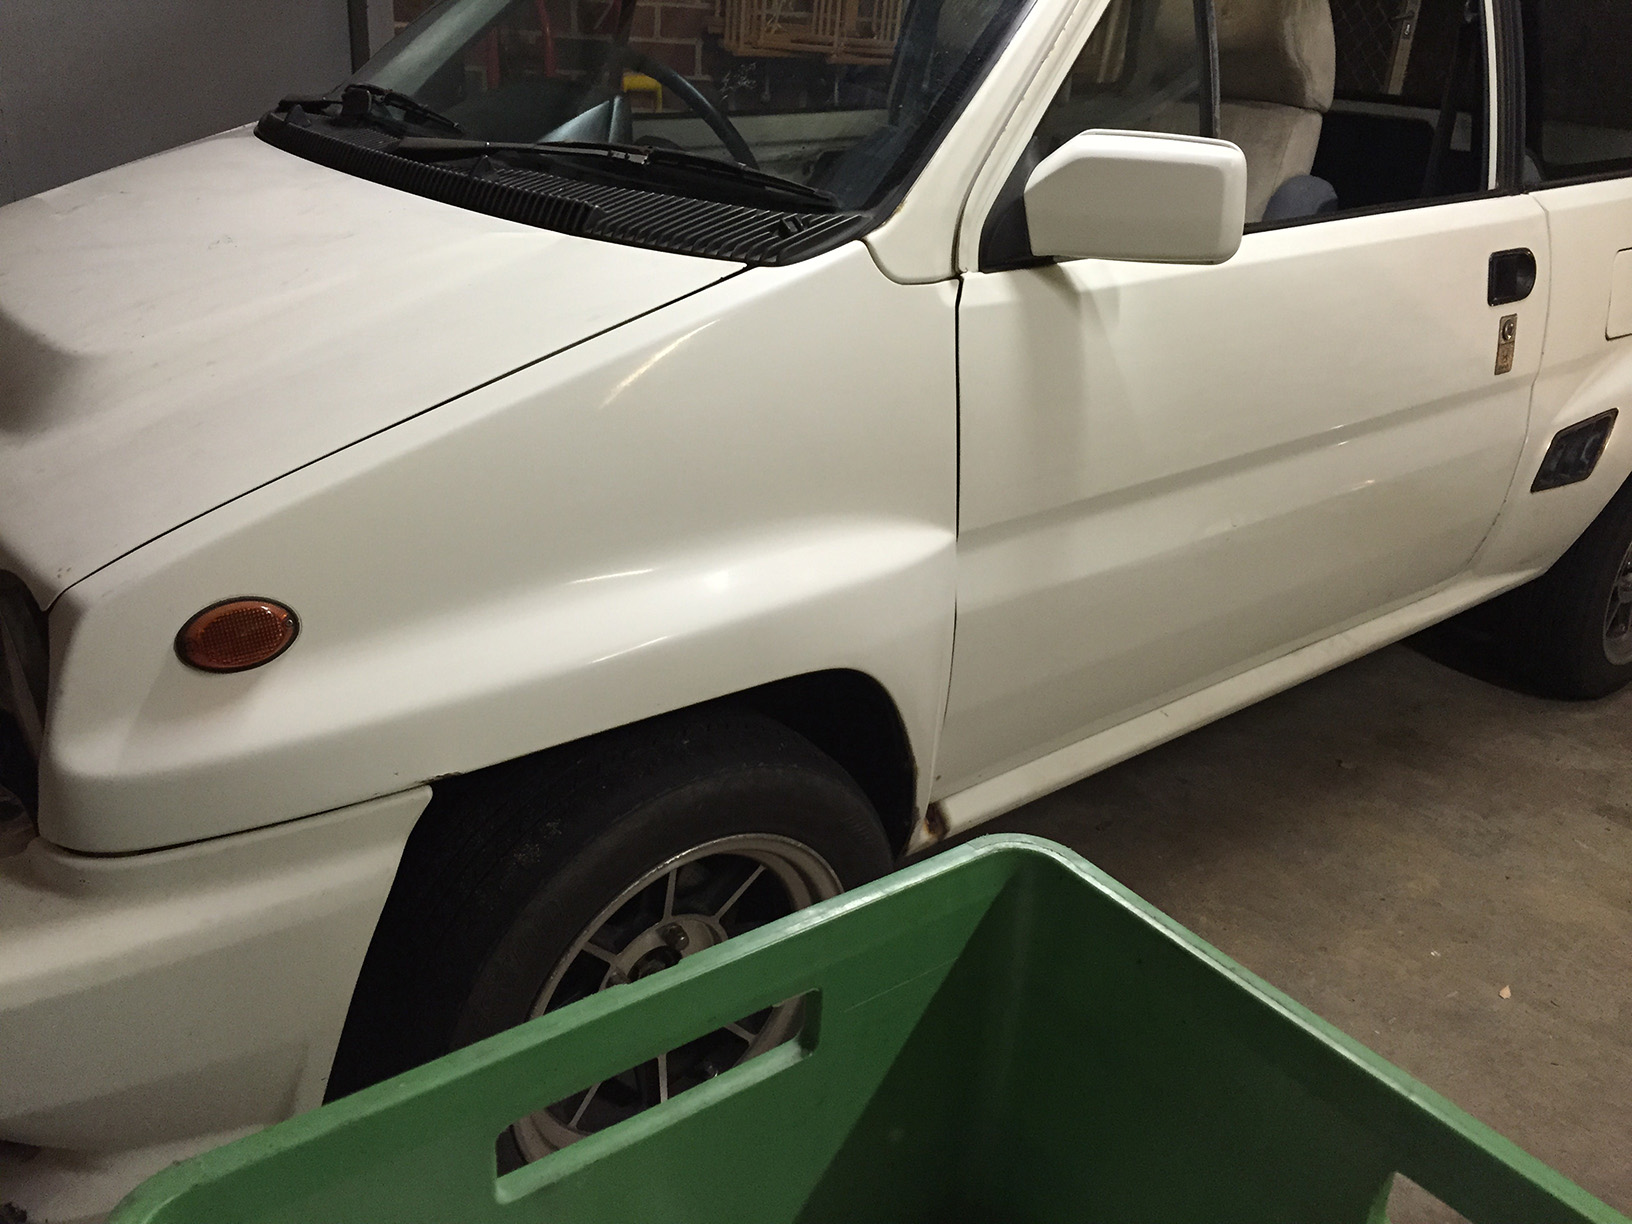
Landed at Tony’s early-ish on Saturday. This is how the car was looking.
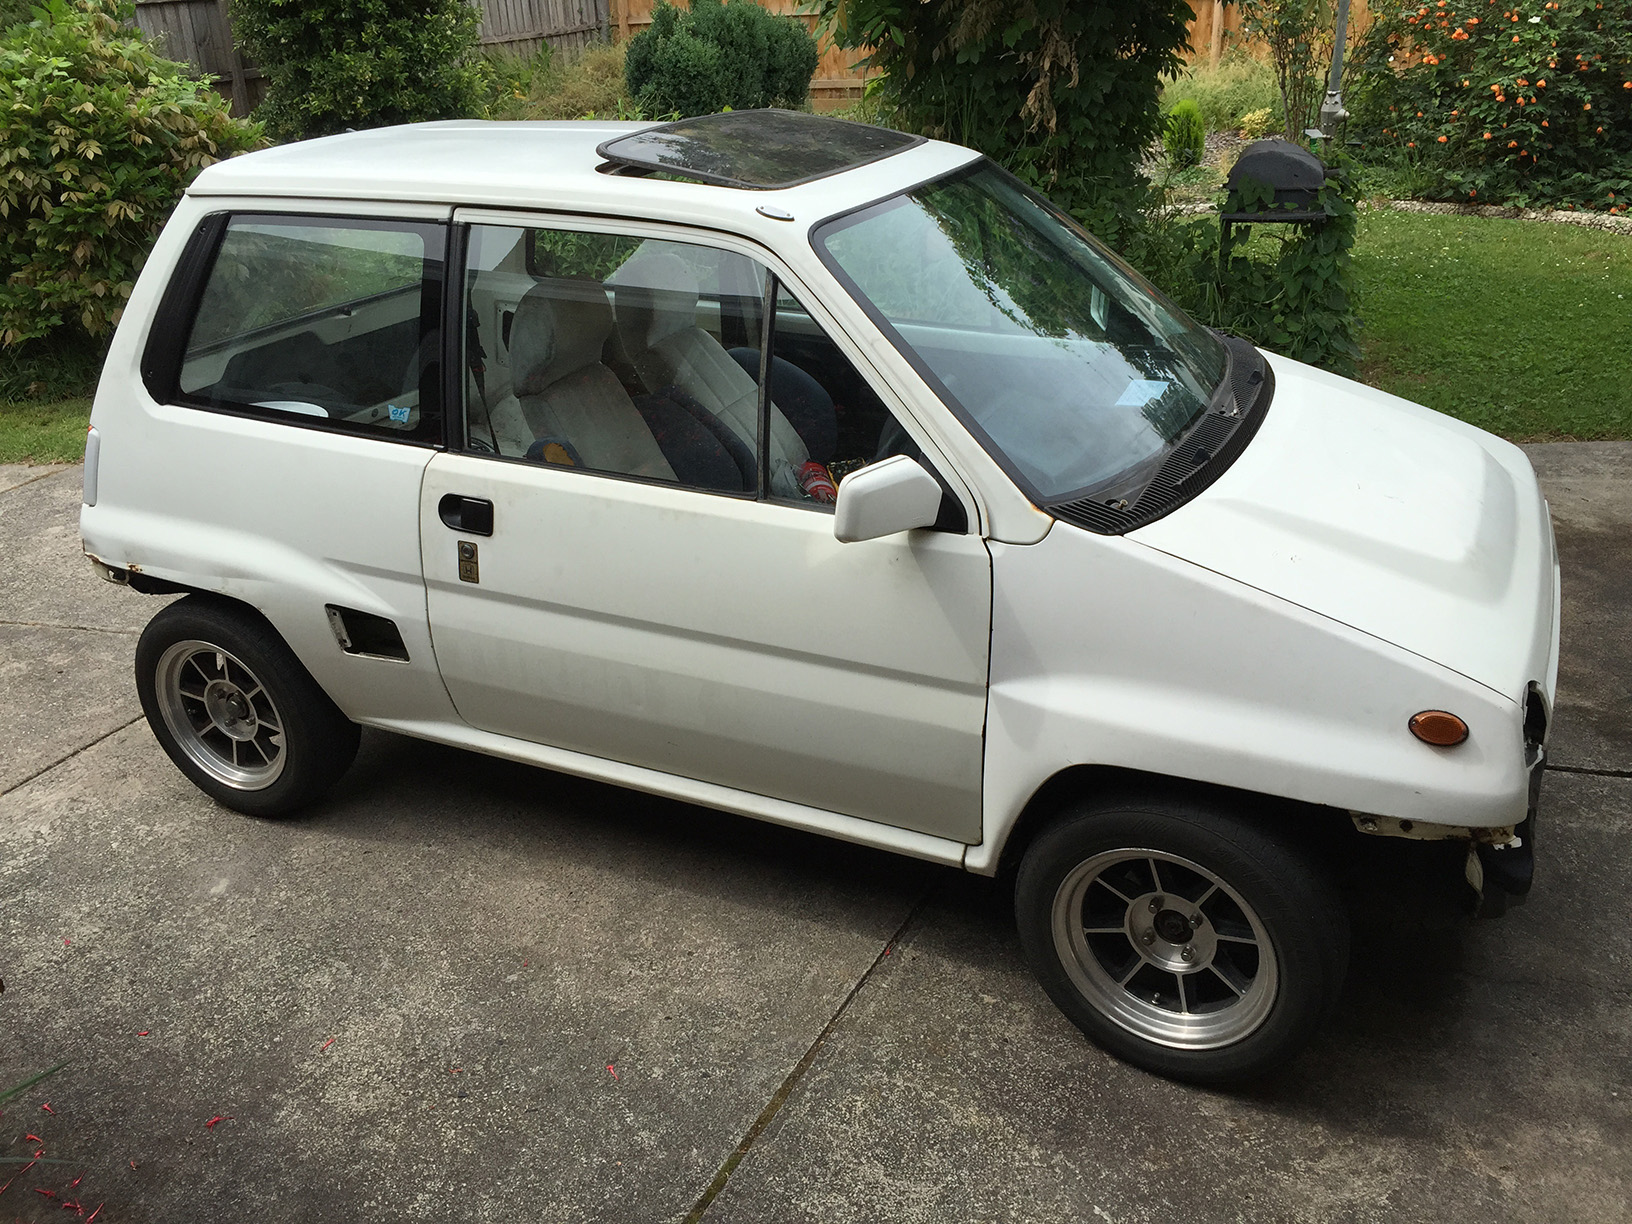
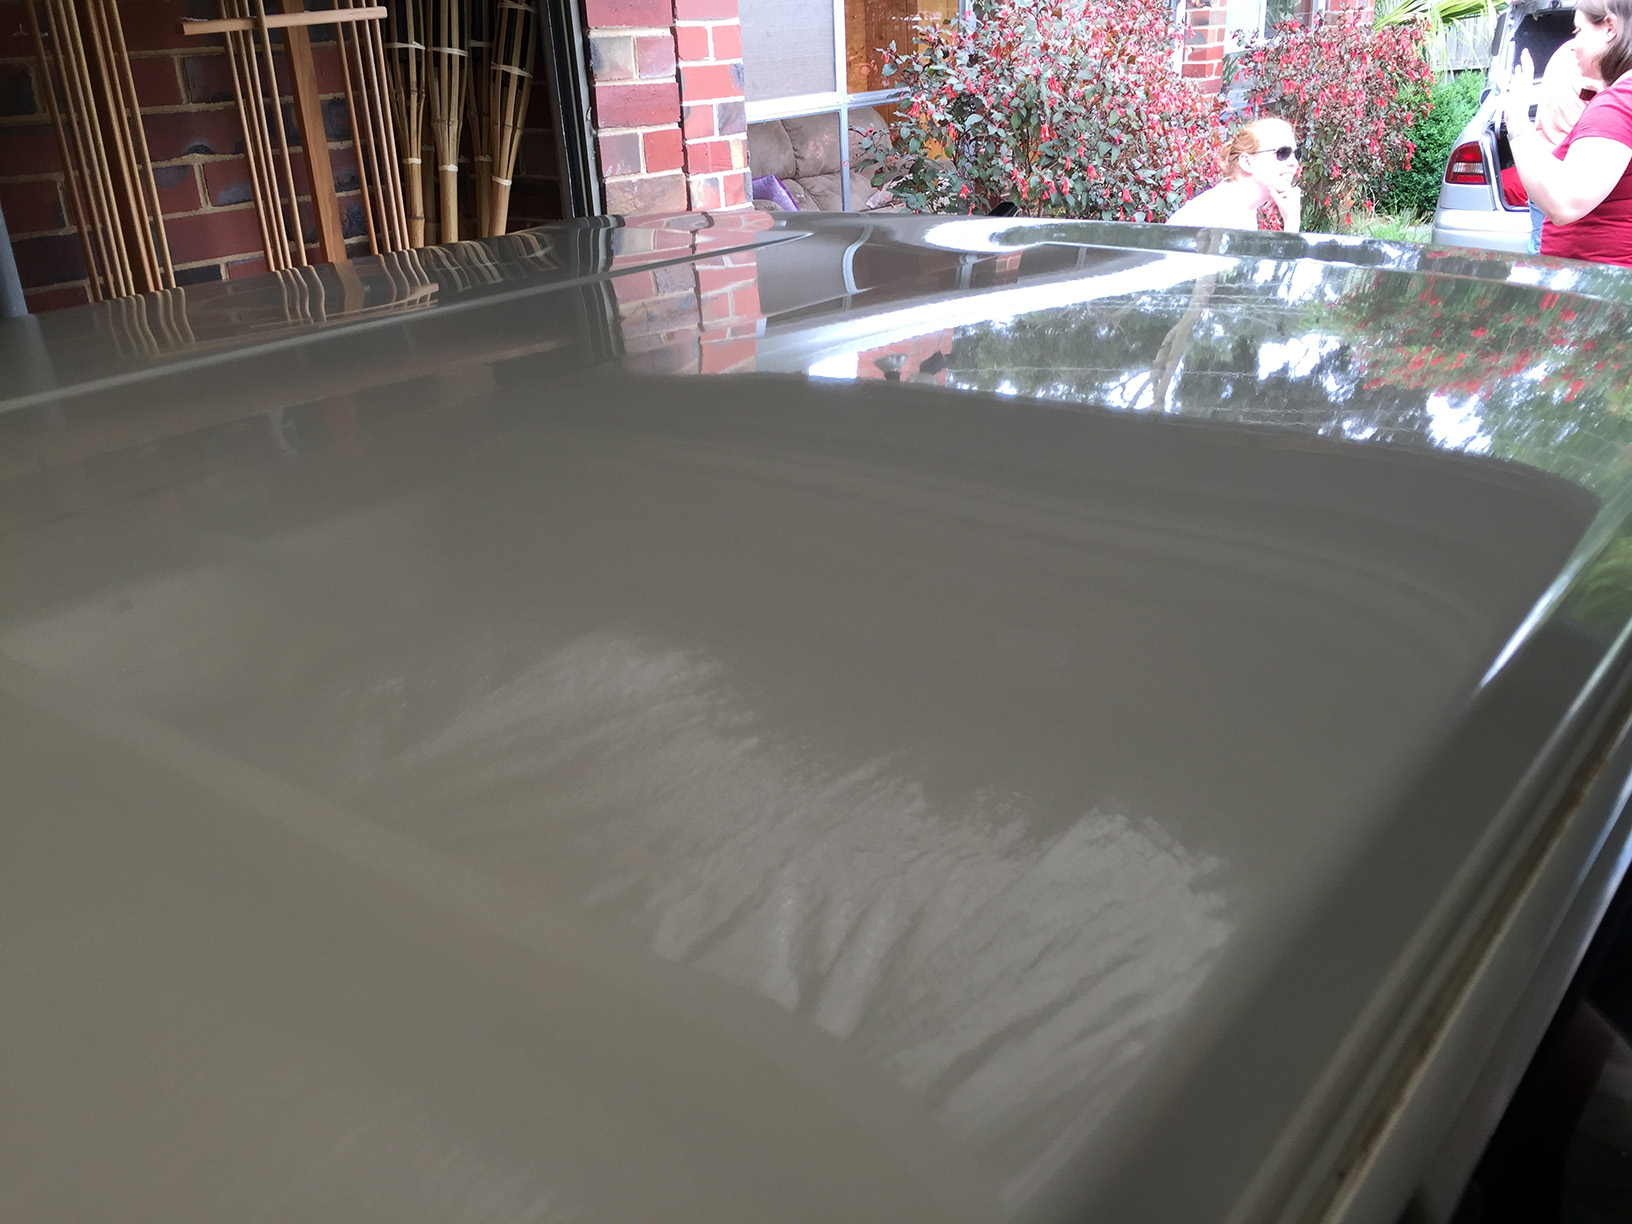
Photos of white paint in the sunlight hides a lot of blemishes. Trust me when I say that the paint was dreadful. Incredibly chalky and covered in greasy fingerprints. You’ve probably seen it in the earlier photos. If anything it got worse around the engine bay.
Before Ryan got there to start polishing I went over the whole body with a powerful cleaning solvent to get rid of as many oily stains as possible.
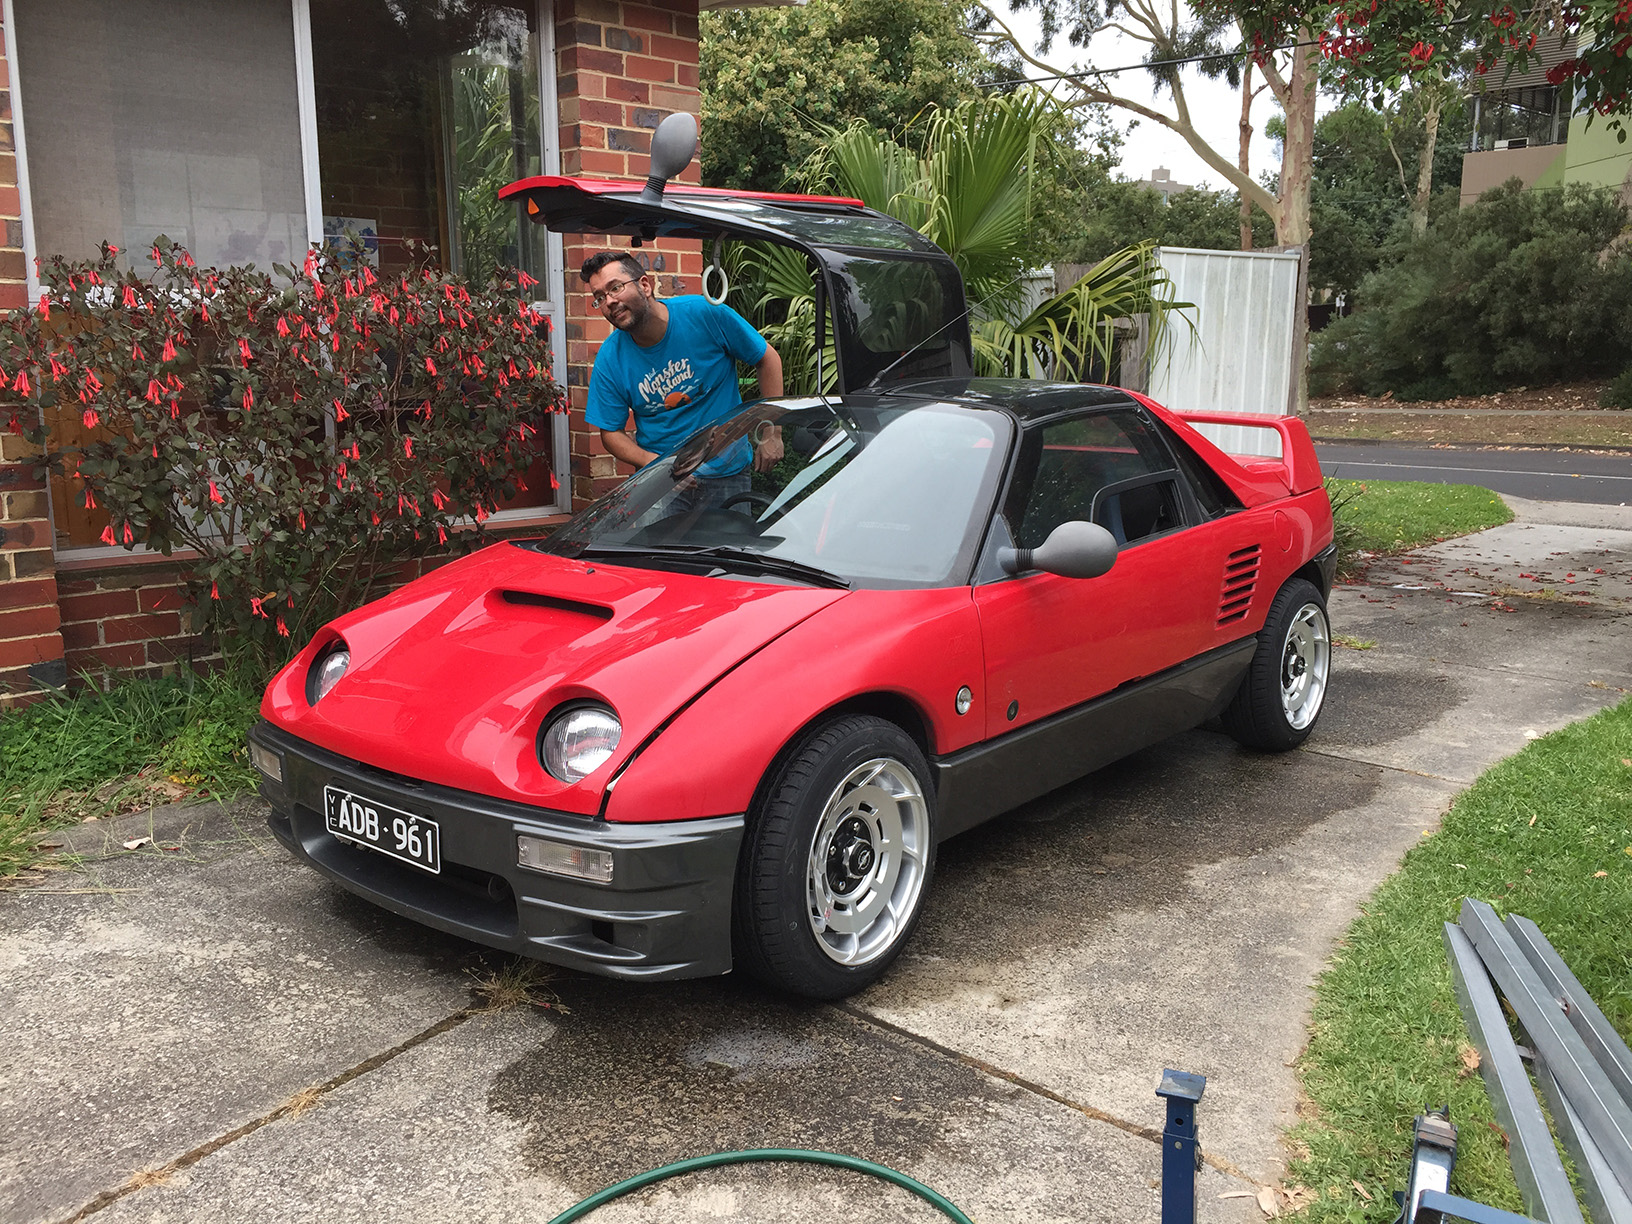
Dan turned up with the AZ-1 for a bit of love before Classic Japan.
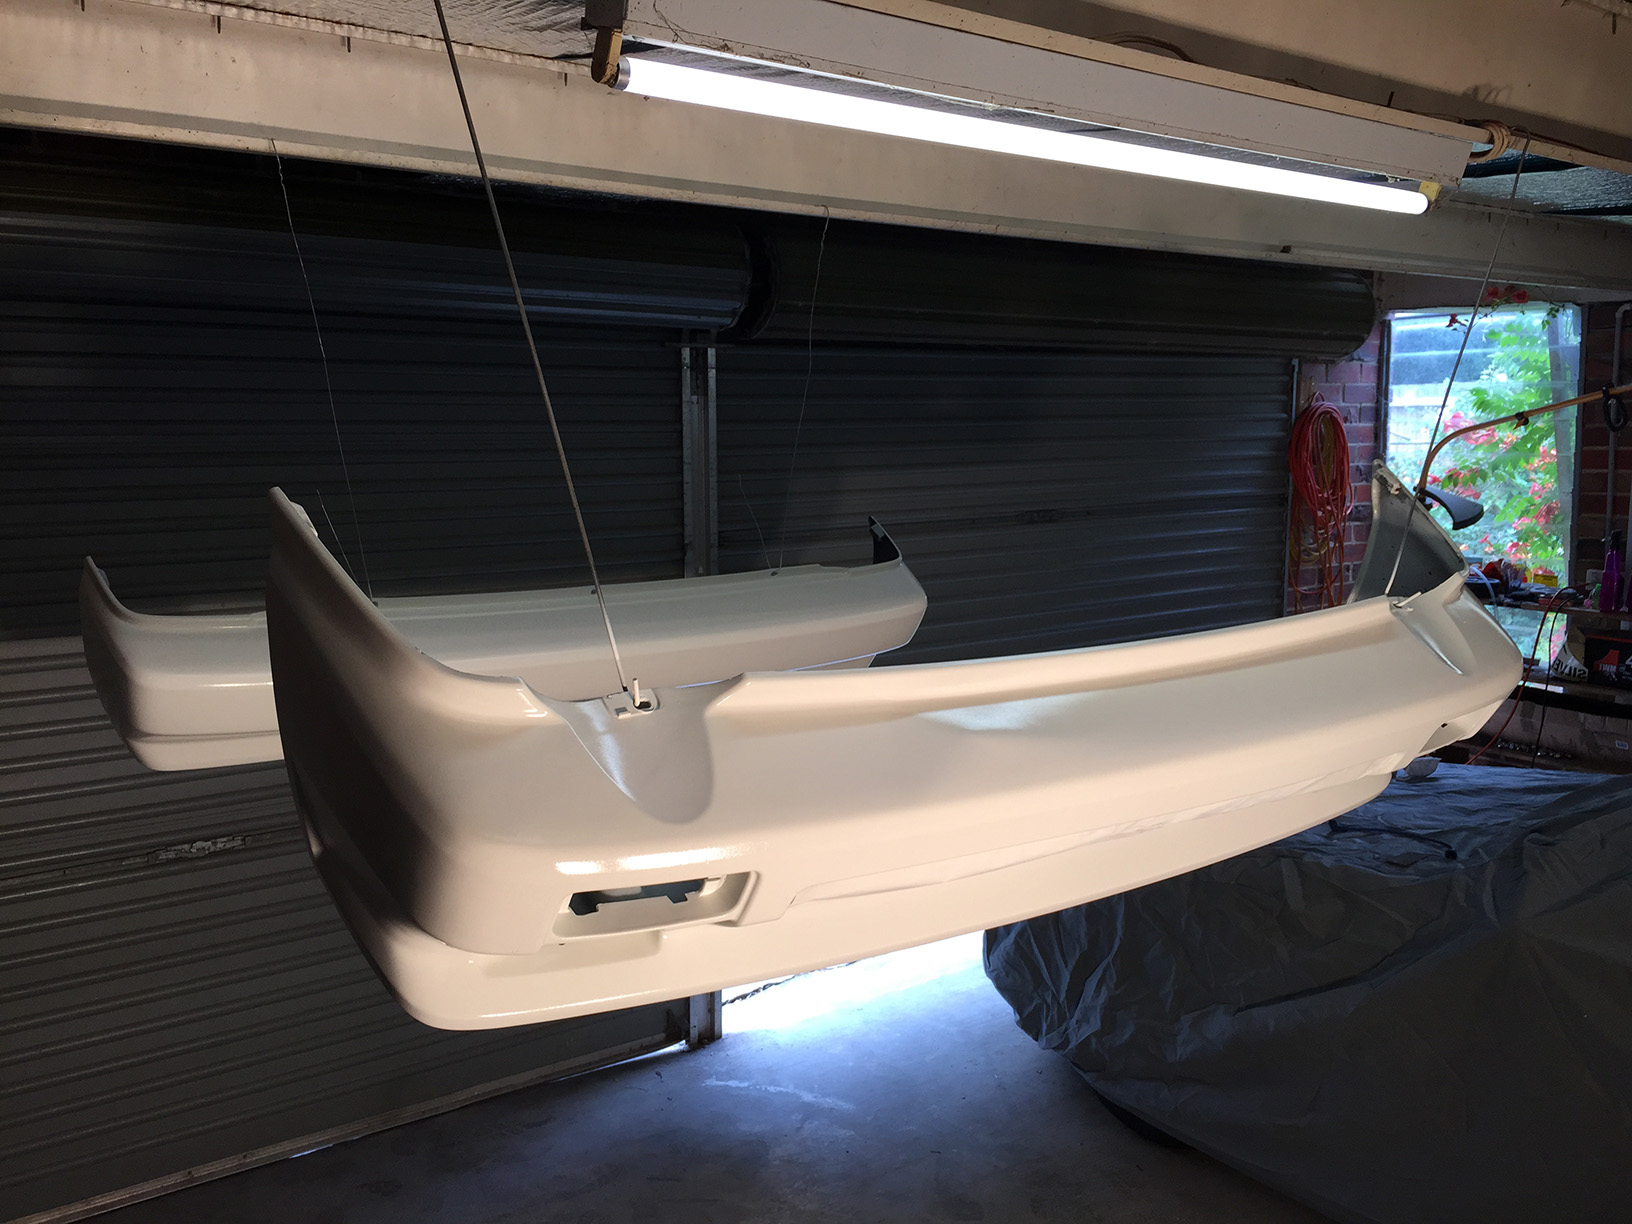
Tony did an outstanding job painting the bumper bars over the two days before this. All done with aerosol cans and patience, the end result is something to be proud of in my opinion. Certainly good enough for the rest of the car.
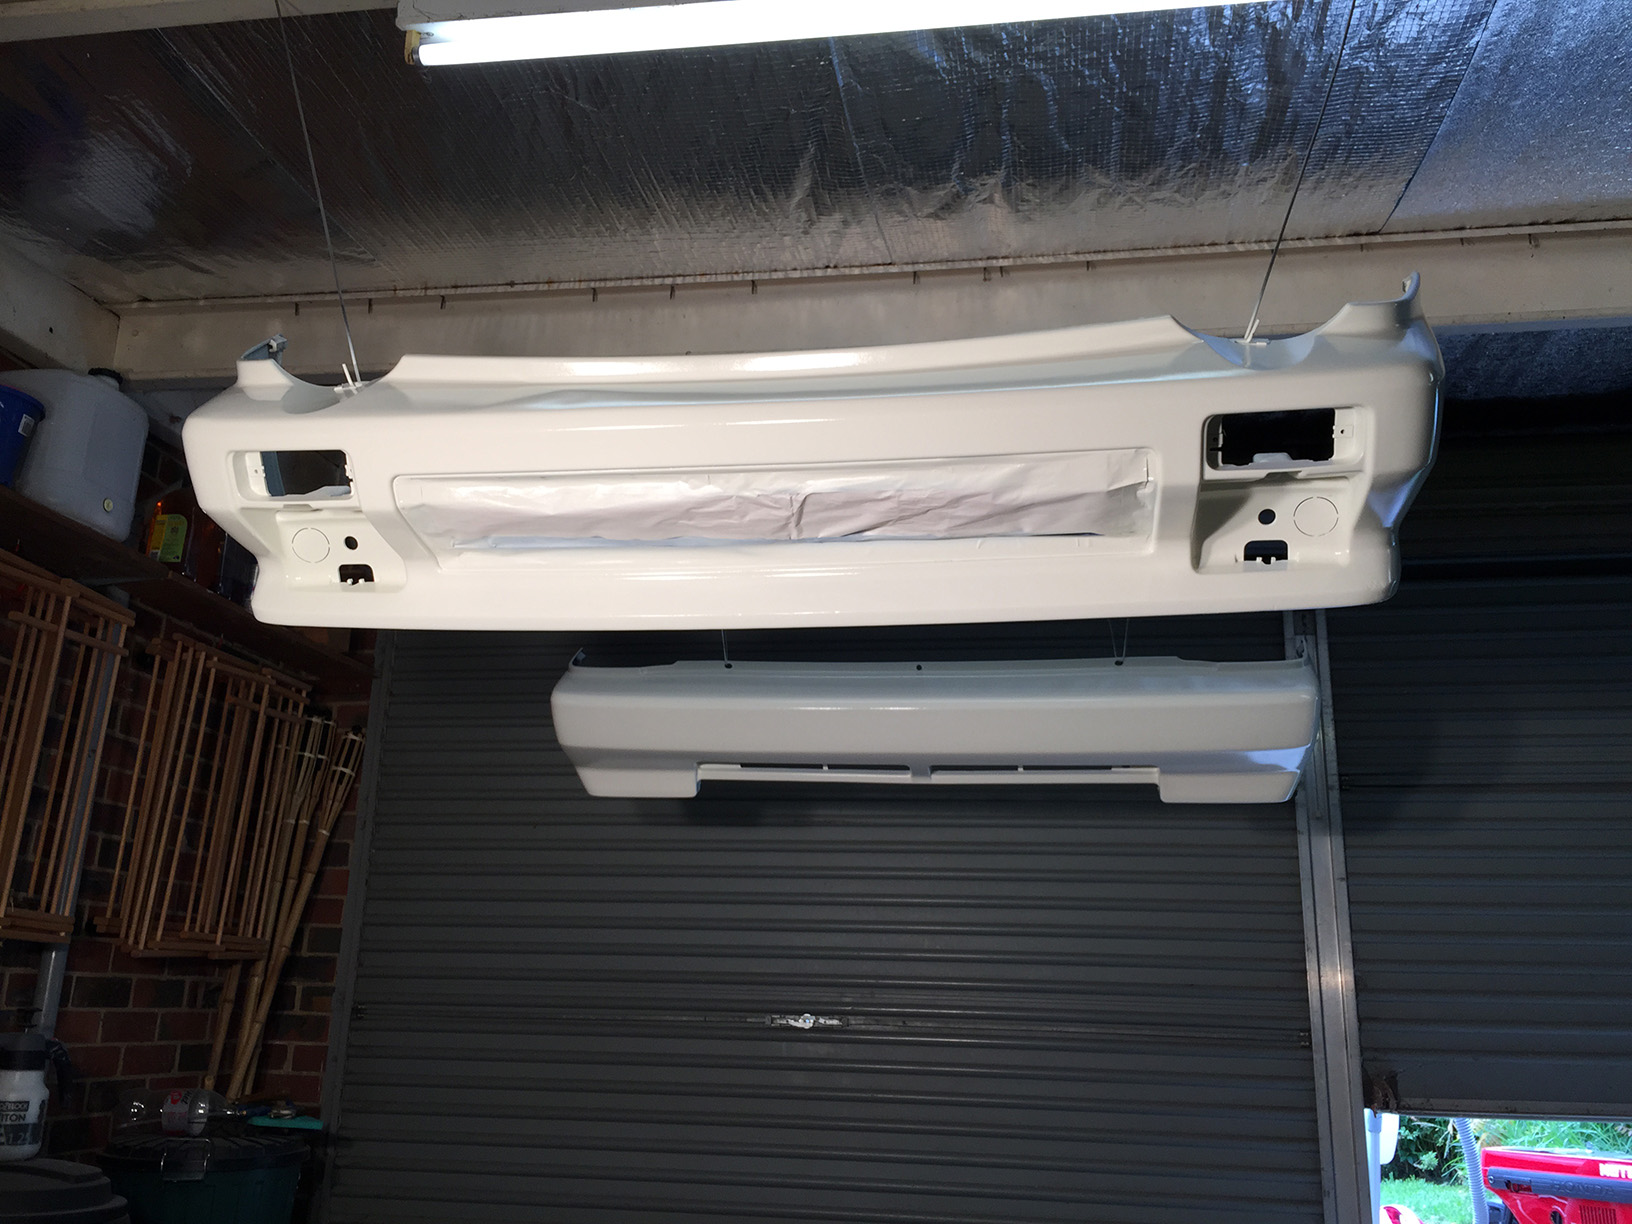
This was after spraying the clear coat.
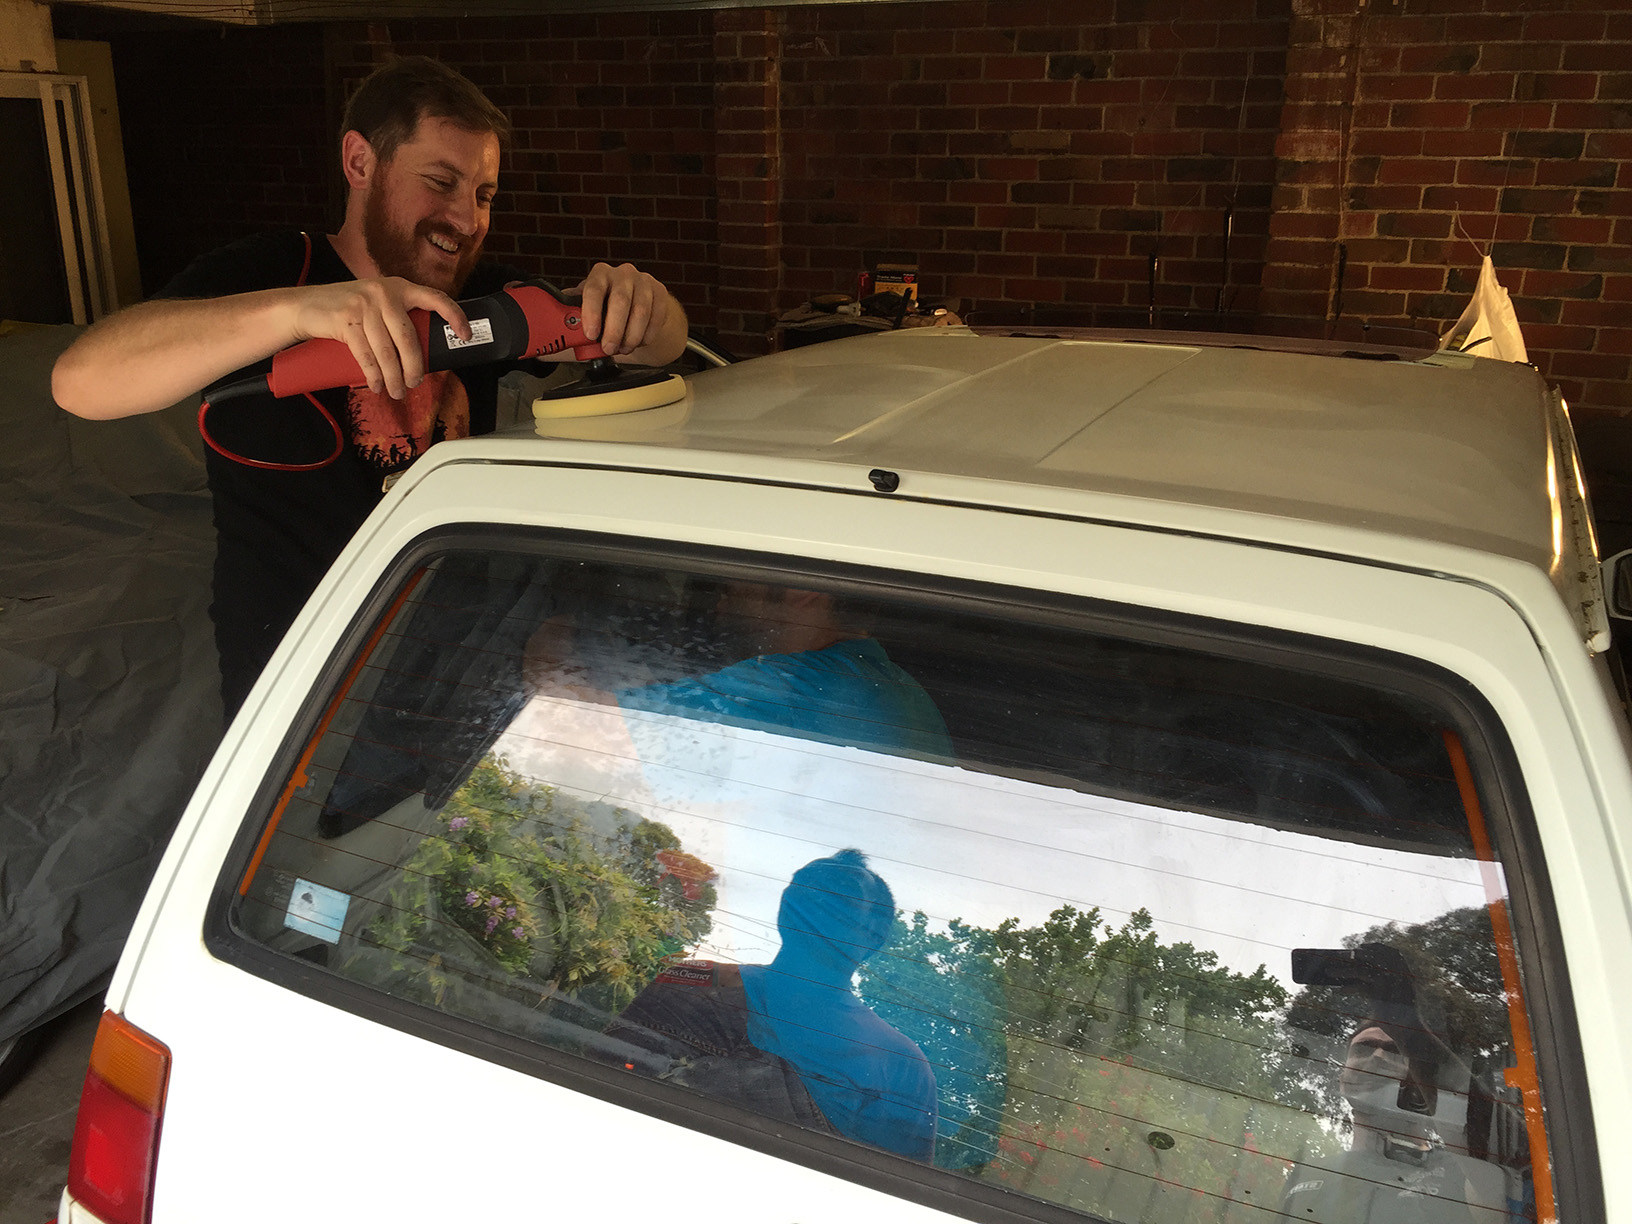
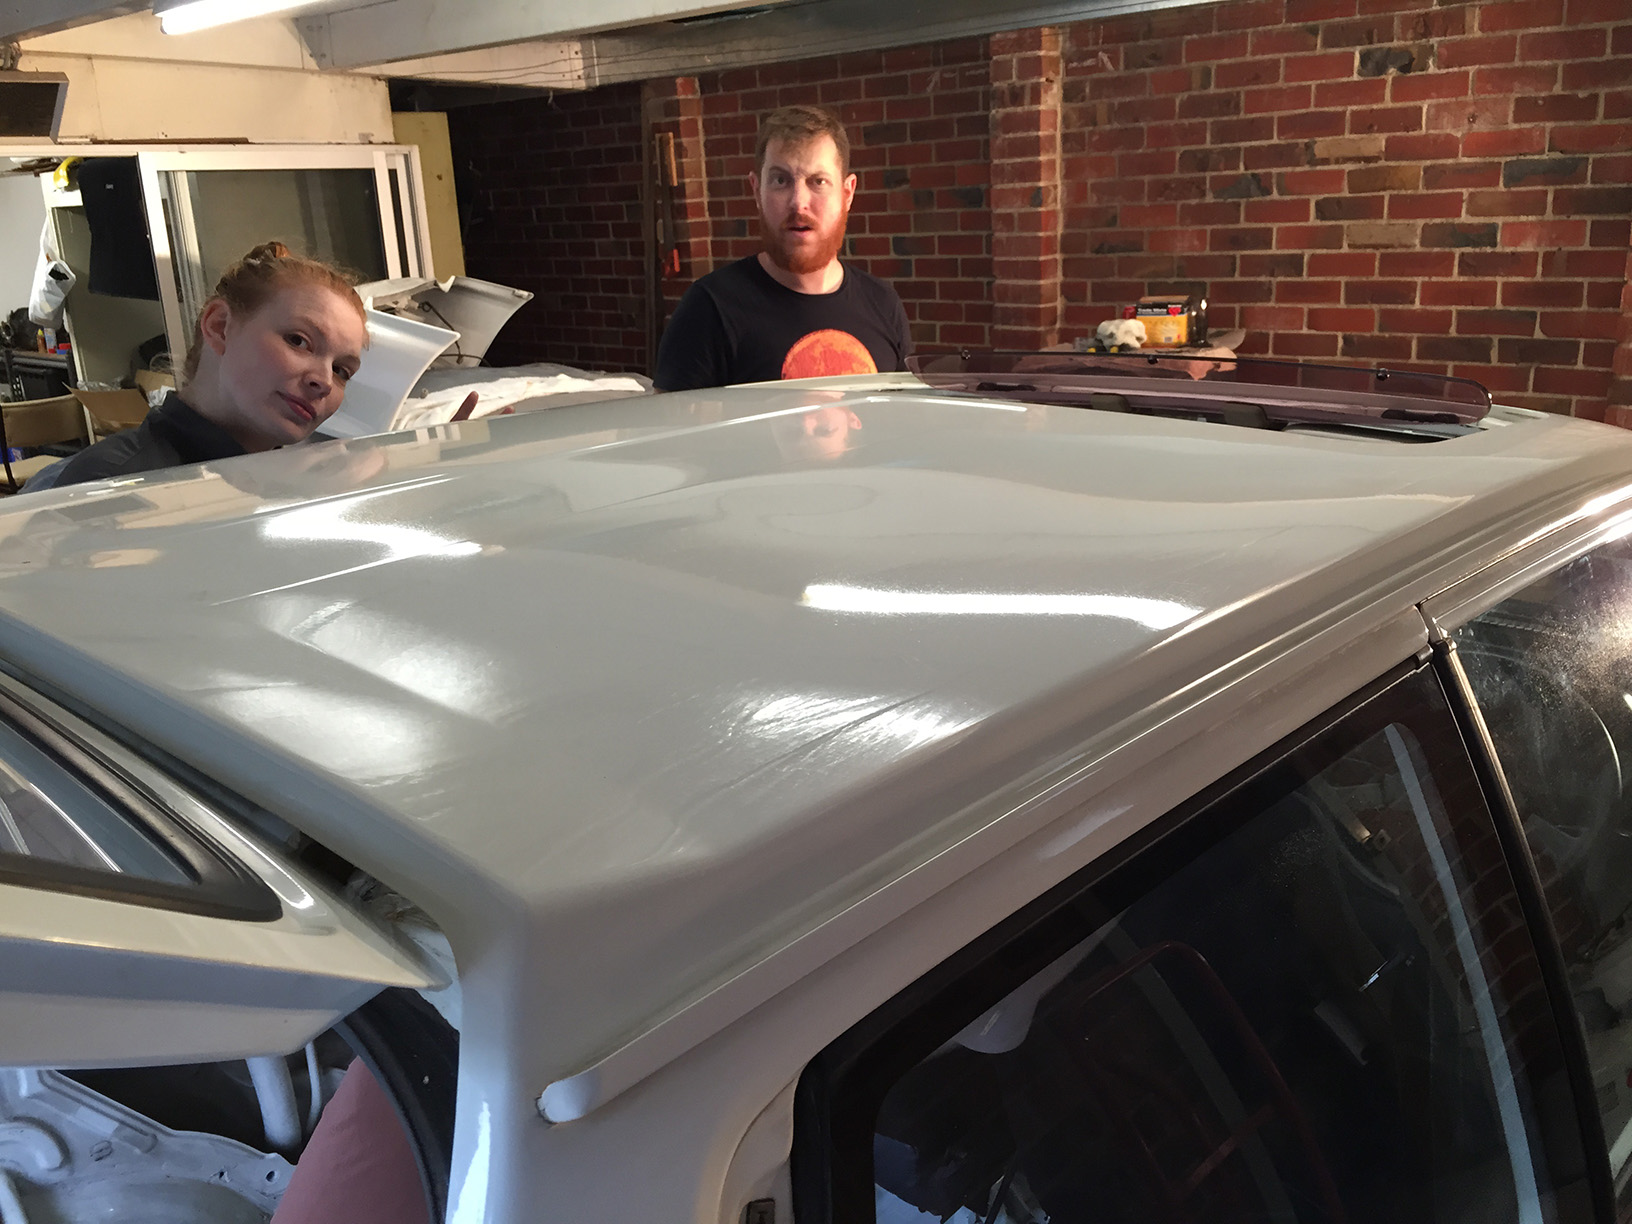
Ryan getting started on the roof!
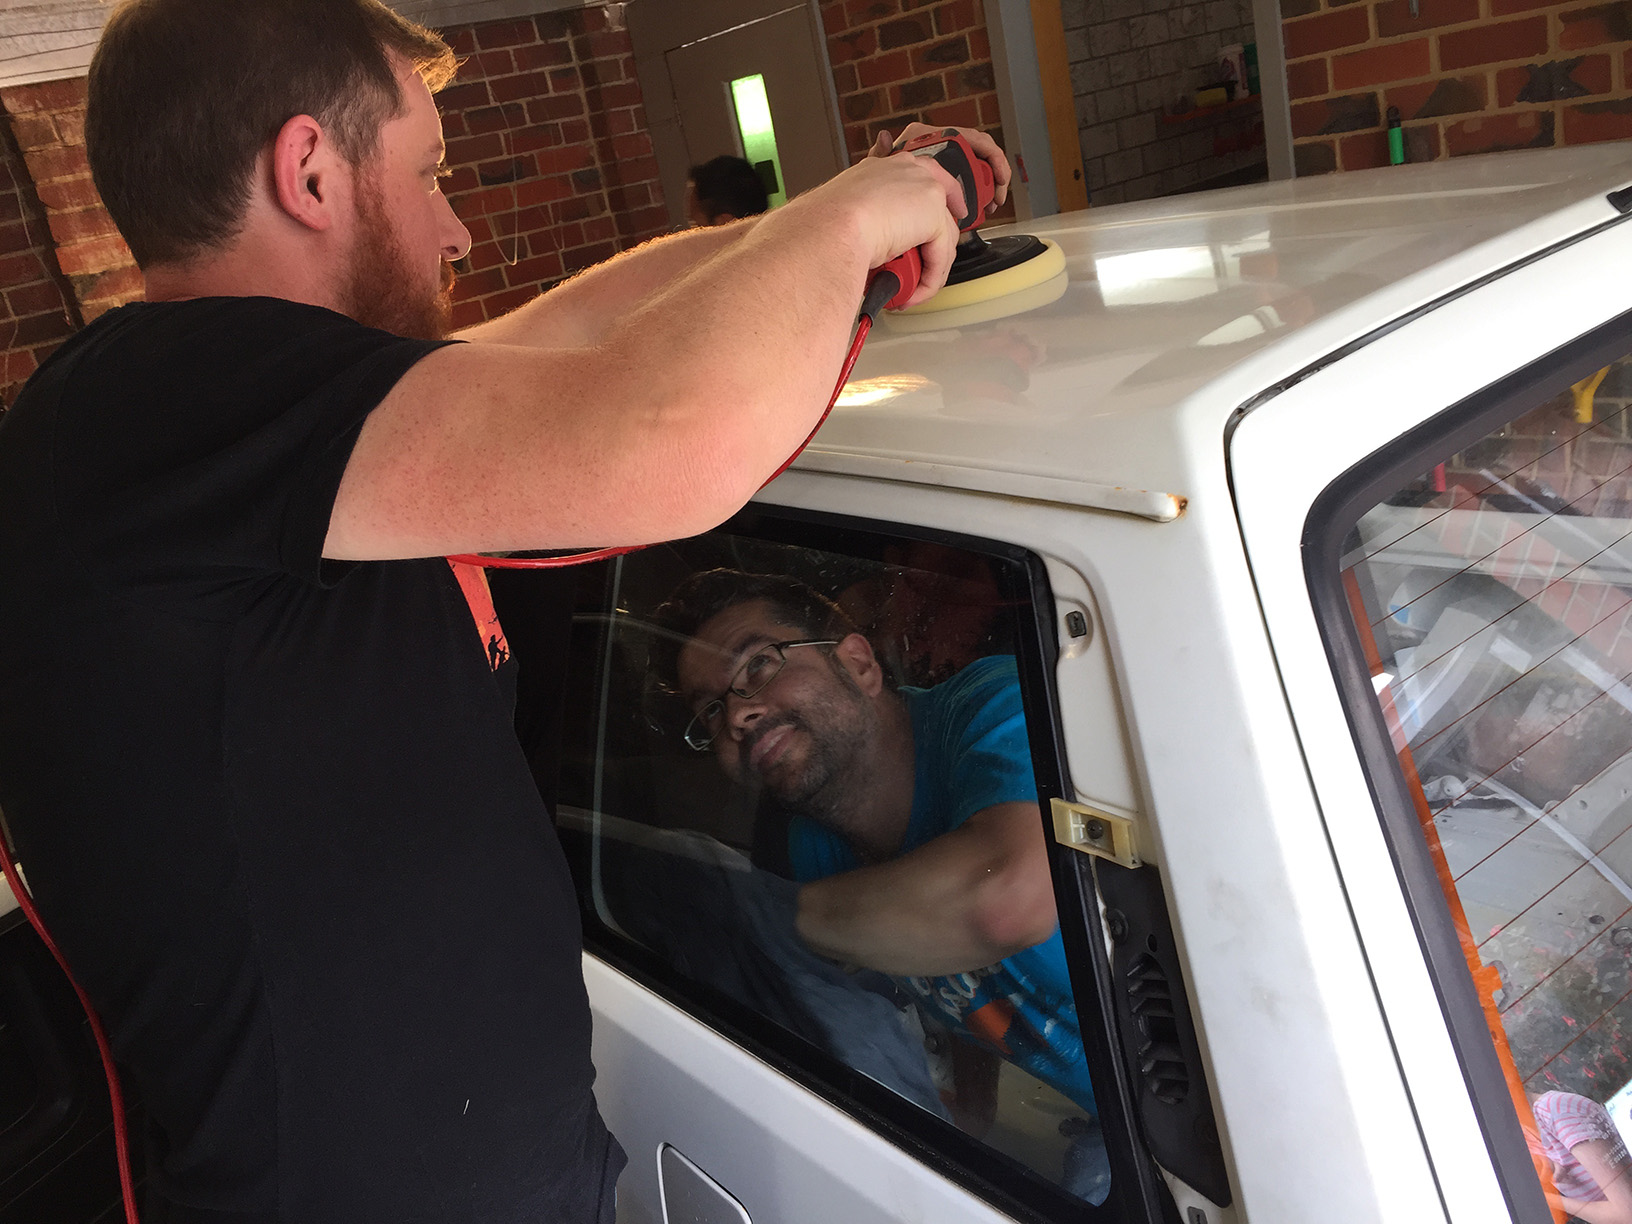
Dan working on the inside and doing his best to make everyone uncomfortable. Another big shoutout to the blokes who visited and lent their hands to the clean up.
Early stages of polishing and already it was looking much better.
Another progress shot.
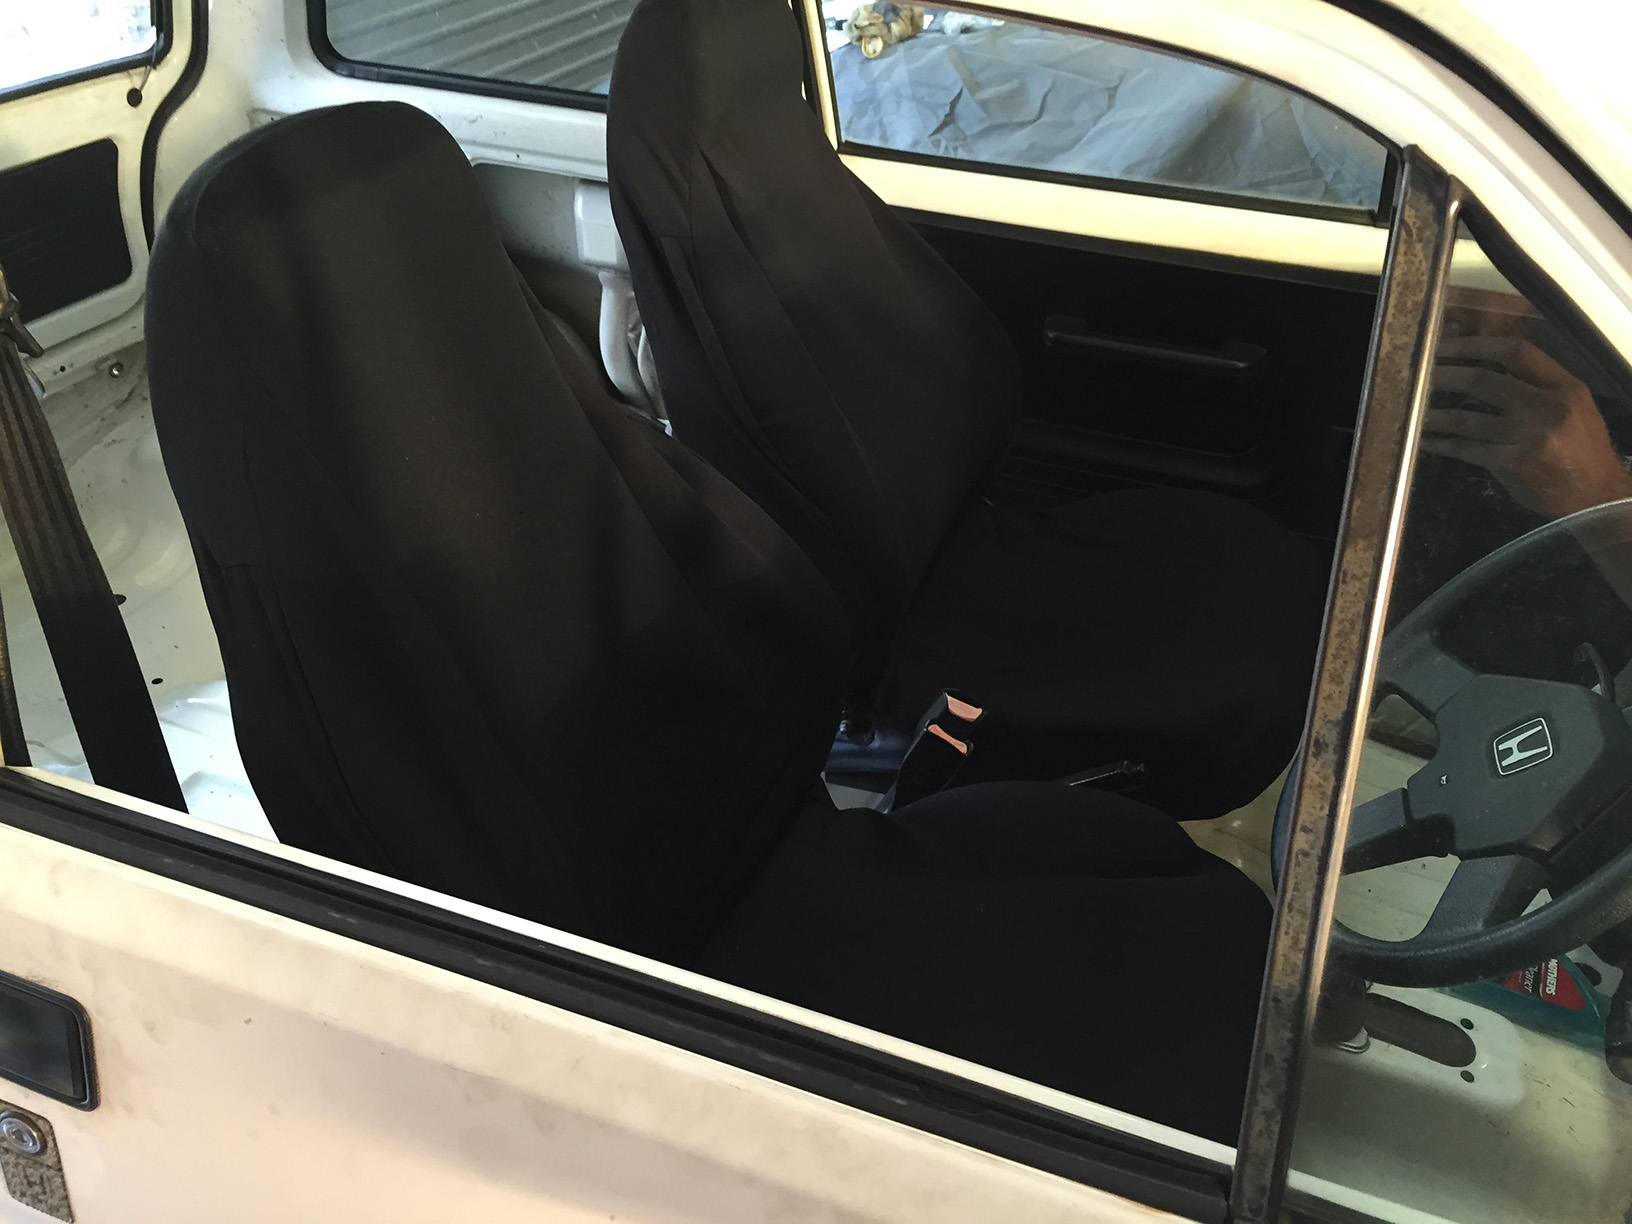
Seat covers thrown in for now to hide the shredded seats. We’ll hunt down some new seats soon.
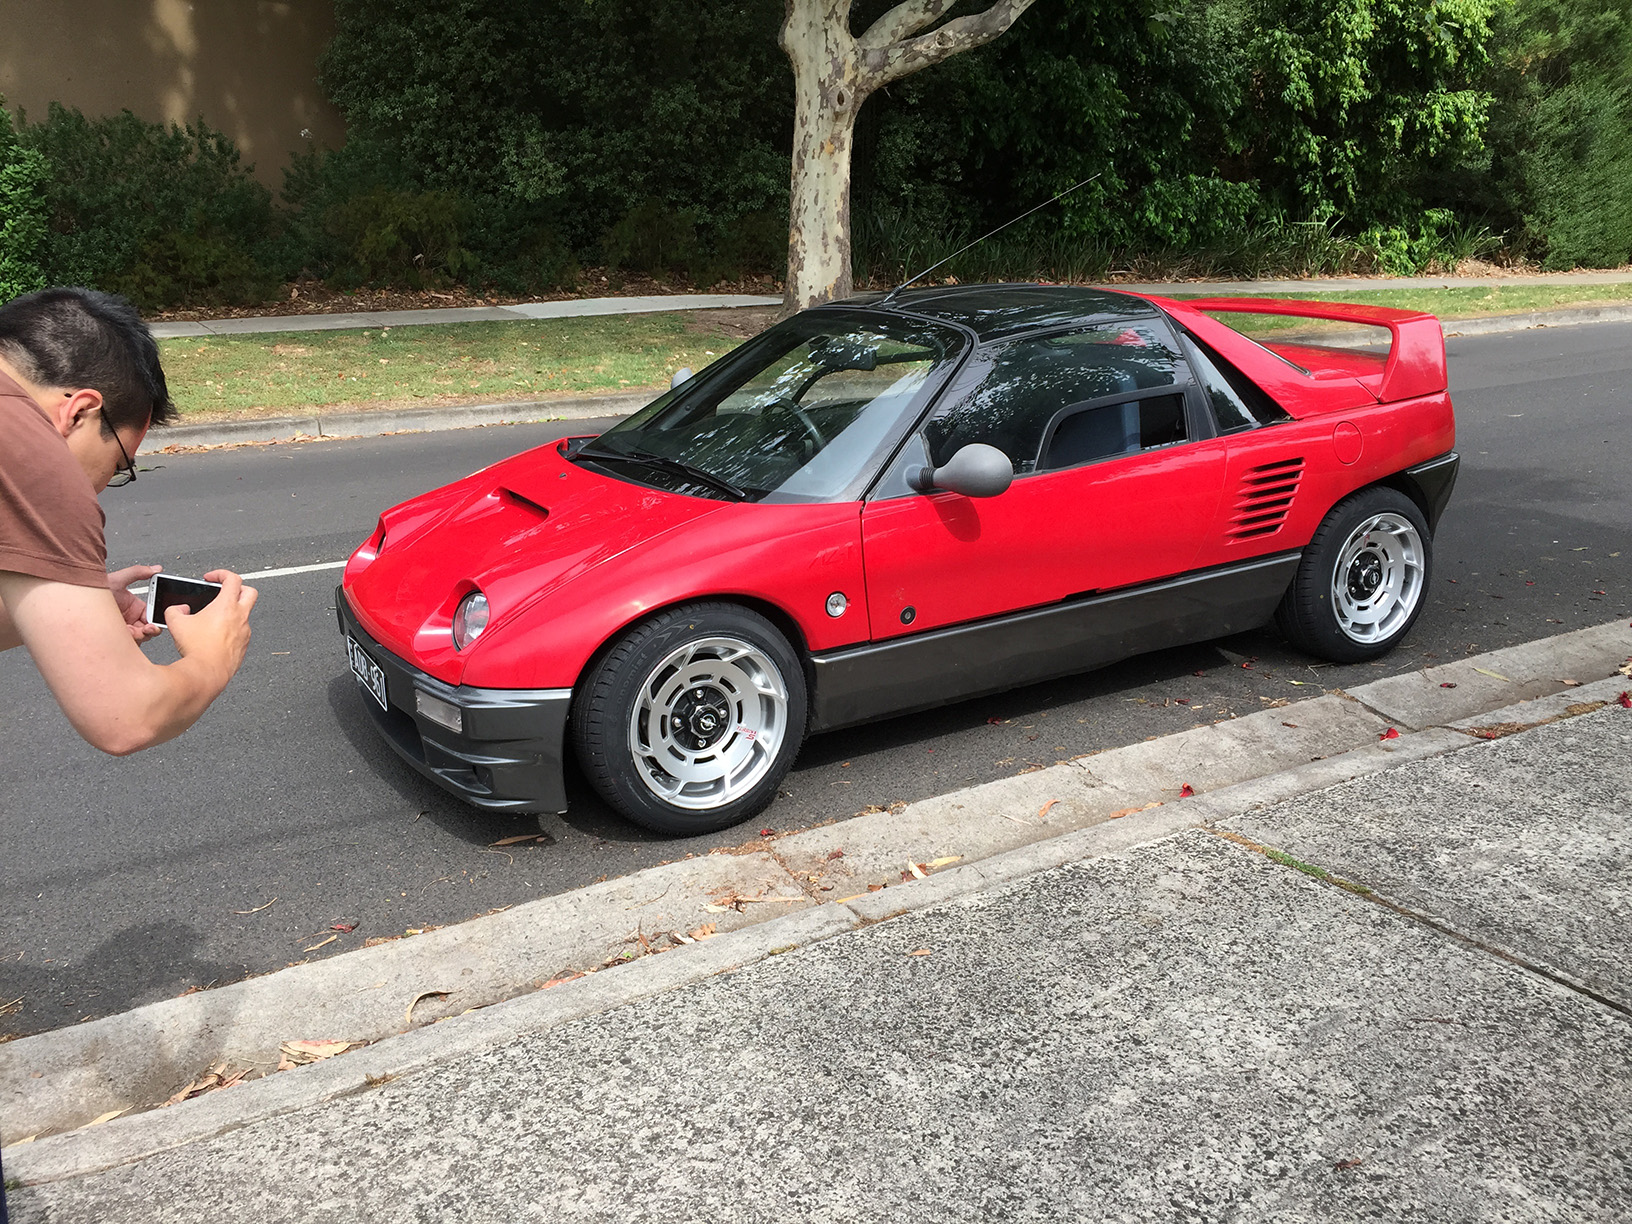
Quick break for this photo op after Dan finished adjusting the AZ-1’s suspension. Epic.

Here’s Tony posing with the front bumper like a proud father.
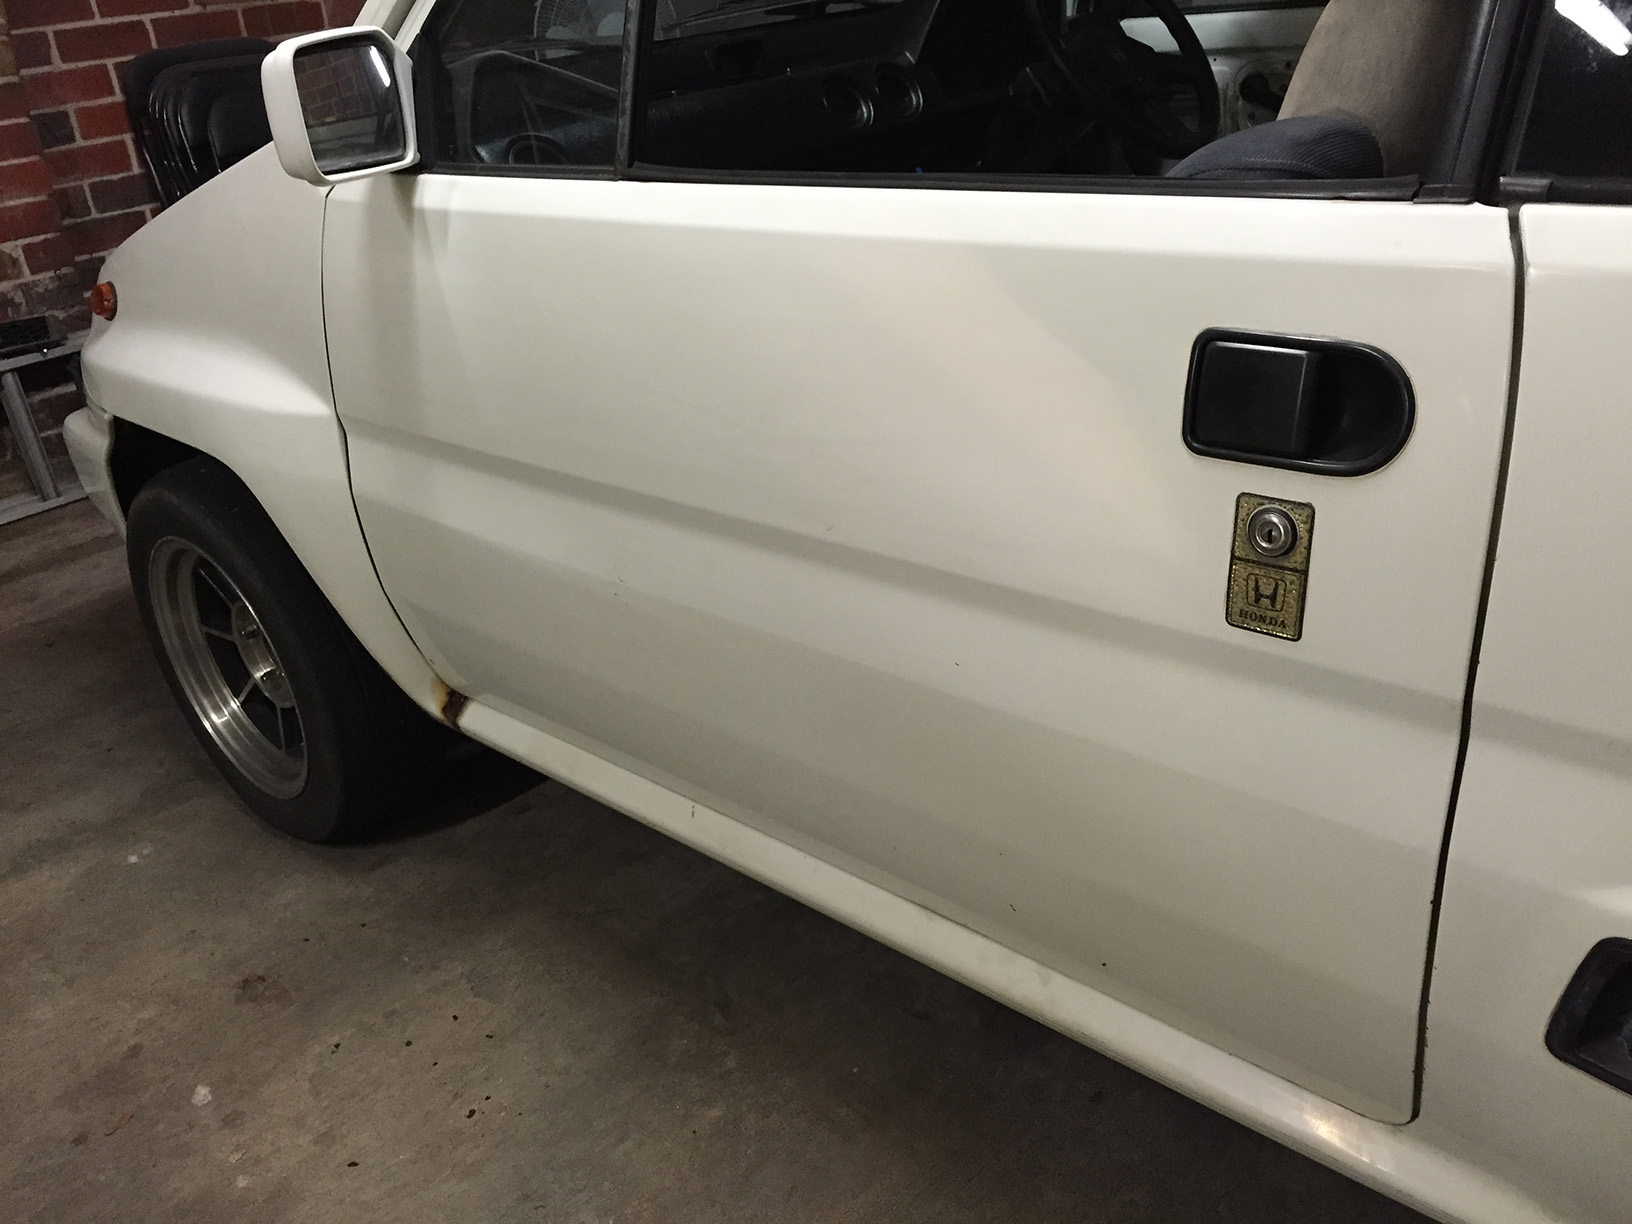
Never thought we’d see this kind of gloss without a respray.
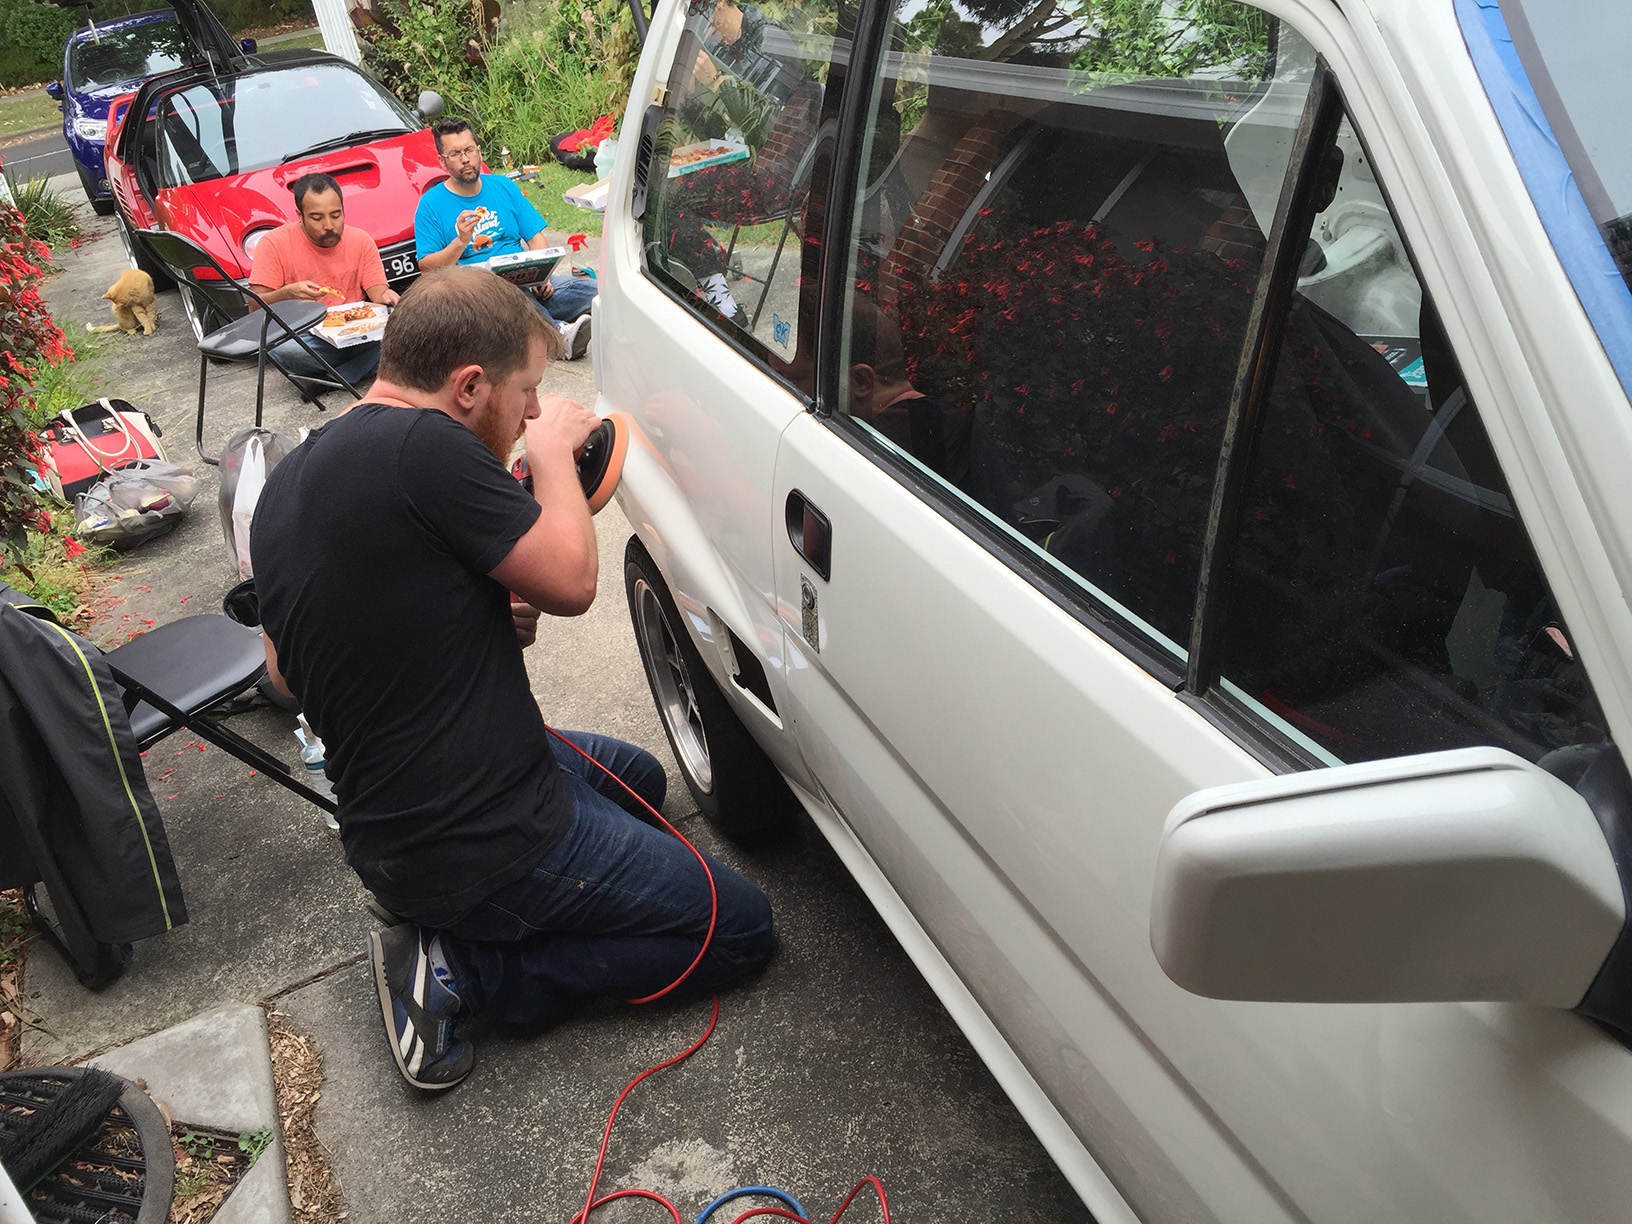
More hard work for Ryan. Smoko for everyone else.
Driveway hangs. Best.
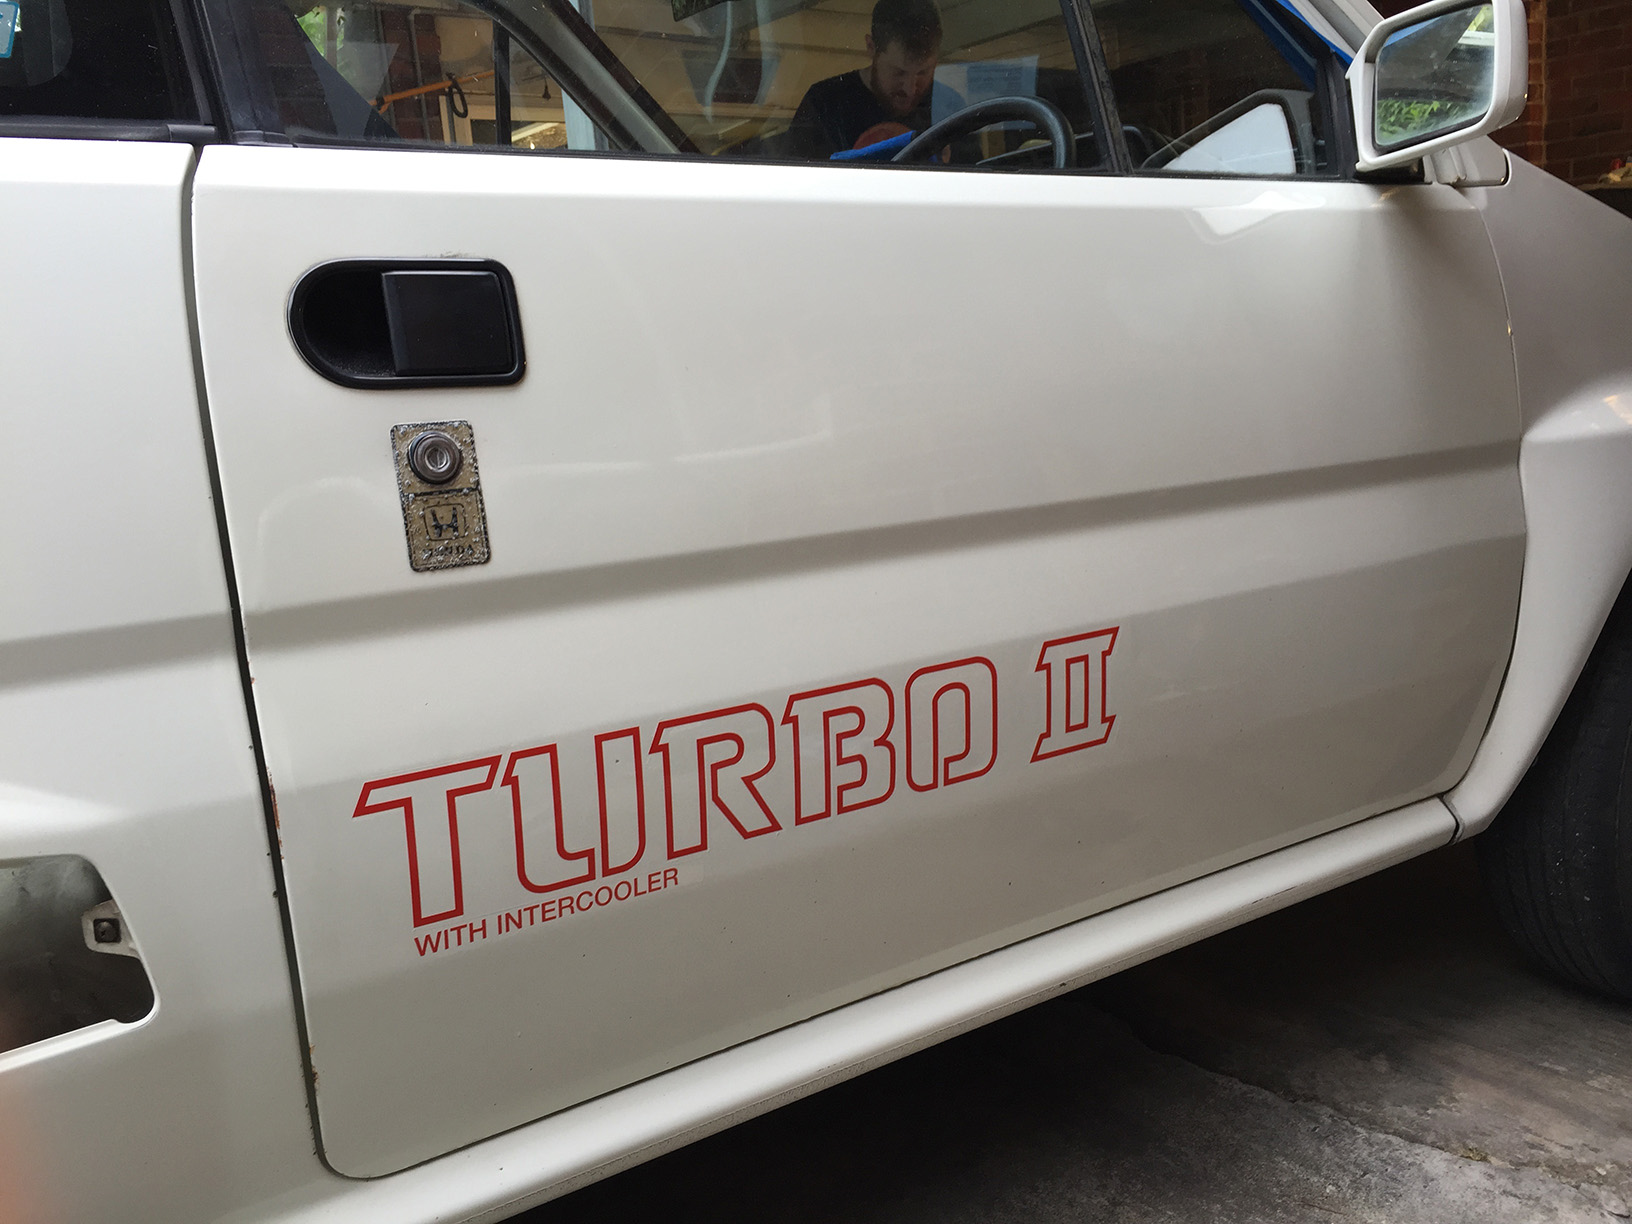
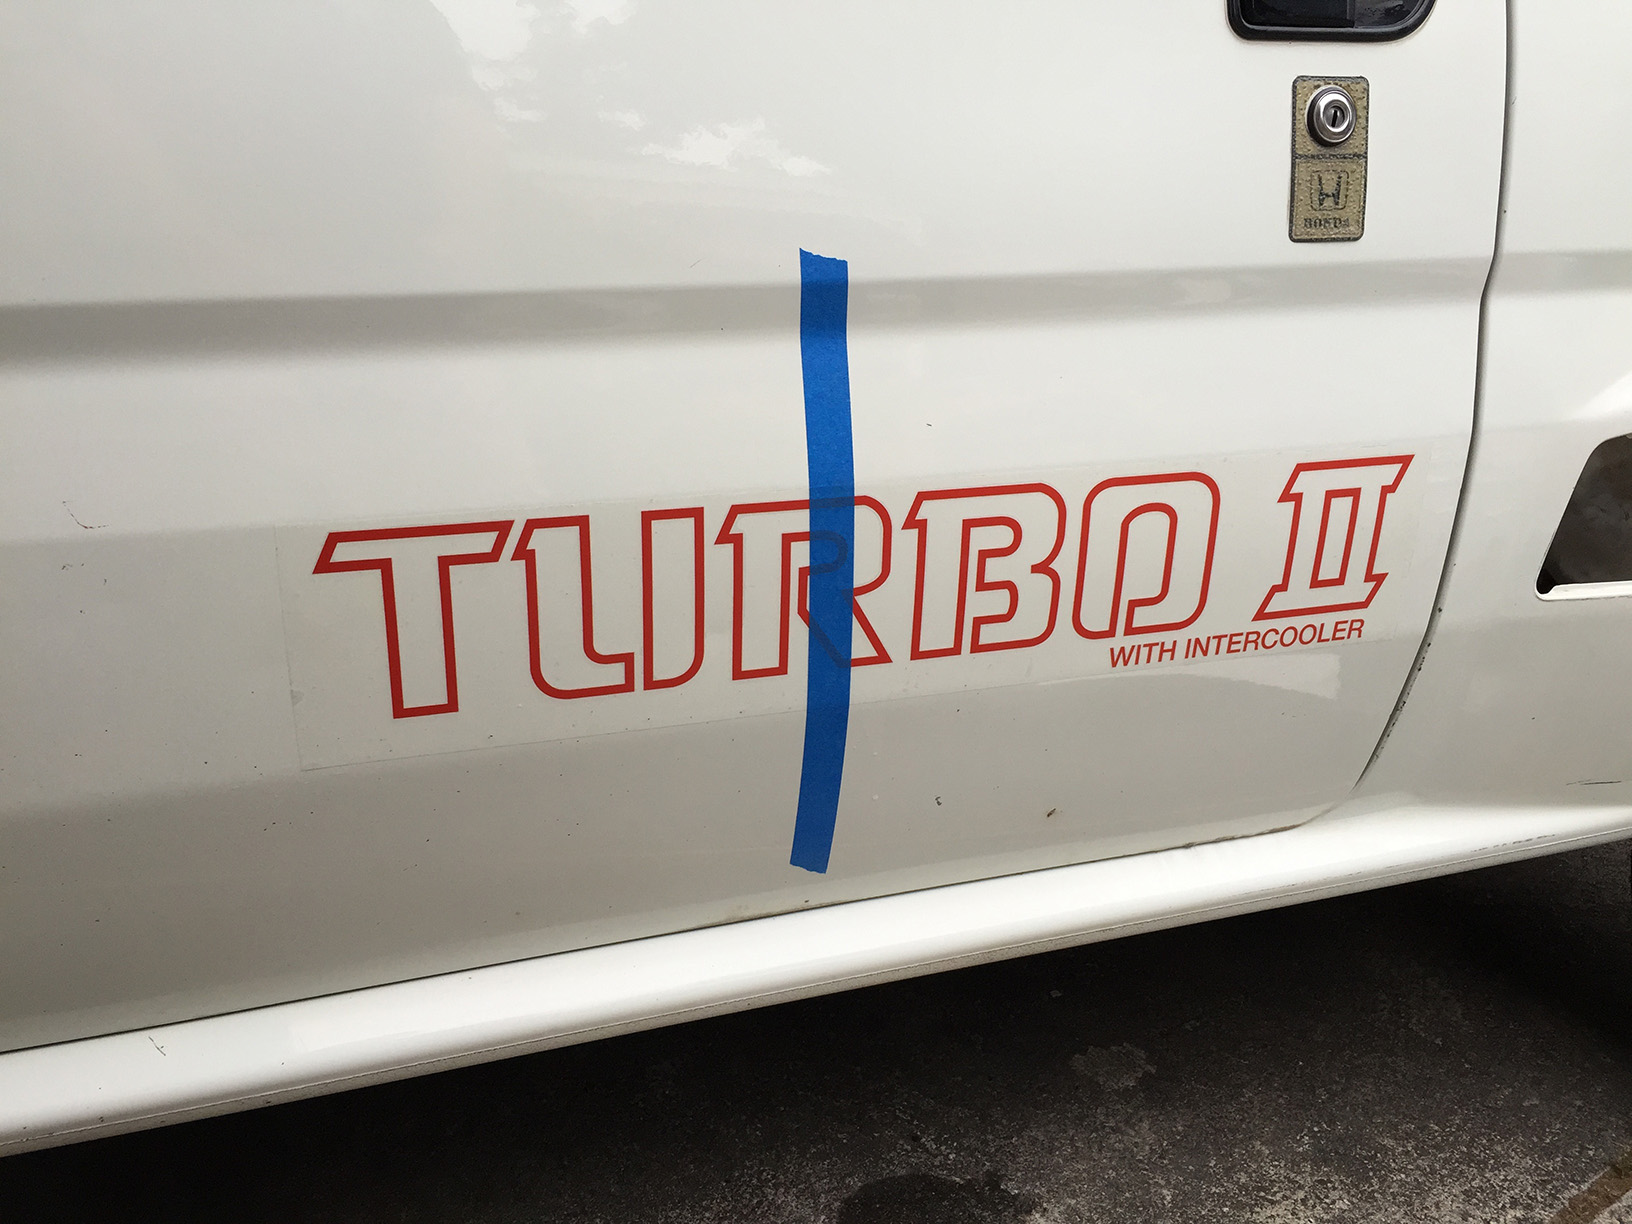
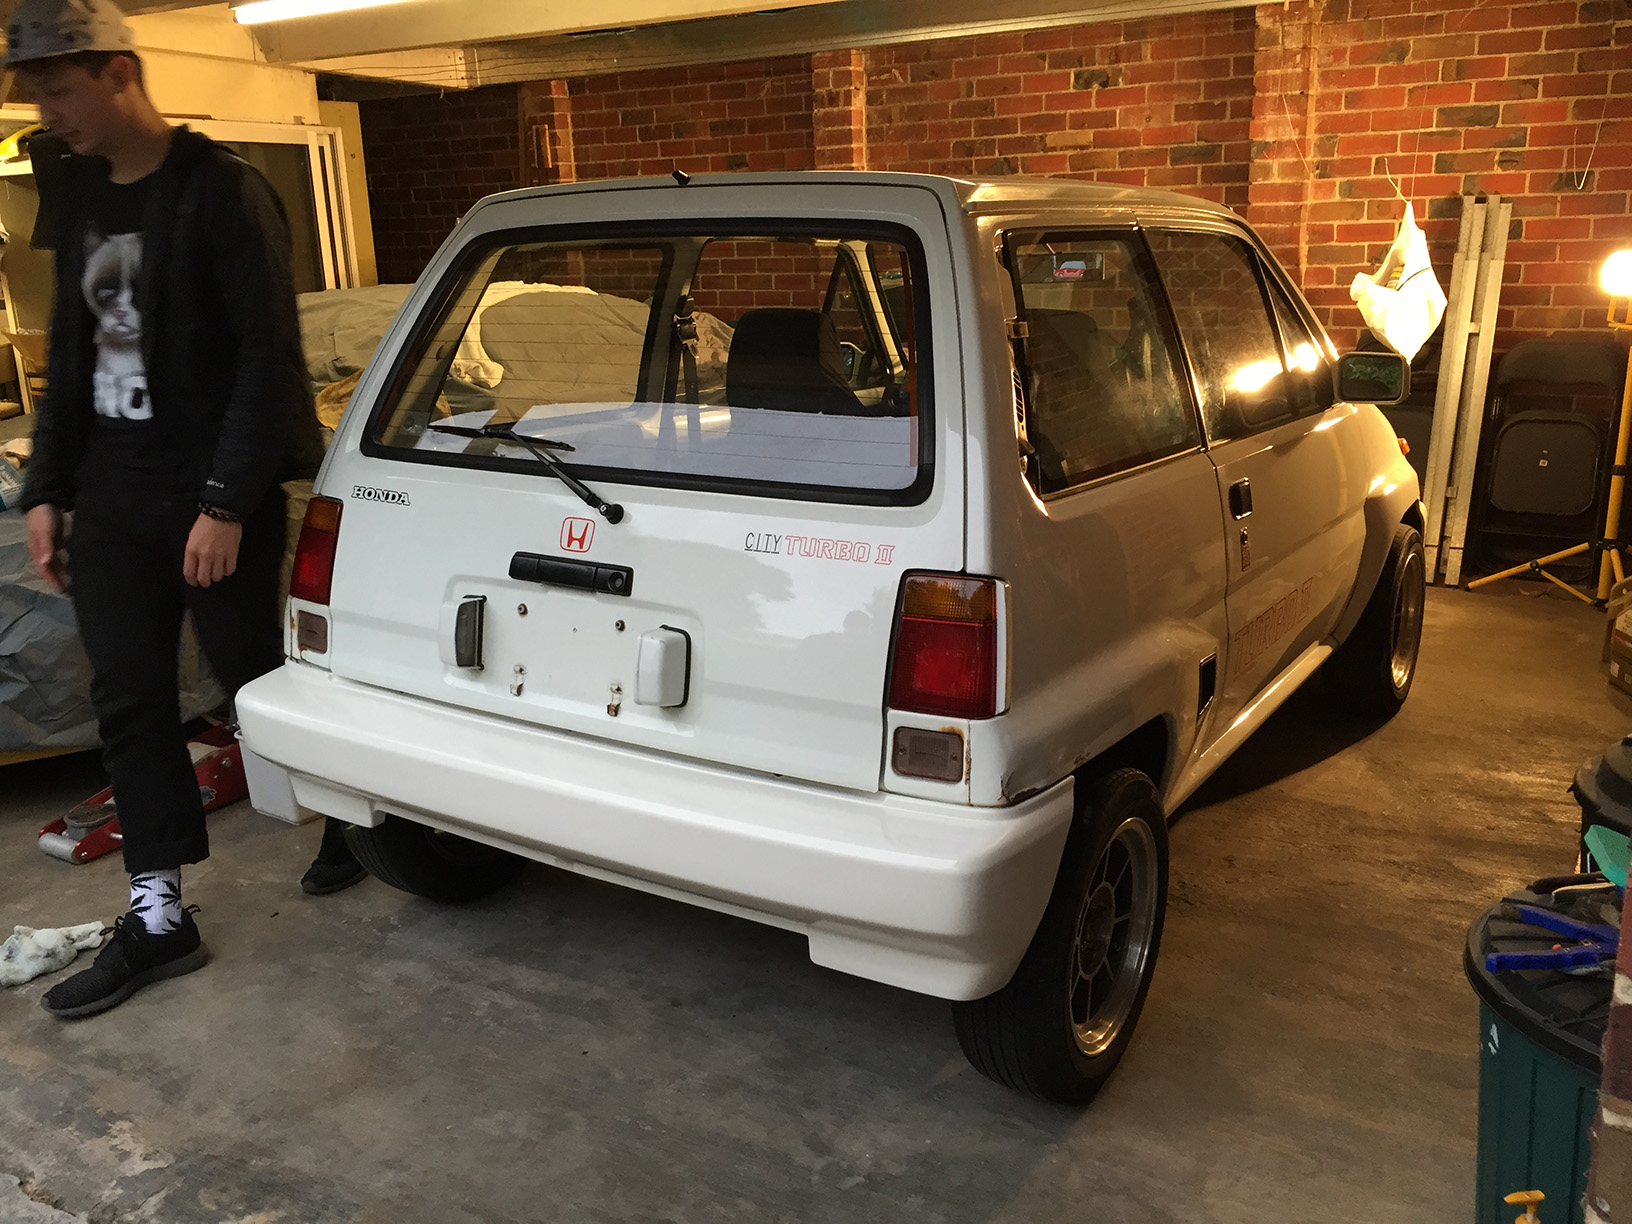
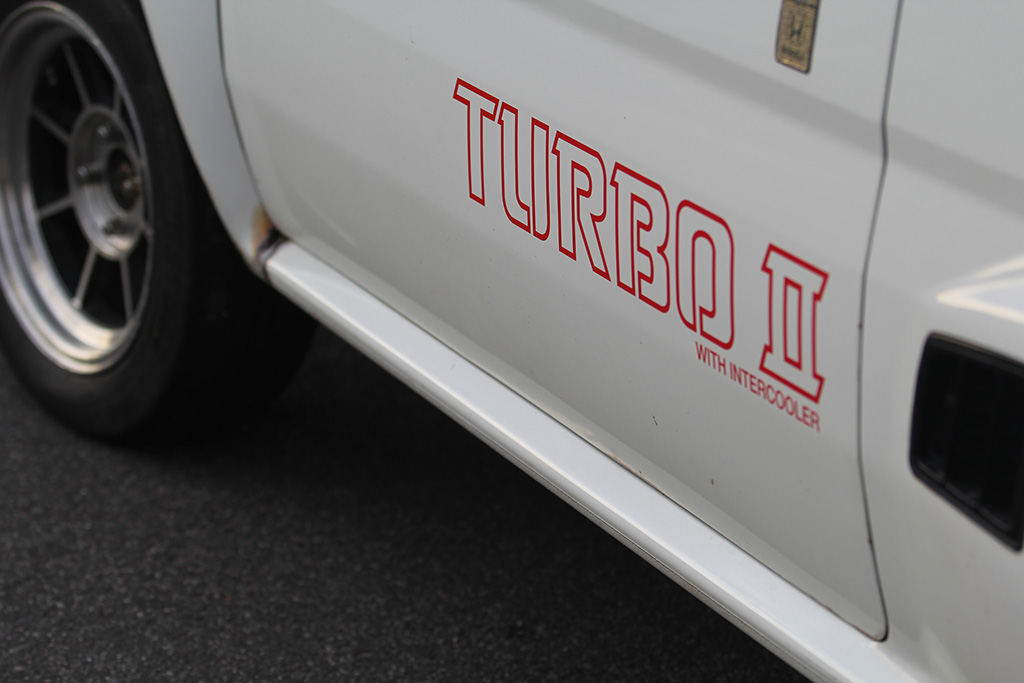
First of the new decals laid down!
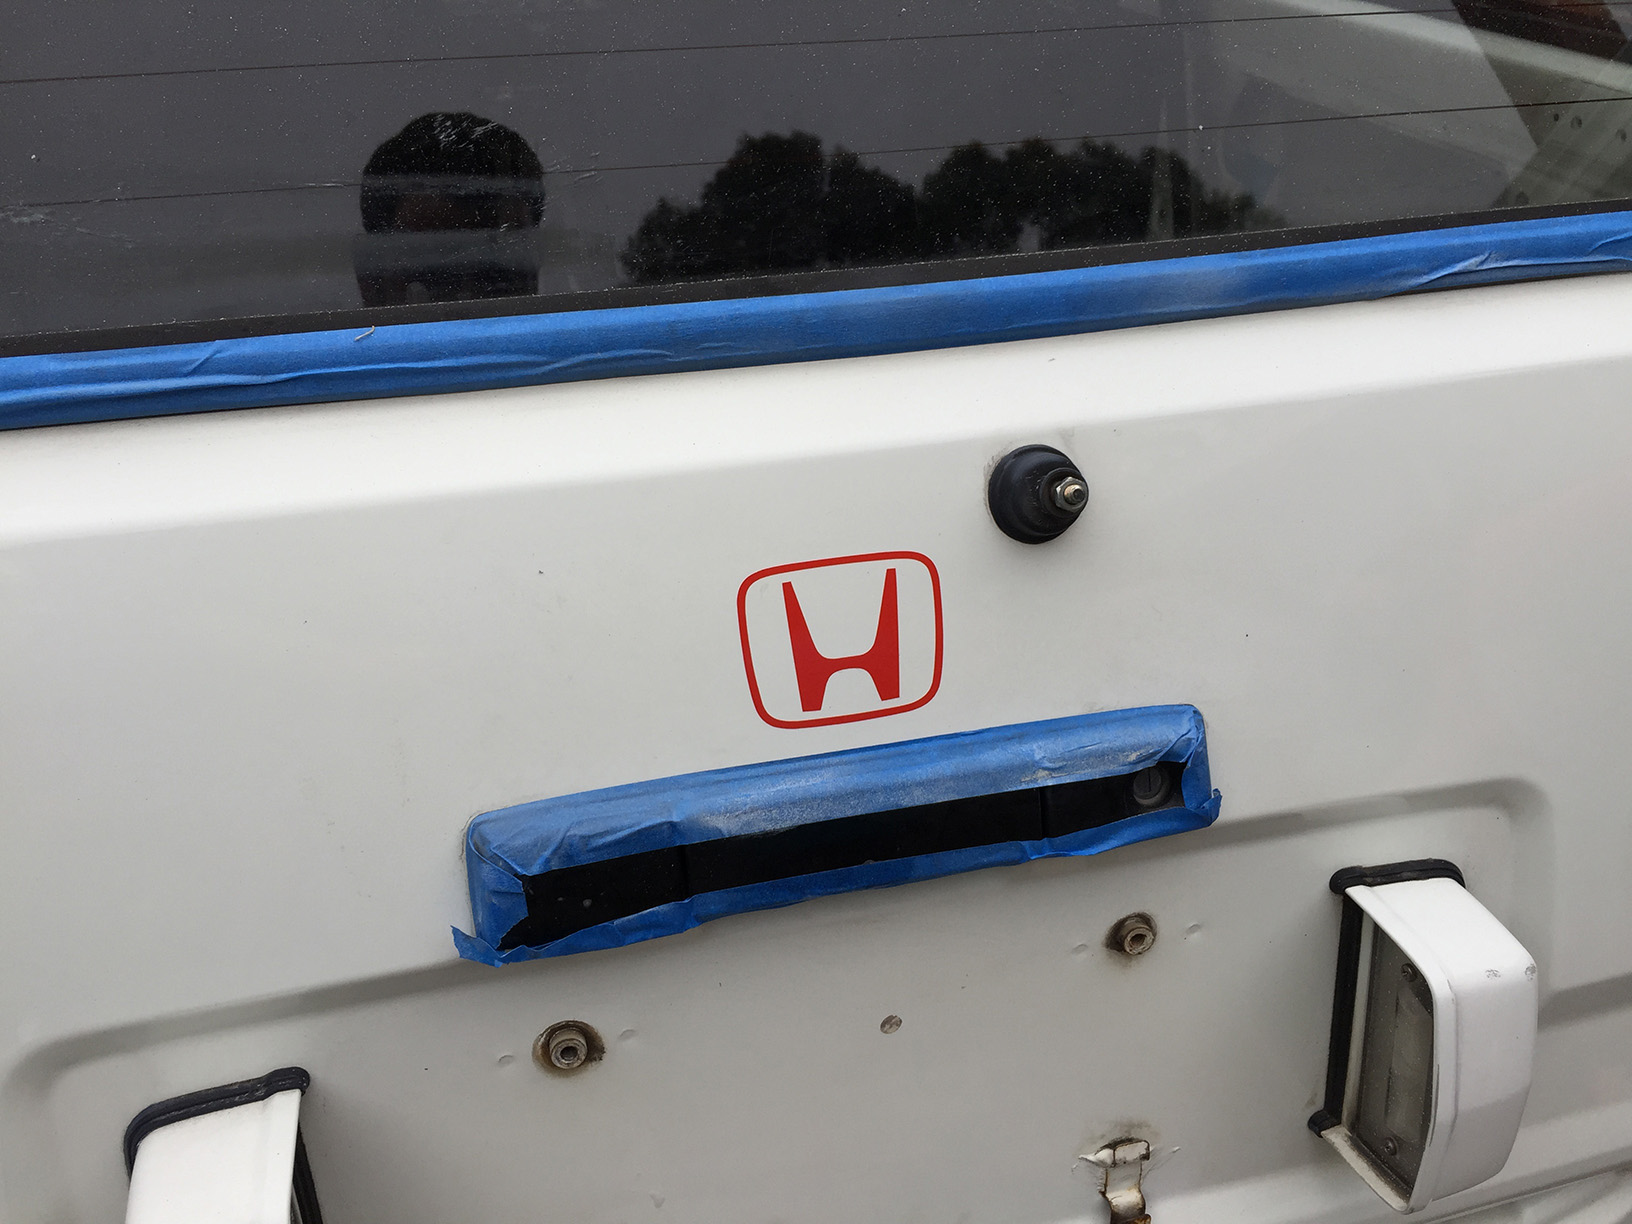
Rear hatch looking new again.
Sticking these on is up there with my favourite parts of the whole build. Such a satisfying ‘finishing touch’ kind of a thing. Even though there’s plenty left to do.
Lining up the passenger side.
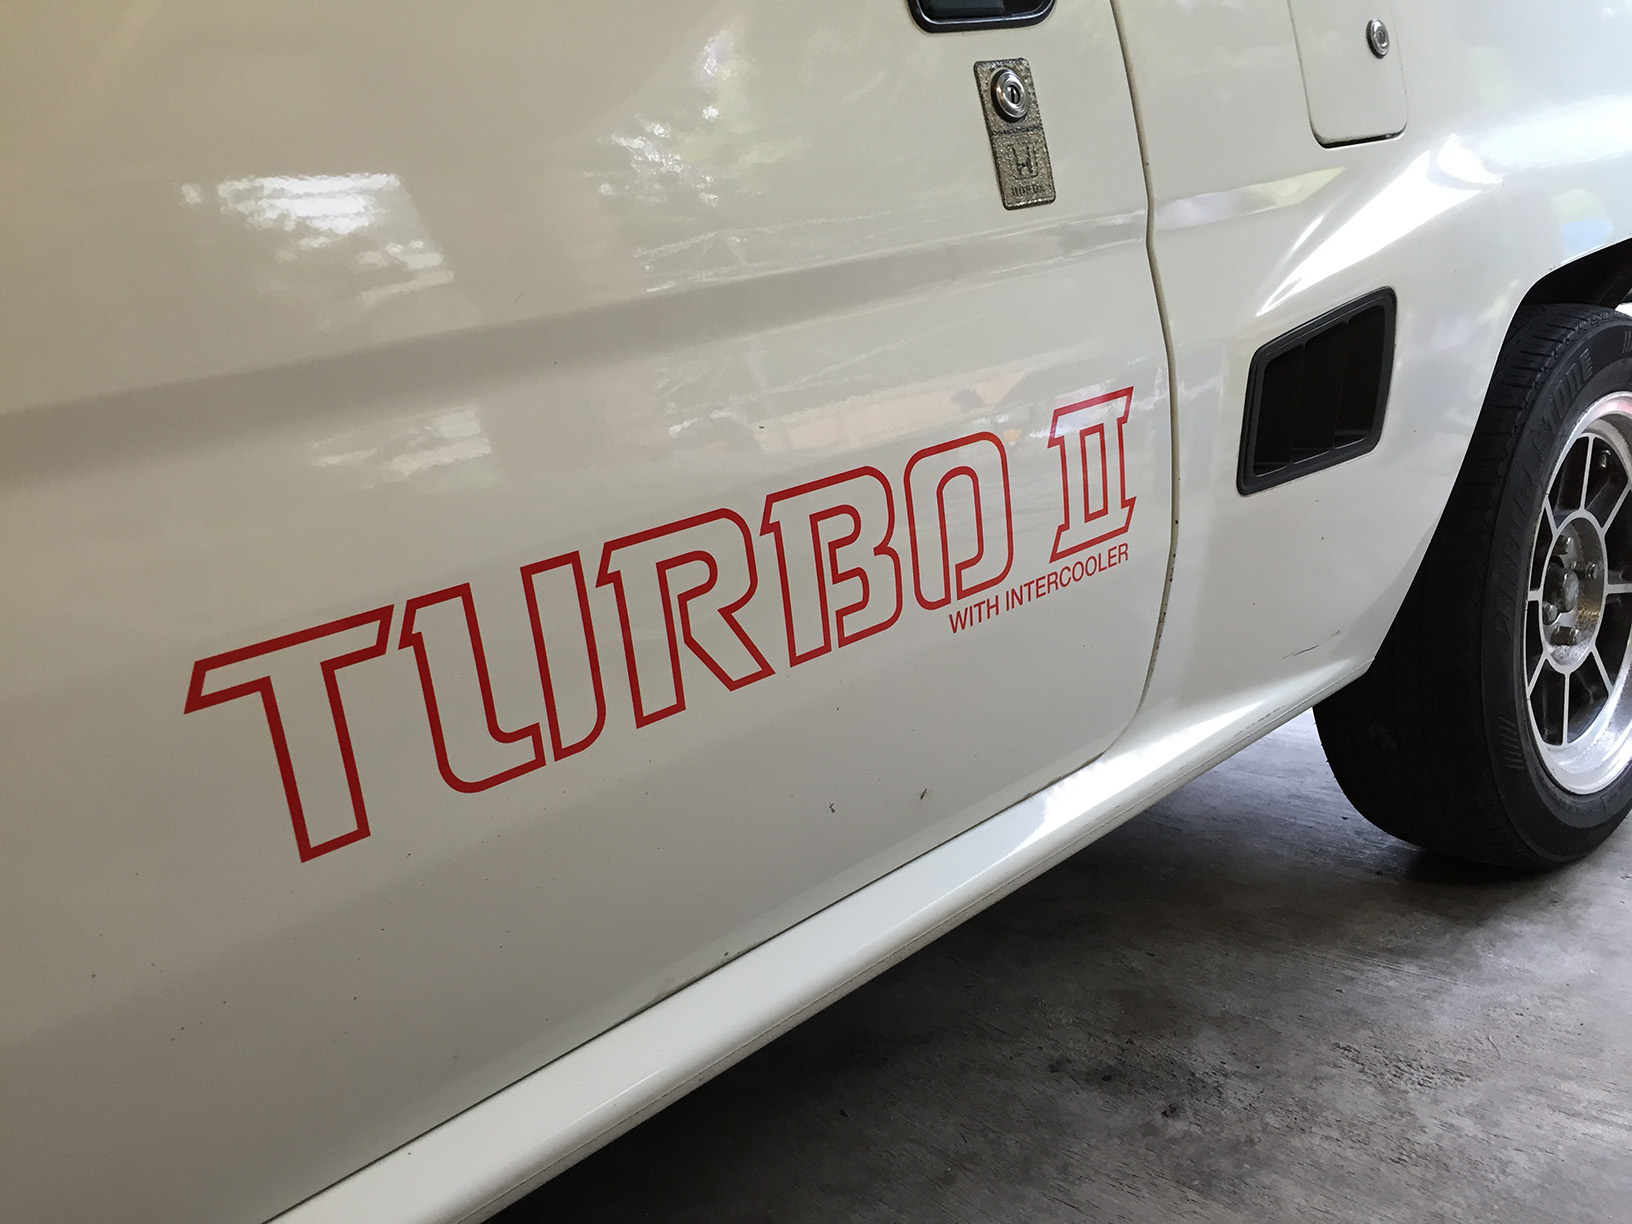
Repainted side duct fitted.
Admiring the gloss again. Amazing.
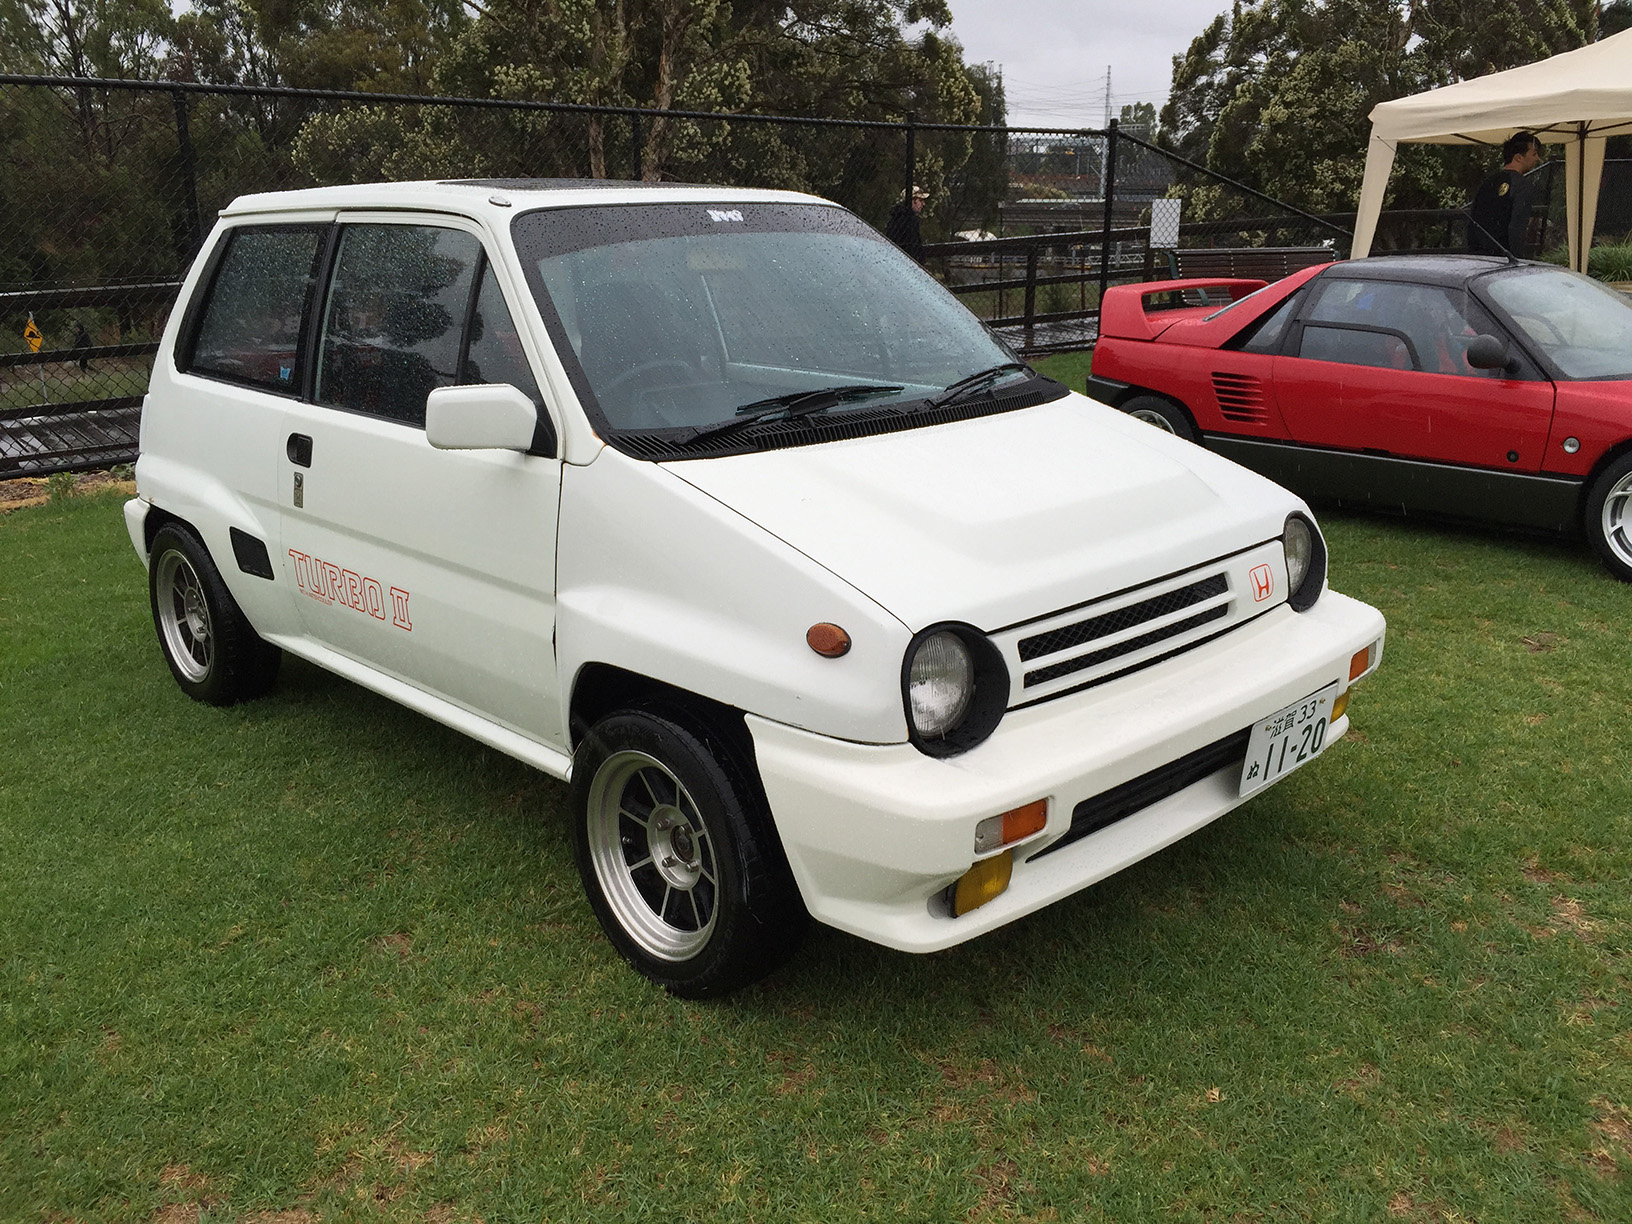
Looking like a new car!
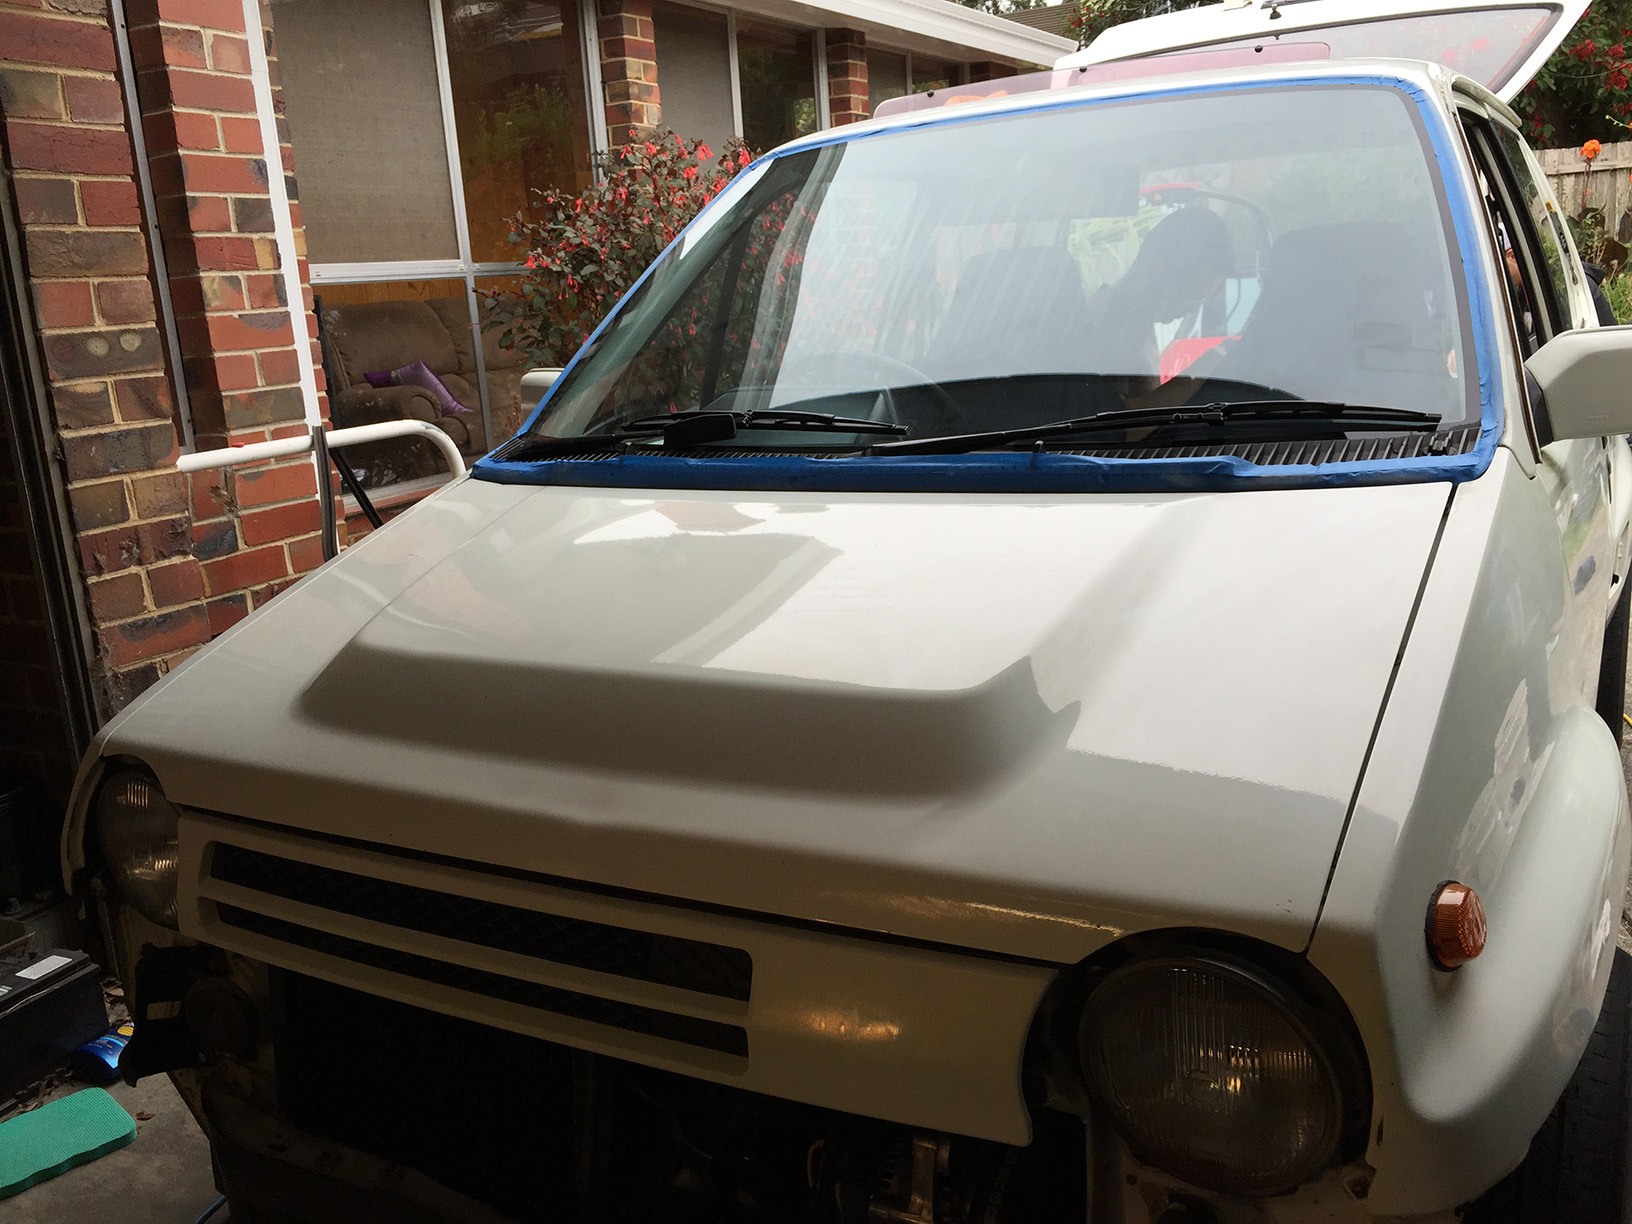
Front bumper on. Pretty happy with the colour match considering it was done off a paint code at Autobarn. It’s very close.
Rear bumper on!
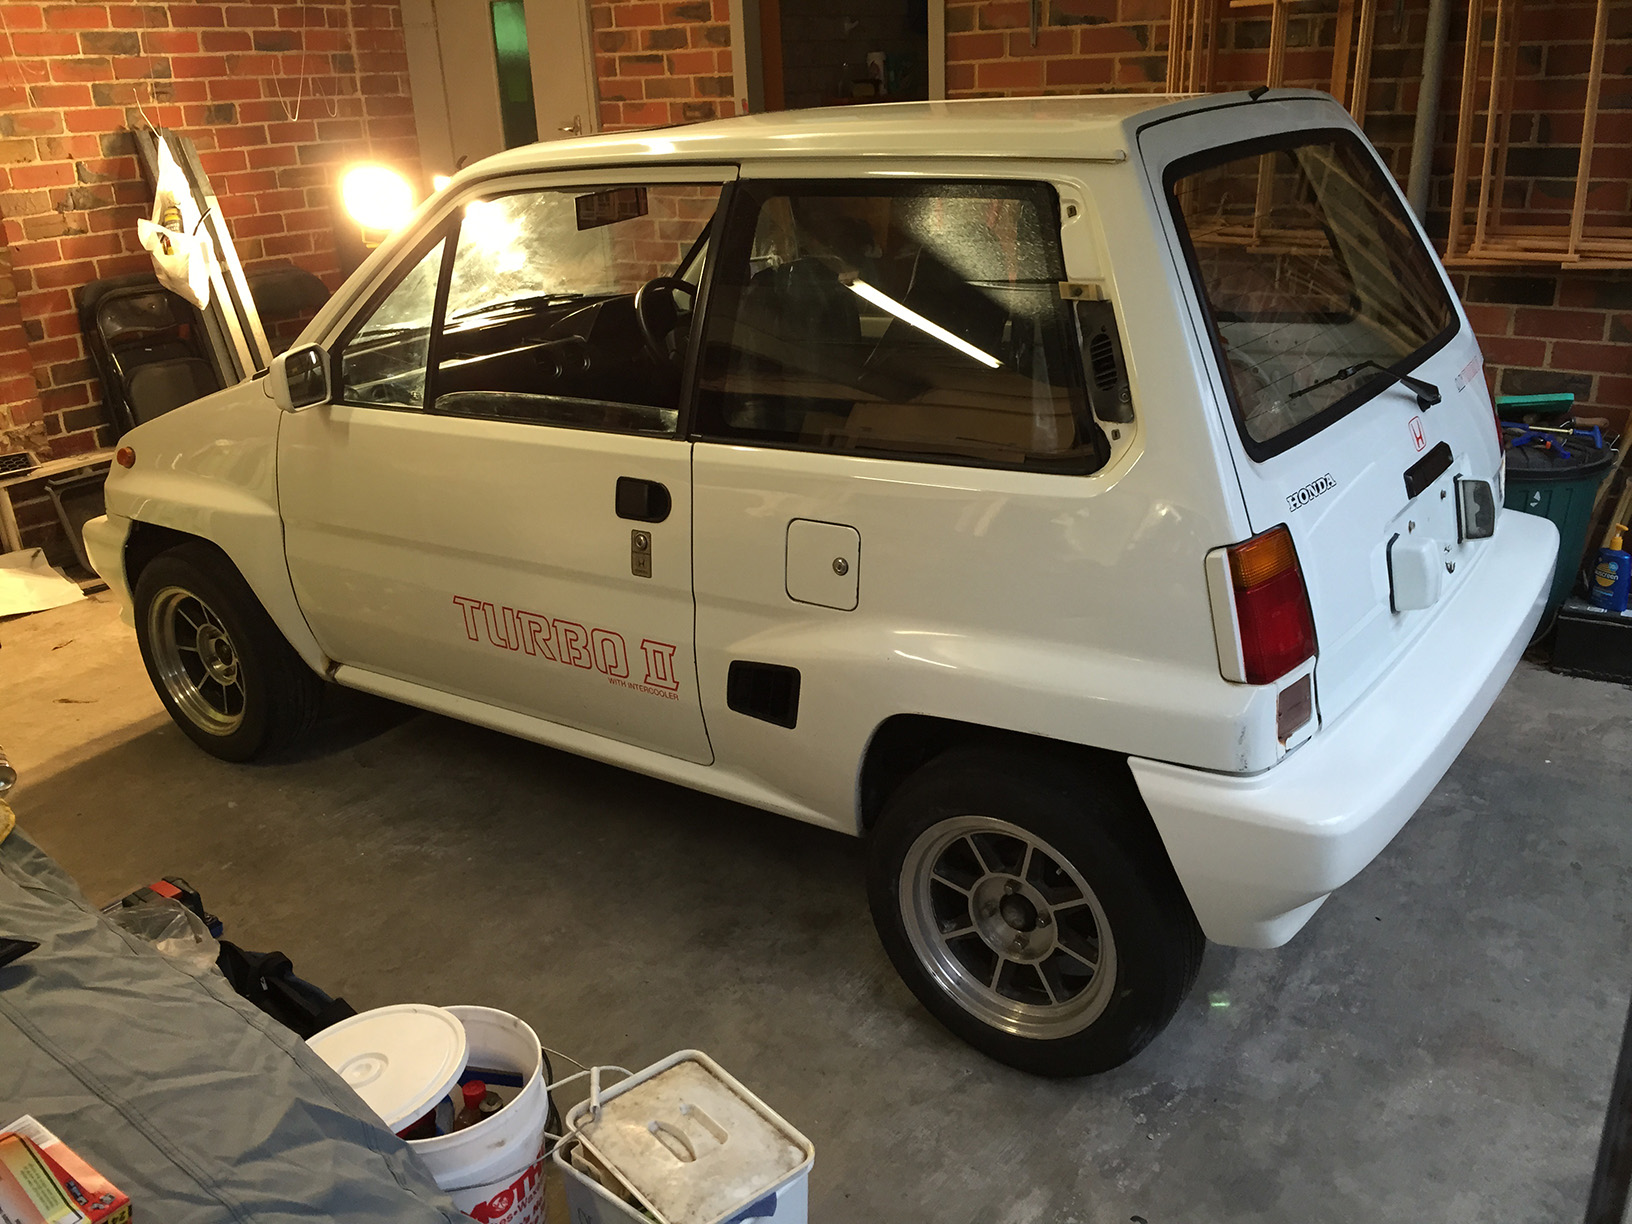
I think this is the best angle of the car.
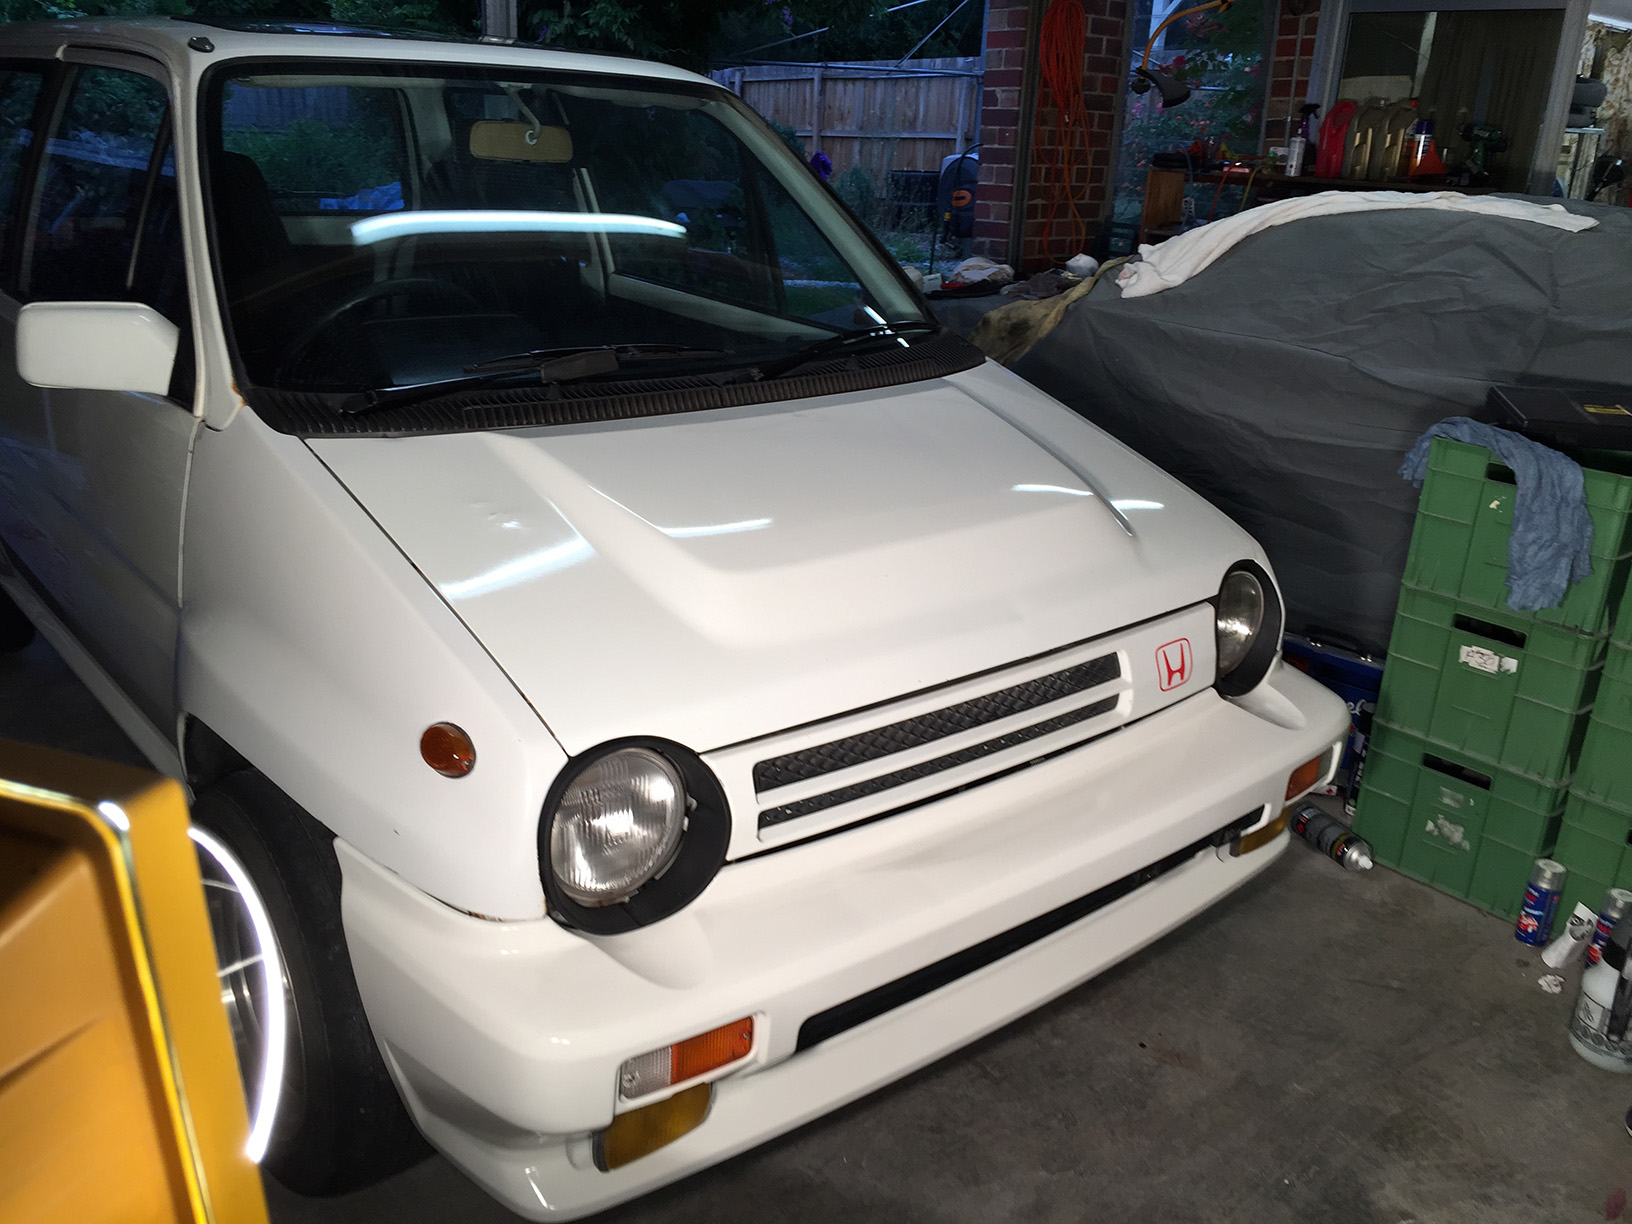
Headlight surrounds in. It has its panda eyes back again.

United at last!
Stuck down the black windscreen banner.
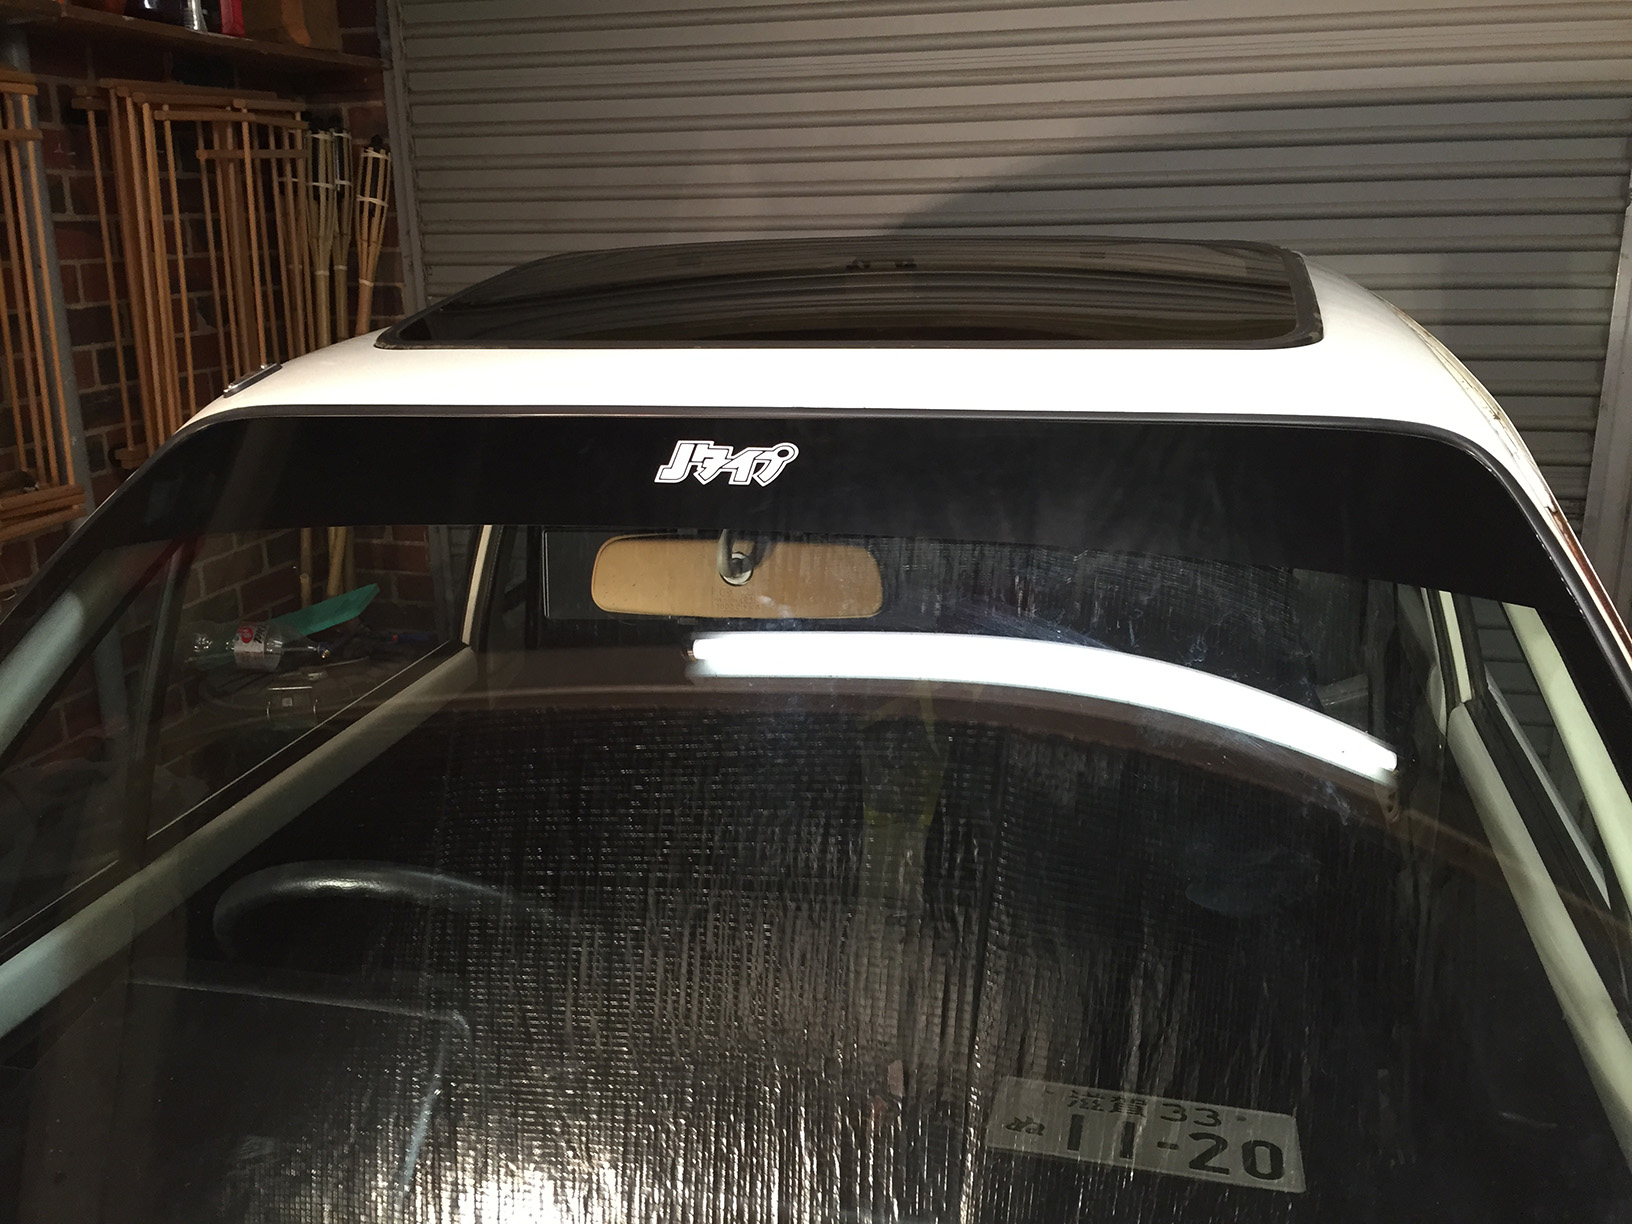
Added a club sticker to finish it off.
We stuck down all the vinyl with a water/detergent solution to make it easier to line them up. Definitely the best way to do it. This was the last one to go down and still has the application tape on the back of it in the photo. The final touch before Classic Japan!
Rolling in early we set ourselves up on one side of the oval. Straight away people were walking to Dan’s car and wondering what it was.

Couldn’t be happier with the way the City is looking after slogging it out these last few months. What a transformation. Most importantly it is running beautifully!
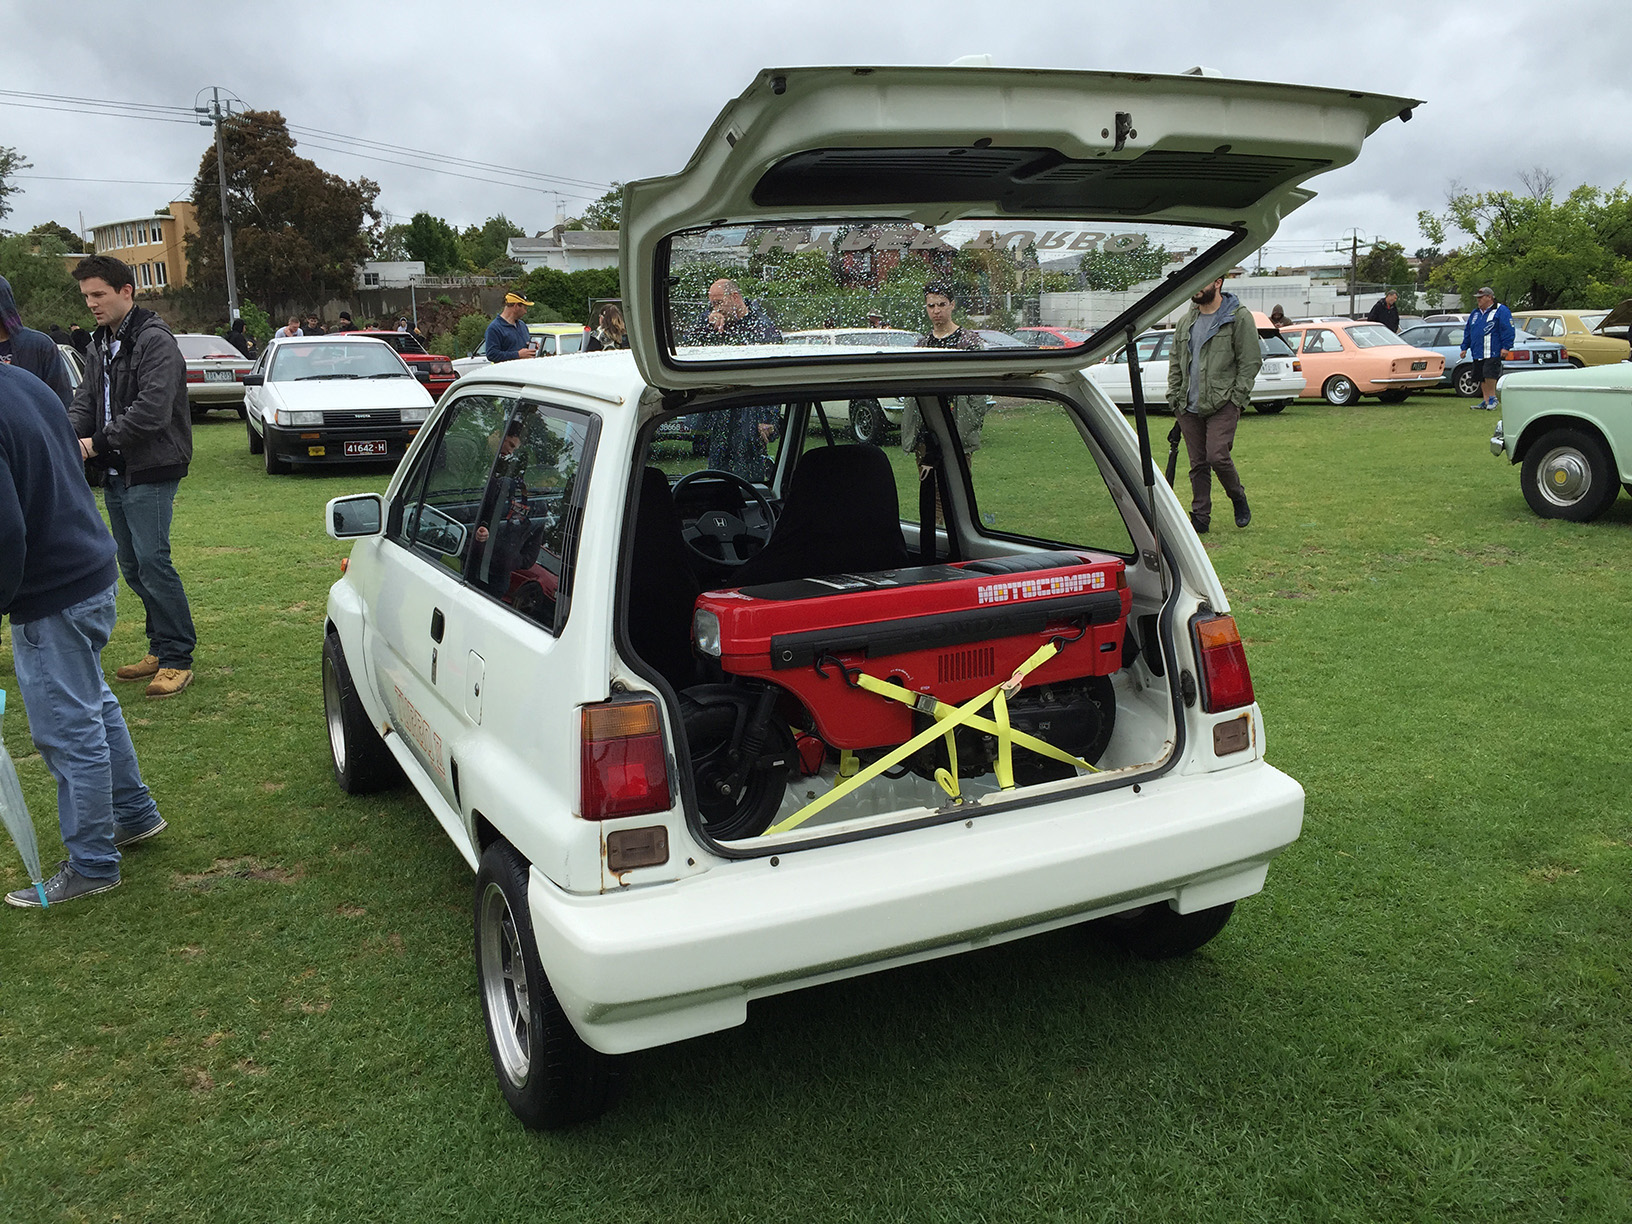
Tony’s Motocompo got a lot of attention and heaps of smiles. It’s one of those things that is just so Japanese it’s hard not to love it.
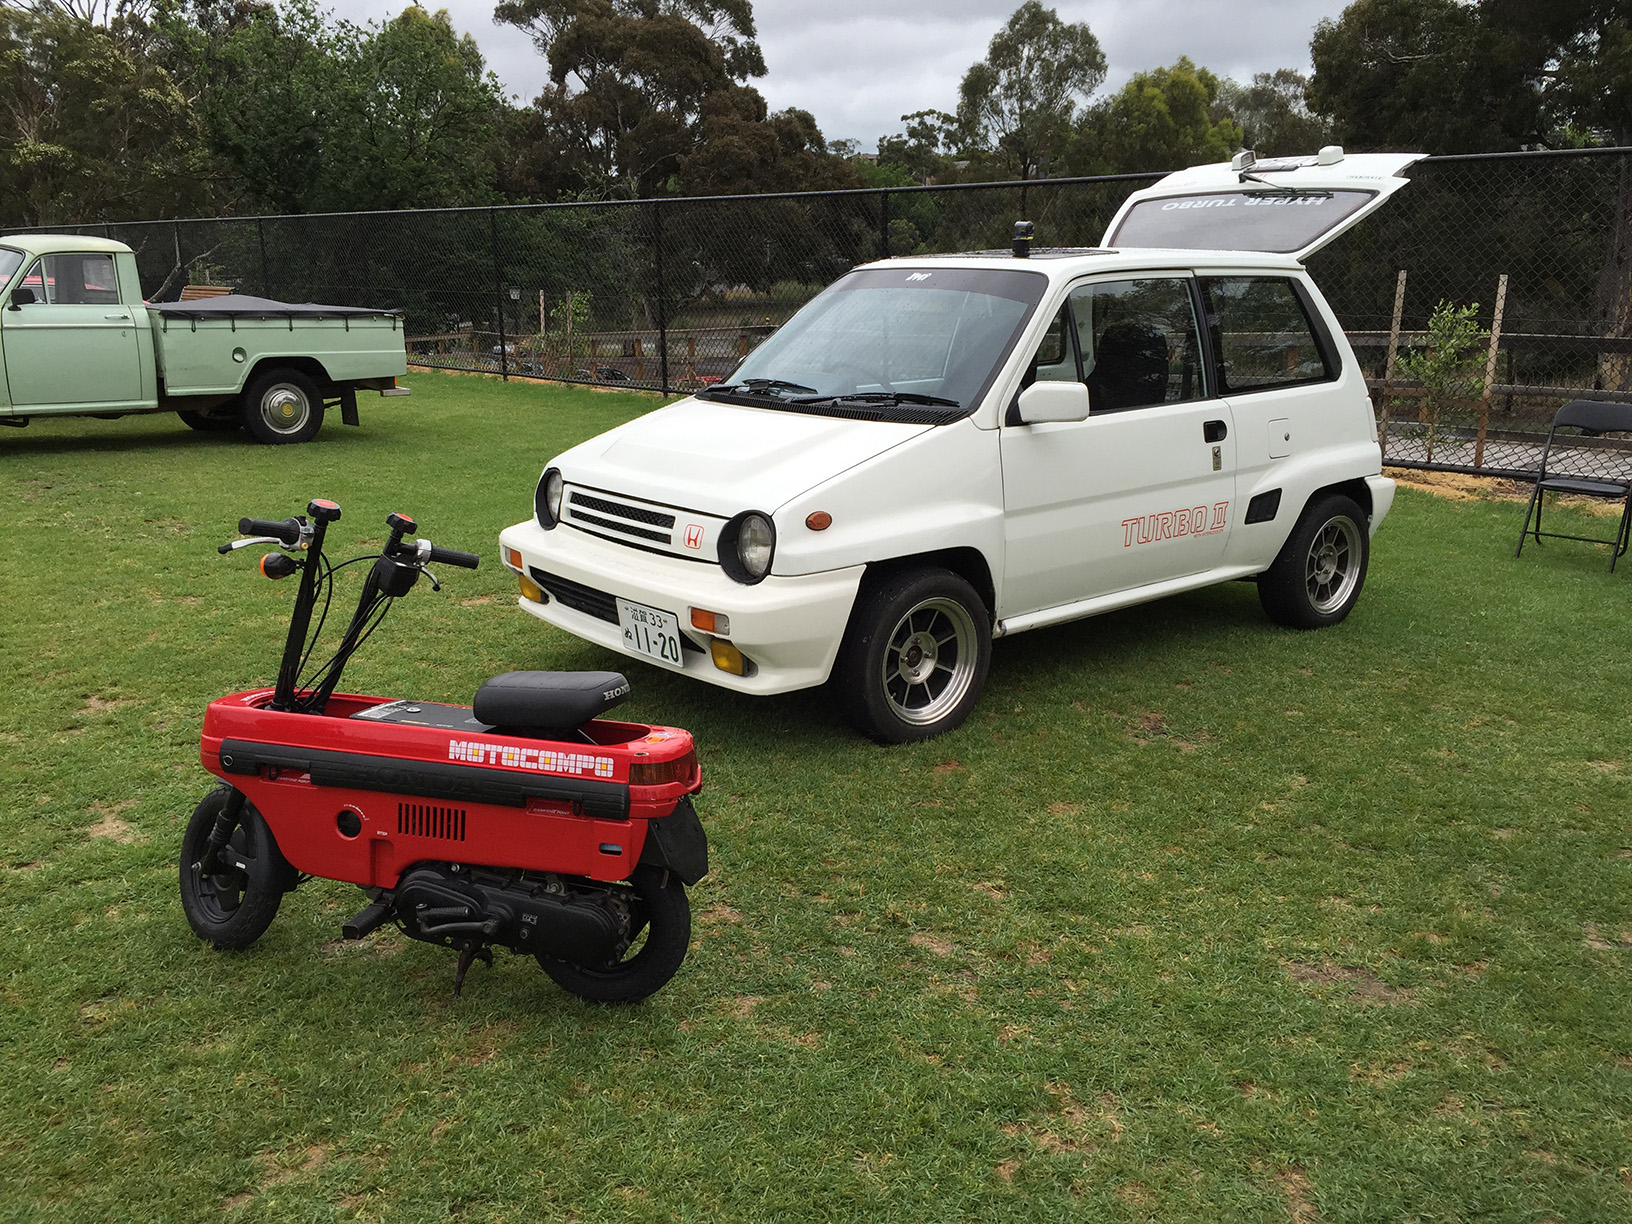
Had to be done.
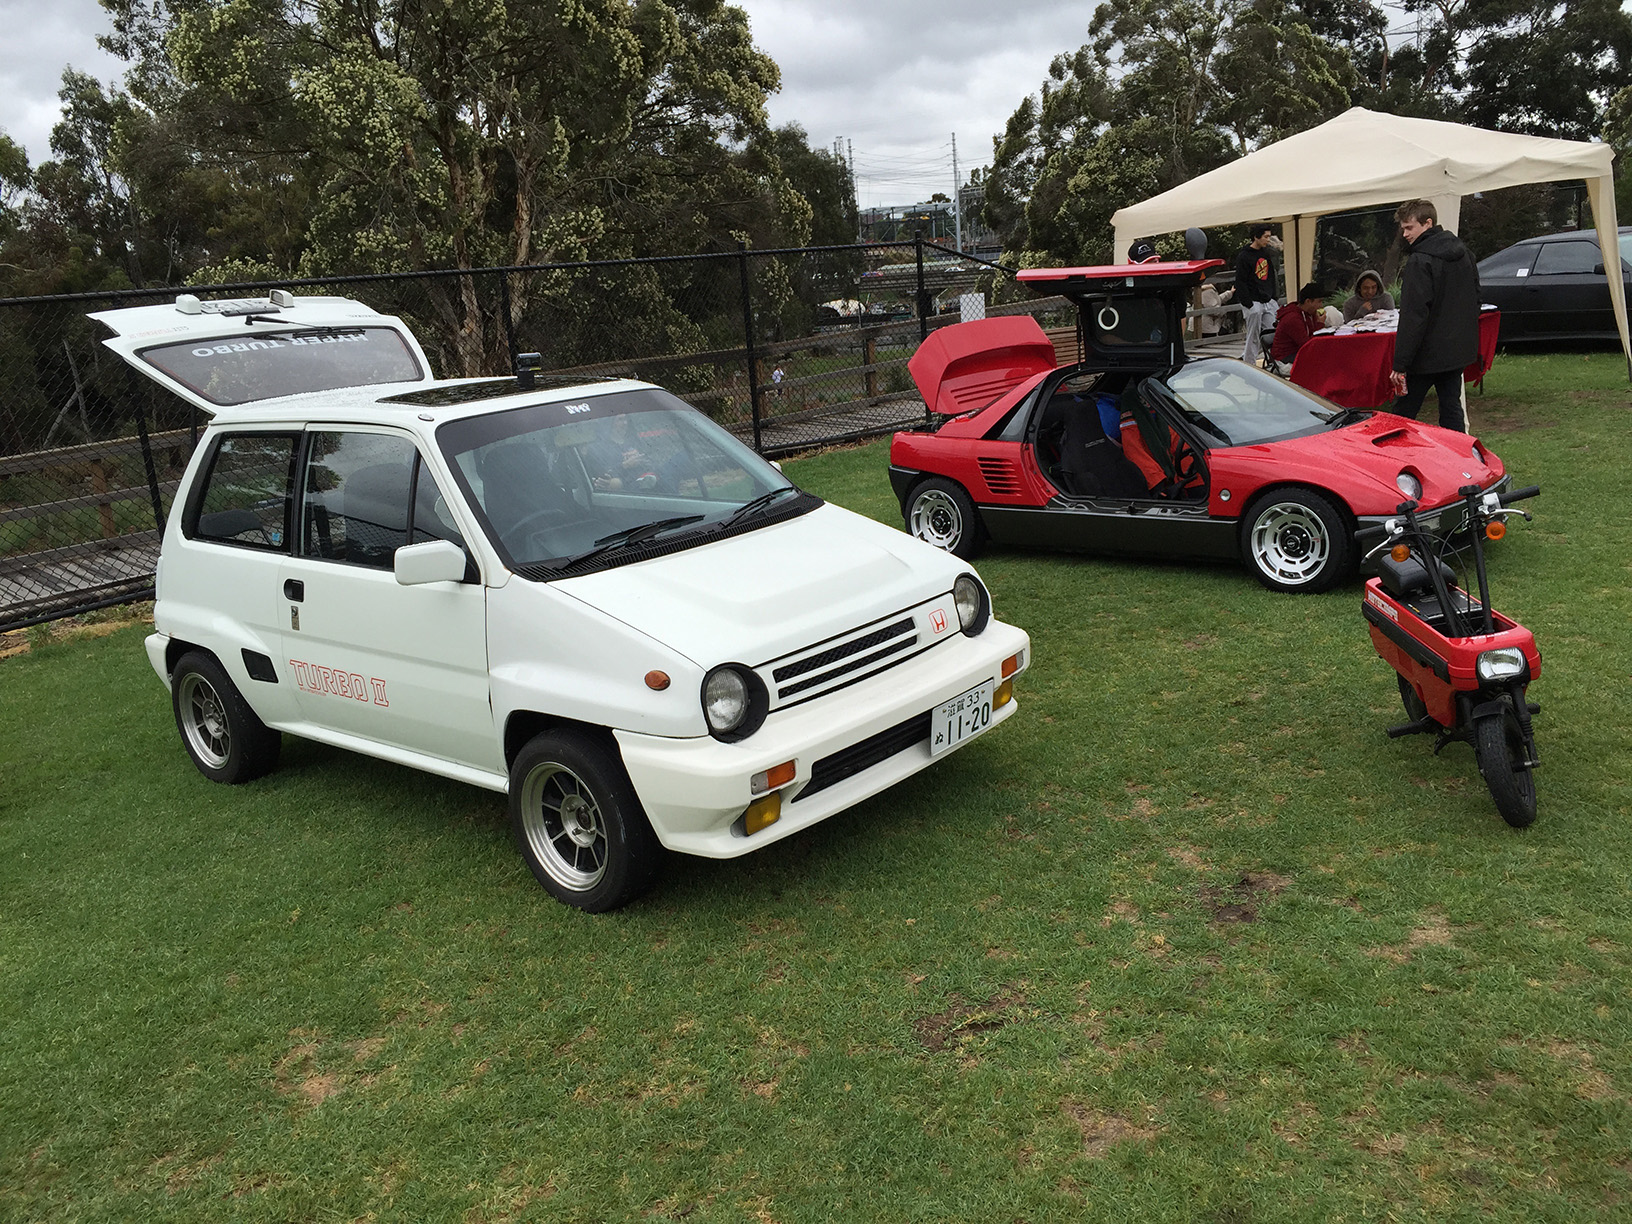
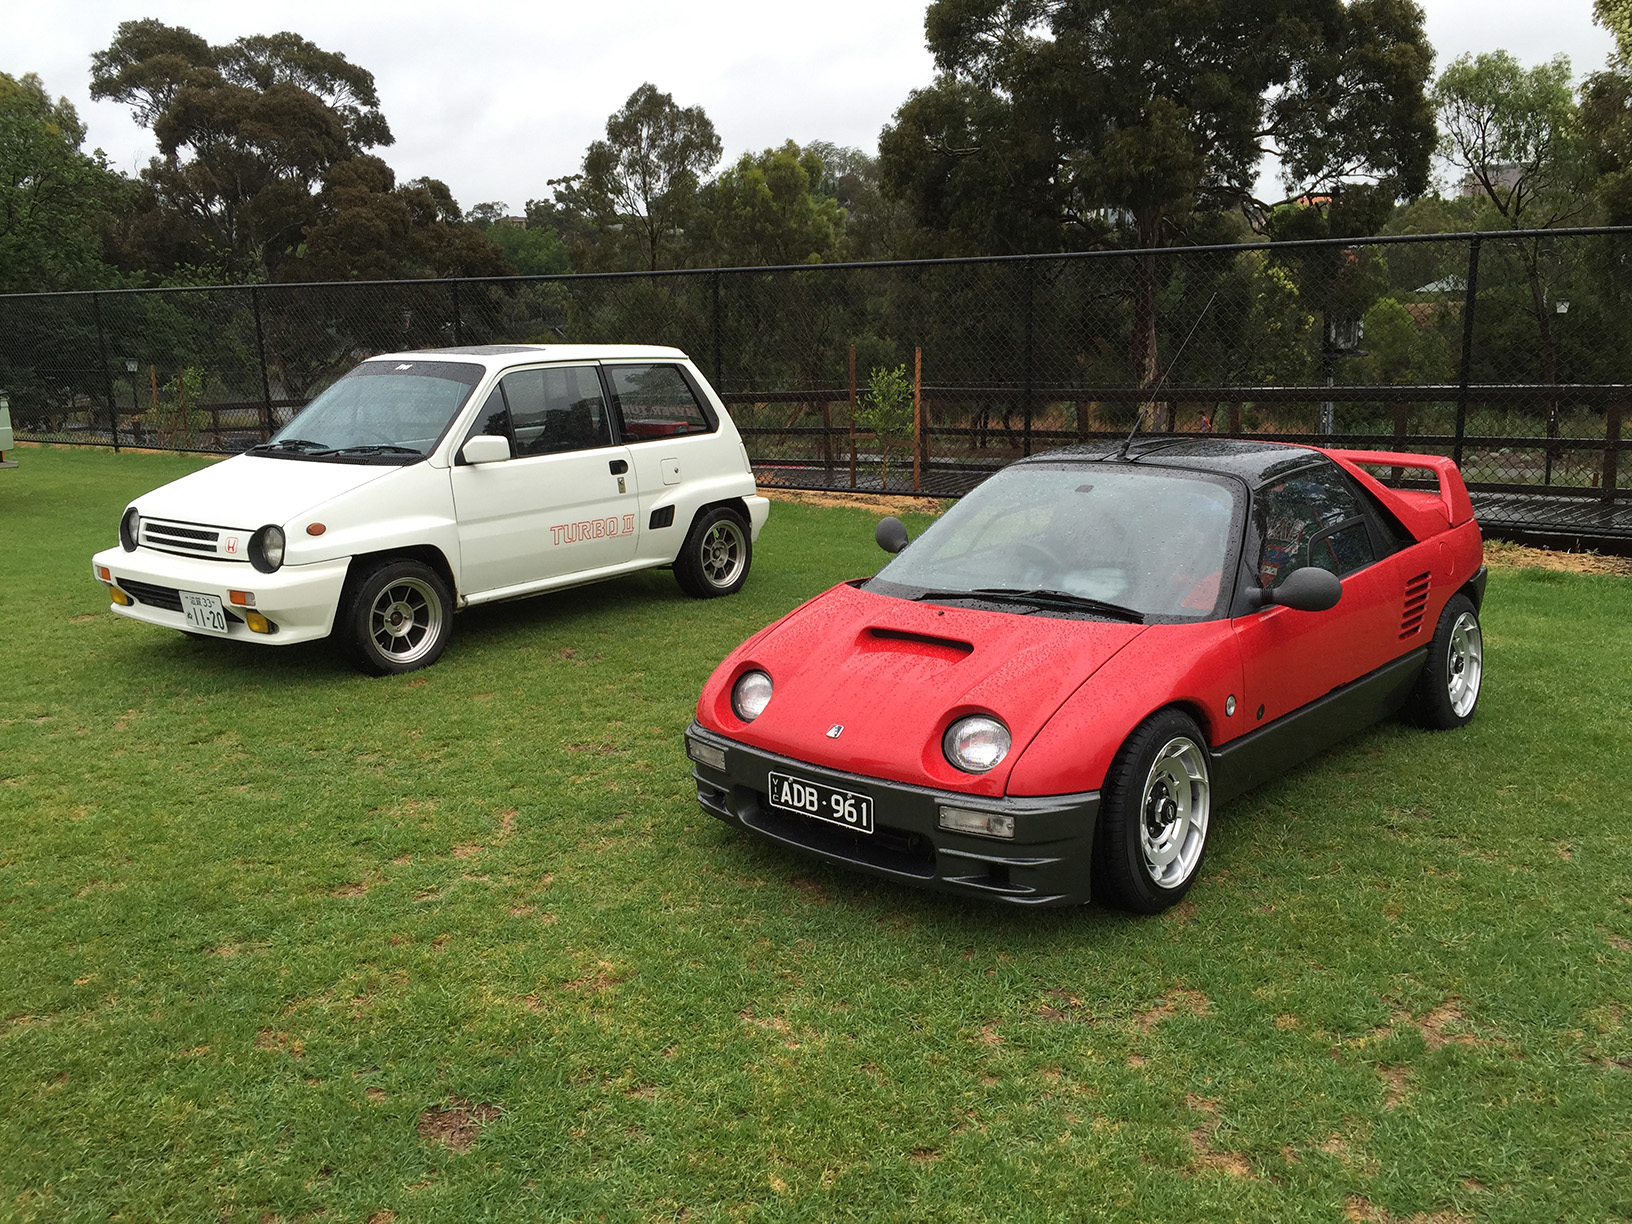
Love this photo of the two cars together. We made it!

Back at Tony’s after a dumpling feast to celebrate. Great day.
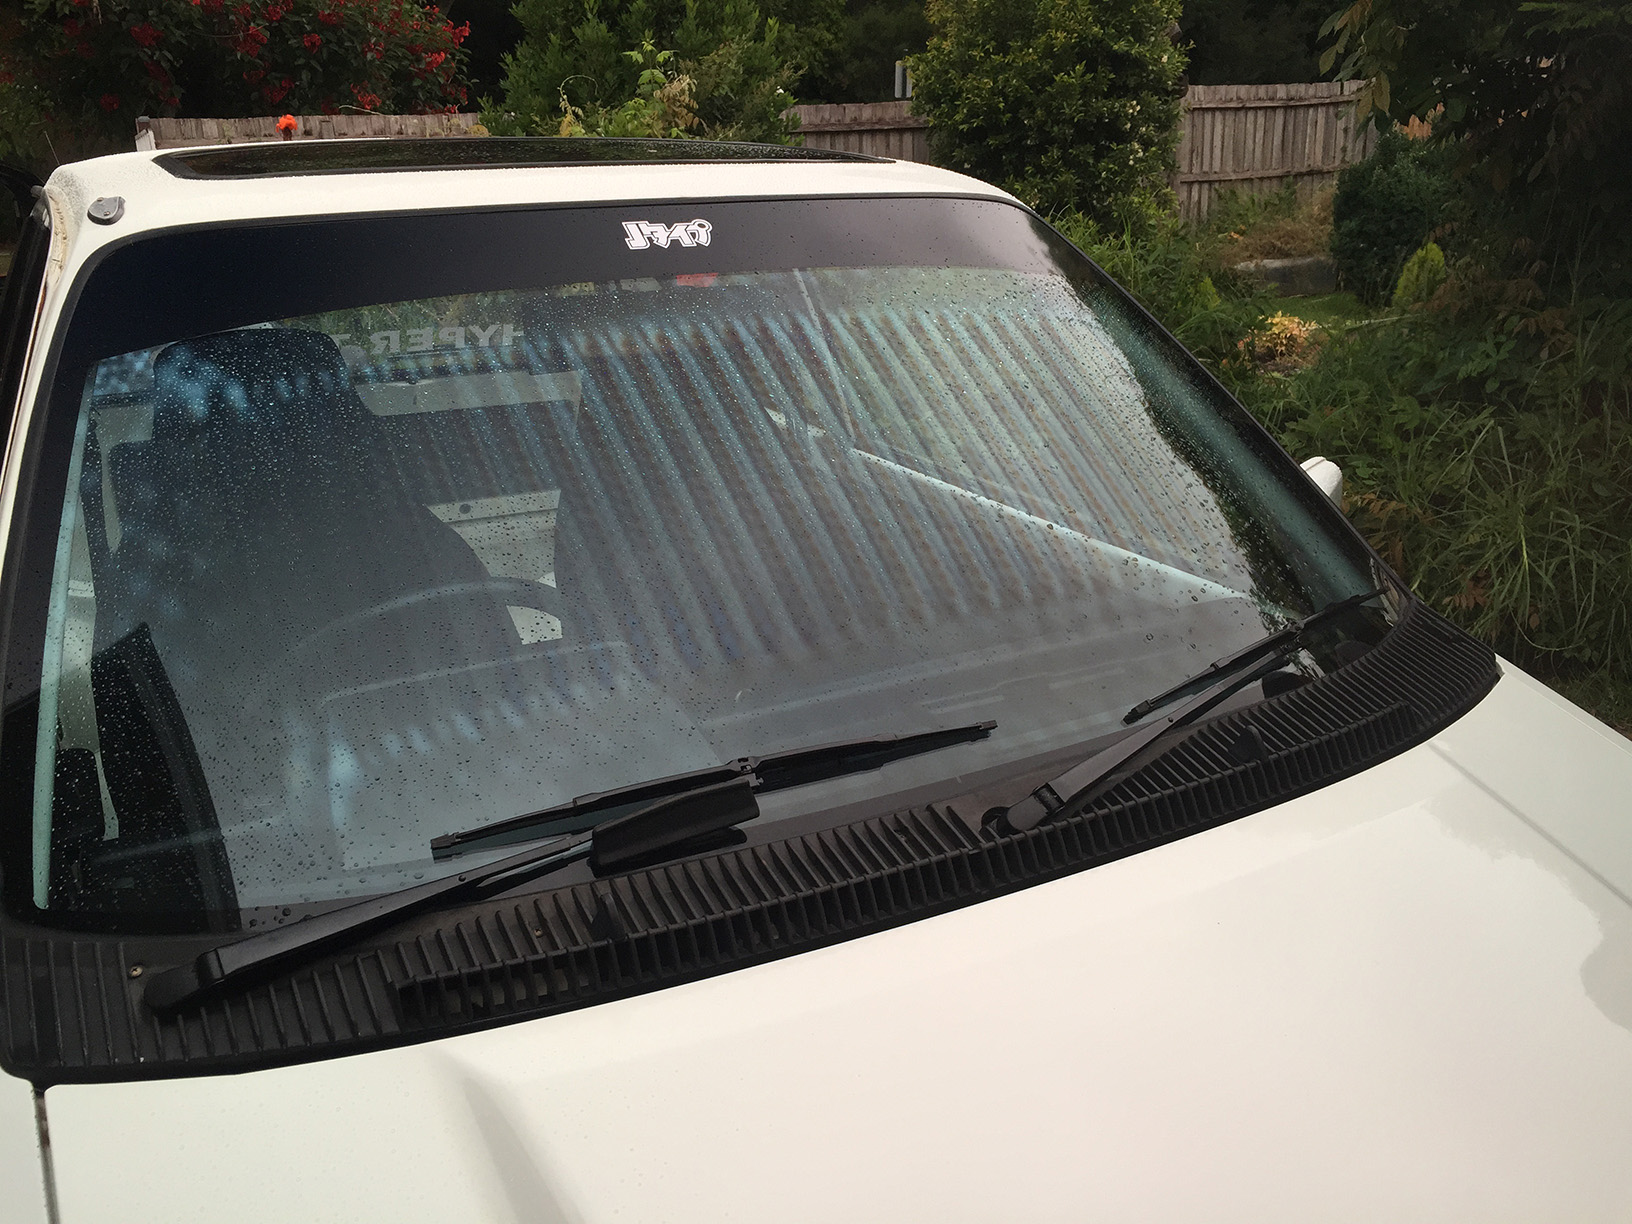
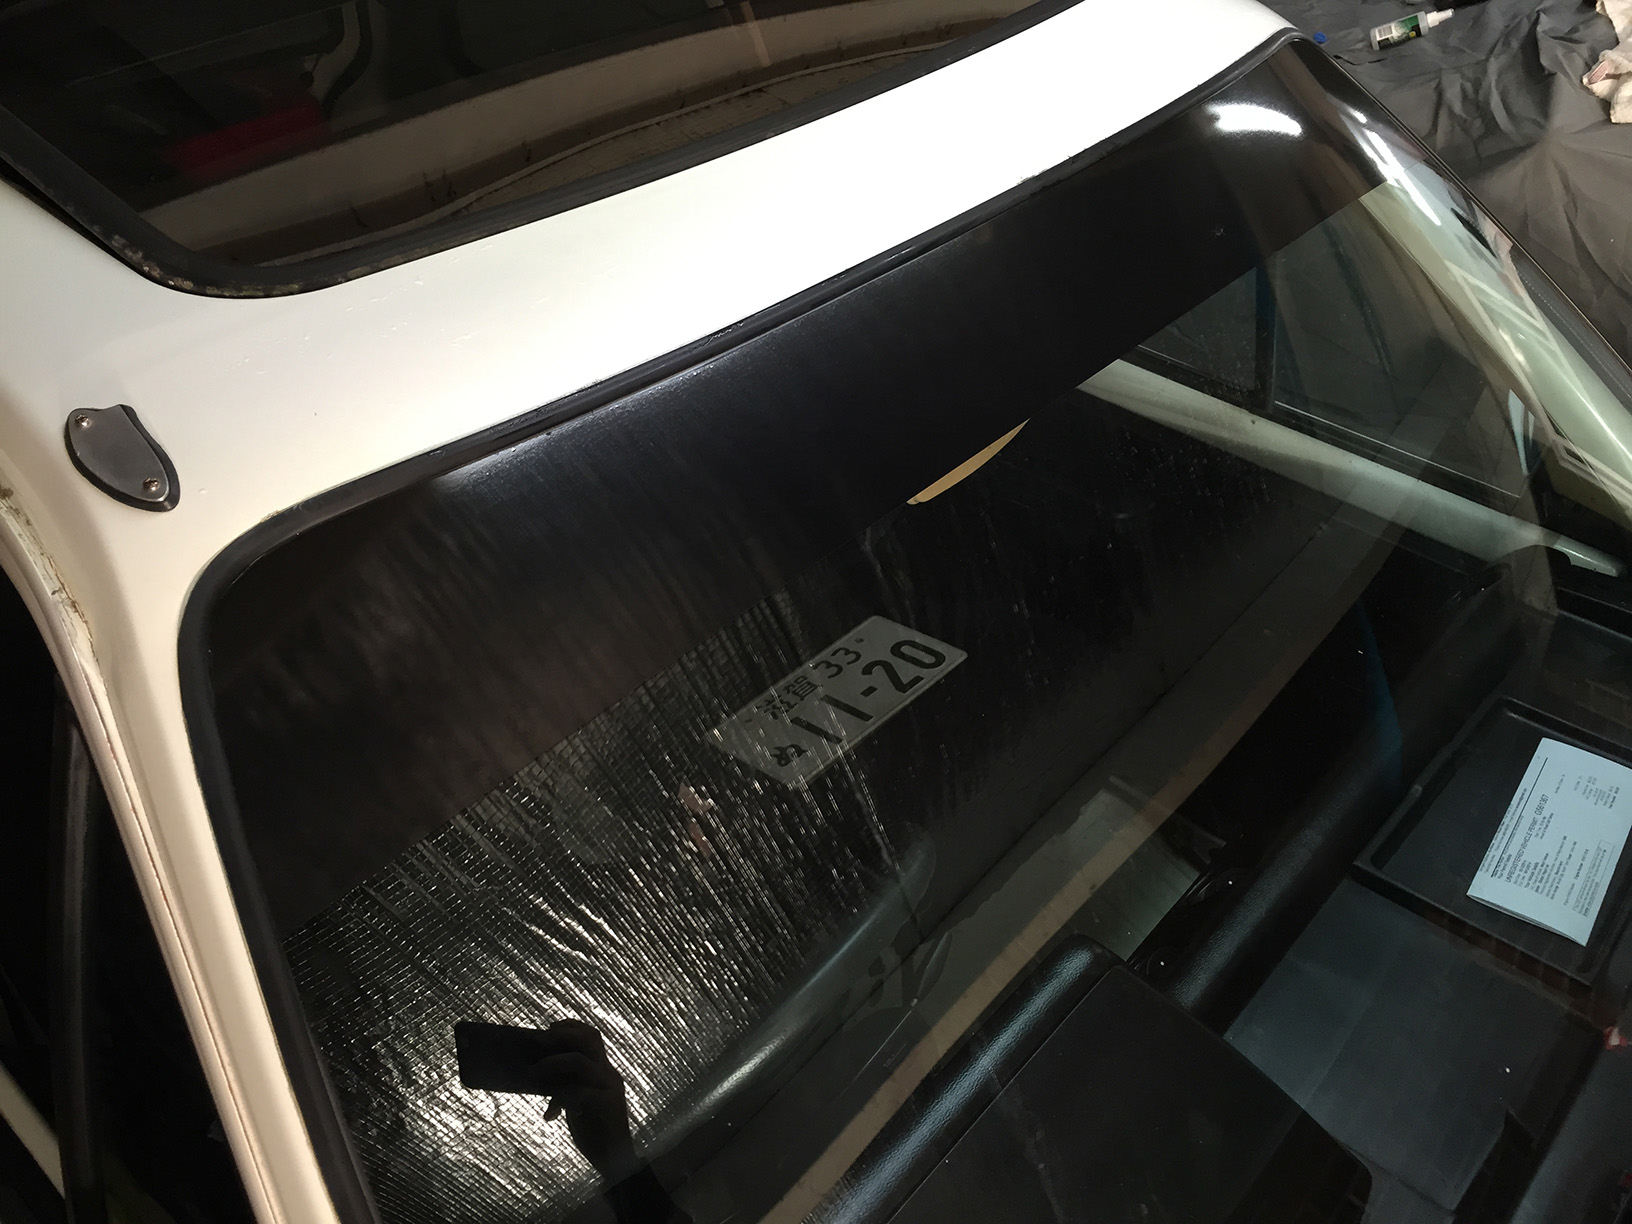
Ever noticed this pattern on JDM windscreens? It’s much more noticable with a polariser filter or when wearing polarised sunglasses. It’s a by-product of the hardening process used on this old safety glass, before laminated glass was the norm.
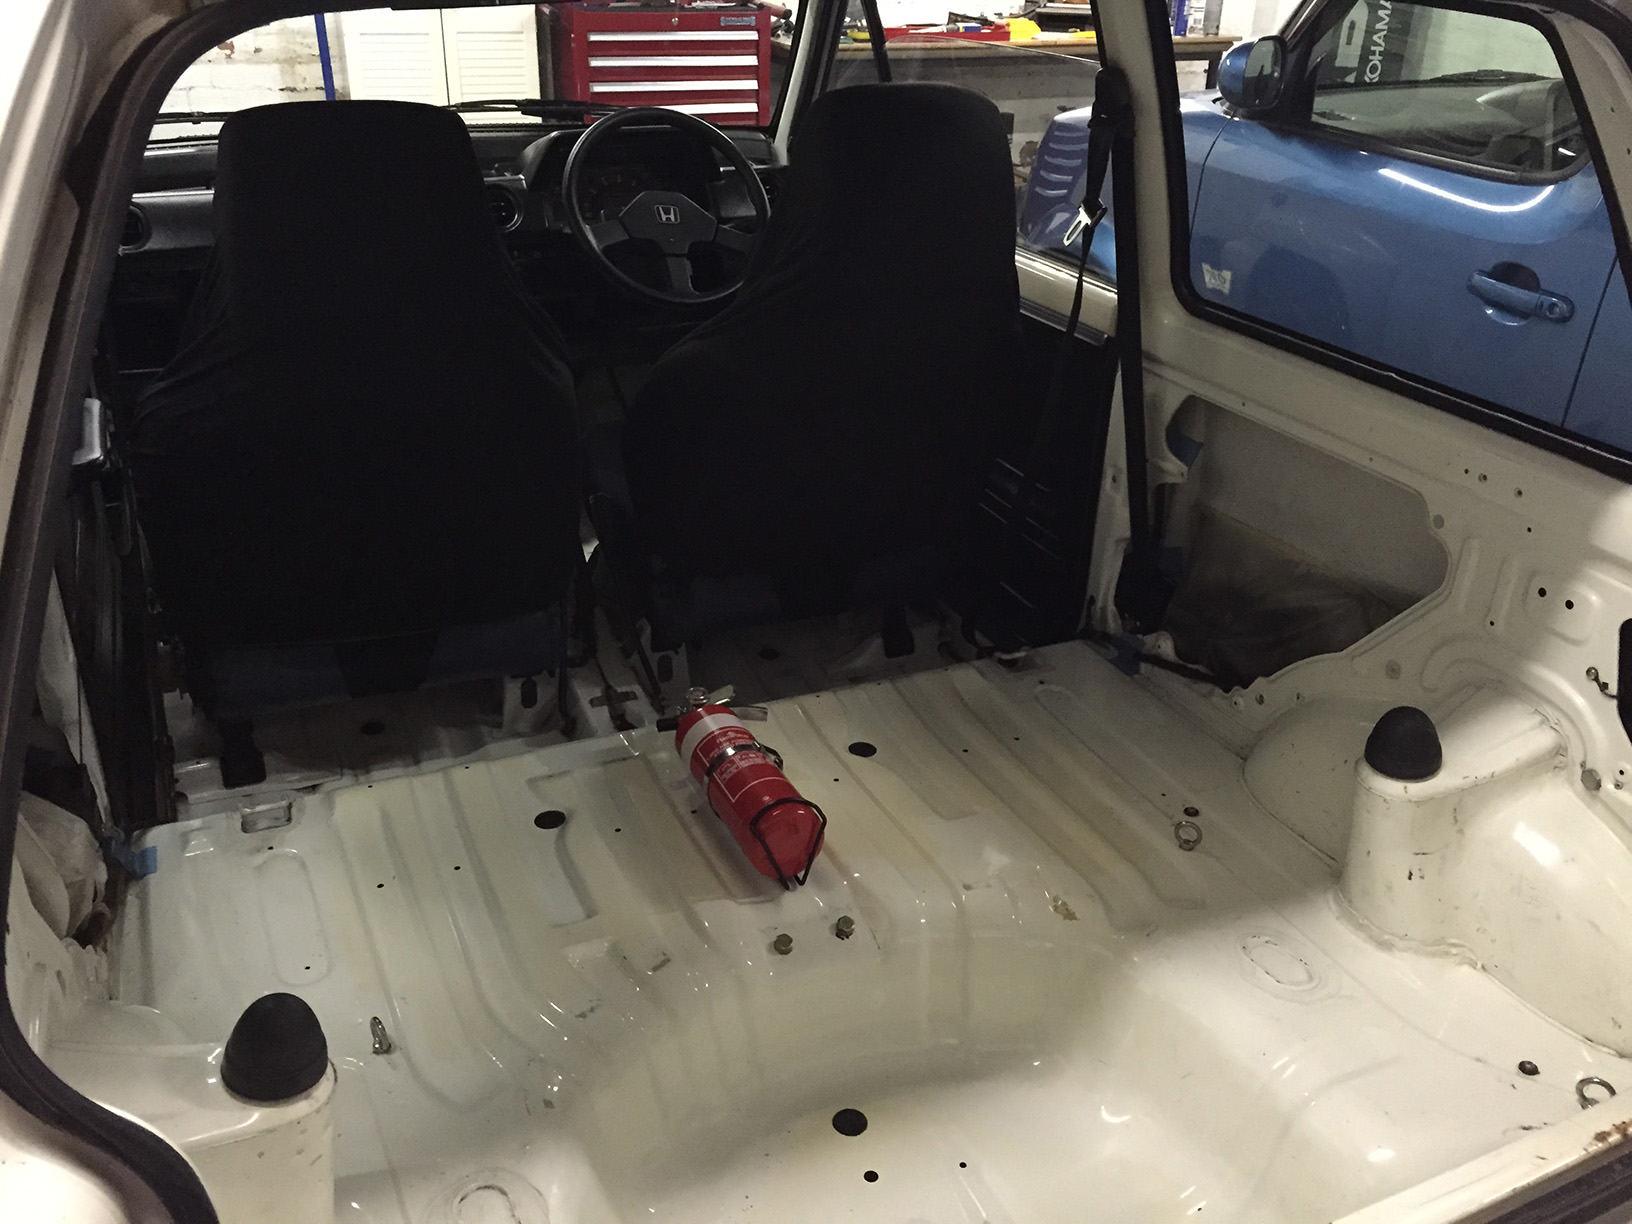
Couple of final snaps. This is inside the hatch after the big clean up. I had the fire extinguisher in a drawer and thought it would look cool.
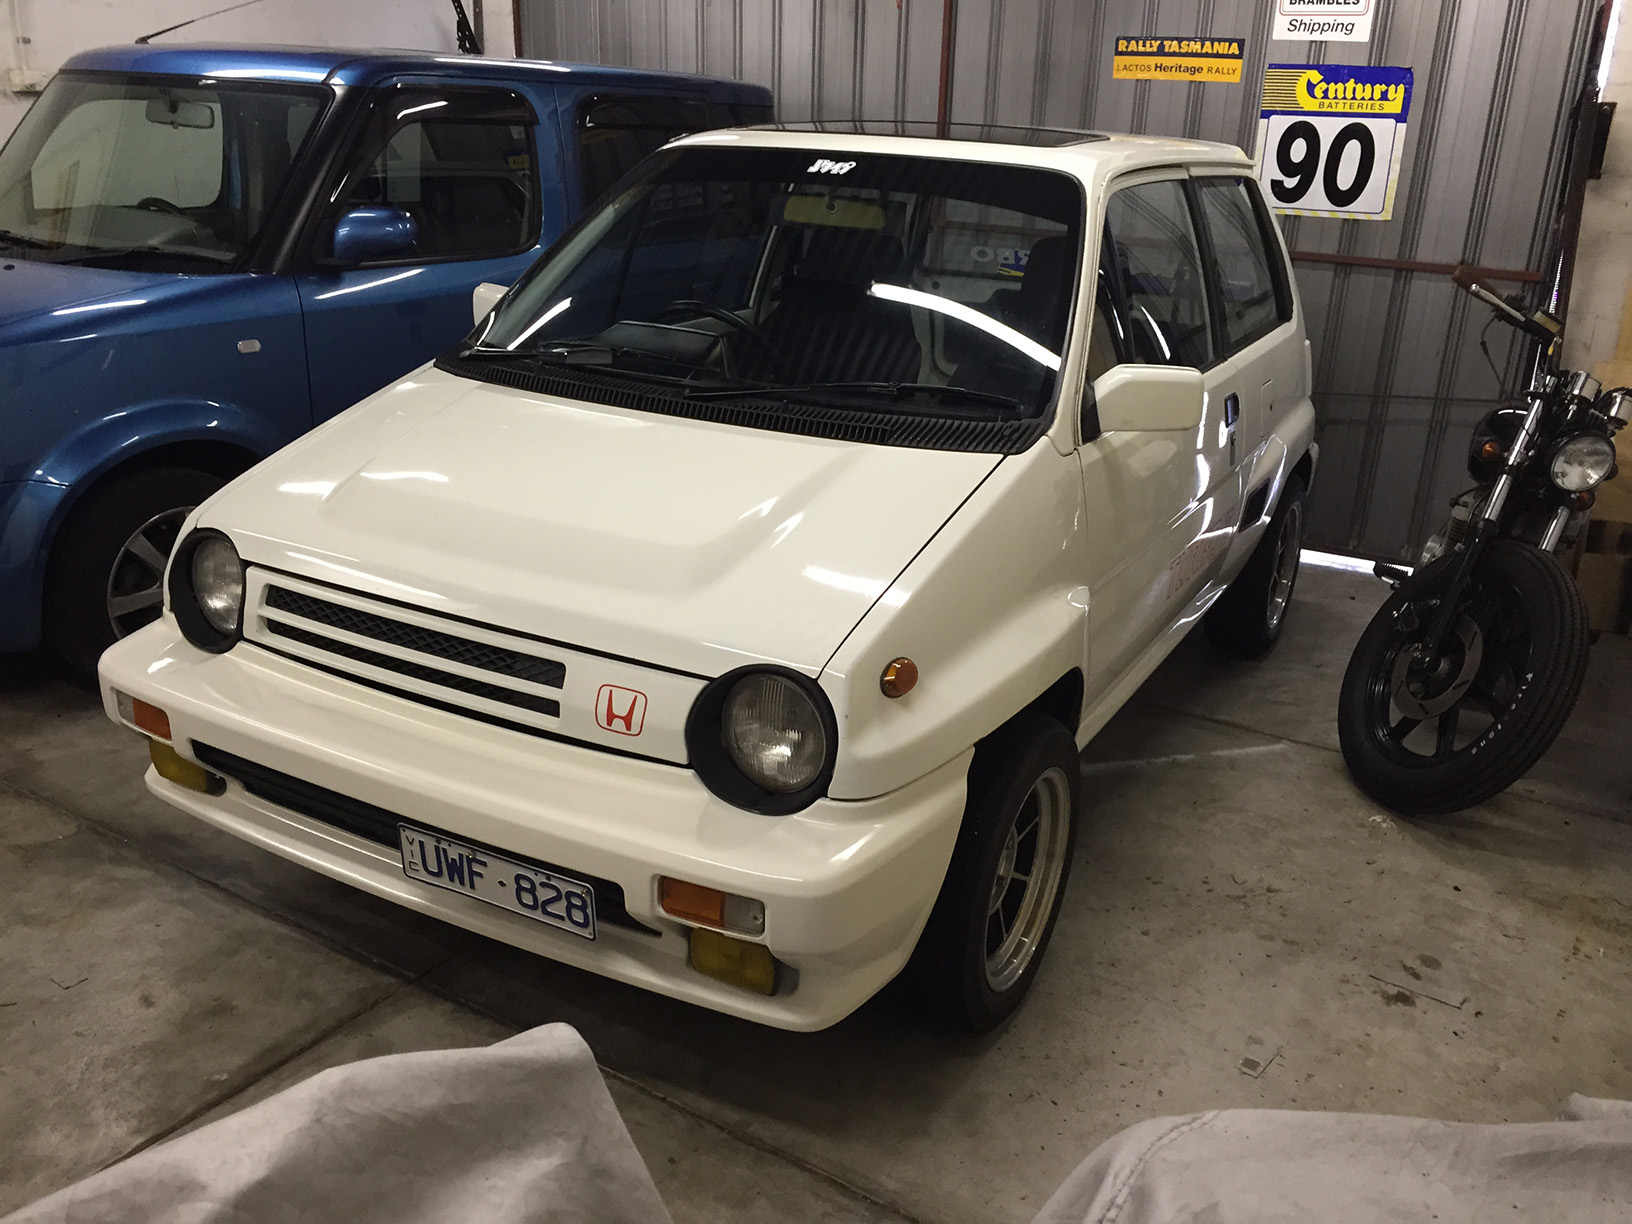
And back in the garage at my place looking totally different to the way it left.
The car’s intake is so much quieter with the airbox in there. Gotta sort out an alternative filter setup quick smart. I’m on holidays in a few days so it’ll be radio silence for a while. More to come in the new year.
To finish off, here are some final images…


The end! If you would like to access all of the Honda City restoration posts, you can do so via the following link: build-threads.com/tag/honda-city-turbo-ii
Awesome restoration! Love it!
Been hunting for a clean Honda City Turbo II in Sydney for a while but no luck! I guess restoring one is the only way to go!
man this ended up really beautiful. love it and nice to see such a cool car preserved. next probably rust repairs in a few years 🙂
Love the Autozam/Mazda AZ-1. Didn’t know there was any in Australia.
As for the city… I wish they had put some rust converter on it. I know it’s a budget build, but a couple of dabs of rust converter before putting the bumpers back on could save the car from being scrapped in a couple of years when the rot takes over.
So love these builds. Btw not to nitpick but paint on the bumpers look a tad whiter than the body.