As you all know, I recently bought some second hand wheels from the Yahoo Japan auctions for the Datsun. (click here to read the previous post)
Like most of you reading this, I can’t leave things alone, and I knew before I even bought them that I wanted the centers to be painted black with polished edges on the star outline. So I began the extremely long, tedious, and tiring process to make these wheels pop.
Come and see how it happened…

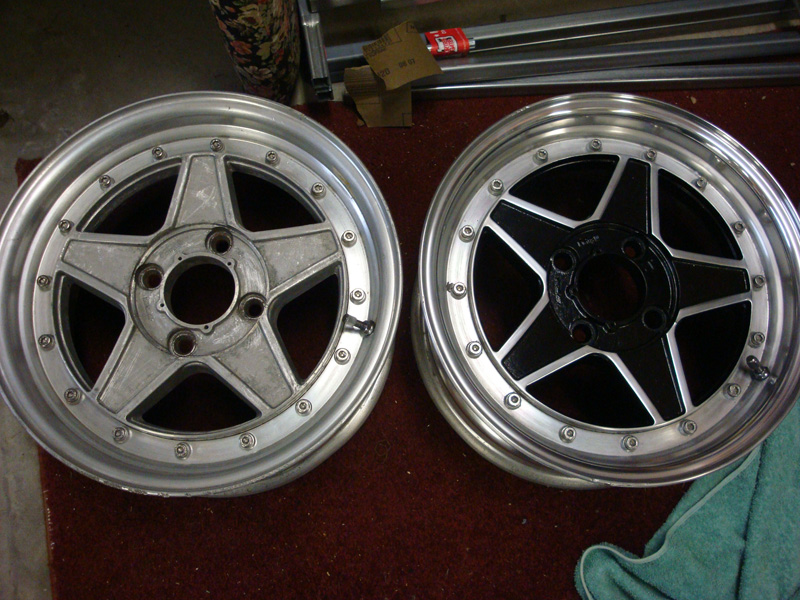
I used multiple grades of sandpaper, everything from 120 up to 2000 grit for the polishing. I also used paint stripper to remove the grey paint that was already on the wheels.

The star outline on the face of the wheels had a textured cast finish, so it had to be sanded smooth first before it could be polished. This is where I used the coarsest grade of paper and worked my way up to 2000. After the first wheel, I realised 120 wasn’t harsh enough, so I got some 80grit and used that with better results.
Here is the star outline sanded on one wheel before I used the paint stripper…

As for the lips of the wheels, I started from 400grit (dry), and then wet-sanded from 600-2000. For better results, I should have started with 120grit, but I really wanted these wheels on the car asap, so I made myself a compromise.
Sand, sand, sand…

Wet-sanding can get messy…

After sanding for what felt like an eternity, I gave the wheels a good wash to make sure all the sanding water & dust was removed, along with any traces of paint stripper.

Now it’s time for some polishing…
For the star outline, I used Autosol metal polish and a rag. Might not be ideal, but I’m not pretending to be any kind of polishing expert, so it’s good enough for me. The compound was rubbed in and then removed with a clean rag.

For the lips, I purchased a Mothers Powerball Mini, as elbow-grease alone wouln’t have sufficed on the more noticable lip area compared to the smaller star outline.

This is how it looks after running the Powerball over the lip…

Then, after removing the polish with a clean rag, this is how it turns out…

Here is the whole wheel with the entire lip polished plus the star outline…

Time for paint. Sadly, the tedious processes didn’t stop with the sanding, we must mask!
I took some painters tape and ran it along each outer spoke, with the overhang on the outside, like so…

Then, taking the pictured razor-blade (the newer the better), I cut off the excess…

Repeat untill the whole wheel is done…

Then, grab some old newspapers and mask off the lips and we’re read to paint.

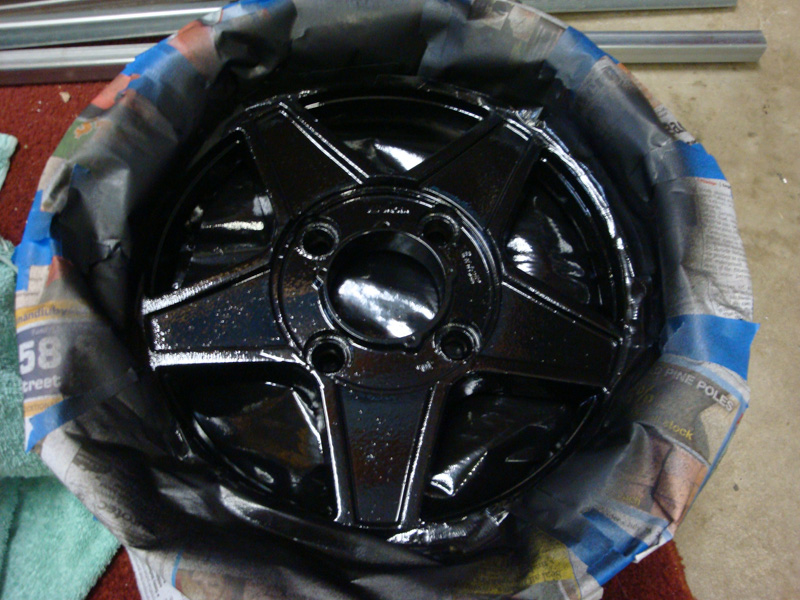
Light coat first. I used a gloss-black wheel-paint which is meant to have some flex in it, to prevent cracking.

Few more coats until it’s all thick and even…

Once it was touch-dry, I started peeling off the tape…

All gone!…

Any rough edges (as seen below) were cleaned up with a rag dipped in Wax & Grease Remover

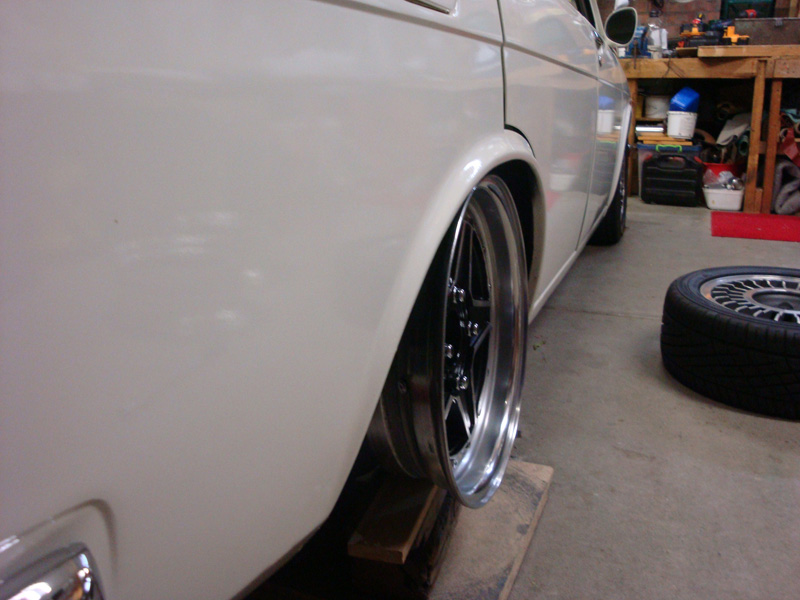
Now for the trial fit…


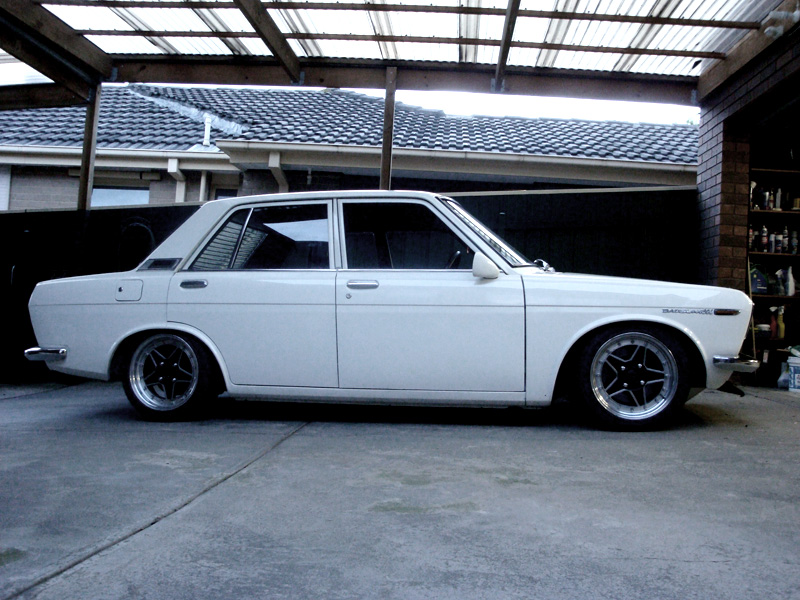
I’m wrapped with the way they look on the car, they turned out exactly how I wanted them to. Not exactly crazy fitment but it’s good to see some lip on the car, giving it that proper old-school look that was missing with the old wheels.
I took the wheels down to my local tyre shop and had them wrapped in some 195/45/15’s. Once on the car, I raised the rear 10mm and lowered the front about 20mm. Here’s the final product…


Took the car for a spin at that height and came home, ended up raising the front about 10-15mm again, as there was a bit too much forward rake for my liking, and the exhaust was scraping on my driveway when none of my previous cars have ever come close. The end result still looks great and is a bit easier to live with.
Next update will be the painting/fitting of the ’73 model JDM grille I bought on ebay, then I’ve got some really nice DSLR pics of the car for you guys, the new look is awesome 🙂

Can’t wait for better pictures of the car, nice job 🙂
Nice outcome on the wheels. Looks amazing on the dime.
Yes! Awesome job man! It looks great! Love 510’s!
Those were pretty sweet to begin with, but they look absolutely stunning on that Dime. They’ve completely resurrected the look, I approve! Nice refurb, just make sure you update us as to how well that paint holds up on the road.
looks awesome man,
im about to put 6.5’s and 7’s on my 1600
what brand tyre are they and how much did they cost you?
thanks everyone, appreciate the kind words
Jack, the tyres are Hankook, not sure what model as I’m at work at the moment but I’m pretty sure I payed around $140 AUD each. I think I should have gone for 195/50s though, as the 45’s are quite small and I now have little ground clearance under the car. keep that in mind
Great restoration, i have the same exact wheels, but my wheel condition is much more worst.
the chrome plating on the star has peeled off. i might use some of your advise. how do i contact you ?